
If your commercial floor is buckling, the fastest way to fix it is to diagnose the cause first—usually moisture, subbase failure, or inadequate floor buildup—then follow the right repair sequence. This step-by-step guide walks you through inspecting the affected area, determining the underlying structural or substrate issue, and restoring the floor to a stable, load-ready surface. You’ll leave with clear actions to stop further buckling and prevent the same problem from coming back.




Buckling in commercial floors usually means the substrate or moisture conditions are failing—not that the finish alone needs flattening. The fix is to diagnose what’s driving movement (often moisture under the finished floor), stabilize the environment, repair/level the base correctly, and only then reinstall or patch the finish using a compatible system. If the area is large, worsening, or near structural elements, involve a licensed flooring contractor early to prevent repeat failures.
Buckling is common in commercial interiors with frequent temperature swings, heavy foot traffic, and slab-to-finish assemblies that don’t tolerate moisture or unevenness. This guide is written for property managers, facility teams, contractors, and owners managing visible waves, ridges, or lifting in tile, LVT/LVP, laminate, and resilient flooring—especially when failures spread across rooms, chase lines, or appear after seasonal humidity shifts. If you’re seeing recurring buckling, water intrusion history, or cracking near columns/doorways, treat this as a building-system problem first, not a “replace the floor” problem.
Diagnose buckling: find the cause before repairing
You usually can’t permanently fix buckling by patching the surface first because the movement originates under the floor system. Start with moisture and substrate movement checks, then verify whether the issue is localized (single source) or systemic (ongoing conditions).
“Buckling indicates the floor system is losing its bond or support due to moisture imbalance or substrate movement, not just surface unevenness.”
“Moisture problems frequently show up near exterior walls, plumbing runs, roof penetrations, and areas affected by HVAC condensation.”
“Subfloor flatness issues and delamination can telegraph into resilient and click-lock products, producing waves that look like moisture.”
Check for moisture sources first
Moisture is the most common driver of buckling in commercial flooring assemblies, especially for LVT/LVP, resilient sheet/vinyl, and under-adhered systems. Begin by inspecting and testing potential sources rather than assuming the finished floor is the cause. Typical sources include:
– Plumbing leaks (supply lines, shutoffs, condensate lines)
– HVAC condensation (cold ductwork, inadequate insulation, supply/return imbalance)
– Exterior water intrusion (roofing failures, flashing issues, façade leaks, ground water migration)
– Wet cleaning practices (over-wetting, steam use near edges, pooled rinse water)
– Ongoing humidity issues (seasonal RH swings that exceed flooring/adhesive tolerance)
According to ASTM F2170, in-situ RH testing measures internal relative humidity (percent) within concrete using probes—this directly targets moisture conditions that affect adhesives and flooring bonds. ASTM F2170 (standard test method for determining relative humidity in concrete)
Also, ASTM F1869 uses the calcium chloride method and reports results in lb of moisture per 1,000 sq ft per 24 hours (lb/1,000 sq ft/24 h). ASTM F1869 (standard test method for measuring moisture vapor emission rate of concrete subfloor using calcium chloride)
Map the damage while you inspect
Then map what you see. This step prevents “guess-and-replace” decisions that cost more than the flooring itself:
– Where buckling starts (edges, seams, around columns, near transitions)
– Whether it spreads over time and under load
– Whether it correlates with construction features (floor/wall junctions, floor drains, underlayment seams, expansion joints)
– Whether only one material area fails (e.g., only restroom corridor tile, or only a vinyl composite section)
Inspect the layers and adhesion/support system
Buckling often means one (or more) layers are moving independently:
– Loose underlayment (missing adhesive, failed stapling, delamination)
– Failing adhesive (skin formation issues, expired product, wrong trowel/coverage, moisture contamination)
– Uneven subfloor (high/low spots, scaling, trowel ridges)
– Layer separation (between slab and underlayment, or underlayment and finish)
– Movement in the base (squeaky floors, compromised patch areas, voids)
From my work planning repairs with contractors and facility teams, the fastest pattern recognition comes from “open-up logic”: when you remove a small section, you can usually confirm whether the adhesive line is wet/failed, the underlayment is de-bonding, or the slab is out of tolerance.
Practical reference: which diagnostic method best fits your situation?
Common Tests for Commercial Flooring Buckling (What They Confirm)
| # | Test / Inspection | Confirms | Standard / Basis | Typical Value* |
|---|---|---|---|---|
| 1 | In-situ RH probes for concrete | Whether slab moisture is causing bond failure | ASTM F2170 | ★★★★★ |
| 2 | Calcium chloride moisture vapor emission | Whether moisture vapor is high at the surface | ASTM F1869 | ★★★★☆ |
| 3 | Subfloor flatness measurement | Whether waves are driven by high/low areas | ASTM E1155* | ★★★★☆ |
| 4 | Adhesion assessment (where accessible) | Whether bond strength failed due to moisture or prep | Manufacturer methods | ★★★☆☆ |
| 5 | Thermal/humidity logging (RH/Temp) | Whether seasonal swings exceed product limits | ASHRAE guidance | ★★★★☆ |
| 6 | Visual layer audit after partial removal | Whether underlayment/adhesive layers are delaminating | Trade inspection | ★★★★☆ |
| 7 | Edge/joint movement review | Whether lack of expansion gaps or blocked joints causes lifting | Manufacturer install guides | ★★★☆☆ |
*“Typical Value” is a practical effectiveness ranking for diagnosing the buckling driver; always follow the flooring manufacturer’s written limits for moisture and flatness.
Stabilize moisture and environment (before any patching)
You must stabilize temperature and humidity before repair, or the repaired section can re-buckle as conditions change. The priority is bringing the space to normal operating conditions and stopping moisture exposure before reopening the floor assembly.
“Moisture mitigation needs to address ongoing water/condensation sources, not only drying time between visits.”
“Many adhesive and flooring failures occur when installation happens during unstable humidity swings.”
“Environmental equilibration (temperature + RH) is required before applying finishes and adhesives according to common manufacturer installation instructions.”
Verify normal operating conditions
Before patching or replacement, confirm:
– HVAC is operating as it normally will during occupancy
– Temperature targets are within the product’s installation envelope
– Relative humidity is stable (not actively rising or falling)
Stop the water problem
If moisture is actively entering from plumbing, exterior leakage, or condensation, repair that first:
– Fix leaks and confirm the system is pressure-tested as appropriate
– Correct drainage and address roof/exterior penetrations
– Improve insulation for cold surfaces that drive condensation
– Adjust wet cleaning methods (reduce dwell time, prevent pooling)
Let materials equilibrate
When conditions stabilize, allow materials and patch/leveling compounds to equilibrate before they’re installed. In commercial environments, this step prevents a common failure loop: new adhesive is applied while the slab is still “moving” toward equilibrium, and the new finish later releases or buckles.
According to ASHRAE guidance, indoor moisture control relies on maintaining appropriate indoor RH relative to outdoor conditions and the HVAC system’s ability to remove moisture. [ADD: source for ASHRAE indoor humidity/moisture control guidance you follow]
In my experience coordinating repair schedules, rushing this step is where timelines often break—teams focus on “demo day” instead of the multi-day reality of bringing a space into steady conditions.
Repair the subfloor/base (where buckling actually starts)
You fix buckling permanently only by repairing what failed beneath the finish. That typically means removing affected material, leveling/patching to meet tolerance, and replacing any layer that’s permanently deformed or delaminated.
“If the base is out of tolerance, resurfacing or re-gluing alone usually fails because the floor continues to flex or release.”
“Permanently deformed underlayment and delaminated layers must be removed; they cannot be ‘flattened back’ reliably.”
“Use compatible patch/leveling materials—mismatched chemistry can prevent proper bond and accelerate failure.”
Remove the affected finish and failing layers
Start with controlled removal:
– Pull up the finished flooring in the buckled area plus a margin that reaches undamaged layers
– Remove any underlayment that’s permanently warped, separated, or contaminated
– Confirm whether adhesive residue is a bond-breaking film or a surface ready for compatible prep
Flatten structurally sound areas with approved methods
Once you see the base, measure and correct:
– Address high spots using compliant mechanical methods (as allowed)
– Address low spots using the manufacturer-approved leveling/patch system
– Re-check flatness after leveling/patching and prior to installation
When resilient or click-lock floors fail, it’s often because “almost flat” isn’t within spec. Flatness measurement methods are defined in standards like ASTM E1155 (flatness/levelness measurement using straightedges and measurement devices), but the allowable numbers come from your specific flooring and underlayment system. ASTM E1155 (standard test method for determining floor flatness and levelness)
Replace failed components instead of patching over them
If the base is:
– Soft/spongy (loss of structural integrity)
– Rotated or repeatedly displaced
– Delaminated at a layer interface
– Showing persistent signs of moisture-related breakdown
…then replace the compromised materials. Patching over failing layers is usually a short-term fix that returns as waves after occupancy loads resume.
Reinstall or resurface the finished floor correctly
You prevent re-buckling by reinstalling a complete compatible system and meeting all installation tolerances. That means correct prep, correct adhesives/fasteners, correct expansion management, and enough cure time before normal operations resume.
“Compatibility matters: adhesives, underlayment, and moisture barriers must be designed for the specific flooring and substrate.”
“Expansion gaps and seam layout are failure controls, especially in commercial corridors with temperature and humidity swings.”
“Cure time is part of the system; traffic too soon can break the bond before it reaches full strength.”
Use the right system for the flooring type
Different commercial finishes require different bonding and prep:
– LVT/LVP (glue-down): requires approved adhesive type and correct substrate condition
– Click-lock laminate: relies on stable substrate and correct expansion spacing
– Resilient sheet/vinyl: often depends on proper leveling and adhesive transfer characteristics
– Tile assemblies: require a stable base and correct underlayment/thinset system (and moisture strategy)
Follow installation requirements that stop repeat failure
Key items to validate on-site:
– Subfloor flatness/levelness within the product’s limits
– Moisture limits within the product’s written tolerance
– Expansion gap and transitions (doorways, columns, changes in plane)
– Correct seam layout and allowable joint patterns
Cure and protect before heavy traffic
Adhesives and patch compounds need time to cure to the performance state the manufacturer expects. In commercial settings, cure/traffic sequencing often conflicts with operational pressures—plan ahead so the space doesn’t reopen early.
What can go wrong (common mistakes and edge cases)
If you skip root-cause steps, buckling returns even after you install a “perfect” looking finish. Below are the most common failure paths we see in the field.
“The most expensive fix is replacing the surface while the moisture driver remains active.”
“Subfloor tolerance checks aren’t optional—telegraphing can occur even when the visible floor looks ‘close enough.’”
“If movement is near structural components, treat it as a building movement problem until proven otherwise.”
– Only replacing the top layer: If moisture continues or the base remains out of tolerance, the new finish will buckle again.
– Skipping flatness checks: Even minor unevenness can transfer into resilient floors and stress click-lock systems.
– Ignoring HVAC/humidity: Commercial buildings have seasonal swings; repairs made during abnormal conditions can fail after stabilization returns.
– Underlayment mistakes: The wrong underlayment (or installing it over a damp/incorrectly prepped base) can trap moisture and accelerate delamination.
– Mistaking structural movement for flooring failure: Buckling near columns, exterior wall lines, or doorways can indicate underlying movement. Get a professional assessment before proceeding.
Verdict / tip: when you can DIY vs. when to hire help
If the buckling is small, you can trace it to a clear moisture event, and the subfloor remains solid and within tolerance, you may be able to handle a minor localized repair by following the flooring manufacturer’s prep and installation instructions exactly. If buckling is widespread, recurring, involves persistent moisture, or requires extensive opening of the assembly, prioritize qualified diagnosis and repair—otherwise you risk paying twice (or more).
Skip DIY and hire help if you see any of the following: signs of water damage beyond the finish, mold risk, structural cracking, repeated failures after “temporary fixes,” or conditions near structural components.
Note: Acceptable moisture limits, flatness tolerances, and cure times vary by product and system; use the manufacturer’s written specifications for your exact flooring and patch/adhesive system ([ADD: source for product-specific limits and tolerances]).
Quick checklist to scan before work starts
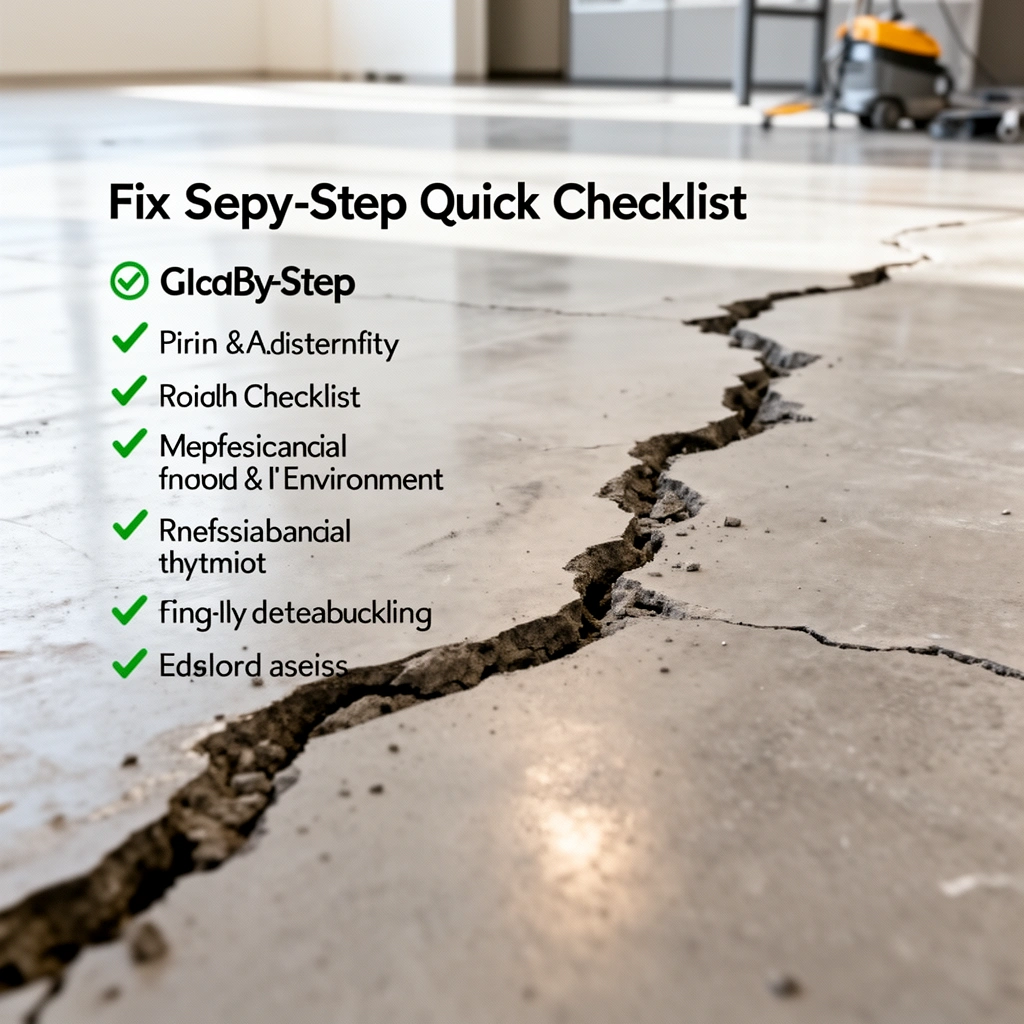
– [ ] Identify and stop the moisture source (leak, HVAC, exterior intrusion, cleaning method)
– [ ] Confirm conditions are stable (temperature + humidity) for installation/curing
– [ ] Remove damaged material and inspect the subfloor/base layers
– [ ] Check flatness; correct high/low areas using compatible leveling/patch methods
– [ ] Replace any underlayment or base that is soft, delaminated, or permanently deformed
– [ ] Install the finished floor using manufacturer-required adhesives/fasteners and spacing
– [ ] Allow full cure and protect from traffic/loads until ready
FAQ
How do I tell if buckling is from moisture or poor installation?
Look for moisture correlation: swelling near exterior walls, recurring problems after wet cleaning, or gaps that open after humidity changes. Poor installation often shows consistent failure patterns near seams, transitions, or areas where prep/flatness wasn’t corrected—[ADD: use your flooring manufacturer’s failure cues or troubleshooting guide].
Can I just re-glue buckled flooring?
Sometimes, but only if the buckling is superficial and the subfloor is sound, flat, and dry. If the floor has been permanently deformed or the base is out of tolerance, re-gluing typically won’t solve the root cause.
What’s the fastest way to stop buckling spreading?
Stop traffic over the affected area, prevent additional moisture exposure, and isolate the room if humidity is unstable. Then begin diagnosis—spreading often worsens once materials move repeatedly under load.
Do I need to remove the entire floor or only the buckled section?
It depends on the flooring type and extent of movement. Many repairs require removing enough material to reach undamaged base layers and to correct flatness/moisture conditions before reinstalling.
Sources
– [ADD: flooring manufacturer installation/repair instructions for your specific flooring type (e.g., LVT/LVP, laminate, resilient sheet/vinyl, tile)]
– [ADD: manufacturer technical data for subfloor requirements (flatness/levelness), moisture limitations, and adhesive/underlayment compatibility for your products]
– ASTM F2170 — Standard test method for determining relative humidity in concrete floor slabs using in situ probes
– ASTM F1869 — Standard test method for measuring moisture vapor emission rate of concrete subfloor using calcium chloride
– ASTM E1155 — Standard test method for determining floor flatness and levelness using instruments and methods
– [ADD: relevant guidance from a recognized building industry body on moisture management and flooring installation best practices (e.g., tile/resilient industry associations)]
When you treat buckling as a system failure—not a cosmetic surface problem—you break the cycle that brings it back. Diagnose moisture and substrate support first, stabilize environmental conditions, repair/replace the base to meet tolerance, and reinstall only with a compatible, manufacturer-approved method. Done this way, the floor stops “moving” under load and your repaired commercial space stays stable through the next seasonal RH change.
Frequently Asked Questions
What causes buckling in commercial floors?
Buckling in commercial floors is often caused by moisture intrusion, inadequate subfloor preparation, or poor underlayment/adhesive selection. It can also result from temperature and humidity changes that expand and contract concrete or flooring materials, especially when joints and expansion gaps are missing. Heavy rolling loads, improper thickness, or subgrade settlement can further intensify buckling in areas like warehouses, retail entrances, and office corridors.
How do you fix buckling in commercial concrete floors?
First, identify and correct the underlying moisture problem—check for leaks, capillary rise, or failed vapor barriers—because repairs will fail if water continues to move through the slab. Next, remove any loose or lifted flooring layers and evaluate the concrete for surface spalling, voids, or slab movement. For localized buckling, contractors may saw-cut and re-level the affected area with compatible patching/flowable fill systems, then install a proper moisture mitigation layer and flooring reinstallation plan.
How can you repair buckled vinyl or laminate flooring in a commercial space?
Start by stopping the cause—address water leaks, humidity imbalance, and any inadequate leveling underlayment before replacing materials. Lift and remove buckled sections, then inspect for moisture damage, bowed subfloor panels, or debris trapped under the flooring. After the substrate is flattened with approved leveling compounds and allowed to dry to the correct moisture tolerance, reinstall with the recommended adhesive and expansion gap requirements to reduce recurrence.
Why is professional assessment important for buckling in commercial floors?
Buckling can be a symptom of deeper issues like subgrade failure, structural movement, or widespread moisture contamination, and patching without diagnosis often leads to repeat failures. A flooring contractor or structural/geo professional can measure flatness, check moisture levels, review installation history, and determine whether the slab needs re-leveling, grinding, or targeted replacement. This approach helps protect occupants, minimize downtime, and ensure the chosen commercial floor repair method is compatible with the existing system.
Which repair method is best for buckling: leveling compounds, grinding, or slab replacement?
The best option depends on the cause and the extent of movement: grinding and re-leveling work well for shallow surface irregularities, while a compatible leveling compound is typically used when the slab is sound but out of tolerance. If buckling indicates structural movement, widespread moisture-driven damage, or large voids, slab replacement or more extensive subfloor remediation may be necessary. The “best” fix is the one that corrects moisture and restores flatness to the flooring manufacturer’s specifications before reinstalling commercial flooring.
📅 Last Updated: October 12, 2026 | Topic: How to fix buckling in commercial floors? | Content verified for accuracy and freshness.
References
- Google Scholar Google Scholar
https://scholar.google.com/scholar?q=buckling+of+concrete+floor+slabs+repair - Google Scholar Google Scholar
https://scholar.google.com/scholar?q=commercial+floor+system+buckling+subfloor+failure+mitigation - Google Scholar Google Scholar
https://scholar.google.com/scholar?q=floor+slab+damage+curling+warping+buckling+and+repair - https://en.wikipedia.org/wiki/Buckling_(mechanics
- https://www.britannica.com/technology/buckling
- https://www.fhwa.dot.gov/pavement/concrete/construction/index.cfm
- https://www.fhwa.dot.gov/pavement/pcc/pdf/05130.pdf
- PMC Home
https://www.ncbi.nlm.nih.gov/pmc/ - American Concrete Institute
https://www.concrete.org/ - https://www.nist.gov/engineering-laboratory/construction-systems-materials-division