


You can dispose of polyurethane floors safely and correctly—but only if you follow the right disposal route for the material and your local waste rules. This guide tells you exactly how to handle polyurethane flooring from removal to packaging, labeling, and where it can legally go. Expect clear steps that prioritize safety, compliance, and avoiding contamination of landfills.



If you need to dispose of polyurethane floors, treat them as regulated construction waste and follow local hazardous/waste rules—especially if the coating contains solvents, is stained/contaminated, or you’re removing a large area. The safest approach is to contain the material during removal, avoid dry sweeping, and separate cured floor debris from any underlying substrates before disposal.
If you’re planning to remove a polyurethane-coated floor in a garage, warehouse, industrial facility, or basement, the disposal step is where many projects accidentally become a compliance problem. This guide walks you through a practical, documentation-driven process—starting with identifying the exact polyurethane system and ending with how to confirm acceptance at your receiving facility in 2026.
Who this is for / when it applies: This is for homeowners, contractors, and facility managers dealing with polyurethane coating systems on floors (e.g., garage, warehouse, industrial, or basement applications) who want a practical disposal plan. It’s especially relevant when you’re removing and hauling debris rather than just cleaning or repairing.
Step 1: Identify the polyurethane system and condition
The right disposal route starts with knowing exactly which polyurethane system you have and whether it’s been contaminated or mixed with other materials. Because many disposal rules hinge on SDS (Safety Data Sheet) guidance and contamination status, identification is not optional—it’s your compliance baseline.
Polyurethane floor disposal requirements often depend on the specific coating, primer, and any adhesives used, which are typically documented in the product’s SDS.
If the coating contains solvents or other regulated ingredients, the waste stream classification can change—even after the floor is physically removed.
Contamination from oils, chemicals, or unknown spills can elevate polyurethane floor debris into a “special waste” or hazardous-waste workflow depending on local rules.
What to inspect (and why it matters)
Start by checking what’s actually on the floor:
– Is it a polyurethane topcoat/coating applied over a substrate (often concrete)?
– Is it a full polyurethane flooring system (including primer/basecoat and topcoat)?
– Is it a polyurethane-based flooring product (e.g., poured or broadcast systems) rather than a simple coating layer?
Then document condition and contamination:
– Look for oil/grease, chemical staining, unknown residues, or areas that were used for chemical storage.
– Identify whether there were solvent-based primers, adhesives, or patching compounds included in the system.
Find the SDS and any manufacturer disposal language
Your SDS is the strongest evidence the receiving facility and hauler can rely on. If you don’t have it, you’ll often need to obtain it by product name, SKU, or the coating batch/label information you find on-site.
[ADD: specific manufacturer/model/SDS link or title if you have it]
For compliance-friendly work, treat the SDS as a “disposal specification,” not just a safety document.
Key facts you can anchor to
– According to the U.S. EPA, the United States generated about 600 million tons of construction and demolition (C&D) debris in 2018—which is why local disposal rules for C&D materials are heavily enforced and standardized across many jurisdictions. U.S. EPA (C&D debris reporting)
– According to OSHA, the PEL (permissible exposure limit) for “particulates not otherwise regulated” is 15 mg/m³ (total dust) and 5 mg/m³ (respirable fraction) as an 8-hour time-weighted average—relevant when grinding or removing coatings that create dust. OSHA 29 CFR 1910.1000, Table Z-3
– According to common HEPA performance definitions used in U.S. air filtration guidance, HEPA systems are designed to capture 99.97% of particles at 0.3 micrometers and larger—supporting the “no dry sweeping” approach during debris handling. U.S. DOE/HEPA filtration definitions commonly used in industrial guidance
Repeat polyurethane identification throughout your project: whenever you change tools, change work zones, or change removal methods, your “what is this waste?” question should be re-validated using the SDS.
Step 2: Plan containment and safe removal
The safest disposal starts before debris exists: plan removal methods that minimize airborne dust, chips, and uncontrolled spread. If you control exposure and keep waste contained and segregated, disposal classification and acceptance are dramatically easier.
Avoiding dry sweeping reduces the chance of spreading fine coating dust into other areas of the site and into waste handling areas.
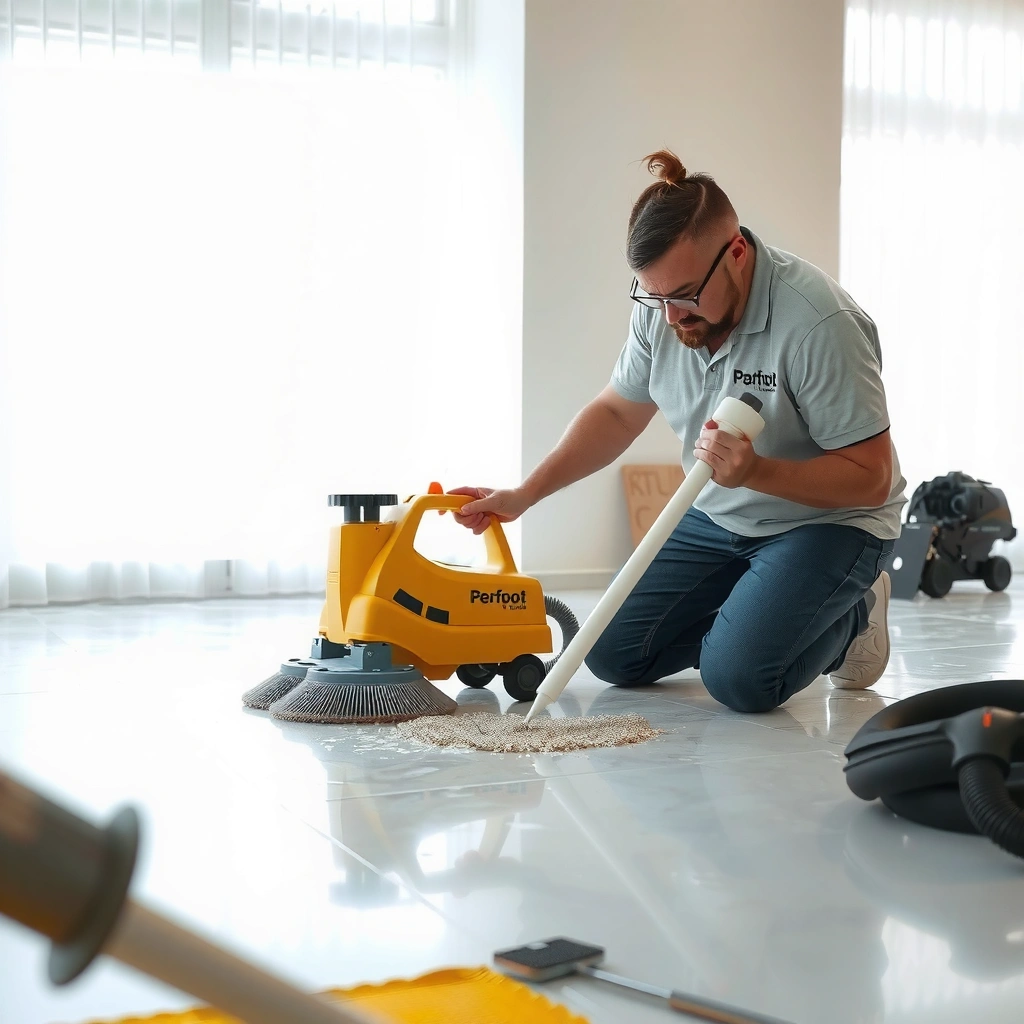
Controlled removal methods (for example, HEPA-filtered collection and contained scraping/grinding) help maintain occupational and environmental controls during floor demo.
Segregating polyurethane-coated debris from other demolition materials early improves the odds that the receiving facility will accept the load without reclassification.
Control dust and chips (especially with grinding or sanding)
Polyurethane removal commonly creates chips and fine dust. If those particles migrate, you create both:
1) a worker exposure issue, and
2) a contamination issue that can affect disposal classification.
Practical planning steps:
– Use PPE appropriate to the SDS (minimum: respiratory protection and eye protection when sanding/grinding is involved).
– Prefer HEPA vacuums and dust-suppressed methods over uncontrolled dry methods.
– Set up containment barriers around the work zone, particularly for large-area removal.
Avoid uncontained grinding and dry sweeping
Dry sweeping is a common way projects accidentally “cross-contaminate” the surrounding area. Instead:
– Collect immediately with a HEPA-filtered system where feasible.
– Bag debris promptly—don’t let chips sit where they can be tracked.
Keep demolition sections sorted during the job
If you’re removing in phases (common in warehouses and multi-tenant facilities), plan waste stream separation from the start:
– “Polyurethane coating debris stream”
– “Concrete/substrate stream”
– “Mixed/uncertain contamination stream” (if you encounter chemical staining or unknown residue)
This early segregation often determines whether the receiving facility can accept your load as construction debris rather than requiring special handling.
Step 3: Separate waste types before disposal
Separation is how you prevent the “mixed load” problem that causes rejections and reclassification at the waste facility. Before you haul anything away, make sure cured polyurethane debris isn’t commingled with underlying substrates or contaminated materials in a way that confuses the waste classification.
Many receiving facilities prefer separated waste streams (for example, cured coating debris vs. concrete) because it supports consistent classification and processing.
Keeping visibly contaminated portions segregated helps prevent a non-hazardous load from becoming treated as hazardous due to mixed contamination.
Proper bagging or lidded containers reduce the risk of leaks during transport, which is a common compliance failure point.
Separate cured polyurethane debris from concrete/substrate
If your floor consists of polyurethane coating over concrete, plan for:
– Cured polyurethane chips/scrap (coating layer and scabbed material)
– Concrete (and any underlayment if present)
If your local facility requires a specific separation approach, follow it—some facilities are strict about what “counts” as C&D debris versus what must go under special waste workflows.
Handle stained/contaminated areas differently
If the floor is stained (oil/chemical exposure) or the contamination source is unknown:
– Treat those removed fragments as higher-risk waste until proven otherwise.
– Label and segregate them clearly for the hauler.
Package and label the waste correctly
Use containers that prevent leaks:
– sealed bags where allowed
– lidded, closed drums/containers when the SDS or facility requires it
– clear labeling that matches your waste stream separation plan
At this stage, your goal is simple: make it easy for the receiving site to see what they’re accepting and under which category.
What Usually Drives “Cured Polyurethane” Acceptance
| # | Decision factor | What you should prepare | Typical acceptance impact | Risk rating |
|---|---|---|---|---|
| 1 | Specific SDS for coating/primer/adhesive | SDS PDF title + product identifier | High confidence for classification | ★★★☆☆ |
| 2 | Cure status (fully cured vs. partially cured) | Removal timing notes vs. installation date | Fully cured often easier to route as C&D | ★★★☆☆ |
| 3 | Oil/chemical staining or unknown spills | Photo log + segregated “stained” stream | May trigger special/hazardous handling | ★★★★☆ |
| 4 | Whether solvents/volatile components were present | SDS section for “hazardous ingredients” | Can change classification even if cured | ★★★☆☆ |
| 5 | Waste stream separation (debris vs. concrete) | Two+ clearly labeled containers/loads | Mixed loads often lead to rejection | ★★★☆☆ |
| 6 | Transport containment (leak prevention) | Sealed bags/lidded bins; intact liners | Protects against spill-triggered special rules | ★★☆☆☆ |
| 7 | Receiving facility acceptance confirmation | Written approval or documented call log | Determines whether the load is accepted on arrival | ★★★★☆ |
Step 4: Find the right disposal route (landfill vs. special waste)
Don’t assume polyurethane floor debris is always regular C&D trash. The correct disposal route is determined by local rules, your contamination profile, and how your receiving facility classifies the specific SDS-linked waste.
The most reliable approach is to ask your local hauler or municipal waste department what classification applies to polyurethane floor debris before you transport it.
SDS/manufacturer guidance can be used by receiving facilities to decide acceptance and whether the load requires special handling.
If you’re unsure about classification, contacting the receiving site is better than guessing—load rejection often results in additional costs and compliance delays.
Confirm classification before hauling
Call or email:
– your waste hauler
– the municipal waste authority or local permitting office (for guidance)
– the receiving facility where you plan to dump
Bring the basics:
– SDS for the polyurethane coating/primer/adhesive
– product identifiers (brand/SKU/label text)
– a description of your removal work (cured vs. partially cured, areas of staining)
If the waste is contaminated, expect special handling
When oil/chemical contamination is present, you may be required to route debris as special waste or hazardous waste (depending on local regulation and the SDS hazard profile). Even cured materials can be treated differently if the mixture meets local criteria.
What to ask (use this wording)
Ask the receiving facility:
– “Is cured polyurethane coating debris acceptable as C&D under your waste acceptance policy?”
– “Do you require separation from concrete and/or labeled stained fractions?”
– “What documentation do you need—SDS only, or additional notes?”
If the facility wants a specific format, capture it and keep it with your project records.
What can go wrong (common mistakes and edge cases)
The biggest disposal failures usually come from assumptions—about cure status, cleanliness, or whether “floor waste” automatically qualifies as regular trash. These mistakes can lead to load rejection, added hauling trips, or regulatory escalation.
Assuming cured polyurethane is non-hazardous can be wrong because some formulations and contamination sources still trigger special disposal requirements.
Mixing polyurethane debris with concrete or visibly contaminated material can cause a receiving facility to classify the whole load more strictly.
Creating uncontrolled airborne dust during removal not only increases exposure but can also spread contamination into clean areas that later become part of the waste stream.
Common mistakes to avoid
– Treating polyurethane waste as regular trash even when there’s solvent use, unknown residues, or chemical staining.
– Dry sweeping or uncontained grinding that spreads dust and chips across the site.
– Mixing waste streams—for example, putting polyurethane chips into the same container as contaminated concrete.
– Skipping SDS-based guidance; disposal requirements often reference product-specific composition and cure/handling status.
Edge cases worth flagging early
– Multi-layer systems: If the floor includes multiple coatings (e.g., epoxy + polyurethane topcoat), classification may depend on the combined SDS hazards.
– Partial cure or recent removal: If the coating wasn’t fully cured before removal, rules can change.
– Unknown chemical staining: When you can’t trace contamination, treat it conservatively and involve the waste facility early.
Practical pros/cons comparison (what changes your risk)
| Approach | Pros | Cons |
|---|---|---|
| Fully segregated “coating debris” load + separate “concrete” load | Easier acceptance decisions; fewer classification surprises | Requires additional containers/labeling |
| Mixed load (polyurethane + concrete + miscellaneous debris) | Less labor sorting | Higher risk of rejection or reclassification |
| No SDS verification; “cured” assumed safe | Faster demo start | Highest risk of non-compliance if solvents/contaminants are involved |
Verdict / tip
If your polyurethane floor is fully cured, not contaminated, and you follow local waste guidance for separated construction debris, you can often route it through a permitted construction waste workflow—but you must verify classification with your waste hauler and receiving facility first. Skip this DIY disposal planning approach if you can’t identify the coating system, there’s chemical/oil contamination, or you’re dealing with unknown multi-layer installations—those cases require SDS-based confirmation and professional handling.
Cured status helps, but SDS content and contamination status still govern acceptance, so verification with the hauler/receiving facility is the safest step.
Segregating cured polyurethane debris from concrete and labeling stained fractions reduces the chance that a receiving facility reclassifies your entire load.
Quick checklist: Dispose of polyurethane floors
– [ ] Identify the polyurethane product(s) and locate the SDS/manufacturer disposal guidance (add SDS title/number here if available)
– [ ] Assess contamination (oil/chemicals/unknown substances) and document affected zones
– [ ] Contain dust/debris during removal; collect promptly (no dry sweeping)
– [ ] Separate polyurethane debris from concrete/other substrates; keep labeled fractions for stained areas
– [ ] Package/label sealed containers/bags as required by the hauler/receiving facility
– [ ] Confirm acceptance/classification with your local waste facility/hauler before transport and keep documentation on-site
A written acceptance confirmation (call log, email, or facility intake notes) is often more useful than verbal guidance when loads are reviewed at arrival.
FAQ
Can I dispose of polyurethane floor debris as regular trash?
Sometimes—if it’s fully cured and accepted as construction debris by your local facility—but classification rules vary by location and contamination status, so you must verify with your receiving site.
Regular-trash disposal is the exception, not the rule, when polyurethane waste includes solvent content or contamination; confirmation from the hauler/receiving facility is the deciding factor.
Does “cured” polyurethane always mean non-hazardous?
Not always. Even cured polyurethane systems can require special handling depending on formulation, additives, and local regulations—your SDS and local guidance control what applies.
“Cured” addresses physical hardening, but it does not automatically remove chemical hazards defined in SDS guidance or local waste rules.
What if the floor is stained or contaminated?
Treat it as higher risk. If there’s chemical or oil contamination, disposal may shift to hazardous/special waste—contact the facility and use the SDS to confirm requirements.
Visible staining and chemical residue are common triggers for stricter waste acceptance policies because they can change the hazard profile of the removed debris.
Do I need to separate polyurethane debris from concrete?
Often, yes. Many disposal sites require or prefer separated streams so they can classify and process each material correctly.
Segregation supports correct classification and reduces the chance that clean concrete becomes “contaminated” by commingled coating debris.
Sources
– Manufacturer Safety Data Sheet (SDS) for your specific polyurethane coating/primer/adhesive: disposal guidance and handling recommendations are typically included in the SDS. [ADD: SDS document name/number or where you obtained it]
– OSHA (29 CFR 1910.1000, Table Z-3): permissible exposure limits for particulates not otherwise regulated. OSHA
– U.S. EPA: C&D debris generation context used to explain why local acceptance policies matter. U.S. EPA (C&D debris reporting)
– HEPA performance definitions used in industrial guidance (capture efficiency standard). U.S. DOE / HEPA filtration definitions
– [ADD: source for your local hazardous waste/construction debris rule—city/state/country and relevant agency/resource]
To dispose of polyurethane floors safely and correctly, focus on the sequence: identify the exact system using the SDS, remove with dust control and containment, separate cured polyurethane debris from concrete and contaminated fractions, and confirm acceptance with your local facility before transport. If you keep documentation and segregation tight, you avoid the most common—and most expensive—compliance surprises when the load is inspected at the receiving site.
Frequently Asked Questions
What is the best way to dispose of polyurethane flooring or polyurethane floor coatings?
The best method depends on whether you’re removing polyurethane floor coatings from concrete or disposing of polyurethane flooring material (like tiles or mats). In many areas, polyurethane waste is handled as construction debris and may require bagging and transport to a licensed landfill or transfer station. If the coating contains solvents, primers, or hazardous additives, it may be classified as hazardous waste, so check your local regulations before disposal.
How do you dispose of polyurethane floor grindings and dust from surface preparation?
Polyurethane floor grindings and dust should be collected using industrial vacuum systems with proper filters to reduce airborne particles, then placed into sealed, labeled containers. Do not sweep polyurethane dust into regular trash, because it can spread contaminants and violate disposal rules. Depending on local requirements, you may need to treat the collected debris as regulated construction waste and take it to a facility that accepts it.
How should polyurethane floor stripping waste be handled if it includes paint flakes and old coatings?
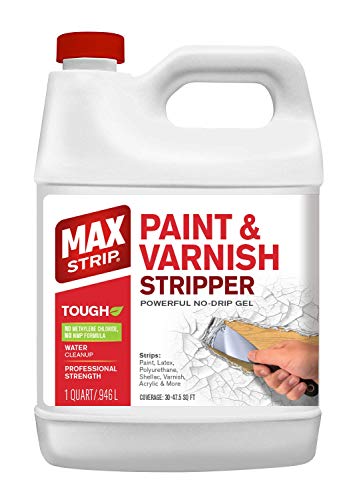
Collect paint flakes, removed layers, and scraped polyurethane flooring material immediately and keep them dry and contained in heavy-duty bags or containers. If you used chemical strippers, oily absorbents, or solvents, those materials may be regulated, so dispose of them separately from dry debris. Always follow the Safety Data Sheet (SDS) and local hazardous waste guidance for polyurethane floor stripping byproducts and contaminated rags.
Why is proper disposal important for polyurethane floor coatings?
Polyurethane floor coatings can contain chemicals that may leach into soil or contaminate waterways if discarded improperly. Proper disposal also reduces fire risk from solvent-containing materials and helps protect workers and nearby residents from hazardous fumes or fine particulate exposure. Following correct disposal procedures for polyurethane floors ensures compliance with environmental regulations and reduces liability for property owners and contractors.
Which disposal option is compliant for polyurethane floors after removal—landfill, recycling, or hazardous waste pickup?
In most cases, small amounts of cured polyurethane floor debris can go to a permitted construction debris landfill, but unconfirmed or solvent-containing materials may require hazardous waste pickup. Recycling of cured polyurethane is uncommon for typical residential or commercial removals, though some specialty waste processors may accept certain fractions. To choose the right route, confirm whether the waste is “hazardous” based on the coating’s SDS, your local rules, and the presence of primers, solvents, or chemical stripping agents.
📅 Last Updated: October 11, 2026 | Topic: How to dispose of polyurethane floors? | Content verified for accuracy and freshness.
References
- Polyurethane
https://en.wikipedia.org/wiki/Polyurethane - https://www.epa.gov/hw/learn-about-hazardous-waste
- https://www.epa.gov/hw/rcra-resource-conservation-and-recovery-act
- https://www.epa.gov/smm/sustainable-management-construction-demolition-materials
- Isocyanates – Overview | Occupational Safety and Health Administration
https://www.osha.gov/isocyanates - Checking your browser – reCAPTCHA
https://pubchem.ncbi.nlm.nih.gov/compound/4_4%27-Methylenediphenyl-diisocyanate - Checking your browser – reCAPTCHA
https://pubchem.ncbi.nlm.nih.gov/compound/Toluene-diisocyanate - Google Scholar Google Scholar
https://scholar.google.com/scholar?q=disposal+of+polyurethane+flooring+waste - Google Scholar Google Scholar
https://scholar.google.com/scholar?q=polyurethane+floor+demolition+construction+and+demolition+waste+management - Google Scholar Google Scholar
https://scholar.google.com/scholar?q=polyurethane+debris+diisocyanate+handling+and+disposal


