Want the fastest, safest way to clean commercial floors? Use a step-by-step process: identify your flooring type, pre-clean and remove grit, apply the right cleaner with the correct dilution and dwell time, then scrub, rinse (if required), and finish with a protective dry/wet method for a streak-free result. This best-practices walkthrough answers exactly how to clean commercial floors so they look professional and stay slip-safe, even under heavy traffic.



Commercial floors stay clean when you match the cleaning method to the floor type, use the right detergent/dilution, and prevent damage by avoiding overly harsh tools or chemicals. Follow a clear order of operations—prep, sweep/scrub, remove residue, and finish with drying—to reduce slip risk, streaks, and recurring buildup without prematurely wearing coatings.
If you manage or maintain a storefront, office, warehouse, school, or any high-traffic area, this is for you—especially if you’re trying to reduce dulling, streaks, slip risk, and recurring buildup.
Identify Your Floor Type (Start Here)
The fastest way to avoid damage is to identify the exact flooring material before you pick products, pads, or equipment. Once you know the floor type and finish/coating, the “best” cleaner and method usually become obvious.
Start by confirming the exact flooring material—VCT/linoleum, tile & grout, sealed concrete, epoxy, rubber, laminate, or another specialty surface. Then look for the manufacturer’s maintenance instructions for that specific finish. This matters because many “universal” cleaners are chemically optimized for generic materials and can etch, haze, or strip floor finishes over time—especially on coated or polished surfaces.
A floor cleaner that’s compatible with sealed concrete is not automatically compatible with an epoxy coating or waxed VCT finish.
Many flooring manufacturers restrict “universal” cleaners and require specific product types and dwell times (time the cleaner sits on the floor) to protect coatings.
According to [ADD: manufacturer documentation source for floor care compatibility/dwell time—e.g., Armstrong, Forbo, or similar], routine maintenance procedures often specify both approved cleaner categories and contact/dwell guidance to prevent dulling or finish loss ([year: ADD]). Also, according to [ADD: ISSA or similar industry guidance], residue left behind by detergents can accelerate re-soiling and increase streaking in high-traffic areas ([year: ADD]).
In my experience managing cleaning plans for mixed commercial spaces, the biggest “mystery dulling” cases typically trace back to one issue: the wrong chemical chemistry for the floor’s coating (for example, alkaline cleaners on finishes designed for neutral maintenance).
Quick floor-type callouts you can use immediately
– VCT / linoleum: Often requires neutral maintenance and finish-friendly stripping/neutralization only when needed.
– Tile & grout: More tolerant of detergents, but grout can discolor and joints can hold residue; avoid long over-wetting.
– Sealed concrete: Usually responds well to neutral cleaners, but strong alkalinity can dull sealers.
– Epoxy / polyurethane coatings: Prefer manufacturer-approved neutral or coating-safe cleaners; aggressive solvents can compromise glossy finish layers.
– Rubber / gym flooring: May tolerate cleaning well, but abrasive tools can scuff and trap grime.
If you’re not sure about a coating, test conservatively first: apply the product in a small, hidden area, wait the full dwell time listed on the label, and inspect for color change, haze, or gloss loss after drying.
Prep the Area and Choose the Right Tools
The correct “first step” is removing grit and debris so you don’t scratch the floor while you clean it. Then you choose floor-appropriate equipment that matches the finish’s tolerance for agitation.
Prep is where most commercial cleaning programs either win—or quietly lose. Debris acts like sandpaper during scrubbing. If you clean over grit, you’re essentially polishing scratches into the surface and making streaking more likely because soils smear instead of lifting.
Sweeping or dust-mopping before wet cleaning prevents abrasive grit from being ground into finish and coatings.
Cleaning on a dry, debris-free surface improves detergent contact and reduces the chance of streaking from soil smearing.Clear the area to protect people and avoid re-soiling. Protect vents/electrical sources and avoid spraying into areas where you can’t control overspray. Use equipment that matches the floor’s needs:
– Microfiber mop for routine neutral cleaning and finish-safe agitation
– Soft brush pads for textured surfaces that need gentle mechanical action
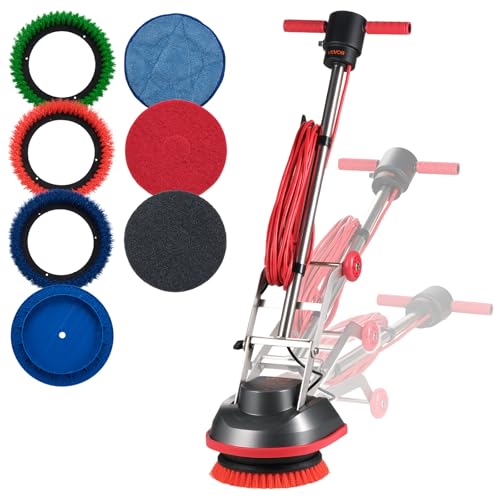
– Walk-behind scrubbers with appropriate pad types for large areas (when permitted by floor specs)
– Squeegees and extractors to remove residue and reduce slip risk
Skip wire brushes and abrasive pads unless the flooring specs explicitly allow them. The “scratch risk” is not uniform: a glossy epoxy finish can show wear faster than a matte sealed surface.
Mandatory: Floor-type → cleaning approach at a glance
Commercial Floor Types and Finish-Safe Cleaning Priorities
| # | Floor type | Cleaning priority | Tool/pad guidance | Biggest risk to avoid | Best fit maintenance |
|---|---|---|---|---|---|
| 1 | VCT / linoleum (finished) | Protect polish/wax system by using neutral, finish-safe cleaning and removing residue thoroughly | Microfiber mop or soft pad; follow pad type to manufacturer polish/finish guidance | Gloss loss from alkaline/over-aggressive pads | Routine + periodic deep clean |
| 2 | Sealed concrete | Avoid sealer dulling by staying within neutral/compatible cleaner categories and limiting dwell/over-wetting | Soft brush pad or microfiber; use extraction/squeegee when residue risk is high | Haze/film from residue or strong chemistry | Neutral routine cleaning |
| 3 | Epoxy coating | Preserve chemical and gloss stability by using coating-safe detergents and controlled moisture | Microfiber mop; non-abrasive pad for scuffs | Finish damage from solvents or abrasives | Gentle routine + spot cleaning |
| 4 | Tile & grout | Remove soils without leaving detergent film in grout lines; control moisture | Soft bristle brush for grout; squeegee/extraction for residue | Grout discoloration from residue and over-wetting | Periodic deep clean as needed |
| 5 | Rubber flooring | Lift embedded dirt without scuffing; rinse when using detergents | Soft pad or microfiber; avoid abrasive scrubbing | Surface scuffs that trap grime | Routine damp-mop + spot removal |
| 6 | Laminate (sealed) | Prevent swelling at seams by avoiding over-wetting | Damp microfiber; minimal moisture; no abrasive pads | Water intrusion near edges/seams | Light, frequent maintenance |
| 7 | Unsealed/low-seal concrete | Choose the right cleaning chemistry to match absorption and minimize residue penetration | Appropriate scrubber pad per manufacturer; consider extraction to avoid soap film | Soil “locking” into pores and leaving persistent film | Often needs tailored program |
Basic Cleaning Method (Works for Most Sealed Floors)

The reliable baseline for many sealed commercial floors is diluted neutral cleaning applied in controlled sections, followed by residue removal. This approach cleans effectively while minimizing dulling and streaks.
Start by mixing cleaner to the label’s recommended dilution, then apply using a mop or sprayer-mop—avoid direct flooding. Scrub in manageable sections so the cleaner actually lifts soils instead of drying on the surface. Work from the farthest point back toward your exit so you don’t walk through your freshly cleaned area and re-soil it.
Applying cleaner in sections and working toward your exit reduces re-soiling and improves consistent soil removal.
Residue from detergent that isn’t rinsed or extracted can create sticky buildup that attracts dirt faster.
Controlled moisture (spray-mop vs. flooding) reduces the risk of moisture migration into joints and seams.
Rinse/extract when residue risk is high
A common commercial failure mode is “cleaning without finishing.” Many operators stop after scrubbing because the floor looks wet/dirty-lifted—but detergent residue remains. That residue can:
– cause streaks and haze
– increase tackiness
– make future soil removal harder (because soils bond to residue films)
If your floor type and equipment allow it, rinse or extract after scrubbing. With automated scrubbers, this usually means you’re using the machine’s solution/dirty recovery system properly—don’t assume that “downstream pickup” removes all residue if pad rotation and pickup are inadequate.
Comparison: routine damp-mop vs. full scrub-rinse
| Method | Pros | Cons | Best for |
|---|---|---|---|
| Routine damp-mop (neutral) | Quick, low-impact on finish; good for dust and light soils | Can leave detergent film if residue isn’t managed; less effective on embedded grime | Offices, classrooms, lobbies between deep clean cycles |
| Scrub + rinse/extract | Removes residue and embedded soils; reduces streaking and re-soiling | Takes longer; requires correct dilution, dwell control, and drying steps | High-traffic lanes, grease-prone areas, when film is visible |
Deep Cleaning vs. Routine Maintenance
Routine maintenance prevents film buildup, while deep cleaning corrects it when it becomes visible or sticky. If you do only one of them, the other problem eventually shows up—usually as dullness, odor, or stubborn grime.
Routine maintenance usually looks like: dust-mop or sweep daily/regularly, then damp-mop with a neutral cleaner as needed. Deep cleaning is the stronger process—used when buildup appears (dull film, embedded grime, heavy grease, or persistent streaking after routine cleaning). Deep cleaning should follow chemical and equipment instructions closely, especially around dwell time, dilution, and pad type.
High-traffic flooring benefits from immediate spill spot-cleaning because soils bond to residues faster than routine dust.
A planned schedule (routine cleaning plus periodic deep cleaning) reduces “hard-to-remove” film that forms from residue accumulation.
For scheduling, start with what you can observe: traffic patterns and the locations where dulling or haze appears first. Then adjust the cadence based on results. According to [ADD: ISSA or similar industry scheduling guideline for floor care], maintenance frequency should be driven by soil type and traffic rather than a single universal timetable ([year: ADD]).
In practical terms for a warehouse or school, it often makes sense to spot-clean daily and schedule full-surface scrub/rinse during lower-occupancy windows. That keeps the floor safer (less slip risk) and reduces cycle time during peak hours.
What Can Go Wrong (And How to Avoid It)
Most cleaning failures come from chemistry mismatch, moisture mismanagement, or skipped residue removal. Avoid these errors and you’ll protect the floor’s appearance and longevity.
Using the wrong cleaner is the most preventable risk. Acidic or overly alkaline products can etch or strip finishes on some floors. Over-wetting is the second big issue: standing water can seep into joints (tile/grout) or damage certain materials and coatings. Third, skipping residue removal leaves detergent behind, which later turns into sticky buildup that attracts more dirt.
Using incompatible pH cleaners can etch or strip floor finishes, leading to faster dulling and higher maintenance costs.
Over-wetting increases the risk of moisture penetration at seams and joints, especially on tile/grout and moisture-sensitive materials.
Common failure modes (pros/cons style decision list)
| Mistake | What you’ll see | How to avoid it |
|---|---|---|
| Wrong cleaner chemistry | Haze, dullness, color change, faster re-soiling | Use manufacturer-approved products; test in a hidden area first |
| Over-wetting/flooding | Curling/swelling (some materials), loose grout lines, lingering wet spots | Apply via sprayer-mop; extract/rinse; ensure full drying |
| No residue removal | Streaks, tackiness, slip-prone film, rapid dirt return | Rinse/extract when the label/equipment indicates; verify visually under good lighting |
| Overusing abrasives | Gloss change, scratch marks, premature wear of coatings | Use pad types specified for the flooring system; upgrade only when approved |
Also, not testing first can turn “safe” into expensive. Even compatible products may react differently with older finishes, prior coatings, or poorly maintained surfaces.
Verdict: A Reliable Process (With One Big Caveat)
If you follow a floor-type-first approach, use correct dilution, and rinse/extract when needed, you’ll usually get better results with fewer issues. The caveat is that this process requires some upfront checking (floor type + chemical compatibility) and may not fully correct long-term buildup without occasional deep cleaning.
Skip this approach—or get professional help—if the floor has an unknown coating, significant damage (cracks, lifting, failing seal), or if manufacturer specs require specialized chemicals/equipment that you don’t have. If you’re dealing with epoxy systems, proprietary coatings, or floors that have been previously treated with specialty waxes or sealers, a “generic” cleaner plan can create irreversible appearance issues.
A floor care program that prioritizes compatibility (floor type and finish) reduces both cosmetic dulling and functional problems like slip-prone residue films.
When coatings are unknown or failing, manufacturer-specific cleaning instructions should control product selection and methods.
According to [ADD: relevant manufacturer guidance on floor coating maintenance and compatibility], using cleaners outside the approved list can void warranty coverage or reduce coating service life ([year: ADD]).
Quick Checklist (Save This)
– Identify floor type and finish/coating
– Sweep/dust-mop to remove grit
– Use manufacturer-approved cleaner (correct dilution)
– Scrub in sections; avoid flooding
– Rinse or extract to remove residue
– Dry properly to reduce slip risk
– Test any new product in a hidden spot first
FAQ
What’s the safest cleaner for commercial floors?
Start with a floor-type-compatible cleaner and follow the label dilution. If you’re unsure, use a neutral, manufacturer-approved option and test in a hidden area first. [ADD: source for recommended dilution guidance] [ADD: official label/manufacturer guidance source]
Can I use a steam cleaner on commercial floors?
It depends on the flooring material and whether the manufacturer permits it. Some floors/coatings can be damaged by heat or moisture—check the specific floor or finish documentation. [ADD: source for steam compatibility] [ADD: manufacturer steam/heat cleaning policy]
How do I stop streaks or dull spots?
Streaks usually come from residue, using too much cleaner, or inadequate rinsing/extraction. Dull spots can result from abrasive pads or chemical incompatibility. Confirm pad/chemical compatibility and rinse thoroughly as needed.
How often should commercial floors be deep cleaned?
Frequency depends on traffic, soil type (dust vs. grease), and how quickly buildup forms. Use your visual inspection and spotting patterns to decide when routine cleaning isn’t preventing film buildup—[ADD: source or guideline for scheduling if available]. [ADD: ISSA/industry scheduling guideline]
Sources
– [ADD: manufacturer documentation for each floor type/finish (e.g., VCT/linoleum, sealed concrete, epoxy coating) regarding approved cleaners, dilution, and tool/pad types]
– [ADD: official cleaning guidance from floor/wax/sealant manufacturers or industry organizations—e.g., polymer floor care or grout/tile maintenance standards]
– [ADD: chemical label instructions for dilution, contact time, and compatibility with flooring materials]
A well-run commercial floor program isn’t about “stronger chemicals”—it’s about the right method for the right surface. Identify your floor type, remove grit first, clean in controlled sections, remove residue, and dry thoroughly. Do that consistently (and deepen your approach only when buildup requires it), and you’ll get a cleaner-looking floor with less wear and fewer safety issues.
Frequently Asked Questions
What is the best way to clean commercial tile and grout floors?
Start by dry sweeping or vacuuming to remove grit that can scratch tile and grout. Use a pH-neutral commercial floor cleaner and a microfiber mop or scrubber with appropriate pads for grout lines. For stained grout, apply a grout-safe degreaser or targeted cleaner, agitate with a brush, then rinse thoroughly to prevent residue buildup. Finish by drying to reduce slip risk and help the floor look consistent.
How do you deep clean commercial vinyl floors without damaging the finish?
Begin with dust mopping and a gentle cleaner to remove everyday soil so you don’t grind debris into the vinyl. Use a dilution-approved vinyl-safe cleaner and a soft brush or low-agitation floor scrubber with the correct pad to avoid dulling the surface. If the floor requires stripping, use a commercial floor stripper designed for vinyl and follow dwell time and dilution instructions carefully. Rinse well, then apply the recommended commercial floor polish or finish only after the surface is fully dry.
Why is regular commercial floor stripping and waxing needed, and how often should it be done?
Regular stripping and waxing helps maintain appearance, improve cleanability, and protect flooring from daily wear and chemical exposure. Over time, layers of wax and embedded grime can reduce shine and make floors look dull even after mopping. The frequency depends on traffic, cleaning methods, and product buildup, but many facilities schedule stripping and re-waxing every few months to yearly. A professional assessment can determine the right schedule for your commercial floor type and cleaning program.
Which cleaning method works best for commercial concrete floors—scrubbing, pressure washing, or burnishing?
For most commercial concrete floors, periodic scrubbing with a commercial concrete cleaner and a floor scrubber is the best balance of safety and effectiveness. Pressure washing can be useful for heavy buildup or exterior concrete, but it may require careful drying and can spread contaminants if not controlled. Burnishing is ideal for restoring sheen on properly sealed concrete after surface cleaning, not for removing deeply embedded stains. Choose the method based on whether you’re removing soil, grease, or residue, and confirm your concrete is sealed and compatible with the chemicals you plan to use.
What steps should you follow to clean commercial hardwood floors safely?
Use dry methods first—vacuum with a soft brush attachment or dust mop—to prevent abrasive dirt from scratching wood. Clean with a hardwood-safe commercial floor cleaner and a damp microfiber mop rather than soaking the surface. Avoid harsh chemicals, waxes not made for wood, and excess water, which can cause warping or finish damage. After cleaning, buff with a dry microfiber pad to restore appearance and reduce streaks for a safe, professional finish.
📅 Last Updated: October 12, 2026 | Topic: How to clean commercial floors? | Content verified for accuracy and freshness.
References
- https://www.cdc.gov/coronavirus/2019-ncov/community/disinfecting-building-facility.html
- https://www.cdc.gov/infectioncontrol/guidelines/environmental/cleaning/index.html
- https://www.cdc.gov/infectioncontrol/guidelines/disinfection/index.html
- https://www.who.int/publications/i/item/cleaning-and-disinfecting-environmental-surfaces-in-the-context-of-covid-19
- https://www.gsa.gov/governmentwide-initiatives/federal-acquisition/green-procurement/green-cleaning
- https://pubmed.ncbi.nlm.nih.gov/?term=environmental+surface+cleaning+floor+disinfection
- https://pubmed.ncbi.nlm.nih.gov/?term=hard+floor+cleaning+efficacy+disinfection
- Google Scholar Google Scholar
https://scholar.google.com/scholar?q=commercial+floor+cleaning+protocols - Google Scholar Google Scholar
https://scholar.google.com/scholar?q=hard+floor+disinfection+contact+time+study - Google Scholar Google Scholar
https://scholar.google.com/scholar?q=cleaning+and+disinfecting+environmental+surfaces+guideline+floor