
To adjust the squeegee on a floor scrubber, follow these steps: locate the adjustment knobs, loosen them, adjust the height and angle as needed, and then tighten the knobs to secure the squeegee in the new position. Now, let’s dive into how to properly adjust the squeegee on a floor scrubber for optimal cleaning performance.
A well-adjusted squeegee ensures effective water and debris removal, preventing streaks and leaving floors spotless. By mastering this simple process, you can ensure that your floor scrubber performs at its best, delivering clean and hygienic results every time. We will guide you through the step-by-step process of adjusting the squeegee on a floor scrubber.
Key Factors Affecting The Performance Of A Floor Scrubber
When adjusting the squeegee on a floor scrubber, there are several key factors that can affect its performance. First, the type of floor plays a significant role. Different floor surfaces require different squeegee adjustments to ensure optimal cleaning results. For example, a soft squeegee is suitable for delicate floors, while a firm squeegee may be better for tougher surfaces.
The type of dirt or debris on the floor also influences the squeegee adjustment. Large particles or stubborn stains may require a higher blade angle to effectively remove them, while smaller particles may necessitate a lower angle for better suction.
Lastly, the speed and pressure settings of the floor scrubber are crucial factors to consider. Adjusting the speed and pressure appropriately can enhance the squeegee’s performance and prevent any damage to the floor. It is essential to find the right balance that ensures the squeegee effectively removes dirt and debris without leaving behind any streaks or residue.
Signs Of Improper Squeegee Adjustment
Signs of improper squeegee adjustment can result in uneven water distribution, streaks or water trails, and incomplete water recovery. When the squeegee is not properly adjusted, it may not effectively remove water from the floor, leading to uneven puddles and wet spots. Uneven water distribution can cause problems such as inconsistent drying times, potential slip hazards, and even damage to the floor’s surface.
Streaks or water trails are another indicator of improper squeegee adjustment. If the squeegee is too worn or not aligned properly, it may not create a solid seal against the floor, leaving behind streaks or water trails. These streaks can be unsightly, can increase the risk of slips and falls, and can also impact the overall cleanliness of the floor.
Incomplete water recovery is yet another sign that the squeegee on a floor scrubber may need adjustment. When the squeegee is not properly set, it may leave behind pools of water on the floor instead of effectively collecting and recovering it. Incomplete water recovery can prolong the drying time, create potential slip hazards, and may even damage the floor or subfloor over time.
Step 1: Preparing The Floor Scrubber For Adjustment
Step 1: Preparing the Floor Scrubber for Adjustment
- Turn off the floor scrubber.
- Drain any excess water from the recovery tank.
- Ensure the squeegee blades are clean and free of debris.
Step 2: Adjusting The Squeegee Height
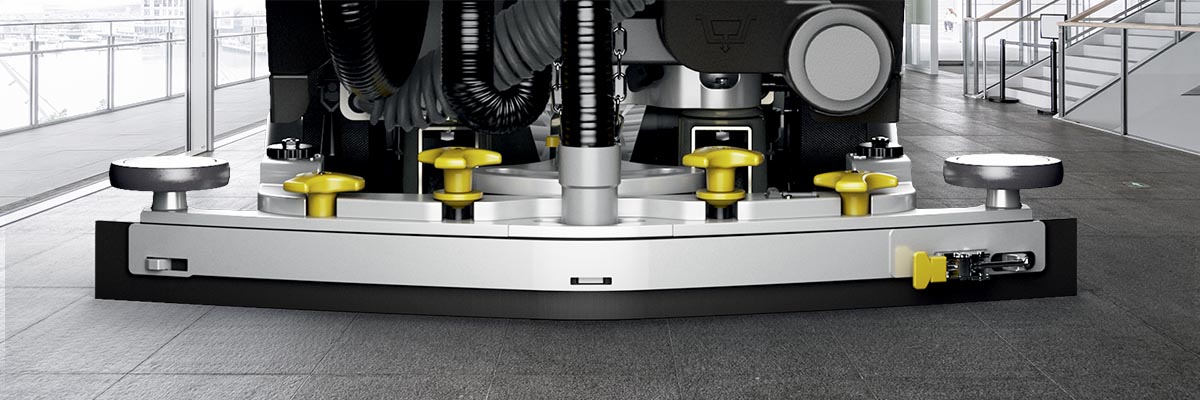
Adjusting the squeegee height is an essential step in achieving optimal cleaning results with a floor scrubber. To do this, start by locating the squeegee adjustment knob. This knob is typically located near the back of the machine.
Once you’ve found the knob, you can proceed to set the squeegee at the appropriate height for the specific floor type you are cleaning. This is important as different floor surfaces require different squeegee heights to ensure efficient water and debris pickup.
When adjusting the squeegee height, pay attention to the contact between the squeegee blades and the floor. The blades should make proper contact with the floor surface, allowing them to effectively remove water and debris. Improper contact can result in streaks or incomplete drying.
Step 3: Ensuring Proper Angle And Pressure
Find the angle adjustment mechanism on the floor scrubber. This mechanism allows you to set the angle of the squeegee blades to optimize water collection. Adjusting the angle is crucial to ensure that the squeegee effectively removes all the dirty water from the floor surface. By setting the blades at the proper angle, you can achieve maximum water pickup and prevent streaks or smears left behind. It’s recommended to refer to the manufacturer’s instructions to locate the angle adjustment mechanism on your specific floor scrubber model.
Once the angle is set, you should also adjust the squeegee pressure for optimal performance. This adjustment will vary depending on the type of flooring and the level of dirt or debris. Properly adjusting the pressure will help the squeegee to maintain contact with the floor surface and efficiently remove the water without leaving behind any residue. Experiment with different pressure settings to find the one that provides the best results for your particular cleaning task.
Step 4: Testing The Squeegee Adjustment
Once you have made the necessary adjustments to the squeegee on your floor scrubber, it’s time to test its performance. Here’s what you need to do:
- Run the floor scrubber over a small test area. This will allow you to observe how well the squeegee is functioning and whether any further adjustments are needed.
- Observe the water recovery. Look for streaks or water trails left behind by the squeegee. If you notice any, it may indicate that the squeegee needs to be adjusted further.
- If necessary, make further adjustments to the squeegee. This could include raising or lowering it, or changing the angle. The goal is to achieve optimal water recovery without any streaks or trails.
By following these steps and testing the squeegee adjustment on your floor scrubber, you can ensure that it is working effectively and delivering clean, streak-free floors.
Tip 1: Use Manufacturer’s Guidelines And Floor Type Recommendations
Using a floor scrubber can be a great way to keep your floors clean and shiny. To ensure optimal performance, it is important to adjust the squeegee correctly. The first tip is to follow the manufacturer’s guidelines and consult the floor scrubber manual for specific adjustment instructions, as different models may have different requirements. Additionally, consider the type of floor you are working with and the recommended settings for that particular floor type. Adjusting the squeegee height and angle correctly will help to ensure effective water and debris collection, leaving your floors looking their best. By taking the time to properly adjust the squeegee, you can get better results from your floor scrubber and extend the life of your equipment.
Tip 2: Regularly Clean And Inspect The Squeegee Blades
To ensure optimal performance and extend the lifespan of your floor scrubber, it is important to regularly clean and inspect the squeegee blades. Before and after each use, remove any dirt or debris from the blades to prevent clogging and maintain effective suction. Check for any damage or wear on the blades that may affect their performance. If you notice any tears, cracks, or uneven edges, it may be time to replace the blades. Proper maintenance of the squeegee blades will help to ensure efficient water recovery and thorough cleaning of your floors. By incorporating this simple task into your regular maintenance routine, you can keep your floor scrubber operating at its best and achieve excellent cleaning results.
Troubleshooting: Common Issues With Squeegee Adjustment
When adjusting the squeegee on a floor scrubber, it is important to troubleshoot common issues that may arise. One common problem is uneven water recovery. This can occur when the squeegee is not properly adjusted and does not make proper contact with the floor. To resolve this issue, it is necessary to adjust the squeegee height so that it is level with the floor surface. Excessive water left on the floor is another common problem that can be fixed by adjusting the squeegee angle. Tilt the squeegee slightly backward to ensure that it makes optimal contact with the floor, effectively recovering the water.
Tip 1: Regularly Replace Worn Or Damaged Squeegee Blades
Tip 1: Regularly replace worn or damaged squeegee blades
Monitoring the condition of your squeegee blades is crucial to maintain optimal performance and prevent issues with water recovery and streaks. Worn or damaged blades can hinder the squeegee’s ability to effectively remove water from the floor surface, resulting in poor water recovery and leaving behind streaks.
It is recommended to inspect the blades regularly and replace them as soon as signs of wear or damage are noticed. Common indications that the blades need replacement include visible wear, cracks, tears, or uneven edges. You can refer to the manufacturer’s guidelines for specific recommendations on the lifespan of the blades.
By regularly replacing worn or damaged squeegee blades, you can ensure the efficient operation of your floor scrubber and achieve optimal cleaning results.
Tip 2: Clean And Maintain The Floor Scrubber Properly
Regularly clean the recovery tank and filters: One important step in maintaining a floor scrubber is to regularly clean the recovery tank and filters. This helps to prevent any debris or dirt from clogging the system and affecting the machine’s performance. Make sure to empty and clean the recovery tank after each use, removing any accumulated dirt or residue. Additionally, regularly check and clean the filters, removing any debris or buildup that may have collected. Keep in mind that clean filters are essential for efficient operation and longevity of the floor scrubber.
Check and adjust other components, such as brushes and vacuum systems: In addition to cleaning the recovery tank and filters, it is crucial to regularly check and adjust other components of the floor scrubber. Inspect the brushes to ensure they are clean and properly aligned, as worn or misaligned brushes may result in unsatisfactory cleaning results. Adjust or replace brushes as needed. Also, check the vacuum system to ensure it is functioning correctly and effectively picking up dirt and debris as intended.
By following these maintenance tips, you can effectively clean and maintain your floor scrubber, ensuring optimum performance and extending its lifespan.
Frequently Asked Questions Of How To Adjust Squeegee On Floor Scrubber
How Do You Adjust A Squeegee?
To adjust a squeegee, follow these steps: 1. Loosen the screws holding the blade in place. 2. Slide the blade up or down to attain the desired angle. 3. Tighten the screws back securely. 4. Test the squeegee on a test surface to ensure proper adjustment.
5. Repeat the adjustment as needed for optimal results.
Why Is My Floor Scrubber Leaving Streaks?
There are a few reasons why a floor scrubber may leave streaks. It could be due to using the wrong cleaning solution or using too much or too little solution. Another possibility is worn or dirty squeegees or brushes. Ensure proper solution mix and maintenance for streak-free results
How Do You Fix A Squeegee Blade?
To fix a squeegee blade, follow these steps: 1. Remove the old blade from the handle. 2. Clean the handle and the blade with warm soapy water. 3. Trim the new blade to the correct size using a sharp knife.
4. Slide the new blade onto the handle, making sure it fits securely. 5. Test the squeegee’s performance by using it on a surface.
How Do You Use A Floor Squeegee?
To use a floor squeegee, start by pushing the squeegee across the floor, applying firm pressure. Move in a back and forth motion to collect water and debris. Tilt the squeegee to direct the liquid into a drain or collection area.
Repeat until the floor is clean and dry.
Conclusion
To wrap up, adjusting the squeegee on a floor scrubber plays a vital role in achieving optimal cleaning results. By following the step-by-step instructions provided in this blog post, you can ensure that your floor scrubber operates efficiently and effectively.
Remember to regularly check and adjust the squeegee to maintain proper contact with the floor surface. With these simple adjustments, you can clean your floors with ease and maintain a safe and hygienic environment for everyone.


