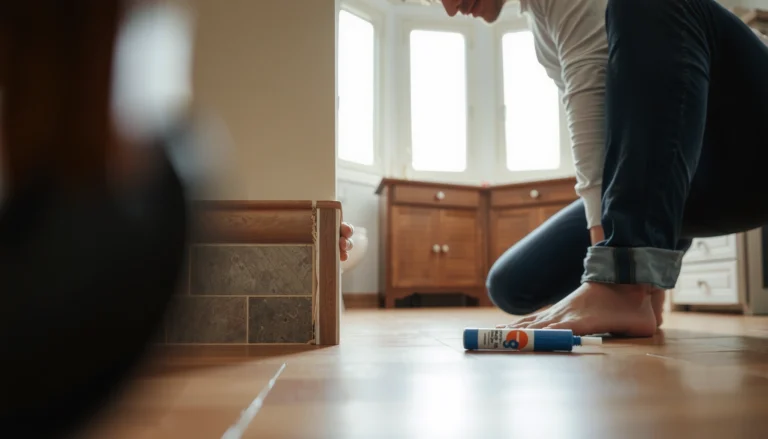
Repairing vinyl floors on a balcony is straightforward when you follow the right order: clean the surface, assess the damage, and use the correct patch or seam repair for the specific problem. This guide walks you through step-by-step fixes for lifting seams, bubbles, cuts, and water-related damage—so you know what to do and when. If your balcony vinyl is failing, you’ll get a clear repair path that’s stronger than a quick patch and avoids repeat breakdowns.




If your vinyl balcony floor has lifting seams, bubbles, or damaged planks, the best fix is usually to remove the affected pieces, confirm the subfloor is dry and flat, then replace or re-glue (or re-lock) using the method approved for your exact vinyl system. Start by checking for moisture or a leak first—repairing only the surface won’t hold if water is still migrating into the subfloor. This guide walks you through diagnosing the damage, choosing the right repair for click-lock vs glue-down vinyl, and preventing the same failure from coming back in 2026.
If your balcony vinyl is showing gaps, cracks, peeling edges, or soft spots after rain or temperature swings, this is for you. It’s especially relevant if the flooring is exposed to moisture, freeze/thaw cycles, or frequent wet-cleaning—because balcony moisture doesn’t forgive small installation mistakes like trapped dampness or missing expansion space.
Diagnose the damage before you cut anything

Repairing balcony vinyl starts with identifying what failed before you change materials or adhesives. The fastest path to a durable fix is to diagnose whether the issue is seam/edge failure, plank movement, or localized subfloor contamination—then confirm the moisture source is actually stopped (because vinyl repairs fail repeatedly when water continues behind the seams).
Balcony vinyl floor failures commonly begin at seams and edges because those areas are the first places water and air can reach the subfloor.
If the subfloor is damp or out of flatness tolerance, re-gluing or re-locking can look successful short-term but relift after the next weather cycle.
Resilient-floor prep focuses on dry, smooth, and flat conditions before any patching or bonding—this is why diagnosis comes before cutting.
What to look for (and what it usually means)
– Identify what’s failing: seams separating, planks lifting, bubbles/edges curling, or localized cracks/tears.
– Seams separating / gaps opening: often points to movement, insufficient perimeter allowance, or moisture at the seam line.
– Planks lifting: commonly indicates adhesive bond failure (glue-down) or trapped moisture/uneven subfloor (click-lock).
– Bubbles / raised edges: suggests moisture trapped under the vinyl or poor bond/voids beneath a glue-down section.
– Localized cracks/tears: often indicates mechanical damage, subfloor grit, or a point impact transmitted through a thin or uneven base.
– Check the subfloor through the damaged area (or by lifting a small section if it’s click-lock) for dampness, softness, or grit that prevents adhesion.
– In practice, you’re looking for two conditions at once: dryness and solid, clean surface. Dust and grit can prevent adhesion from wetting out properly, even when the glue is the “right type.”
– Look for the “source,” like a leak, poor drainage, or water tracking from the door threshold—if water is still entering, plan to fix that first.
– If your balcony has standing water after rain, clogged drainage channels, or a door sill that lets water run under the flooring, repair longevity will be limited no matter how carefully you re-glue or re-lock vinyl.
Key prep numbers that matter during diagnosis
According to RFCI / resilient floor covering installation guidance, subfloor flatness targets commonly used for resilient installations are on the order of 3/16 in (about 5 mm) over 10 ft (and tighter tolerances in smaller spans).
And per ASTM F1869, calcium chloride testing reports moisture as a moisture vapor emission rate (MVER) in lb per 1,000 sq ft per 24 hours—a unit you’ll see again when moisture limits are specified by adhesives or manufacturers.
Comparison: quick fault-to-fix logic
A “symptom-first” approach helps you decide whether you’re repairing vinyl installation mechanics or repairing vinyl materials.
- Primary symptom on balcony vinyl
- Most likely failure mechanism
- Lifting seams / expanding gaps
- Moisture reaching edges, insufficient expansion gap, or bond failure
- Raised bubbles
- Moisture trapped under glue-down vinyl or voids beneath
- Soft spots after rain
- Damp subfloor or failed waterproofing/drainage system
- Localized tears/cracks
- Mechanical damage or stress from an uneven base
Choose the right repair method (click-lock vs glue-down)
The right repair method for balcony vinyl depends on the installation system: click-lock (floating) repairs typically avoid adhesives unless the manufacturer explicitly permits them, while glue-down vinyl repairs typically require approved adhesive and a patch approach. If you choose the wrong method, you can lock in movement or weaken bonds—especially under freeze/thaw and wet-cleaning conditions in 2026.
Click-lock (floating) vinyl is normally repaired by replacing affected planks/tiles and re-locking, not by spreading random glue.
Glue-down vinyl repairs typically require cutting out the failed section and re-installing with the manufacturer-approved adhesive and patch technique.
When the installation type isn’t clear, following the product’s official repair guidance is safer than guessing—especially on exterior-exposed balcony decks.
Click-lock (floating) balcony vinyl: what to do
– Click-lock (floating) vinyl: you typically replace individual planks/tiles and re-lock them, avoiding adhesives unless the manufacturer specifically allows it.
– Practically, your goal is to restore the locking geometry without overfilling seams with adhesive that the system wasn’t designed for.
Glue-down balcony vinyl: what to do
– Glue-down vinyl: you typically cut out the damaged area and re-install with the manufacturer-approved adhesive and patch approach.
– With glue-down vinyl, “roll it tight” isn’t optional—bonding depends on full contact during adhesive cure.
If you can’t identify your vinyl system
– If you can’t identify the installation type (or the product is older/unknown), follow the manufacturer’s repair guidance for your exact model—use instructions if available.
– On balconies, the “approved method” is particularly important because exterior exposure changes how moisture moves and how fast bond lines fail.
Replace damaged vinyl planks or tiles
For balcony vinyl, the durable option when planks are lifted, cracked, or otherwise compromised is usually replacement, not patching on top. Replace only what’s necessary, keep cuts controlled, and prep the base so the new planks can bond (or lock) over a dry, flat substrate.
Replacing damaged balcony vinyl is usually more reliable than patching because vinyl systems depend on edge integrity and full seam support.
Before installing replacement click-lock planks or glue-down patches, removing old residue and debris is what allows proper contact and lock/bond strength.
Precise cut lines protect adjacent planks from damage, reducing the chance of seam separation spreading.
Steps for clean removal
– Remove the damaged piece(s) cleanly: use a straightedge and sharp utility knife to cut along plank seams, then lift carefully without tearing surrounding layers.
– For glue-down sections, plan your cut so you can reach sound flooring and avoid cutting into structural layers underneath.
Subfloor prep is not optional
– Prep the base: scrape off old residue, remove debris, and ensure the surface is flat and dry before installing replacements.
– If the subfloor has grit or high spots, the “new” balcony vinyl will flex above voids, which can reopen joints later.
Install replacements correctly
– Install the replacement: match the plank direction and click-lock orientation (for click-lock) or apply adhesive only as specified (for glue-down), then keep it still until fully set as directed by the manufacturer.
– In 2026 installations, many manufacturers still emphasize cure-time discipline: walking or shifting the replacement too soon can create micro-gaps that later become visible under humidity cycles.
Repair lifted edges, seams, and bubbles
If the vinyl balcony floor shows lifted edges, seam gaps, or small bubbles, your fix depends on whether moisture is present underneath and whether the vinyl is click-lock or glue-down. When the subfloor is dry and the problem is localized, re-locking/re-gluing with correct pressure during cure is the standard path to stabilization.
Lifted seams on balcony vinyl often trace back to moisture at edges or insufficient bonding contact, so you must clean underneath before re-locking/re-gluing.
Bubbles usually indicate a void or trapped moisture; flattening without confirming dryness can trap water and cause repeat failure.
Resilient flooring bonding guidance commonly calls for firm rolling/pressing with appropriate tools to improve adhesion coverage.
Lifted edges and seam lines
– Lifted edges/seams: clean under the edge (dust and debris stop bonding), then either re-lock (click-lock) or re-glue using the approved adhesive (glue-down).
– If you re-glue, avoid “skim coating” over contaminated areas; adhesive needs clean contact.
Bubbles and raised areas
– Bubbles/raised areas: if the vinyl is only slightly raised, flatten and weigh it temporarily—but only if moisture isn’t trapped underneath.
– If there’s any sign of dampness (dark spots, soft substrate, persistent musty odor), stop and address the moisture path first.
After-repair pressure and cure
– After repair: roll/press firmly with a hand roller or flat tool (no sharp edges), and avoid heavy foot traffic until the adhesive cures per instructions (use from your adhesive/manufacturer docs).
– According to RFCI resilient flooring installation guidance, seams and glue-down areas are typically pressed/rolled with substantial pressure (often referenced as a 100-lb roller for installing resilient flooring) to promote full adhesive transfer—follow your manufacturer’s specific direction first.
Stop balcony moisture and movement from ruining the repair
The most important balcony vinyl repair step is stopping the moisture source and allowing for the movement balconies naturally experience. Even a perfect seam repair will fail if water keeps reaching the subfloor or if the flooring is rigidly trapped against fixed surfaces during thermal swings in 2026.
Repairing balcony vinyl works long-term only when water entry is stopped—vinyl seams are a primary pathway for moisture migration.
Balconies cycle temperatures, so expansion gaps and correct transitions help prevent buckling and seam openings.
Moisture management is installation management: drainage details and threshold sealing are as important as plank seams.
Address water entry before you “finish”
– Address water entry first: confirm drainage and check door thresholds/side joints for gaps—repairs fail fast if water continues to reach the subfloor.
– Look for:
– standing water after rain,
– gaps around door sills,
– inadequate slope to drainage points,
– sealant degradation at penetrations (rails, drains, lights).
Maintain expansion allowance
– Maintain expansion allowance: balconies experience temperature change; don’t eliminate required perimeter gaps or trap the flooring against fixed surfaces.
– Floating click-lock systems especially need space to move; over-constraining can reopen seams right where you just repaired them.
Use a balcony-appropriate perimeter/transition strategy
– Use a balcony-appropriate perimeter/transition strategy: where your flooring meets walls/thresholds, rely on the installation spec for sealing/finishing (use ).
– The “wrong” transition detail can create a water channel that drains directly into seam lines.
What can go wrong (and how to avoid it)
Most repair failures happen when the cause isn’t fixed, the installation method is mismatched, or the prep steps are skipped. If you avoid these common mistakes—especially moisture and adhesion errors—you significantly reduce repeat lifting in 2026 balcony conditions.
Sealing over a damp subfloor is the quickest route to repeat failure because moisture reactivates the problem behind the vinyl.
Using non-approved adhesives can prevent proper bond development, leading to seam curling or future separation.
Ignoring expansion requirements can make a click-lock or mixed installation buckle during temperature swings—even if the repair itself is correct.
– Sealing over a wet subfloor: if the base is damp, the vinyl can re-lift and the problem can spread—dry and investigate the cause first.
– Wrong adhesive or patch type: using non-approved glue can make seams fail or cause future curling—use the adhesive and method recommended for your flooring system.
– Cutting without a plan: cutting too wide can damage adjacent pieces; measure and cut only what you must to fit replacement planks/tiles.
– Ignoring expansion gaps: shrinking/expanding floors can buckle if you fully lock it into corners—follow the manufacturer’s spacing requirements.
– Trying to “patch and paint” failures: cracks, edge curl, and seam separation often indicate adhesion or moisture issues that a superficial patch won’t fix.
> Real-world note: In many balcony repairs, the root cause is not the vinyl itself—it’s the substrate and water behavior under or at the edges. If you treat only the vinyl surface, you often see the same failure pattern reappear after the next rainy stretch.
Verdict / tip + quick scan checklist
DIY is most realistic when the damage is localized (a few lifted planks, a small seam opening, or one or two damaged tiles) and the subfloor is dry and solid. If you find widespread soft spots, ongoing water intrusion, or you can’t determine whether it’s click-lock or glue-down, replacing the flooring or hiring a pro may be the safer route.
Quick checklist (scan before you start):
| Step | What to check | DIY-friendly? |
|---|---|---|
| 1 | Is the subfloor dry, firm, and flat? | Yes if dry/solid |
| 2 | Is the problem localized to a few planks/seams? | Yes if small area |
| 3 | Can you identify click-lock vs glue-down? | Yes if known |
| 4 | Do you have matching replacement pieces? | Yes if you can match |
| 5 | Are water/leak sources ruled out? | Yes if no active leak |
| 6 | Do you have the manufacturer-approved adhesive/patch method? | Yes if confirmed |
7 Standards & Practices Commonly Used for Resilient/Vinyl Installation QA
| # | Standard / Guide | Primary Focus | Common Output | U.S. Use in Repairs |
|---|---|---|---|---|
| 1 | ASTM F1869 | Concrete moisture (MVER) | lb/1,000 sq ft/24h | Often gateway test |
| 2 | ASTM F2170 | In-situ RH moisture | %RH at probes | Often decision-driving |
| 3 | ASTM F710 | Floor prep for resilient coverings | Prep acceptance criteria | Common prep reference |
| 4 | ASTM E1155 | Measuring floor flatness | Flatness deviation | Sizing/leveling QA |
| 5 | ASTM F3196 | Impact testing for resilient products | Performance metrics | Helps interpret damage |
| 6 | RFCI Resilient Floor Covering Installation Guidelines |
Industry best practices | Prep + install checklists | Widely cited |
| 7 | Manufacturer Installation Manual | Adhesives, cure, transitions | Approved method + limits | Must-follow for balconies |
Conclusion
To repair vinyl floors on a balcony, start with diagnosis—confirm what failed, inspect the subfloor for dryness and flatness, and rule out water entry—because the durability problem is usually below the vinyl, not in the surface. Then repair only the failed sections using the correct method for your system: replace and re-lock for click-lock, or cut out and re-glue for glue-down, with the approved adhesive and adequate rolling/pressure. If moisture is still getting in, the subfloor is soft, or you can’t confirm the installation type, replacing the affected area or hiring a pro is the safer decision.
Sources
– RFCI / resilient flooring installation guidance: for general best practices on resilient flooring prep and installation.
– ASTM standards (as applicable to resilient flooring materials/installation): (examples mentioned above in context: ASTM F1869, ASTM F2170, ASTM F710, ASTM E1155).
Frequently Asked Questions
What tools and materials do I need to repair vinyl floors in a balcony?
For most balcony vinyl floor repairs, you’ll want a utility knife, vinyl floor patch (matching style/thickness if possible), a scraper, a clean microfiber cloth, and vinyl adhesive or seam tape designed for LVP/LVT. If the damage includes lifting, you may also need a small roller or weighted object to press the area while the adhesive cures. For wet spots, keep paper towels and a fan or dehumidifier handy to fully dry the subfloor before you patch to prevent future bubbling.
How do I fix lifted or peeling vinyl planks on a balcony?
Start by lifting the plank edges carefully and removing any old adhesive residue so the surface is clean and dry. Apply the correct vinyl adhesive beneath the lifted area (or use seam tape if recommended for your product) and press the plank down firmly, using a roller or flat weight to improve bonding. Let it cure fully before walking on it, and check for moisture or drainage issues outdoors because balcony vinyl floor damage often returns if the underlying cause isn’t addressed.
How can I repair scratches or gouges in luxury vinyl flooring on a balcony?
Clean the scratched area thoroughly, then assess whether it’s a surface scratch or a deeper gouge. For light damage, use a vinyl floor repair kit or color-matched filler designed for LVP/LVT to fill the mark and smooth it level with the surrounding surface. For deeper cuts, you may need a patch that matches the wear layer pattern, cutting out a neat section and installing the replacement piece with vinyl adhesive to restore the surface.
Why does balcony vinyl flooring buckle, and how should I prevent it during repairs?
Vinyl floors on balconies often buckle because of moisture, temperature swings, or improper expansion gaps near the edges. Before repairs, dry the area completely and inspect for signs of water intrusion under the vinyl, such as damp subflooring or recurring bubbles. When re-installing or patching, ensure proper expansion space around perimeter walls and use an underlayment or adhesive system compatible with outdoor or moisture-prone balcony conditions.
What is the best way to patch a damaged section of vinyl flooring on a balcony?
The best approach is a “replace-the-area” patch: cut out the damaged section in a straight, square shape (avoiding jagged edges) and remove any loose plank layers down to a stable base. Test-fit the replacement vinyl piece, then glue it down with the recommended adhesive for your vinyl type and press it evenly with a roller. After installation, keep foot traffic light and allow full cure time, and consider sealing seams or addressing drainage so the repair holds up against balcony exposure.
📅 Last Updated: October 27, 2026 | Topic: How to repair vinyl floors in a balcony? | Content verified for accuracy and freshness.
References
- Vinyl flooring
- Flooring
- https://www.cdc.gov/mold/default.htm
- Mold | US EPA
- Mold Cleanup in Your Home | US EPA
- https://www.hud.gov/program_offices/healthy_homes/healthy_homes/mold
- dampness mold remediation guidance – Search Results – PubMed
- https://scholar.google.com/scholar?q=vinyl+floor+repair+damaged+plank Google Scholar
- https://scholar.google.com/scholar?q=vinyl+flooring+repair+water+damage+sheet+flooring Google Scholar
- https://scholar.google.com/scholar?q=balcony+outdoor+vinyl+flooring+moisture+subfloor+repair Google Scholar