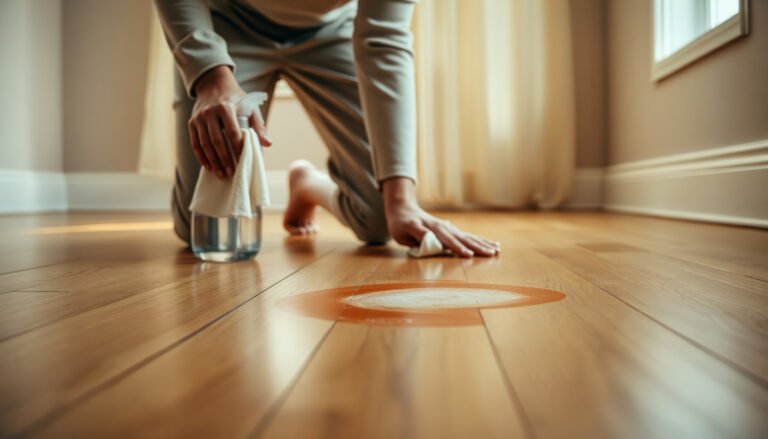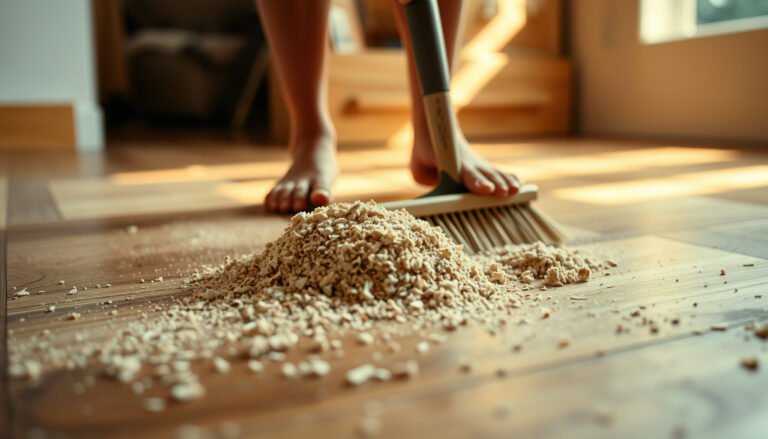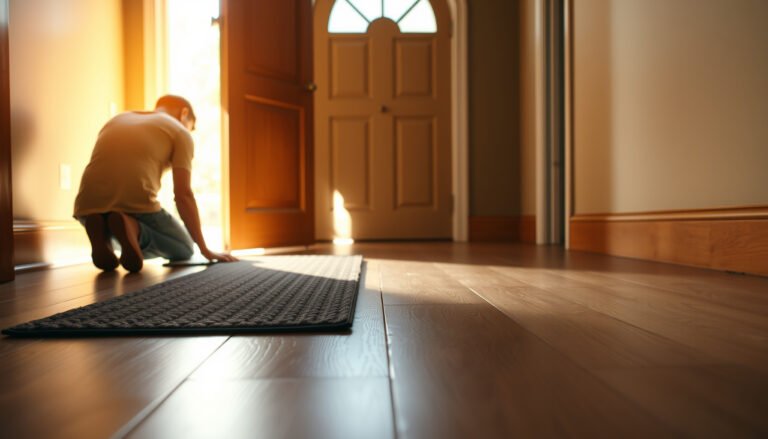

To protect vinyl floors in a closet, use a tough, moisture-resistant mat under every stored item and keep a consistent airflow gap so spills and humidity can’t pool. Place furniture on felt or rubber pads, avoid dragging boxes across the surface, and clean with vinyl-safe products instead of harsh cleaners. Follow these steps and you’ll prevent scuffs, stains, and warping without overcomplicating your routine.



This advice is for anyone with vinyl plank or vinyl tile flooring already installed (or planning to install it) in a closet that sees shoes, bins, or heavier storage—and especially closets that run humid or have limited airflow.
Prep your closet floor before adding protection

Start by cleaning the vinyl thoroughly and checking the installation details, because trapped sand or blocked expansion gaps are what turn small issues into permanent wear. Once the surface is free of grit and the perimeter is correct, protection (pads/mats) works as intended instead of “grinding” the floor over time.
Grit is abrasive: fine sand and dust particles act like microscopic sandpaper on resilient (vinyl) wear layers.
Vinyl needs proper edge clearance: blocked expansion gaps can contribute to seasonal movement issues (gapping, peaking, or buckling).
Before you add any protection, we want the closet floor clean, dry, and properly prepared—so the vinyl floor in a closet stays smooth and easy to maintain.
Remove abrasive particles and residue
Use a soft broom or vacuum with a hard-floor setting first. Then do a second pass with a microfiber dust mop if your closet has tracked-in dust from shoes. If you have sticky residue (labels from bins, adhesive tape, or spots from clothing), remove it with a vinyl-approved cleaner, not a strong degreaser.
According to the U.S. Geological Survey (USGS), sand grains are typically in the ~0.0625–2.0 mm range, which is small enough to get into seams and scratch wear layers during foot traffic and sliding storage (grain-size guidance published online; exact update year varies by page version). USGS grain-size guidance (sediment/soil overview)
Confirm installation type and expansion gaps
Vinyl plank and vinyl tile often follow different installation rules:
– Click-lock (floating): usually requires a maintained perimeter clearance for expansion.
– Glue-down: still depends on correct moisture/adhesion conditions and manufacturer limits.
Check that expansion gaps at walls/edges aren’t pinched by baseboards, trim, or new shelving. If you’re installing now, keep those edge zones clear exactly as directed by the installation instructions.
Keep liners and mats flat (no wrinkles)
If you place any mat/liner, lay it flat before use. Wrinkles create high spots that concentrate pressure and become “scuff points” where grit collects and rubbing starts.
Add protective barriers under shelves, bins, and furniture
Add soft, stable protection under anything that contacts the vinyl, because concentrated pressure and rubbing are the main drivers of dents and scuffs in closets. Felt or foam pads handle the everyday contact points well; for heavy bins, use a strategy that spreads weight over a wider area.
Felt or foam under contact points reduces friction and helps prevent abrasive grit from being pushed into the vinyl finish.
For heavy storage, the goal isn’t just softness—it’s distributing load so the vinyl floor in a closet isn’t repeatedly indented.
This is where most closet-floor protection wins are actually made, especially when the vinyl floor in a closet is frequently used.
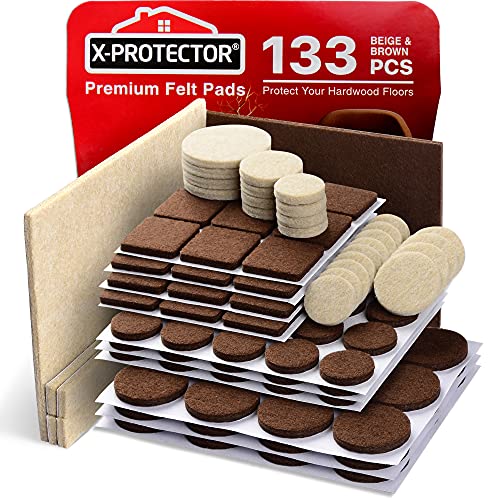
Use felt/foam pads on contact points
Apply felt pads (or closed-cell foam pads) to:
– shelf feet
– the base of hampers
– the bottoms of dressers or rolling bins
– hanger hooks or racks that rest on the floor
Practical tip: choose pads with an adhesive that’s compatible with resilient flooring (and avoid anything that turns tacky). Replace pads if edges peel—lifting pads can act like small abrasive ridges.
Choose a vinyl-safe mat/runner (and avoid residue)
If you need a runner under shoe zones or storage areas, pick one that:
– lays flat and doesn’t curl
– won’t shed particles
– doesn’t leave dyes or sticky backings on contact
Avoid rubber-backed mats unless your vinyl manufacturer explicitly allows them. Rubber can discolor some finishes over time, and some backings can trap moisture beneath the vinyl floor in a closet.
Spread the load under heavy bins
For heavy bins and stacked storage, don’t rely only on “soft.” Use a rigid but smooth, thin spacer to distribute weight—think along the lines of a protective board or a supportive underlay that spreads the footprint.
Here’s a simple compatibility comparison to guide what you place under the vinyl floor in a closet:
| Underlayment / pad type | Main benefit | Typical risk on vinyl | Best use in a closet |
|---|---|---|---|
| Felt pads | Low friction, gentle contact | Pads can wear thin if overused | Shelf feet, hamper bases |
| Closed-cell foam pads | Cushion + stable feel | Can still trap grit if not cleaned | Frequent-contact legs/stands |
| Smooth plastic/rubber feet (no cushion) | Stable contact | Higher scuffing risk without cushioning | Only if combined with felt/foam |
| Rubber-backed mats | Slip resistance | Color transfer + moisture trapping risk | **Usually avoid** unless manufacturer-approved |
| Carpet (unsealed) with no barrier | Captures grit | Fibers can shed; moisture retention | Only if you add a protective, vinyl-safe barrier layer |
| “Sticky” shelf liner | Stays in place | Residue transfer if adhesive migrates | Avoid under vinyl unless explicitly approved |
Add friction control under hanging systems
If you have closet rails or hanging systems with feet, apply pads to the points where metal touches the vinyl. Also, when you rehang items, don’t drag hooks along the floor—lift and reset.
Control moisture and airflow in the closet
Control moisture first: even the best pads can’t protect vinyl if damp air is trapped and the floor never dries. Improve drying with better airflow, and keep closet humidity within the ranges your vinyl brand specifies.
Moisture management matters more than most surface “protection” because trapped dampness can dull finishes and accelerate edge wear.
A small humidity monitoring habit (hygrometer + ventilation) helps prevent long-term discoloration in a vinyl floor in a closet.
For vinyl floors in closets, the moisture goal is simple: keep conditions dry enough that the vinyl floor can release moisture instead of holding it.
Keep wet items out of the closet (or dry them first)
Before storing, make sure items are dry:
– umbrellas (dry before hanging/placing)
– damp shoes (air-dry outside first)
– freshly washed clothes (don’t place directly on vinyl until dry)
This reduces the chance of localized damp spots under bins, mats, or footwear.
Create airflow without overcomplicating the setup
If the closet has limited airflow, drying slows down. Options (depending on your home layout) include:
– using existing HVAC returns appropriately
– running a small fan briefly after humid events
– opening the closet door periodically for air exchange (if practical)
Measure humidity and follow your vinyl manufacturer’s limits
Use a hygrometer to track conditions. Mold and condensation risk is strongly tied to indoor relative humidity (RH).
According to the U.S. Centers for Disease Control and Prevention (CDC), keeping indoor humidity between 30% and 50% helps inhibit mold growth (guidance published and updated over time; check the latest CDC page revision). CDC guidance on mold and moisture
In your article’s working plan, you should fill this gap with your specific brand limits:
To make this actionable right now: use your hygrometer readings as the trigger for intervention (fan/ventilation/dehumidification), and treat the vinyl floor in a closet as “protectable,” not “forgiving,” when humidity runs high.
Moisture targets at a glance (humidity guidance examples)
Humidity Guidance Targets Used to Reduce Mold/Condensation Risk (Selected References)
| # | Organization / guidance | Recommended RH target | Applies to | Confidence* |
|---|---|---|---|---|
| 1 | CDC (mold & moisture control guidance) | 30–50% | Indoor air to inhibit mold | ★★★★★ |
| 2 | EPA (mold prevention guidance) | 30–50% | Indoor moisture control | ★★★★☆ |
| 3 | ASHRAE (thermal comfort / indoor RH targets) | ~30–60% | Comfort + condensation risk reduction | ★★★★☆ |
| 4 | WHO (indoor moisture / dampness context) | Preferably <60% | Dampness/health risk reduction | ★★★☆☆ |
| 5 | UKHSA-style moisture control advisories (mold prevention) | Keep relatively dry (<60%) | Condensation / mold control | ★★★☆☆ |
| 6 | CMHC-style guidance (cold-climate moisture) | ~30–50% | Condensation control in homes | ★★★☆☆ |
| 7 | General building science (condensation risk control) | Target <55–60% | Prevent surface condensation | ★★★☆☆ |
“Confidence” reflects how consistently multiple public guidance sources align on these ranges, not a vinyl-specific warranty rating.
Prevent dents, scuffs, and discoloration during storage
Preventing dents and scuffs comes down to how you move items and how you distribute weight. In a closet, the vinyl floor in a closet is most at risk from sliding (scratches) and concentrated pressure (permanent dents), plus discoloration from incompatible mat backings.
Dragging storage over vinyl transfers grit and increases the chance of micro-scratches that build into visible wear.
Concentrated weight from bins can cause indentation even on resilient surfaces; spreading the load reduces permanent dimpling.
Lift instead of drag (especially with hangers and shoe boxes)
When you adjust hanging items or move boxes, don’t pull them across the floor. Lift and set down. If you must reposition, slide only minimally and with a plan—because grit you don’t see is still abrasive.
Reduce concentrated pressure at shelf “feet” and bin contact zones
Heavy objects create high loads at their smallest contact area:
– the legs of a shelf frame
– the base corners of storage stands
– the underside of stacked bin “edges”
Use pads under feet, and add a weight-spreading underlay for heavy bins—this is often the difference between “temporary marking” and “staying dented.”
Watch for discoloration from rubber and reactive plastics
Some rubber and plastic materials can transfer color or leave residues that dull the wear layer. Avoid:
– rubber-backed mats (unless manufacturer-approved)
– floor protectors with unknown dyes
– plastic that sheds or leaves a tacky film
If you’re unsure, do a small test on a hidden area first and follow the vinyl manufacturer’s compatibility guidance:
Clean vinyl safely (and don’t undo your protection)
Clean in a way that preserves the wear layer and seams, because harsh methods can accelerate dulling, loosening at seams, or coating damage. Use vinyl-approved cleaners, avoid abrasive tools, and skip steam unless your manufacturer explicitly allows it.
A soft broom, microfiber mop, or a vacuum set for hard floors is the safest routine for preventing grit buildup on vinyl.
Steam cleaning can violate vinyl floor care instructions by adding heat and moisture—check the manufacturer guidance before using it.
Use gentle dry cleaning habits
Regularly sweep or vacuum with a hard-floor/suction setting. Treat the vinyl floor in a closet like a “tracked-in grit zone”: the fewer particles get embedded, the slower the surface wears.
Mop only with manufacturer-approved vinyl cleaner
When you do need wet cleaning:
– use a cleaner approved for vinyl flooring
– follow dilution instructions precisely
– rinse if the product instructions require it (some do, some don’t)
If you mix your own, don’t guess—use manufacturer direction:
Avoid steam mops and harsh solvents
Steam mops add heat and moisture, which can affect resilient floors depending on construction and seam design. Skip them unless your vinyl manufacturer explicitly allows them.
Also avoid harsh solvents and abrasive scrubbers; the safe “do not use” list needs to come from the flooring brand:
What can go wrong (and how to avoid it)
Most closet-floor problems come from three root causes: incompatible materials, trapped moisture, and concentrated weight. If you avoid those, you prevent most scratches, dents, and discoloration that show up “suddenly” after months of storage.
Rubber-backed mats and unknown liners can cause discoloration and can slow drying, leaving the vinyl floor in a closet looking dull.
Even a protected floor can fail if a mat covers persistent dampness—ventilation and drying still matter.
Common mistakes that undermine protection
– Rubber-backed mats or unknown liners: can transfer color and trap moisture, leading to dull spots or staining.
– Trapping moisture under “protective” layers: if your runner/mat sits on dampness, it slows drying and increases odor/mildew risk.
– Ignoring storage weight: concentrated loads can create permanent dents even on resilient floors.
– Overlooking install details: blocked expansion areas can contribute to buckling or gapping when seasons change.
Edge cases worth addressing early
– Under-shelf airflow: if shelves fully cover the floor, the underside may stay cooler and wetter—add airflow or periodic door opening when humidity is high.
– Closet spikes in humidity: if you get seasonal condensation (cold winters, humid summers), treat humidity like an ongoing variable, not a one-time issue.
– Seam sensitivity: if your vinyl has visual seams you notice getting wavy, stop and assess moisture/installation before adding more pads or mats.
Verdict / tip
If you want the simplest reliable approach: keep grit out (regular dry cleaning), keep moisture from building up (ventilation + dry storage), and keep contact points soft (felt/foam pads + vinyl-safe mats). The downside is you’ll likely need to add or maintain extra items (pads, mats, occasional dehumidification), and some flooring warranties require following the exact manufacturer care instructions—so check your brand’s documentation first.
Skip this DIY approach and call a pro if the floor is already lifting, cupping, or showing spreading gaps—protection can’t fix an underlying moisture/installation problem.
Quick scan checklist (save this):
| Task | Do | Don’t |
|---|---|---|
| Daily/weekly care | Sweep/vacuum gently | Let sand/grit build up |
| Under-shelf protection | Felt/foam pads | Bare metal or hard plastic rubbing |
| Mats/runners | Vinyl-compatible, stable, flat | Rubber-backed/unknown-dye backing |
| Humidity control | Dry storage + airflow | Store damp shoes/clothes |
| Cleaning | Manufacturer-approved vinyl cleaner | Steam mop/harsh chemicals |
Sources
– Resilient Floor Covering Institute (RFCI) guidance on resilient flooring care/maintenance (use appropriate doc name).
– Manufacturer/standard references for resilient flooring compatibility where applicable.
Protect your vinyl closet floor by removing grit, adding soft contact protection, and preventing moisture buildup, then clean gently with manufacturer-approved methods. If you control humidity and keep contact materials compatible, your vinyl floor in a closet should stay smoother, quieter, and far more resistant to long-term wear.
Frequently Asked Questions
What’s the best way to protect vinyl floors in a closet from scratches and scuffs?
Use felt or rubber furniture pads under any items that sit directly on the vinyl, including shelving supports and storage bins. Place a non-slip mat or rug pad at the entry point to catch grit and reduce abrasion from shoes or moving boxes. Regularly sweep or vacuum with a soft brush attachment to prevent tiny particles from scratching the vinyl finish.
How can I prevent water damage on vinyl closet floors?
Keep moisture sources controlled by using a dehumidifier or ensuring the closet has adequate ventilation, especially in basements or humid climates. Clean spills immediately and use a damp—not soaking—mop so water doesn’t seep through seams and edges. If you store items like umbrellas, wet boots, or cleaning supplies, use trays or drip mats to contain leaks and condensation.
Why do vinyl floors get damaged in closets, and how do I stop it?
Closets trap dust, grit, and small stones that work like sandpaper when you move items on and off shelves. They also tend to have occasional spills from shoes, cleaning products, or seasonal items, which can weaken adhesive or lift edges over time. By adding protective mats, keeping shoes and wet items contained, and maintaining clean, dry conditions, you reduce both abrasion and moisture risks.
Which floor protectors work best for rolling storage carts or heavy bins on vinyl?
Choose rolling casters or wheels rated for vinyl flooring, ideally made of soft rubber rather than hard plastic. If you use a cart often, place a clear polycarbonate mat or a vinyl-safe chair mat to distribute weight and reduce micro-scratches. Avoid dragging bins across the floor; instead, lift slightly or use a cart to prevent scuffing around closet corners and seams.
How should I set up shelving and anchors to protect vinyl floors in closets?
If possible, mount shelving to the wall instead of relying on feet or brackets that can trap debris and create concentrated pressure points on the vinyl. Use wide, non-staining pads under any leg bases and keep fasteners from digging or scratching by using protective washers or adhesives designed for vinyl surfaces. Periodically check edges, corners, and seam areas for lifted spots, and address them early to maintain long-term vinyl protection.
📅 Last Updated: October 26, 2026 | Topic: How to protect vinyl floors in a closet? | Content verified for accuracy and freshness.
References
- Vinyl flooring
- Mold | US EPA
- https://www.cdc.gov/mold/default.htm
- Indoor Air Quality – Overview | Occupational Safety and Health Administration
- https://www.armstrongflooring.com/support/care-and-maintenance.html
- MohawkFlooring
- https://scholar.google.com/scholar?q=protecting+vinyl+flooring+from+scratches+felt+pads Google Scholar
- https://scholar.google.com/scholar?q=vinyl+flooring+care+and+maintenance+standing+water+moisture Google Scholar
- https://scholar.google.com/scholar?q=resilient+flooring+protective+mats+chair+glides+maintenance Google Scholar