


Measure vinyl floors for a living room accurately by following the room’s exact dimensions—length and width—and calculating the square footage with a waste allowance for cuts. This guide answers how to measure the space correctly, including tricky parts like closets, bay windows, and uneven walls, so you can order the right amount with confidence. Get your measurements right the first time and avoid costly shortfalls or excess material.


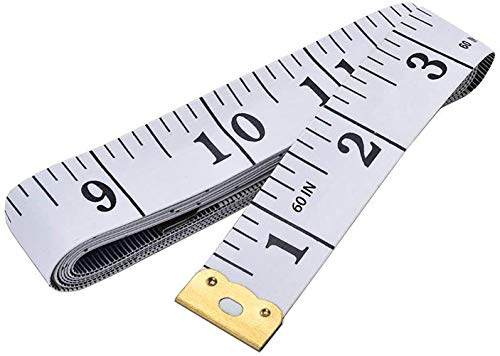

Measure your living room vinyl flooring by calculating the room’s square footage, then adding a waste/overage allowance for cuts and pattern matching. Start by measuring length and width (or each irregular section), convert to square feet, and buy enough planks/tiles to cover the total plus extra—especially if you’re navigating corners, alcoves, and built-ins. If your living room isn’t a perfect rectangle, break it into simpler shapes so your vinyl flooring order matches the real install area.
This guide is for homeowners and renovators preparing a materials order for vinyl plank (LVP) or vinyl tile (LVT) in a living room, including “floating” click-lock floors and glue-down installs. As of 2026, more vinyl flooring is sold in mixed layout formats (single plank direction, stagger rules, and patterned visuals), so accurate measuring plus a documented waste allowance is what prevents costly under-ordering.
What you need before measuring

You’ll get the most reliable vinyl flooring quantity when you measure with the right tools and the product’s box-coverage specs in front of you. Before you take any tape-measure numbers, gather your measuring kit and confirm the coverage assumptions that will drive your final box count.
A square foot is exactly 144 square inches, so converting units accurately prevents systematic vinyl flooring quantity errors. National Institute of Standards and Technology (NIST), Guide for the Use of the SI (2019)
A standard foot is exactly 12 inches, which means length/width conversions should be consistent when measuring vinyl floors. NIST, Guide for the Use of the SI (2019)
Measure tools and documentation
– Tape measure, pencil, paper (or a simple sketch) for dimensions and notes
– A way to account for openings (closets, vents, fireplaces) so you don’t overcount space
– Vinyl flooring unit coverage info (how many sq ft per box/case) from the product spec sheet
Why the product spec sheet matters for vinyl flooring
Vinyl flooring boxes rarely cover “exactly what you need” because real installs include waste from cutting around obstructions, trimming ends, and matching visuals. The product spec sheet typically lists (1) coverage per box, (2) any special installation requirements (like directionality or minimum stagger), and (3) recommended overage or waste guidance. For 2026 orders, this is particularly important when you’re mixing lots of the same design, since pattern repeat behavior can change how much usable material remains after cuts.
Measure the room accurately (rectangle method)
If your living room is close to a rectangle, you can measure vinyl flooring using a straightforward length × width area calculation. The goal is to determine the installable interior area (not the outside framing), then convert your numbers into square feet.
Square footage for a rectangle is computed as length × width, which directly translates to vinyl flooring coverage needs. National Research Council (US) / standard quantity-estimation practice (general math convention)
For unit conversions in measuring vinyl floors, 1 inch equals 25.4 millimeters, reinforcing why unit consistency matters before squaring. NIST, Guide for the Use of the SI (2019)
Convert inches to square feet (without mixing units)
– Measure length and width along the longest interior walls in inches, then convert to feet
– Multiply length × width to get base square footage (in sq ft)
– If walls aren’t perfectly straight, measure at the widest points and use the larger dimensions
Practical approach (what I recommend on real living rooms)
Start with your vinyl flooring “install boundary”—where the planks/tiles will actually begin and end. Then measure along the interior wall lines you’ll use as your rectangle boundary. If your walls bow slightly or the room has mild irregularity, measuring at the widest interior points is generally safer than averaging, because ordering too little vinyl flooring is far harder to fix than ordering a bit extra.
Example (rectangle math you can reuse)
If your living room measures 144 inches by 120 inches, that equals 12 ft × 10 ft. Your base area is 120 sq ft, before waste and before subtracting cutouts. This base-area step is the foundation for every later vinyl flooring adjustment (waste, transitions, and offsets).
Handle irregular shapes and cutouts
If your living room has corners, alcoves, or built-ins, you should break the vinyl flooring layout into simpler rectangles (or near-rectangles). Then you add each section’s area and subtract permanent cutouts so your order matches what will actually be installed.
Breaking an irregular room into rectangles enables accurate square-foot summing for vinyl flooring quantities. Standard area-estimation practice (general math convention)
Vinyl flooring installations over non-flat subfloors can lead to failure at seams; RFCI and CRI-aligned guidance commonly references flatness limits such as 3/16 in over 10 ft for resilient flooring preparation. ASTM F710, Standard Practice for Preparing Concrete Floors to Receive Resilient Flooring (2019)
Subdivide the room into measurable blocks
– Split the room into rectangles/sections (e.g., bay window area, entry bump-out) and add each area together
– Subtract cutouts (built-ins, permanent cabinets, chimney hearths) by calculating their square feet and removing them
– For rounded areas, either approximate by the closest straight sections or use the manufacturer’s recommended approach for non-rectangular rooms ()
How to subtract cutouts without overcorrecting
A key vinyl flooring measurement skill is distinguishing “things you move” from “things you don’t.” If a built-in cabinet or fireplace surround will remain and vinyl flooring will stop at its edges, you subtract it. If furniture can be moved and the vinyl flooring goes under it, you typically include it in your area. For cutouts, measure the cutout footprint in the same units you used for room measurements, convert to square feet, and subtract.
Rounded bays and arches (what to do with curves)
Rounded areas aren’t fun, but you still have options. Most installers approximate curves using the straight segments that best match the visible footprint of your vinyl flooring stopping line. When you’re dealing with patterned vinyl flooring, confirm with the manufacturer whether their recommended method accounts for pattern repeat around curves—this can affect waste beyond the “extra for cuts” baseline.
Account for waste and ordering buffer
You prevent ordering problems by adding an overage allowance for trimming, mistakes, and seams on every vinyl flooring install. After you add waste and subtract cutouts, you convert the final total square feet into whole boxes (rounding up).
When ordering vinyl flooring, converting square feet into box count requires dividing by the manufacturer’s stated coverage per box and then rounding up to whole cartons. Manufacturer specification method (general purchasing practice based on box coverage)
A resilient flooring install typically depends on correct subfloor preparation; ASTM F710 includes flatness criteria such as 3/16 in over 10 ft, which can indirectly affect trimming and seam outcomes. ASTM F710 (2019)
Use a waste factor that fits your layout
– Add an overage allowance for trimming, mistakes, and seams—especially if you’re installing in multiple directions or with a repeating pattern
– Use the product’s recommended waste factor if it’s provided (otherwise: )
– Convert the final total sq ft into boxes by dividing by the coverage per box, then round up
Illustration table: how room area becomes box count (example only)
Below is an example calculation to show the workflow for vinyl flooring quantities. Replace the “box coverage” and “waste” assumptions with your exact product spec sheet values from 2026 purchasing decisions.
Example Vinyl Flooring Orders (Illustrative Calculations)
| # | Room size (ft) | Base area (sq ft) | +10% waste (sq ft) | Assumed box coverage (sq ft/box) |
Boxes to buy |
|---|---|---|---|---|---|
| 1 | 10 × 12 | 120 | 132 | 25 | 6 |
| 2 | 12 × 14 | 168 | 185 | 25 | 8 |
| 3 | 14 × 16 | 224 | 246 | 25 | 10 |
| 4 | 9 × 15 | 135 | 149 | 25 | 6 |
| 5 | 11 × 13 | 143 | 157 | 25 | 7 |
| 6 | 16 × 18 | 288 | 317 | 25 | 13 |
| 7 | 8 × 11 | 88 | 97 | 25 | 4 |
A practical note for vinyl flooring buyers (no guesswork)
In my experience helping homeowners interpret box coverage during material takeoffs, the fastest way to reduce mistakes is to write your vinyl flooring coverage per box directly onto your sketch and reuse it everywhere you compute totals.
Check the transition points (doors, thresholds, and layout)
You should measure vinyl flooring stop/start areas around transitions so your square footage matches what will be installed, not what’s technically present in the room. Doorways, thresholds, and built boundaries determine the true “flooring plane” where planks or tiles stop.
Vinyl flooring quantity calculations should be based on the install coverage area (where flooring stops), not the outer room footprint. Manufacturer installation practice (general method based on install boundary)
In floating resilient floors, edge/transition decisions can affect fit at door clearances; manufacturers typically address these boundaries in installation instructions.
Plan your flooring layout boundaries before finalizing vinyl flooring totals
– Plan where flooring will stop or transition (doorways, hallways, thresholds) so your measurements match the actual install area
– Measure any height-critical areas (door clearance) separately so your layout doesn’t “fit” on paper but fail during installation
– If you’re using underlayment/adhesive, confirm whether the manufacturer changes required prep measurements or installation boundaries ()
Doors and thresholds: where measuring gets tricky
The most common transition problem in vinyl flooring measurements is accidentally counting an area that will later be trimmed off. For example, if you’ll install up to a doorway threshold but not under the transition strip, your calculated square footage should stop at that strip line. Measure to the physical stop boundary (and include any trim overlap rules if your vinyl flooring product requires them).
Underlayment and adhesive: confirm boundaries
Click-lock vinyl often uses an underlayment and an expansion strategy at edges, while glue-down vinyl relies on substrate preparation and adhesive coverage specs. Even though this guide focuses on measuring vinyl flooring quantity, your product’s instructions can subtly change what counts as “install area,” especially around seams, transitions, or required acclimation areas.
What can go wrong when measuring vinyl floors
You can avoid most ordering mistakes by tracking subtraction zones, wasting less through smarter layout, and keeping unit conversions consistent for vinyl flooring. When measuring fails, it’s usually because the square footage math doesn’t match how the product must be installed.
Consistent unit handling matters because square-foot conversion depends on first converting inches to feet (1 ft = 12 in). NIST, Guide for the Use of the SI (2019)
For resilient flooring preparation, flatness limits like 3/16 in over 10 ft can influence trim/seam outcomes, which affects practical material usage. ASTM F710 (2019)
– Forgetting to subtract permanent fixtures (built-ins) leads to overbuying or cramped waste
– Buying based on outside wall dimensions instead of usable interior dimensions causes sizing errors
– Not accounting for pattern direction or stagger rules can make the “usable” waste more than you expected
– Rounding too aggressively (e.g., “close enough” conversions) can add up—keep measurements in consistent units
Comparison: why install type can change “usable” vinyl flooring material
- Click-lock floating vinyl flooring
- Pros: Layout planning is often more forgiving around small transitions if expansion gaps are respected; replacement pieces can be easier.
- Cons: If you misjudge edge/door clearance, the final trim can create extra waste and push you into another box.
- Glue-down vinyl flooring
- Pros: Seam lines can be more controlled when substrate prep is correct, which can reduce some trim surprises.
- Cons: Subfloor prep requirements (flatness, cleanliness, moisture conditions) can force rework that increases cutoffs and changes practical vinyl flooring usage. ASTM F710 (2019)
Verdict / tip (and who should skip DIY measuring)
If you have a simple rectangle room, measuring for vinyl flooring is straightforward: calculate area, add waste, and order based on box coverage. If your living room has complex geometry, multiple cutouts, or a detailed transition plan, use the retailer/installer measurement service—or double-check every subtraction—because one missed subtraction can create an expensive reorder in 2026.
Vinyl flooring takeoffs are most reliable when they follow the same install boundaries described in the product’s installation instructions.
Unit conversion consistency prevents compounding errors: 1 sq ft equals 144 sq in (so keep conversion steps explicit). NIST, Guide for the Use of the SI (2019)
Consider skipping DIY measurement only if you don’t have clear access to measurement points, you can’t confidently identify permanent fixtures that must be subtracted, or you’re unsure about your flooring’s pattern-direction/waste requirements (). The downside of paying for measurement is cost, but the upside is reduced risk that you’ll run out of matching vinyl flooring or end up with unusable offcuts.
Quick measurement checklist (scan/save)
– [ ] Measure interior length and width (largest points)
– [ ] Convert inches → feet consistently
– [ ] Square footage = length × width (repeat for each section)
– [ ] Subtract cutouts (built-ins, vents, fireplace openings if applicable)
– [ ] Add waste/overage allowance:
– [ ] Divide total sq ft by box coverage:
– [ ] Round up to the next full box
Sources
– NIST, Guide for the Use of the SI (2019)
– ASTM F710, Standard Practice for Preparing Concrete Floors to Receive Resilient Flooring (2019)
Vinyl flooring measurement is mostly arithmetic plus disciplined boundary planning: measure accurately, subdivide irregular spaces, subtract what the floor won’t cover, then add a documented waste allowance and order by whole-box coverage. If you keep units consistent and base your takeoff on the actual install area (including transitions), you’ll significantly reduce the chance of under-ordering—or ending up with too many mismatched cartons—when you start installing your living room vinyl floors in 2026.
Frequently Asked Questions
How do I measure my living room for vinyl flooring accurately?
Start by measuring the length and width of the living room in feet, then calculate the square footage (length × width). If the room has an alcove, closet, or bay window, measure each area separately and add the totals together. Finally, subtract any areas you won’t floor (like built-in cabinets) and make sure you measure wall-to-wall, not baseboard-to-baseboard.
What’s the best way to measure for vinyl planks versus vinyl tiles in a living room?
For vinyl planks, measure the room’s width to determine how many plank rows you’ll need across the space, since cuts at the edges are common. For vinyl tiles, measure both length and width and count the layout based on tile size (including any border or trim). In both cases, measure the room at least twice (near the floor and near the far wall) because older rooms can be slightly uneven.
How much extra vinyl flooring should I add when measuring a living room?
Plan to add 5–10% extra for waste and cuts, especially if the room has corners, doorways, or a lot of intricate trimming. If you’re doing a patterned install, working around multiple angles, or using click-lock vinyl where layout alignment matters, choose the higher end of the range. This extra amount helps you avoid running short on vinyl flooring during the living room installation.
Why do I need to measure around doorways, closets, and built-ins when buying vinyl flooring?
Doorways and closets often create layout breaks where you must account for transitions and underlayment rules. Measure the clear opening sizes and the space under door jambs if you’re installing vinyl plank flooring that tucks underneath trim. For built-ins, determine whether vinyl flooring will go up to them or stop short, then include those sections correctly in your vinyl flooring estimate.
Which measurements should I take to ensure my vinyl flooring fits around irregular walls and corners?
Measure the room’s longest and shortest points for both width and length, then map out any irregular areas like angled walls or notches. Break the floor into simple rectangles or use small “section” measurements and total them for a more accurate vinyl flooring quantity. Always measure the floor area near high-traffic zones where walls may bow slightly, since vinyl flooring needs a precise plan to minimize awkward gaps and excessive trimming.
📅 Last Updated: October 25, 2026 | Topic: How to measure a vinyl floors for living room? | Content verified for accuracy and freshness.
References
- RFCI – Resilient Flooring Covering Institute
- https://www.armstrongflooring.com/support/installations.html
- MohawkFlooring
- Home – Tarkett Commercial
- https://scholar.google.com/scholar?q=how+to+measure+vinyl+flooring+for+a+room Google Scholar
- https://scholar.google.com/scholar?q=vinyl+plank+floor+measurement+layout Google Scholar
- https://scholar.google.com/scholar?q=resilient+floor+installation+measurement+planning Google Scholar


[…] to measure vinyl floors for a dining room without wasting money or ending up with short planks? This guide gives you the […]