
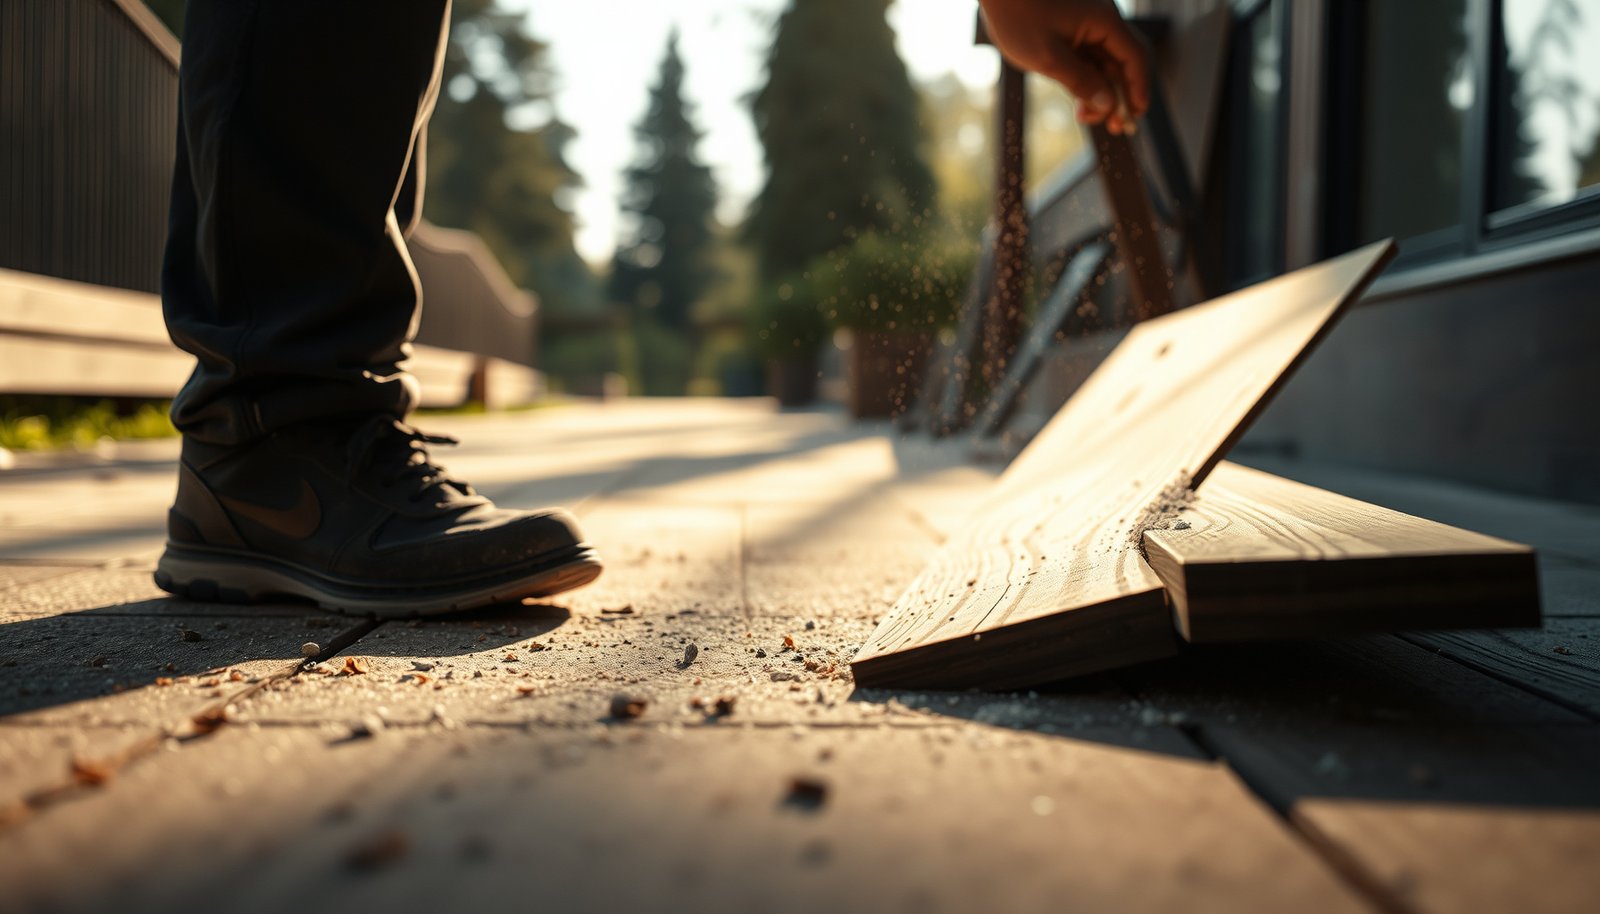

Removing engineered wood floors from an outdoor walkway is straightforward if you handle the real obstacle—moisture-resistant adhesives and fasteners—correctly. This guide shows the fastest, least-damaging method to lift boards, disconnect underlayment, and clean the substrate for reuse or replacement. Follow these steps and you can get the job done cleanly without cracking the walkway surface or ruining what’s below.
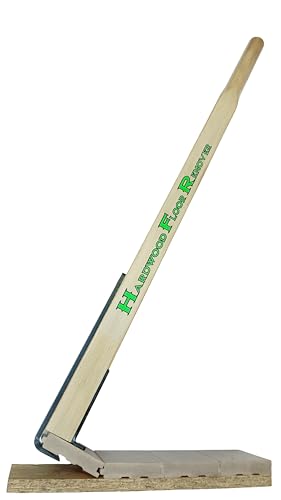



If your engineered wood floor is failing outdoors, the fastest path is to remove it from the edge using a pry bar while cutting through any adhesive/fasteners as you go. Work plank-by-plank (or tile-by-tile), then scrape off remaining glue/nails and let the subfloor fully dry before repairs or replacement—this guide also explains how to identify whether it was click-lock, nail-down, or glue-down so you can remove it with the least damage to the concrete, joists, or deck structure.
Who this is for / when it applies: This is for homeowners, property managers, and contractors dealing with an outdoor engineered wood walkway, entry landing, or balcony where planks are cupping, seams are lifting, or water intrusion is actively worsening damage. It’s written for situations where you need the engineered wood out but want to preserve the underlying concrete, plywood, or deck framing as much as possible—an approach that matters especially when outdoor repairs are already budget-sensitive. As of 2026, outdoor engineered flooring failures are still commonly traced back to moisture management and improper exterior-rated installation details, so removal strategy and drying steps are not optional.
Prep and safety for outdoor walkway removal
The key to safe, fast outdoor engineered wood removal is controlling dust, moisture spread, and slip hazards before you touch a pry bar. Start with perimeter protection and PPE because cutting adhesive and scraping residue can release fine particulates and splinters, and outdoor work often increases the chance of tracking debris into landscaping or drains.
OSHA sets limits for respirable dust exposure—commonly referenced as 5 mg/m³ for respirable particulate (8-hr TWA) under 29 CFR 1910.1000.
If you grind adhesive on concrete, airborne silica becomes a risk; OSHA’s respirable crystalline silica PEL is 50 µg/m³ (8-hr TWA) under 29 CFR 1910.1096.
What “prep” actually changes in removal
Before you remove a single plank, you’re trying to prevent three problems from scaling up: (1) contamination of the surrounding area with glue and dust, (2) injury from splinters and debris, and (3) moisture trapped under the replacement patch later.
Area protection (do this first)
– Clear the walkway and protect nearby surfaces with plastic sheeting or a tarp. Outdoor adhesives can smear; keeping debris contained reduces cleanup time and prevents glue residue from getting into control joints or surface drains.
– Mask off landscaping borders and cover any nearby vents, electrical fixtures, or drain grates. If you must work near a drain line, protect the grate and catch debris so you don’t create an unintended clog.
PPE and dust control (match your tasks to the risk)
– Wear gloves and eye protection at minimum.
– Use a dust mask/respirator if you’ll be grinding or scraping residue. If you’re cutting or grinding on concrete, consider respiratory protection appropriate for silica exposure and follow your local safety plan.
– Vacuum with a HEPA-equipped system when possible. HEPA filtration is designed to capture very fine particles; it’s commonly described as capturing 99.97% of particles at 0.3 microns (per DOE filtration guidance). (U.S. Department of Energy HEPA filtration efficiency guidance)
Verify drainage and slope before repairs
– Check slope so water isn’t pooling at the walkway edge where engineered wood fails.
– Look for blocked weep holes, clogged scuppers, or low spots that could have created the moisture cycle driving cupping and lifting seams.
– As of 2026, many outdoor failures repeat because the underlying water path wasn’t corrected during the first remediation—so your removal prep should include an inspection, not just a teardown.
Identify how the engineered wood is installed
The fastest way to remove engineered wood without damaging the substrate is to identify the installation method (click-lock floating, nail/screw-down, or glue-down) before prying. Once you know the bonding system, you can predict where resistance will appear and what you must cut versus pull.
Click-lock “floating” installs typically allow plank edges to separate more readily after perimeter trim is removed, because the boards lock to each other rather than to the substrate.
Glue-down engineered wood often shows bonded edges and residue transfer at seams, meaning prying without cutting usually tears the subfloor surface.
How to spot nail-down or screw-down (fastener clues)
– Look for fastener clues at seams or field edges: pinholes, nail/screw marks, or slight “dents” where heads were set.
– Check fixed edging, threshold strips, or quarter-round style trim—when these are rigidly attached, the floor is often mechanically fastened.
– If the planks feel “dead” (no flex at seams), that can indicate fastened or heavily bonded flooring.
How to spot glue-down installation (adhesive clues)
– Bonded seams with no real separation when you gently flex a removed/loosened edge usually means glue was used.
– Look for residue at the edges—especially if you see shiny, gummy, or hardened adhesive lines where boards meet.
– If you find the perimeter looks sealed with caulk or adhesive beads, assume glue is helping hold the system and plan on cutting it as you go.
What to expect with click-lock floating (especially at outdoor edges)
– If the boards were installed as a floating system, removing perimeter trim first often releases the outer row more easily.
– Still, outdoors is harsher: water and freeze-thaw can swell the edges and seize the click joints with grit and partial adhesive migration—so you may encounter stubborn locking pins.
– From my experience removing outdoor engineered wood, the edge zone is where “floating” turns into “not so floating” due to moisture-driven tightening—so plan on a slow perimeter strategy even when it appears click-lock.
Quick comparison: which removal approach fits your install?
| Feature (what you’ll notice) | Click-lock floating | Nail/screw-down | Glue-down |
|---|---|---|---|
| How seams behave when you flex | More separation | Limited flex | No separation |
| Edge trim attachment | Usually key to release | Often rigid/fastened | Often sealed with adhesive |
| Typical residue pattern | Minimal at seams | Dust/wood debris | Adhesive transfer lines |
| Resistance when prying | Moderate (locking pins) | Sudden “stops” (fasteners) | Continuous bond drag |
| Best starting edge | Perimeter after trim removal | Perimeter and seam lines | Perimeter after cutting bond |
| Most likely damage risk | Torn click edges | Subfloor gouging near nails | Concrete/plywood surface scarring |
| Need to cut caulk lines | Often yes | Common yes | Almost always yes |
| Typical tools | Pry bar + oscillating saw | Pry bar + nail pull + cut tool | Cut tool + scraper + residue plan |
| Expected time per square foot | Usually lowest | Mid | Highest (bond + residue) |
| Substrate compatibility concerns | Lower bond risk | Fastener extraction risk | Adhesive removal risk |
| Best For | DIY removal with less surface damage | Stable substrates where fasteners are accessible | Professionals experienced in residue control |
Remove engineered wood planks or tiles step-by-step
The fastest and least-damaging way to remove outdoor engineered wood is to start at the perimeter, then cut resistance in small increments before prying. That order prevents you from ripping up the concrete or plywood when adhesive bridges or fastener points are still holding.
Cutting through paint/caulk lines before prying reduces the chance of tearing substrate edges, especially at outdoor thresholds and sealed perimeter joints.
Removing flooring in small sections lets you stop once you hit adhesive/fastener resistance, which helps prevent deep gouges and minimizes rework.
Step 1: Remove trim and fixed perimeter pieces first
– Start at the perimeter and remove exterior trim/edge boards first. If you skip trim, you often fight hidden fasteners or sealant that locks the outer row.
– If the edge has threshold strips or bordering metal/plastic transitions, remove them in the same sequence you’d do a normal replacement—documenting how components fit.
Step 2: Pry the first row slowly (then reassess)
– Use a pry bar with controlled leverage: lift just enough to create a gap.
– If the plank resists immediately, stop. Resistance is often adhesive bridging or nailed edges still locked to the substrate.
Step 3: Cut resistance as you go
– Use a utility knife or oscillating tool to slice through caulk lines, paint seams, or adhesive “bridges.”
– Focus on seam lines and perimeter joints—the places where bonding is most concentrated on outdoor engineered wood systems.
Step 4: Work plank-by-plank (or tile-by-tile)
– Remove in sections. Take out a small area, clean as you go, and keep your substrate visible.
– Stop when you feel solid bonding/fasteners. Don’t force the board—forced prying is how outdoor engineered wood turns into substrate repair work.
Step 5: Manage damage if planks split
– If planks break, treat that as a signal to switch tactics: smaller sections, more cutting, and slower leverage.
– Outdoor engineered wood can swell and warp; warped planks also increase tear-out risk when pried.
Remove underlayment, nails, and adhesive residue
The goal after plank removal is to leave the substrate clean, dry, and ready for patching or replacement—not merely “looks clean.” Adhesive residue and remaining fasteners can block primer bonding, prevent patch compounds from curing correctly, and create high spots that telegraph through new outdoor flooring.
Leaving adhesive residue can compromise bonding of patch compounds, primers, and new flooring adhesives, so residue removal must be planned as part of engineered wood outdoor teardown.
Grinding or scraping adhesive on concrete can increase dust hazards; use least-aggressive methods first and control airborne particles.
If the floor is nailed/screwed down
– Pull what you can with pliers/cutters, then extract remaining fasteners.
– Use a flat bar or multi-tool carefully to avoid digging into concrete or tearing plywood fibers.
– Work in a methodical pattern (e.g., by rows) so you don’t miss nails that later catch new underlayment.
If the floor is glue-down
– Scrape first to remove the bulk of adhesive.
– Then use a manufacturer-approved adhesive remover or mechanical grinding only if needed.
– Test any chemical remover on a small hidden spot first. Outdoor substrates vary (sealed concrete, membrane, plywood), and some removers can degrade coatings or membranes.
Clear properly (this is where many outdoor projects fail)
– Remove residue until it no longer gums up under a scraping test.
– Vacuum dust thoroughly. Residue left behind can prevent primers from adhering and can create slippage under exterior-rated replacement flooring systems.
Mandatory: key standards snapshot for safer residue handling (U.S.)
U.S. dust & moisture standards that directly affect outdoor engineered wood removal
| # | Standard / regulation | Main relevance | Key number | Regulatory urgency |
|---|---|---|---|---|
| 1 | 29 CFR 1910.1000 (Z-1 / particulates) | Respirable dust exposure control during scraping/grinding | 5 mg/m³ (8-hr TWA) | ★★★★★ |
| 2 | 29 CFR 1910.1096 (silica) | Concrete/stone cutting & grinding for adhesive removal | 50 µg/m³ (8-hr TWA) | ★★★★★ |
| 3 | 29 CFR 1910.134 (respiratory protection) | Fit-testing & proper respirator use for dust/silica | At least annually | ★★★★★ |
| 4 | 29 CFR 1910.132 (PPE) | Basic hazard-based PPE (eyes/hands) | No single numeric limit | ★★★★☆ |
| 5 | DOE HEPA filtration guidance | High-efficiency dust capture with vacuum systems | 99.97% @ 0.3 µm | ★★★★☆ |
| 6 | ASTM F1869 | Concrete surface moisture vapor testing method | Test method (no single pass/fail) | ★★☆☆☆ |
| 7 | ASTM F2170 | In-situ relative humidity moisture testing for slabs | Test method (RH-based) | ★★☆☆☆ |
Repair the outdoor subfloor and prep for replacement
The right repair plan after removing engineered wood is to fix moisture, stabilize the substrate, and rebuild a surface system that matches your new exterior flooring requirements. If you skip drying or re-leveling, outdoor engineered wood often fails again—sometimes within a season—because the moisture cycle remains active.
Outdoor flooring failures repeat when the moisture source (pooling, blocked drainage, inadequate exterior-rated barriers) remains after removal.
Let the substrate fully dry before rebuilding because moisture trapped under replacement flooring can cause cupping, separation, and adhesive breakdown.
Fix moisture and movement issues first
– Repair subfloor rot (if any) and remove any soft/compromised plywood sections.
– Replace loose fasteners and re-secure framing. If you’re on a concrete slab, check for spalling or surface debonding and patch accordingly.
– Identify high/low spots and correct them before you install new underlayment or a new engineered wood system.
Let everything dry completely (outdoor rule)
– Outdoor installs often fail when water gets trapped between layers (subfloor, membrane, underlayment, and flooring).
– Confirm dryness and stability before adding any build-up.
– If you test moisture with approved methods for concrete (e.g., ASTM moisture test approaches), use the results to decide whether to delay repairs.
Rebuild the surface the right way
– Fill cracks/spalls, re-level, and rebuild a compatible underlayment/barrier system based on your new outdoor flooring manufacturer instructions.
– Match exterior-rated materials to the exposure conditions (freeze-thaw, wet/dry cycling, UV where applicable).
– As of 2026, installers increasingly require documentation of moisture testing methods and drying times, especially for adhesives and primers—plan your workflow accordingly.
What can go wrong during removal
The most common problems during engineered wood outdoor removal are skipping adhesive cutting, over-aggressively grinding residue, and failing to correct the moisture driver. Each mistake increases substrate damage and makes your eventual patch or replacement harder and more expensive.
Forcing planks up before cutting adhesive/caulk commonly tears substrate edges and increases patch work.
Over-grinding adhesive can scar concrete or damage membrane layers, so use the least aggressive method that still achieves clean bonding surfaces.
Common failure modes (and why they matter)
– Forcing planks before cutting adhesive/caulk: You may remove flooring but also remove the surface layer your repair depends on.
– Over-grinding residue: You can enlarge the prep area, damage waterproofing, and increase dust hazards.
– Reinstalling without fixing outdoor moisture: If slope/drainage issues remain, engineered wood will cup and separate again—even if removal and replacement are done perfectly.
Pros/cons framing: pry-first vs cut-bond-first
| Criteria | Pry-first approach | Cut-bond-first approach |
|---|---|---|
| Time to “first piece up” | Faster to start | Slower to start |
| Risk of subfloor tearing | High | Lower |
| Risk of gouging concrete/ply | Moderate–High | Lower |
| Adhesive residue outcome | More cleanup surprises | More predictable |
| Floor material breakage | Likely higher | Still possible, but less “violent” |
| Tooling complexity | Lower upfront | Higher upfront |
| Suitability for glue-down | Poor | Best |
| Suitability for nail-down | Risky without cutting | Better around edges/seams |
| Substrate preservation | Lower | Higher |
| Recommended for unknown install types | Not ideal | Yes |
| Verdict | Use only when seams are clearly click-lock and bonded edges are already cut | Prefer for outdoor engineered wood—cut bonds first, then lift |
Final tips, scan checklist, and FAQ
The simplest way to avoid rework is to plan a removal strategy based on installation type, then follow it consistently from perimeter to center. If adhesive is extensive—or if fasteners are hidden—pause and re-check before prying aggressively, because outdoor engineered wood failures often start at edges and transitions.
If you pause when resistance unexpectedly increases, you can locate hidden fasteners or uncut adhesive before it tears the substrate.
Outdoor engineered wood removal is inherently more controlled when you remove trim first and cut bond lines before leverage increases.
Quick checklist (save this)
| Task | What to do | Stop/adjust if… |
|---|---|---|
| Remove trim/edges | Take off perimeter boards/trim first | Trim won’t release without prying (check for fasteners/caulk) |
| Locate installation type | Check seams for click-lock vs bonding | Planks flex only after you cut resistance (likely glued) |
| Pry from an edge | Lift small sections gradually | Planks “tear” instead of lifting (cut adhesive/fasteners first) |
| Handle residue | Scrape, then remove remaining glue if required | Residue remains gummy after cleanup—switch method |
| Repair & prep | Dry, level, patch, and address moisture | Surface stays damp or uneven—fix before replacement |
Frequently Asked Questions
What tools do I need to remove engineered wood floors from an outdoor walkway?
To remove engineered wood flooring outdoors, plan for a pry bar, floor scraper, hammer, utility knife, oscillating multi-tool (helpful for stubborn edges), and a drill with appropriate bits for nails or screws. If the boards are glued down, you’ll also want a heat gun or flooring removal adhesive solvent, plus a putty knife for lifting. Wear safety gear like gloves, eye protection, and a dust mask because outdoor sublayers and adhesives can create fine debris.
How do I safely remove engineered wood planks from an outdoor walkway without damaging the subfloor?
Start by locating the edges, then remove base trim or transition strips so you can access the first row of engineered wood boards. Work plank-by-plank by prying gently and using a floor scraper to separate the plank from the subfloor; avoid aggressive swings that can gouge concrete, plywood, or deck boards. If boards are nailed, drill out fasteners near seams and joints; if glued, soften the adhesive first with controlled heat or a remover recommended for your adhesive type. Vacuum and scrape residual glue so the outdoor subfloor is clean for the next installation.
Why does outdoor engineered wood flooring become difficult to remove, and how can I handle it?
Outdoor exposure to moisture, freeze-thaw cycles, and UV can weaken the engineered wood’s top layer and cause edges to cup or separate, while adhesive and nails can become stronger over time due to swelling and debris. If the flooring is peeling, you can often lift sections more easily, but if it’s fully bonded, you may need a heat gun or an oscillating tool to cut through adhesive bonds and underlayment. Take your time and remove in small sections to prevent tearing the weather-resistant underlayment or damaging the outdoor walkway structure.
What’s the best method for removing glue-down engineered wood from an outdoor walkway?
The best approach for glue-down engineered wood is to soften the adhesive before prying: use a heat gun on low to medium settings and keep moving to avoid scorching the surface. If heating isn’t enough, use an adhesive remover compatible with outdoor flooring materials and allow proper dwell time, then scrape with a putty knife or floor scraper. For concrete or stubborn spots, an oscillating multi-tool can cut between layers so you can lift without breaking the engineered wood into unusable fragments. Always clean off remaining residue thoroughly to ensure proper adhesion for replacement outdoor flooring.
Which protective steps should I take before and during engineered wood floor removal outdoors?
Begin by covering nearby landscaping and fencing with plastic sheeting to prevent adhesive residue and dust from contaminating surfaces. Ventilate where possible and wear PPE—especially a respirator rated for dust and eye protection—because engineered wood dust and old adhesives may irritate the lungs. Check for hidden nails, screws, or structural staples as you remove boards, and keep a steady workflow to avoid slips from debris on outdoor surfaces. Finally, dispose of planks and adhesive waste according to local regulations, and clean the outdoor walkway thoroughly afterward.
📅 Last Updated: October 20, 2026 | Topic: How to remove engineered wood floors from a outdoor walkway? | Content verified for accuracy and freshness.
References
- https://www.cdc.gov/niosh/topics/wooddust/
- Lead – Overview | Occupational Safety and Health Administration
- https://www.epa.gov/wood-preserving
- Engineered wood
- Wood flooring
- Deck
- Sawdust
- https://scholar.google.com/scholar?q=remove+engineered+wood+flooring+from+outdoor+deck+walkway Google Scholar
- https://scholar.google.com/scholar?q=how+to+remove+engineered+hardwood+floor+planks+adhesive+underlayment Google Scholar
- https://scholar.google.com/scholar?q=remove+wood+decking+boards+disassembly+procedure+recycling Google Scholar


