
Want to estimate the cost of engineered wood floors in a basement without getting surprised by change orders? This guide gives you a clear, room-ready pricing formula—so you can total materials, underlayment, subfloor prep, installation, and moisture-related add-ons fast. By the end, you’ll know what budget range fits your basement size and condition and which cost drivers move the needle most.


If you want to estimate the cost of engineered wood floors in a basement, start by calculating your total square footage and then add money for subfloor prep, underlayment, moisture protection, and installation. Basements add a wrinkle—humidity and concrete subfloors can require additional materials—so your “per-square-foot” estimate should be more detailed than a simple materials-only number. In this guide, you’ll learn a practical estimating method and the common cost drivers that change the final total.
If you’re planning a DIY-friendly estimate or gathering quotes from installers, this layout helps you break the project into line items so you can compare apples to apples. It’s especially useful for basements where moisture mitigation and subfloor leveling often affect both material needs and labor time.
This guide is for homeowners and property managers planning engineered wood flooring in a basement—especially when the subfloor is concrete and you need to account for moisture risk. It’s also useful if you’re evaluating DIY vs. contractor installation and want a realistic “all-in” budget before you commit.
Step 1: Measure the basement floor area (and confirm waste)

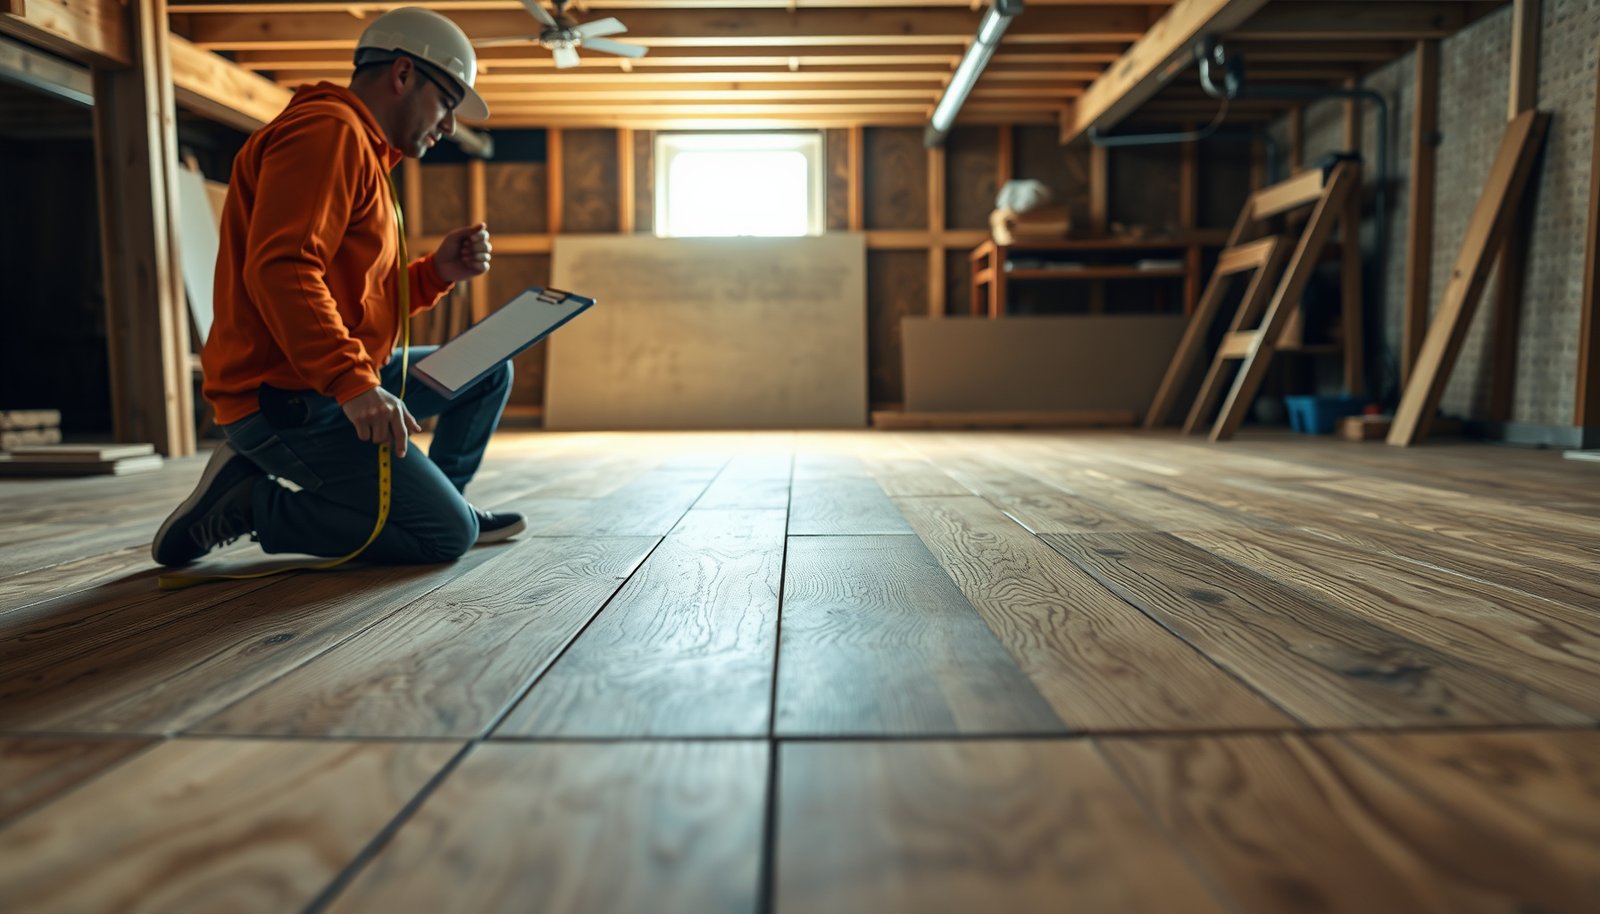
Measure your basement floor area in usable square feet, then apply an intentional waste allowance based on how complicated the room shape is. For engineered wood flooring, that waste isn’t just about cuts—it also covers transitions, stair/door undercutting, and alignment around obstacles.
Basement engineered wood flooring costs hinge on usable square footage (not the room’s gross dimensions) because built-ins, columns, and stair openings remove installable area.
A realistic waste allowance prevents a “good-looking” engineered wood estimate from failing during checkout—especially in basements with multiple doorways, offsets, or irregular walls.
Here’s a field-tested way to do it for engineered wood floors in a basement:
– Measure usable length × width for the main open area.
– Subtract non-install areas (stairs landings, columns, built-in cabinets, and permanent hearths).
– Add allowance for trims/transitions (treat thresholds, hearth edges, and stair transitions as “consumption points,” not afterthoughts).
– Use waste by layout complexity:
– 10% waste for mostly rectangular basements with few obstacles.
– 15–20% waste if you have multiple door openings, jogs/offset walls, or many perimeter cuts.
Important: engineered wood flooring calculations also need to reflect how planks run relative to the longest wall and where seams will land. If the plan forces frequent short plank sections, your effective waste rises even if the room is “square.”
A quick practical note: I usually build the estimate around the installable area after cuts, then I treat trim and transition pieces as separate line items—because installers often price those very differently than plank footage.
Quick measuring checklist (engineered wood flooring in basements)
– Measure to inside wall faces (or follow your installer’s takeoff method).
– Count stair openings and utility penetrations as non-install or special-cut areas.
– Plan plank direction: avoid seam patterns that create tiny slivers on the room perimeter.
– Confirm whether your engineered wood flooring is tongue-and-groove, click-lock, or glue-down—installation method affects how transitions and expansion gaps are handled.
Step 2: Estimate materials cost (engineered planks + underlayment)
Estimate engineered wood plank quantity from box coverage, then add underlayment and moisture protection components required by the specific system. In basements, the underlayment/moisture layer can cost as much as the flooring itself—so it can’t be treated as a “small extra.”
Engineered wood floors in a basement typically require a moisture-appropriate underlayment/vapor retarder system that follows the manufacturer’s installation instructions for concrete subfloors.
Concrete moisture mitigation is often driven by standardized testing outputs such as in-situ relative humidity (%) and calcium chloride results in lb/1,000 ft²/24 h.
Start with your engineered wood boxes:
1. Find plank coverage per box on the carton label or spec sheet (often ~20–25 sq ft per box, but you must use your product’s real coverage).
2. Compute boxes needed:
– Boxes = (Installable square feet × (1 + waste)) ÷ box coverage
3. Add an extra margin only if your product is discontinued or if you expect difficult cutting around built-ins (many engineered wood floors in basements are not installed from “perfect inventory”).
Then add underlayment/vapor components:
– If the engineered wood has an attached pad: it may reduce underlayment cost, but it does *not automatically* replace the vapor retarder requirements over concrete. Follow the product instructions exactly.
– If it requires a separate underlayment: budget for the underlayment layer plus any seam tape/overlap details.
– If it requires a specific vapor barrier: budget for the exact type (for example, a manufacturer-approved barrier system rather than “generic plastic”).
Moisture system planning (what actually changes engineered wood flooring costs)
Moisture control affects both materials and labor. The biggest budget “surprise” in engineered wood floors in a basement is when the installer needs to switch to an approved moisture mitigation pathway (barrier + prep, or a different assembly) after testing.
For moisture layer context, vapor retarders are commonly classified by permeance. For example, per ASTM E1745:
– Class I: ≤ 0.1 perms
– Class II: ≤ 1.0 perm
– Class III: ≤ 10 perms
ASTM E1745 (see sources section)And concrete moisture testing commonly reports results in defined units:
– Calcium chloride tests commonly report lb/1,000 ft²/24 h
ASTM F1869– In-situ probes report relative humidity (%) at the slab depth
ASTM F21707 Standards That Drive Basement Engineered Wood Estimates
| # | Standard / Method | What it tells you for a basement | Typical Output Metric | Estimate confidence impact |
|---|---|---|---|---|
| 1 | ASTM F2170 | In-situ relative humidity testing to evaluate concrete moisture risk before installing engineered wood floors | %RH | ★★★★★ |
| 2 | ASTM F1869 | Calcium chloride moisture vapor emission testing for slab-based moisture mitigation planning | lb/1,000 ft²/24h | ★★★★☆ |
| 3 | ASTM E1745 | Vapor retarder classification (permeance classes) used to select an appropriate barrier over basements | perms class | ★★★★★ |
| 4 | ASTM E1155 | Floor flatness/levelness measurements that help you budget leveling/skim work for engineered wood flooring | F-number | ★★★★☆ |
| 5 | ASTM F710 | Concrete floor surface preparation practices (cleaning, grinding, and conditions for resilient/finished floor systems) | surface readiness | ★★★☆☆ |
| 6 | ASTM D4263 | Plastic sheet test to screen for moisture-related issues (qualitative, not a substitute for engineered spec testing) | condensation/no condensation | ★★☆☆☆ |
| 7 | ASTM E96 | Water vapor transmission testing used to understand barrier performance (permeance and related metrics) | g/m²·day or perms | ★★★☆☆ |
Step 3: Add basement-specific moisture and subfloor prep costs
For engineered wood floors in a basement, the “real” cost is often prep and moisture control—not the plank price. Your estimate should include concrete testing/assessment, cleaning, leveling, crack repair, and the approved moisture mitigation pathway required by the engineered wood product.
Moisture mitigation for engineered wood floors over concrete should be based on manufacturer-specific limits and the test method used (e.g., ASTM F2170 RH% or ASTM F1869 moisture vapor emission).
Flatness and levelness (commonly evaluated with F-number approaches) directly affect whether engineered wood flooring can be installed without noise, movement, or excessive underlayment compression.
Budget the prep work with explicit line items:
– Moisture assessment (if not already done)
– Record existing results if you have them (e.g., ASTM F2170 RH% or ASTM F1869 lb/1,000 ft²/24 h).
– If you don’t have results, include a placeholder allowance for testing and an additional allowance for mitigation if results exceed limits.
– Cleaning and mechanical surface prep
– Basements often have dust, paint residue, or old adhesive spots that must be removed for proper adhesion/installation assemblies.
– Concrete leveling/patching
– Include crack patching, patch compounds, and (if needed) a self-leveling underlayment or skim coat.
– Moisture barrier and seam details
– Don’t just price “a barrier”; include overlap/seam tape, perimeter sealing, and any primer steps required by the system.
When estimating adhesives or barrier systems, treat them as “assembly components.” In basements, these often outweigh engineered wood flooring materials in the total, particularly for glue-down or systems requiring specific vapor retarders.
Concrete over slab: what to ask so your engineered wood estimate stays accurate
1. “Which moisture test method will you use (and what output unit do you report)?”
2. “Which vapor barrier class/system is approved for my engineered wood flooring product and installation type?”
3. “What flatness standard will you target for the subfloor before install?”
4. “Will you price leveling/skim as a separate line item or bundle it into labor?”
In my own estimate workflow, I always require the contractor to separate prep from installation on engineered wood floors in a basement. That separation is what makes bids comparable when moisture mitigation varies between basements.
Step 4: Estimate installation labor (DIY vs contractor)
Your labor budget should match the installation method and the amount of prep required. DIY can lower cash outlay, but basement engineered wood floors still demand careful moisture handling, accurate layout, and correct underlayment/barrier installation.
In engineered wood floors in a basement, the labor risk isn’t only cutting and fitting—it’s also whether moisture barriers and seams are installed exactly as the manufacturer specifies.
Contractor quotes are easiest to compare when they break labor into prep, install method (floating/click, nail/staple, or glue-down), and trim/transition work.
DIY estimating (what to line-item)
For engineered wood floors in a basement, DIY labor planning should include:
– Acclimation time and scheduling (follow the manufacturer’s direction; record it on your schedule).
– Layout and proof cuts (especially around door openings, vents, and utility pipes).
– Tools/supplies you may need to rent or buy (underlayment seam tape, spacers, saw blades rated for wood, etc.).
– Finishing transitions (reducers, T-molds, stair nose, baseboard undercutting, or caulking/trim detail).
If you already track time, insert your own number of hours per step here:
Contractor estimating (what to require)
Ask for a quote broken into:
– Subfloor prep labor (cleaning, patching, leveling).
– Install labor by method:
– click-lock floating
– nail/staple-down
– glue-down (if approved for your product)
– Trim and transition labor (thresholds, door jamb undercuts, reducers, and finishing details).
Here’s a comparison structure you can use to evaluate engineered wood flooring bids in basements:
| Installation method (engineered wood) | Pros in basements | Cons / budget risks |
|---|---|---|
| Click-lock / floating | Often faster to install; may avoid adhesives; easier to keep consistent layout if subfloor prep is adequate | Requires correct underlayment and flatness—uneven slabs can cause noise and movement |
| Nail/staple-down (when approved) | Can create a stable feel if the subfloor and nailing requirements match the product | Not all engineered products allow this over concrete; moisture and fastening details can raise labor cost |
| Glue-down (when specified) | Can be very solid when installed per system requirements | Often requires stricter concrete moisture/barrier prep; adhesive and moisture system costs can dominate the budget |
Step 5: Calculate your total with line items (a simple formula)
Use a worksheet-style total so your basement engineered wood flooring budget doesn’t hide surprises. In basements (as of 2026), the safest approach is to calculate both a low/prep-minimum scenario and a typical scenario.
A line-item estimate for engineered wood floors in a basement reduces bid shopping errors because it separates flooring, moisture protection, leveling, and transition labor.
Because basement subfloors vary in flatness and moisture, using a low vs. expected prep range helps prevent underbudgeting—especially for concrete slabs.
Use this formula (based on your own takeoff):
– Total = Flooring materials + Underlayment/moisture protection + Subfloor prep + Installation labor + Trim/transitions + Misc.
Then build two scenarios for engineered wood floors in a basement:
– Low case (“minimum prep”): assume
– Expected case (“typical prep”): assume
This range approach is particularly important when you don’t yet know:
– whether the concrete moisture is within the engineered product’s limits
– how flat your slab actually is in practice
– how many transitions/thresholds exist
A simple way to check your math
After you calculate engineered wood flooring line items:
– Confirm that your plank boxes match your installable square footage with your waste.
– Confirm your barrier/underlayment buys include coverage for overlap and waste.
– Confirm prep scope matches what the installer promised (leveling vs. patch-only).
What can go wrong (and why your estimate may be off)
Most estimate failures in engineered wood floors in a basement come from moisture and flatness surprises, or from under-scoping the “detail work” around doors and transitions. If your estimate is only based on plank price per square foot, you’ll almost certainly underestimate your all-in cost.
– Moisture issues discovered late: if moisture levels are higher than expected, you may need extra barrier steps or an approved moisture mitigation system—changing both materials and labor.
– Skipping flatness/leveling: engineered wood installs best over a sufficiently flat surface; uneven concrete can cause movement/noise or require leveling compounds.
– Underestimating cuts and transitions: basements with irregular shapes, thresholds, multiple door openings, or duct/pipe intrusions can require more labor and waste than a typical “open plan.”
Other common budget disruptors for engineered wood floors in a basement:
– Subfloor condition mismatch (spalling, paint contamination, or old adhesive residue).
– Incorrect install method (e.g., assuming floating rules apply when the product spec requires a different moisture assembly).
– Expansion gap and perimeter detailing mistakes that lead to edge buckling or tight seams.
In 2026, many engineered wood products still require strict adherence to their installation instructions; if your baseline estimate assumes “generic underlayment,” you can end up with a system upgrade during install.
Verdict / tip: How to estimate without getting burned
A solid basement cost estimate is mostly about being honest with prep and moisture-related line items—not just the engineered wood price per square foot. If your basement has known leaks, visible dampness, or you don’t yet know your concrete moisture/flatness situation, treat your first estimate as a “planning range” and verify with tests and an installer’s prep checklist. Skip pushing a tight budget until you’ve confirmed moisture mitigation requirements and how your floor system is specified for basement/over-concrete installs—those are the parts that change the number most.
Who should be cautious: if you’re unwilling to test (or you can’t get credible flatness/moisture data), you’re taking on the biggest estimator risk. In that case, prioritize a contractor estimate that includes moisture and flatness assessment scope rather than DIY-only pricing.
Quick cost checklist (scan/save)
– ☐ Basement square footage (usable area) +
– ☐ Engineered wood coverage per box/carton + box count (use your product’s labeled coverage, then apply waste)
– ☐ Underlayment/vapor barrier (based on your installation method and manufacturer instructions; include seam tape/overlap)
– ☐ Moisture mitigation plan for concrete (include the chosen test method outputs if known: ASTM F2170 RH% and/or ASTM F1869 results)
– ☐ Subfloor prep: cleaning, patching, leveling/skim, repairs (include crack patching and surface readiness)
– ☐ Install method: click/floating vs nail/staple vs glue-down (only as approved by the engineered wood product)
– ☐ Labor: prep + install + trim/transitions
– ☐ Misc: undercutting doors, transitions, caulk/adhesive supplies
Sources
– ASTM E1745 (vapor retarder classification by permeance classes; see standard text for exact class criteria)
– ASTM F1869 (calcium chloride moisture vapor emission test method and reporting units)
– ASTM F2170 (in-situ relative humidity test method for concrete moisture)
– ASTM E1155 (standard practice for determining floor flatness and levelness using F-number approach)
– ASTM F710 (standard practice for preparing concrete floors to receive resilient floor coverings)
Final note: If you budget engineered wood floors in a basement as a full system—flooring plus moisture protection plus subfloor prep—you’ll get a number you can trust. That’s how you avoid the most expensive mistake in basement projects: underestimating what concrete moisture and flatness will force you to fix after the flooring arrives.
Frequently Asked Questions
How much do engineered wood floors cost to install in a basement?
Basement cost depends on your engineered wood plank price, underlayment, subfloor preparation, and installation labor. For typical residential projects, you’ll often budget for materials (engineered wood flooring, moisture barrier/underlayment, and trim) plus labor for leveling, acclimation, and laying planks. To estimate accurately, calculate total square footage and add 10%–15% for cuts and waste, especially if you have columns, stairs, or irregular room shapes.
How do I estimate engineered wood floor costs per square foot for my basement?
Start by multiplying your basement square footage by your expected per-square-foot pricing for engineered wood flooring, then add line items for underlayment/moisture barrier and any required leveling compound. Next, include installation costs per square foot or labor hourly rates, plus extras like transitions (thresholds), baseboards, and demolition of old flooring if needed. Don’t forget delivery, taxes, and permit/inspection fees if your area requires them—those can meaningfully affect the final engineered wood floor installation cost.
Which basement moisture factors can increase engineered wood flooring expenses?
Basements often require more moisture control than above-grade rooms, which can raise costs for vapor barriers, sealed underlayments, and sometimes additional subfloor prep. If your concrete slab has high moisture readings or requires leveling, you may need moisture testing, patching compounds, or a more robust underlayment system designed for below-grade conditions. These steps help prevent cupping, gapping, or delamination, but they can increase the overall engineered wood floor cost estimate.
What’s the best way to budget for subfloor prep before installing engineered wood floors in a basement?
Measure the concrete slab flatness and condition first, because the biggest cost drivers are leveling and repair. If there are cracks, low spots, or uneven areas, you may need floor grinding, patching, or a self-leveling underlayment—then include labor and material for those steps in your engineered wood flooring quote. A thorough site assessment can prevent surprises like extra compound, longer installation time, or additional underlayment layers.
Why do engineered wood floor installation costs vary so much in basements?
Basement projects vary because of moisture requirements, slab condition, layout complexity, and whether you’re installing floating vs. nail-down engineered wood floors. Rooms with many doorways, closets, or stair transitions require more trim, underlayment cuts, and floor planning, increasing labor hours. Quotes also differ based on regional labor rates and whether contractors include acclimation, removal of old flooring, and installation accessories in the total engineered wood floor cost.
📅 Last Updated: October 19, 2026 | Topic: How to estimate the cost of engineered wood floors in a basement? | Content verified for accuracy and freshness.
References
- https://www.epa.gov/mold/moisture-control-home
- https://www.cdc.gov/mold/default.htm
- Occupational Employment and Wage Statistics (OEWS) Tables : U.S. Bureau of Labor Statistics
- https://www.nist.gov/publications/handbook-life-cycle-costing
- F2170 Standard Test Method for Determining Relative Humidity in Concrete Floor Slabs Using in sit…
- F1869 Standard Test Method for Measuring Moisture Vapor Emission Rate of Concrete Subfloor Using …
- https://www.energy.gov/energysaver/basement-insulation
- https://scholar.google.com/scholar?q=engineered+wood+floor+cost+basement Google Scholar
- https://scholar.google.com/scholar?q=wood+floor+installation+cost+estimating+labor+materials Google Scholar
- https://scholar.google.com/scholar?q=basement+moisture+subfloor+preparation+engineered+wood+floor+cost Google Scholar