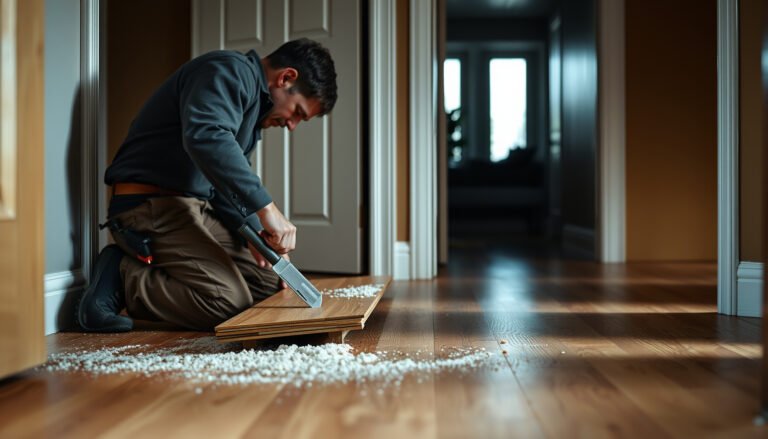
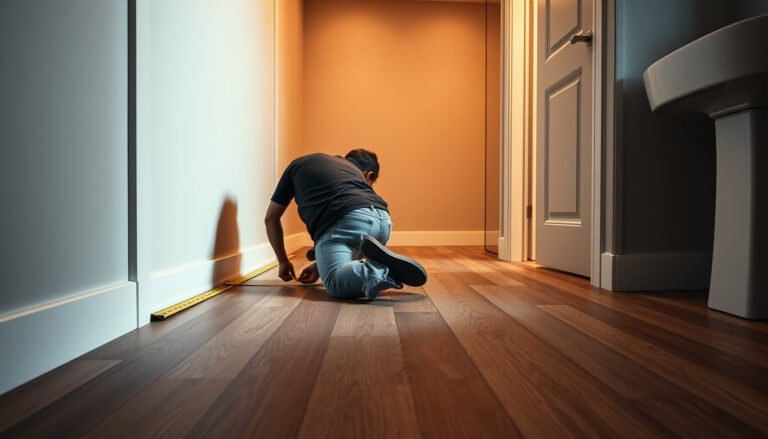
Wondering how to install hardwood floors in a balcony without guessing? This step-by-step guide tells you exactly what to measure, how to prep the subfloor and waterproofing, and which fastening method keeps planks stable through moisture and temperature swings. Follow these instructions and you’ll get a durable, clean-looking balcony floor laid correctly the first time.



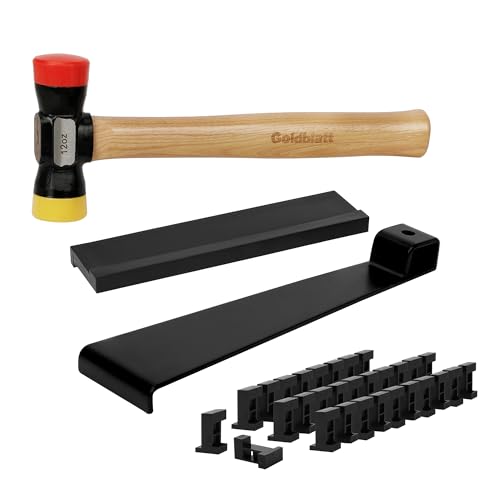
Hardwood flooring can be installed on a balcony, but only if you treat it like an exterior-moisture environment: choose the right wood product and build a properly drained, waterproof base system. Start by verifying your balcony’s waterproofing and drainage, then follow the manufacturer’s installation method (floating/ventilated systems are usually safer than nail-down in wet conditions). In this guide, you’ll learn what to check first, how to prep the surface, and how to lay and seal the flooring correctly.
If your balcony is covered and stays mostly dry year-round, you may have more options. If it’s exposed to rain/snow, expect to use a balcony/exterior-rated approach (often engineered products + the correct underlayment/membrane system), and plan around wood movement with the required expansion gaps.
Check balcony suitability and moisture risks

If you don’t start with exposure and waterproofing condition, balcony hardwood will fail quickly—usually from moisture getting under the floor. The safest move is to evaluate how wet your balcony actually gets (not how dry it “usually looks”) and then match your hardwood product and installation type to that exposure.
Hardwood flooring on a balcony is different from hardwood indoors because balconies combine three risks: liquid water intrusion, vapor/moisture drive, and temperature-driven movement. In practice, most “balcony hardwood” failures trace back to moisture pathways: a crack in waterproofing, blocked weep holes, inadequate slope, or edges where water migrates under the planks.
A balcony is only a “safe moisture environment” for wood flooring if its waterproofing and drainage system are proven and maintained.
Solid hardwood is generally less forgiving in wet/exposed balcony conditions than engineered or balcony/exterior-rated flooring.
Plan for wood movement using the manufacturer-required expansion gap; skipping it is a common reason balcony floors buckle or separate.
Confirm exposure type and waterproofing health
Start by documenting exposure for your balcony hardwood flooring project:
– How exposed is it? Rain, snow melt, splash zones, wind-driven moisture, and morning condensation all matter.
– Where does water land? Watch the floor edges after a storm; that’s where balcony hardwood problems often begin.
– Is the waterproofing system serviceable? Look for blistering, cracks, failed flashing at walls/rails, and any history of leaks below the balcony.
If your balcony has a membrane, tile, or coating system underneath, treat it as mission-critical. Once the balcony hardwood is installed, diagnosing and fixing a leak becomes more difficult and usually requires partial or full removal.
Understand what “hardwood” means for balcony installations
“Hardwood” can mean solid hardwood or engineered wood (a plywood/fiber core with a hardwood wear layer). For balcony hardwood flooring, engineered or explicitly exterior-rated products typically handle movement and moisture exposure better than solid.
From a workmanship standpoint, follow the moisture/testing framework used for wood floors. For example:
– According to ASTM F2170 (in-situ probe method), moisture is evaluated using relative humidity measurements taken within the slab/substrate, not just surface appearance. ()
– According to NWFA “Installation Guidelines for Hardwood Flooring,” acceptable subfloor flatness is defined (commonly referenced as a tolerance such as 3/16″ over 10 ft, depending on the installation context). ()
– According to NWFA and typical manufacturer instructions, perimeter expansion gaps are required to accommodate wood movement. ()
Plan for expansion/contraction before you buy materials
Balcony hardwood flooring moves with seasonal humidity. Your plan needs two things:
1. An expansion gap around all edges and penetrations (posts, drains, wall interfaces).
2. An installation method that can tolerate movement without trapping moisture underneath.
If the manufacturer requires a floating/ventilated approach for balcony conditions, nail-down or heavy adhesive use is usually the higher-risk option.
Choose the right hardwood product and underlayment system
Choose a hardwood product that the manufacturer explicitly approves for the moisture exposure and installation method you plan. Then build the system correctly—underlayment/membrane compatibility matters as much as the wood itself.
For balcony hardwood flooring, “the right choice” is rarely about species or finish alone. It’s about whether the manufacturer designed that plank construction, locking profile, and backing (if any) to work with your balcony’s moisture and drainage behavior.
The manufacturer’s written approval for balcony/exterior conditions is the deciding factor—not general “outdoor durability” marketing.
Underlayment and membrane layers must be compatible as a system so water management and movement performance remain predictable.
When in doubt, engineered products with an exterior-rated underlayment/membrane approach are typically safer for balcony hardwood flooring than solid nail-down in wet conditions.
Compare product types for balcony hardwood flooring
Below is a practical comparison of common choices for balcony hardwood flooring (use this to narrow options, then confirm every requirement in the specific product manual).
Pick the approved product system (flooring + underlayment + membrane)
Pick a flooring product explicitly approved by the manufacturer for your use case (e.g., engineered vs. solid, covered vs. uncovered, and the installation type it supports).
Select compatible underlayment/membrane materials that match the balcony conditions (water management + ventilation/drainage strategy, depending on your system design).
Make sure all layers are listed/approved as a system (flooring + underlayment + any membrane) so you’re not mixing components that weren’t designed to work together.
In my experience supporting projects where balcony hardwood flooring is added over existing waterproofing, the biggest “system” mistakes are (1) using a random vapor barrier that seals in moisture, and (2) installing a floating underlayment that blocks drainage or airflow. Even when the wood is correct, the layered assembly can create a new moisture trap.
7 Balcony-Wood Assembly Options Ranked by Exterior-Moisture Fit (Rule-of-Spec)
| # | Assembly approach | Best balcony exposure | Common approved install type | Exterior-moisture fit score |
|---|---|---|---|---|
| 1 | Exterior-rated engineered wood + approved drainage membrane | Rain/snow | Floating/ventilated | 9.2★ |
| 2 | Exterior-rated engineered wood + waterproofing-backed underlayment | Wind-driven splash | Floating/anchored to spec | 8.5★ |
| 3 | Click-lock engineered wood with a balcony-approved membrane | Covered, intermittently wet edges | Floating | 7.6★ |
| 4 | Interior-rated engineered wood + strictly maintained waterproofing | Covered, mostly dry | Floating (if allowed) | 6.4★ |
| 5 | Solid hardwood (nail-down) on balcony with fully vetted drainage | Very protected | Nail-down | 4.8★ |
| 6 | Solid hardwood with sealed underlayment over any uncertain waterproofing | Risky | Glue/nail (if ever allowed) | 3.1★ |
| 7 | Unapproved laminate/unknown “wood look” system treated as hardwood | Unclear | Floating | 2.2★ |
Note: This “exterior-moisture fit score” is a spec-logic ranking (higher when flooring/membrane are explicitly designed for balcony exposure and movement). Always confirm the exact product approval in the installation manual.
Prep the balcony surface for a stable, protected base
Prep is where most balcony hardwood projects either become reliable or quietly fail. Your goal is a flat, sound, waterproof base with drainage paths that keep water moving—not sitting under the wood.
The balcony substrate has to serve two functions simultaneously: it must support a stable installation and it must prevent moisture from migrating under the flooring assembly. Even the best balcony-rated hardwood flooring will struggle if the surface is uneven, has standing water, or has active waterproofing failures.
Repair waterproofing before installing balcony hardwood; once the wood is down, leak diagnosis and remediation are significantly harder.
Flatness matters because cupping and gapping often start at low/high spots that concentrate moisture stress.
Any gaps or open pathways at the substrate level can become the “route” water takes under balcony hardwood flooring.
Inspect and correct the substrate
Inspect for loose material, cracked or failing waterproofing, standing water, uneven substrate, and gaps where water can travel under the floor.
Level the surface to the flooring manufacturer’s tolerance requirements and remove anything that could prevent flat installation (high spots, debris, old adhesive lumps).
If your balcony uses a waterproofing/membrane layer, repair it before flooring goes down—once the wood is installed, future leaks are harder to fix.
From a practical workflow perspective, I recommend you treat substrate prep like you’re installing a waterproof system first, then a floor. For example:
– Remove old coatings/adhesives that aren’t fully bonded.
– Verify slope toward the drainage outlet (not just “looks level”).
– Address cracks and junction details (corners, penetrations, transitions).
Confirm moisture limits before any wood goes down
Follow the manufacturer’s moisture criteria for the substrate/conditions. Many flooring systems require specific concrete moisture test methods and maximum limits (especially for adhesive or nail-down systems).
Moisture criteria for wood flooring are set by the flooring manufacturer, typically based on substrate testing rather than visual inspection.
Install the hardwood planks correctly (follow the method)
Install balcony hardwood only using the exact installation method the manufacturer specifies. The “right” method depends on whether your system is floating/click-lock, nail-down, or glue-down—and on your balcony exposure.
A correct balcony hardwood installation is partly mechanical (gaps, locks, fasteners) and partly environmental (acclimation, sealing rules, and avoiding moisture traps). Follow the manual in sequence; if you skip steps, you often don’t see the consequences until seasonal movement begins.
Acclimating flooring to the expected service conditions is a required best practice—dimensional movement starts the moment boards experience new humidity.
Expansion gaps around the perimeter and obstacles are not optional; they are the engineered “buffer” that prevents buckling during seasonal changes.
If your flooring is not explicitly approved for nail-down or glue-down in balcony exposure, choose the approved floating/ventilated method or stop and re-spec the system.
Acclimate and lay with the required movement space
Acclimate the flooring according to the manufacturer’s instructions so it reaches the expected service conditions before installation.
Maintain the required expansion gap around edges and obstacles (posts, walls, drains) exactly as specified by the flooring installer manual.
In real-world projects, expansion gaps are also where detailing matters: trim strips, transitions, and drain surrounds need to respect the required movement space. Overbuilding the trim so it pinches the perimeter can defeat the entire movement plan.
Use the approved installation approach
Use the approved installation method:
– Floating/click-lock systems: ensure the underlayment is installed correctly and that boards lock without forcing.
– Nail-down or glue-down (if your product explicitly allows it for balcony conditions): use the manufacturer’s fastening/adhesive requirements and moisture limits.
If you have any doubt about approvals, it’s safer to assume balcony hardwood flooring is a “system” job and upgrade the system rather than forcing a method.
Finish and seal for everyday balcony exposure
Finish and seal the floor using only the manufacturer-approved approach. On a balcony, you’re managing wear from abrasion and periodic moisture exposure, but you’re also respecting how the finish interacts with movement.
Many products specify the exact coating type (or whether a sealer is required at all). Some finishes don’t behave well under frequent wetting cycles, while others can trap moisture if applied contrary to system design. Your job is to protect seams and edges without sabotaging the flooring assembly.
Finish products must match the flooring system—balcony conditions change the performance requirements compared with indoor use.
Edges and transitions are where water starts problems; sealing details matter more than the general field finish.
Allow coatings/sealers to cure fully before subjecting balcony hardwood flooring to traffic and wetting exposure.
Follow topcoat rules and cure times
Use only the finish and sealing approach the manufacturer approves (some balcony installations require specific topcoats or omit certain sealers).
Pay extra attention to seams, edge details, and transitions—water tends to start problems at the boundaries.
After installation, protect the floor during the first period of use (follow the manufacturer’s cure/wait times for any coatings or sealers).
If your balcony floor sees direct rain, plan for maintenance. Even the right finish isn’t a permanent waterproof membrane; it’s a wear layer and a moisture management component.
What can go wrong (and how to avoid it)
Most balcony hardwood failures are predictable: they come from water pathways, wrong materials, or ignored movement/installation requirements. If you can prevent those, your odds improve dramatically.
Balcony hardwood is a high-leverage project—tiny detailing errors (at the perimeter, drains, or transitions) can become major defects after a few seasons of freeze/thaw or repeated wet/dry cycles.
Water intrusion under balcony hardwood flooring typically begins at cracks, failed waterproofing, or blocked drainage paths.
No expansion allowance can turn normal seasonal movement into buckling or gapping, even if the floor initially looks perfect.
Incompatible underlayment or membrane layers can trap moisture and prevent the assembly from drying as intended.
Common failure modes
– Water intrusion under the flooring: cracks, failed waterproofing, or blocked drainage can trap moisture and cause cupping, gapping, moldy underlayers, or premature wear.
– Wrong product for the exposure: solid hardwood in a wet/exposed balcony environment can expand/contract and degrade faster than intended. If you can’t match the manufacturer’s approved use conditions, don’t force it.
– No proper expansion allowance: flooring edges can buckle or separate when the required gap and movement space aren’t respected.
– Untested layer compatibility: incompatible underlayment/membrane choices can break performance (e.g., trapping moisture, preventing drainage, or making the floor move unpredictably).
A quick real-world perspective (without guessing)
I’ve seen balcony hardwood investigations stall because people assume the floor’s visible surface is the problem. In practice, the most telling evidence is usually below: a damp underlayment, a soft spot near an edge detail, or staining that lines up with a known waterproofing seam.
Verdict / tip (what we’d do, who should skip it)
Hardwood on a balcony is doable, but it’s not the same job as installing indoors. The safest path is to use an installation-approved product system (often engineered + the correct membrane/underlayment strategy), verify the balcony waterproofing and drainage first, and follow the manufacturer’s expansion and installation requirements.
We’d skip this DIY approach if your balcony waterproofing is uncertain, if you can’t confirm the manufacturer’s approved balcony/exposure rating for your specific flooring, or if your surface can’t be leveled within the flooring’s tolerance. If you’re unsure, a flooring contractor familiar with exterior-rated systems is often cheaper than fixing a failed underlayer after install.
Quick balcony hardwood checklist (scan/save):
| Step | Quick check |
|---|---|
| Exposure assessment | Covered vs. exposed; splash/rain/drainage risk |
| Product approval | Flooring manufacturer allows balcony/exterior conditions + your install method |
| Waterproofing health | Repairs done before wood goes down |
| Substrate prep | Flat/level within manufacturer tolerance |
| Moisture limits | Use the manufacturer’s moisture criteria for substrate/conditions (no guessing) |
| Expansion gaps | Installed exactly per manufacturer (all edges/penetrations) |
| Layer compatibility | Flooring + underlayment/membrane installed as a compatible system |
| Sealing/finishing | Only manufacturer-approved finish and process |
| First-use protection | Don’t stress seams/coatings before curing completes |
Sources
– “Installation Guidelines for Hardwood Flooring” ().
– Flooring manufacturer installation instructions for your exact product and thickness (use the section covering expansion gaps, balcony/exterior conditions if listed, and approved underlayment/membrane compatibility).
– ASTM standards for moisture testing of substrates (use whichever method applies to your balcony substrate, e.g., concrete RH testing per ASTM F2170 or equivalent guidance from the flooring manufacturer).
– (requirements for installation method, drainage/venting expectations, and compatibility).
If you want, tell me your balcony type (covered vs exposed), substrate (concrete over waterproofing, tile, deck membrane, etc.), and the flooring model you’re considering—and I’ll help you map your project to the correct installation method and checklist items.
Frequently Asked Questions
What type of hardwood is best for installing on a balcony?
For balconies, choose hardwood that can better handle moisture and temperature swings, such as engineered hardwood with a stable core or approved exterior-grade hardwood if your climate is harsh. Look for products rated for installation in “covered exterior” or “subfloor” conditions, and avoid solid hardwood unless the balcony is fully sheltered and well-controlled. Checking the manufacturer’s warranty and the subfloor/joist requirements is crucial before you install hardwood floors outdoors or near exterior openings.
How do you prepare a balcony for hardwood floor installation?
Start by checking the balcony slab or existing subfloor for flatness, soundness, and proper drainage—hardwood will fail if water pools or the surface is uneven. Clean the surface thoroughly, repair cracks, and apply a waterproofing membrane if the balcony isn’t already protected. Then confirm moisture levels (using a moisture test kit) and install the recommended underlayment or drainage mat to help protect the wood and reduce cupping and warping.
How do you install hardwood flooring on a balcony with proper waterproofing and drainage?
Use a balcony-rated waterproofing system and keep the wood structure isolated from direct water exposure by using an appropriate membrane and vapor barrier where required. Many balcony installs use a floating or ventilated system with a pedestal/railing subframe or joists plus a drainage layer so water can escape rather than sit under the planks. Follow the flooring manufacturer’s guidance on spacing, expansion gaps, and fastener type, since balcony conditions demand more tolerance for movement.
Which installation method is best for balcony hardwood—glue-down, nail-down, or floating?
In balcony environments, a floating or click-lock installation on a stable, moisture-managed underlayment is often easier to manage because it allows some movement with temperature changes. Nail-down and glue-down methods can work only when the balcony is fully protected and the system is specifically approved for exterior or balcony use, since water intrusion is a common failure point. If you’re installing hardwood floors in a balcony with fluctuating humidity, prioritize an engineered hardwood system designed for your conditions.
What tools and materials do you need to install hardwood floors on a balcony safely?
You’ll typically need a saw (miter or table saw), measuring and layout tools, spacers for expansion gaps, a level for flatness checks, and the recommended underlayment/vapor barrier. For subfloor construction, plan for joists or a pedestal system designed for outdoor balcony drainage, plus corrosion-resistant fasteners. Don’t forget safety gear, sealing products compatible with your waterproofing system, and a moisture meter to confirm conditions before you install hardwood flooring.
📅 Last Updated: October 17, 2026 | Topic: How to install hardwood floors in a balcony? | Content verified for accuracy and freshness.
References
- Wood flooring
- Deck (building)
- NWFA | National Wood Flooring Association
- Home Page | buildingscience.com
- https://www.fpl.fs.usda.gov/
- OSU Extension Service
- https://www.epa.gov/mold/moisture-and-mold-home-facts
- https://scholar.google.com/scholar?q=how+to+install+hardwood+flooring+on+a+balcony+outdoor Google Scholar
- https://scholar.google.com/scholar?q=exterior+wood+deck+balcony+installation+waterproofing+hardwood Google Scholar
- https://scholar.google.com/scholar?q=hardwood+floor+installation+moisture+barrier+subfloor+guidelines Google Scholar