


Learn how to measure hardwood floors for a staircase with a step-by-step method that prevents costly mistakes before you buy or cut material. You’ll measure each tread and riser accurately, account for overhangs and stair geometry, and total the square footage the right way for a clean, professional fit. By the end, you’ll know exactly what to measure and how to calculate your hardwood needs—so the installation matches your staircase, not guesswork.




To measure hardwood floors for a staircase, take accurate measurements for each tread (depth/run and width) and each riser (height), including any nosing/overhang. Record landing dimensions too, then convert those measurements into tread boards (plus a waste allowance). This guide walks you through what to measure and how to avoid common sizing mistakes before you cut anything.
If your staircase has uneven steps, a landing, angled corners, or a noticeable overhang on the nosing, you’ll want to measure step-by-step instead of assuming “standard” sizes. This is also the right approach when you’re installing stair treads, not just carpeting/covering the stairs.
Measure the staircase width, stringers, and landings
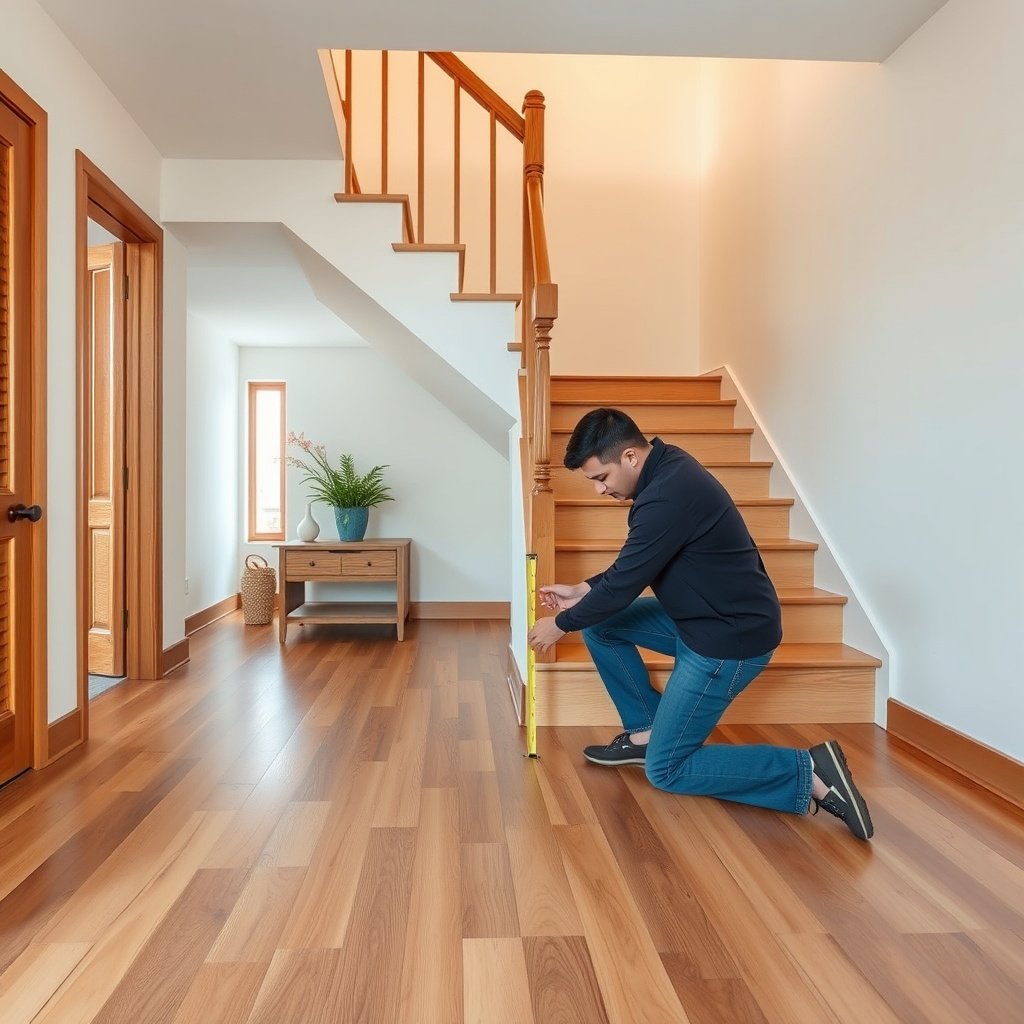
Measure the usable stair width first because it determines your maximum tread board size and how much trimming you’ll need at the stringers. Then measure the landing(s) exactly so your hardwood edges land cleanly where the stair run transitions to flat floor. This prevents “perfectly sized” treads that still don’t fit once they meet the stringers, posts, or the landing framing—an error I’ve seen commonly when installers rush the first measurement.
What “width” actually means for hardwood treads
Use the tread surface as your reference plane (the walking surface where the tread will sit). Measure from inside face to inside face of the stringers (or any surfaces that constrain the tread), not from outer trim. If there’s a skirt, rail support, or specific stair-nosing detail, you still want the tread seat width—where the wood actually touches the structure.
According to the 2021 International Residential Code (IRC), the minimum clear width of a stairway is 36 inches. International Residential Code (IRC) 2021, R311.7.1
“For hardwood stair treads, measure the usable tread width at the tread seating surface, not the distance across trim or handrail elements.”
“A common code benchmark is a minimum 36-inch stair width (clear width), which helps sanity-check your layout even when you’re not redesigning the stair.”
Measure landings as separate “flat” flooring areas
If your staircase includes a landing, treat it like a distinct flooring zone. Measure length × width, and note where the landing meets the first and last steps (the landing edge alignment matters for tread projection and visual continuity).
L-shaped or U-shaped stairs: split the runs
If your staircase turns (for example, an L-shape or U-shape), measure each stair run separately. Sketch which tread numbers belong to each run side so you don’t accidentally assign the wrong measured run length/depth pairing to the wrong treads. For hardwood stair treads, this matters because angled cuts and grain direction consistency can differ between runs.
“For turned staircases, separate each run and identify which tread numbers belong to each side before calculating quantities.”
Measure stair tread depth (run) and nosing/overhang
Measure tread depth using a consistent reference tied to the walking surface, then separately measure any nosing projection. For most hardwood stair-tread installs, this is the single biggest driver of fit—measure it inconsistently and you’ll end up with treads that are visibly long or short relative to each riser.
Depth/run: measure from the correct edges
Measure the tread depth at the walking surface: from the front edge of where you’ll walk to the point the tread ends at the riser/wall-side reference. On many stairs, that “where your hardwood ends” point is effectively the back edge or where the tread seat sits against structure.
“Stair tread depth for hardwood should be measured at the walking surface, aligned to the same front-edge and rear reference on every step.”
Nosing projection/overhang: measure how much it sticks out
If your existing stair has nosing (the tread projects past the riser), measure how far the nose projects. Use the same method on every step so your hardwood stair treads keep their visual line from tread to tread. If the nosing is worn, it may be helpful to measure from multiple points and average—but keep the reference point consistent.
Because stair geometry rules are tied to how nosing is treated, confirm your reference against code terms. According to the 2021 IRC, the required nosing projection is generally not less than 3/4 inch. International Residential Code (IRC) 2021, R311.7.5
“When nosing exists, measuring the overhang projection is necessary to match existing stair geometry and tread placement.”
Keep your reference point uniform across every step
In my experience reviewing jobsite notes, the most common “small measurement” problem is that people shift references mid-project—starting from the front of the nosing on one step and the front of the walking surface on another. For hardwood stair treads, that mismatch can compound into gaps or uneven toe-kicks by Step 5.
Practical tip: put a pencil tick at your chosen front reference (walking surface edge), and always transfer the measurement to the same rear seat reference (where the hardwood will land).
Measure riser height for accurate vertical cuts
Measure riser height for each step individually, because staircases are rarely perfectly uniform. Then pair each riser height with its matching tread depth so your hardwood stair treads produce a consistent run/rise geometry from step to step.
Riser height: floor-to-tread relationship
Measure from the floor (or the tread-to-floor interface on your specific stair) up to the underside/top relationship that determines where the next tread will sit. The goal is to capture the vertical “rise” that affects how tall each tread must be to close gaps.
According to the 2021 IRC, the maximum riser height is 7-3/4 inches. International Residential Code (IRC) 2021, R311.7.2
Plan for variable risers (custom-fit strategy)
If steps vary, write down each riser measurement and plan custom-fit treads. Don’t force uniformity by ordering “one size for all steps,” because hardwood stair treads will telegraph any variation visually and structurally at the riser line.
“Riser height is often measured per-step because stair geometry frequently varies even within the same run.”
“Tread depth and riser height should be paired step-by-step so hardwood stair treads fit without misaligned edges.”
Quick geometry sanity-check using the run/rise comfort relationship
A common stair geometry comfort relationship is expressed as 2R + T (rise plus tread) typically landing between 24 and 25 inches for many residential stairs. Use this as a check—not as a replacement for measuring your actual staircase.
According to the 2021 IRC, the stair geometry guidance uses the relationship 2R + T to help achieve consistent step feel. International Residential Code (IRC) 2021, R311.7.5
Example Rise/Tread Pairings Consistent with Common Stair Geometry Checks (IRC)
| # | Riser (R, in) | Tread (T, in) | 2R + T (in) | Check Result |
|---|---|---|---|---|
| 1 | 6.5 | 11.0 | 24.0 | Within 24–25 |
| 2 | 6.5 | 11.5 | 24.5 | Within 24–25 |
| 3 | 7.0 | 10.0 | 24.0 | Within 24–25 |
| 4 | 7.0 | 11.0 | 25.0 | Within 24–25 |
| 5 | 7.25 | 10.5 | 25.0 | Within 24–25 |
| 6 | 7.5 | 10.0 | 25.0 | Within 24–25 |
| 7 | 7.75 | 10.0 | 25.5 | Outside 24–25 |
Account for stair angles, wall gaps, and trim details
Account for trim and geometry changes because hardwood stair treads rarely sit in a “bare box.” If you ignore stair skirts, rail mounts, wall gaps, or angled turns, you’ll create interference points even when your measurements look correct on paper.
Measure what the trim consumes (skirt/rail/nosing caps)
If you’ll use stair skirts, stair rails, or nosing caps, measure the areas they cover so the hardwood doesn’t land where trim needs to sit. For hardwood stair treads, this affects both edge clearances and how you align the front projection.
“Hardwood stair treads must be measured relative to the trim and nosing system so the finished edge doesn’t conflict with skirt or cap components.”
Wall gaps, expansion space, and edge clearances
Note wall gaps and any spacing requirements, especially if you’re leaving expansion space or working against base/trim. Even if your tread depth is exact, a neglected side clearance can force you into trimming a board you already cut.
Angled/turned sections: plan which cuts belong to which tread
For angled or turned sections, mark which boards get which cut orientation so your grain direction stays consistent. Grain consistency isn’t just aesthetic—it can reduce how noticeable directional mismatches are at stair visibility angles.
“For turned staircases, labeling each tread and mapping its cut orientation helps keep hardwood stair treads aligned and visually consistent.”
Convert measurements to hardwood quantities (plus waste)
Convert your measurements into quantities by calculating area first, then translating area into board count based on actual usable board length and width. Add waste for stair complexity—custom fitting, angled cuts, and pattern matching typically require more offcuts than flat flooring.
Step 1: compute area per tread and landing
Calculate tread area for each step using: tread width × tread depth (using your measured hardwood tread depth/run and the usable tread width). Then add landing area (length × width) if the system uses hardwood on the landing as well.
Step 2: convert area to board count using usable dimensions
Convert the total area into board count using your actual product dimensions. In practice, you’ll use: plank/stair-tread width × usable board length per piece based on how you’ll cut treads. The “usable length” can be less than the labeled board length due to end trim, joint spacing, and cut pattern.
Step 3: add a waste allowance based on your stair complexity
Add a waste/extra allowance based on your product’s cutting plan. For stairs—especially turned designs—waste is often higher than a straight-wall room because each tread behaves like a small custom project.
“Staircases require a higher waste allowance than flat installations because each tread often needs custom-cut geometry and may not reuse offcuts cleanly.”
What can go wrong
What goes wrong is usually predictable: inconsistent references, missed geometry features, and quantity math that doesn’t reflect real cutting constraints. If you catch these early, you avoid the most expensive failure mode—running short after you’ve cut.
Common mistakes that impact hardwood stair treads
– Assuming all treads and risers are identical—real staircases often vary slightly, which leads to gaps or misaligned edges.
– Measuring tread depth from the wrong reference point (especially when nosing is involved), which makes stair treads “too long” or “too short.”
– Forgetting landings and trim/nosing components, then running short after you’ve already cut boards.
– Not planning for angled cuts and pattern matching, causing unnecessary waste or boards that won’t fit cleanly.
A quick contrast: “measure once” vs “measure per-step”
- Measure once (typical approach)
- Faster, works only if your staircase is extremely uniform and your nosing/trim is consistent.
- Measure per-step (recommended for hardwood stair treads)
- More reliable for uneven steps, landings, and turned staircases; requires extra material planning.
“The most frequent measurement failure is inconsistent reference points—especially on stairs with nosing—leading to cumulative alignment errors across hardwood stair treads.”
Verdict / tip: a reliable measurement workflow before you cut
If you want the most dependable results, treat stair measuring like a “per-step job”: measure, record, sketch, and number each tread/riser location before ordering or cutting hardwood. Downsides: it takes longer than measuring “one typical step,” and you may need extra material if your staircase is irregular—so this isn’t ideal if you’re on a tight timeline or can’t do careful notes.
From a documentation standpoint, we’ve found that a simple labeling system (Step 1, Step 2, etc.) plus a measurement sheet reduces rework. If you’re installing hardwood stair treads in 2026 and your staircase includes a landing or noticeable nosing, the per-step workflow is usually the safest way to avoid a costly “board already cut” situation.
Quick scan checklist (save this):
– [ ] Measure stair width (usable tread width) at every location that matters
– [ ] Measure each tread depth/run and record nosing/overhang projection ()
– [ ] Measure each riser height (and confirm whether they vary)
– [ ] Measure all landings (length × width)
– [ ] Sketch the order of steps and number them (Step 1, Step 2, etc.)
– [ ] Calculate total tread/landing area and convert to board count
– [ ] Add manufacturer-recommended waste/allowance ()
– [ ] Plan for trim/nosing pieces so your hardwood edges land correctly
Sources
– National Wood Flooring Association (NWFA). Installation Guidelines (use manufacturer installation guidance in combination with NWFA best practices for stair installations).
– International Residential Code (IRC). Stair requirements for general riser/run relationships and nosing rules (for understanding geometry reference points).
– Your hardwood flooring or stair tread manufacturer installation instructions (for spacing, underlayment/adhesive requirements, and recommended waste/extra material guidance).
Measuring hardwood stair treads isn’t hard, but it is detail-driven: you need consistent references for tread depth (including nosing), step-by-step riser heights, accurate width/landing dimensions, and a waste-aware quantity plan. If your staircase is turned or has uneven steps, treating it as a per-step project is what keeps your finished hardwood look tight and your installation fit-ready before you cut.
Frequently Asked Questions
How do I measure hardwood stairs for flooring accurately?
Start by measuring each tread (horizontal surface) from the front nosing edge to the back edge, and each riser (vertical surface) from the top of one tread to the top of the next. Record the tread depth, riser height, and the thickness of any existing stair components you plan to keep. Use consistent measurement points and write dimensions per step because stair runs often vary slightly from top to bottom. Double-check with a “dry fit” plan or a quick template to confirm your hardwood stair measurements match the actual stair geometry.
What’s the best way to measure a staircase for hardwood stair treads and risers?
Use a tape measure and note both the width of each tread and the thickness of the hardwood stair material you’ll install. For widths, measure the usable tread width where the wood will sit, accounting for stringers, walls, or any trim that limits the tread size. If the staircase has curves or landings, measure those separately by mapping the shape and confirming the maximum and minimum dimensions at several points. Create a simple step-by-step schedule listing each tread and riser size before ordering hardwood stair parts.
Why do stair dimensions vary, and how should that affect your hardwood floor measurements?
Real staircases rarely have perfectly uniform tread and riser dimensions due to settling, remodeling, or uneven framing. Even small differences can cause hardwood stair treads to overhang incorrectly or leave gaps at the risers. Measure each tread and riser individually rather than assuming every step is the same, and plan to stagger or cut parts to fit. This reduces costly mistakes when ordering prefinished hardwood stair treads or custom stair flooring.
Which measurements should I take for stair nosing and overhang when installing hardwood?
Measure the existing nosing projection (the overhang distance) and note whether the new hardwood stair tread will follow the same profile. Determine how far the hardwood tread edge should extend beyond the riser, especially if your staircase requires a specific overhang for safety and visual alignment. Measure the length from the back of the tread to the front edge where nosing will land, then confirm the height relationship with each riser. Accurate nosing and overhang measurements are critical for achieving a professional look and consistent stair-to-stair spacing.
What tools and techniques help you measure hardwood staircases without errors?
Use a measuring tape, a straightedge, and a level to verify tread and riser alignment, and consider using cardboard templates for each tread shape. For tricky stairs, measure from reference edges (like the same side stringer) to keep widths consistent, and write down results immediately to avoid mix-ups. If you’re dealing with angled or curved staircases, measure multiple points across each tread and use the smallest workable dimension when ordering hardwood stair flooring. Taking careful measurements with the right tools helps ensure accurate cuts, fewer returns, and a smoother installation.
📅 Last Updated: October 17, 2026 | Topic: How to measure a hardwood floors for staircase? | Content verified for accuracy and freshness.
References
- Redirecting…
- 1910.23 – Ladders. | Occupational Safety and Health Administration
- https://www.access-board.gov/ada/guides/accessible-stairs-ladders-and-elevators
- Staircase
- Stair tread
- Stairs
- Stair nosing
- https://scholar.google.com/scholar?q=how+to+measure+stair+treads+for+hardwood+flooring Google Scholar
- https://scholar.google.com/scholar?q=stair+flooring+measuring+template+estimating+materials+wood Google Scholar
- https://scholar.google.com/scholar?q=hardwood+stair+tread+measurement+and+layout+methods Google Scholar
[…] hardwood floors in a retail store with a clear, step-by-step method that holds up to heavy foot traffic and daily maintenance. This guide tells you exactly what to do […]
[…] layouts, and order the right amount of boards and underlayment. You’ll leave with a clear step-by-step method that prevents costly shortages and […]