
You can level a hardwood floor before installing a bedroom successfully—but only if you follow the right prep method for your subfloor conditions. This guide tells you the fastest, most reliable way to find high and low spots, choose the correct leveling approach, and get a flat surface ready for hardwood. If your goal is a squeak-free, properly installed bedroom floor, these steps are the clear winner.




Level first—your goal isn’t “smooth,” it’s flat—because bedroom hardwood will rock, gap, or separate if the subfloor has highs and lows. Start by checking the subfloor across the full room, then correct high spots (usually sanding/grinding), fill low spots (patch/leveling compound), or add a flat underlayment/patch layer where needed—so the planks sit solidly before you install anything else. If you’re installing hardwood in a bedroom, you’ll want to do this before any flooring underlayment or boards are laid, especially when the existing subfloor shows dips, squeaks tied to uneven support, or an older surface that isn’t flat.
Check how flat the subfloor really is

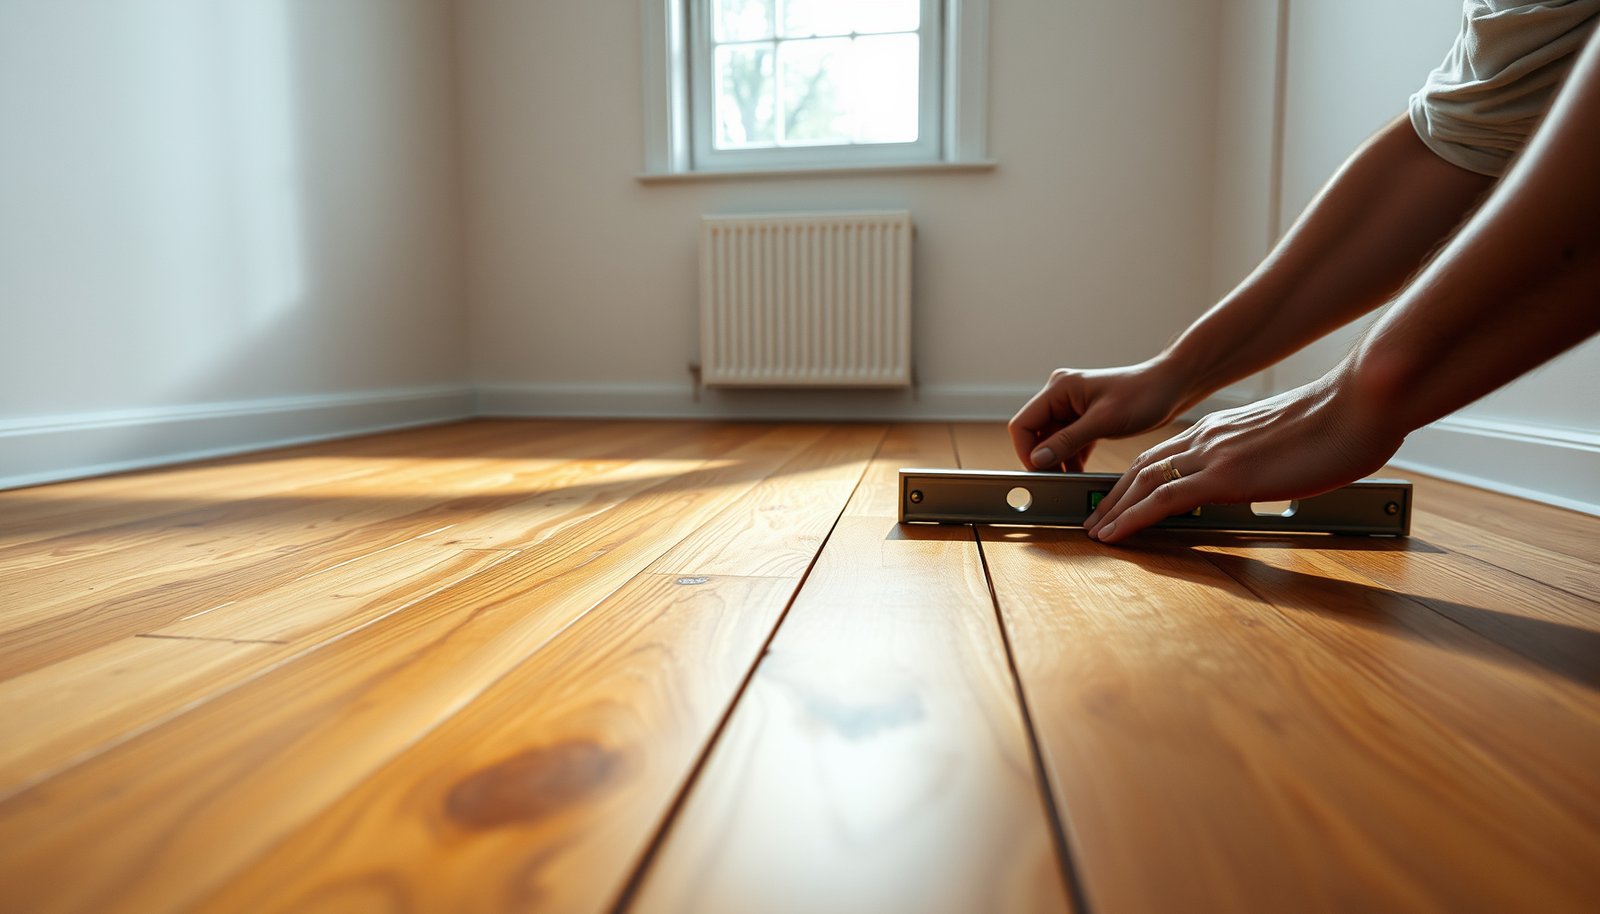
The fastest way to avoid guessing is to measure flatness with a long straightedge and mark every high and low zone. In practice, bedroom floors fail most often because unevenness isn’t uniform—one corner might be “fine” while seams and doorway transitions still create rocking.
A long straightedge helps you find both high spots and low spots because flatness is about “variation,” not just smoothness.
ASTM E1155 is the standard test method commonly used to evaluate floor flatness with straightedge measurements.
Use the right length and method for real flatness
A short ruler can miss dips that only show up under full plank spans. When checking a bedroom for hardwood installation, sweep the straightedge in a grid-like pattern, then mark locations with painter’s tape or a pencil line so you can address them in order.
In my own walkthroughs (where we map leveling issues before recommending a fix), the biggest pattern I keep seeing is that “problem areas” cluster near seams, furniture legs, and doorways—places that are easy to overlook if you only check the center.
Look for more than one kind of problem
Flatness readings tell you where correction is needed, but they don’t always tell you why. If you find:
– Deflection (the straightedge lifts when you press) → likely loose subfloor panels or insufficient support.
– Loose edges (sections move independently) → you may need tightening/fastening before any patching.
– A consistent slope across one plane → you may be dealing with a broader structural or joist-level issue.
According to National Wood Flooring Association (NWFA) installation guidance, subfloors must meet required flatness tolerances before wood flooring is installed, because movement under load can telegraph through the finished planks.
Choose the right leveling method (based on what’s wrong)
The best leveling method depends on whether you’re dealing with highs, lows, or a stability problem—not just “how bad it looks.” Sanding, patching, or installing a flat underlayment/plywood approach all work, but only the one that matches the cause will keep your hardwood from rocking or separating.
High spots are typically corrected by removing material rather than building up over them, because compounds can create ridges that telegraph through flooring.
Low spots are usually corrected by filling/patching with a subfloor-rated compound and feathering edges to maintain a gradual transition.
Pick a method by the symptom
Here’s the decision logic most installers use:
– High spots: Correct by sand/grind down to a flat plane.
– Low spots: Correct by patching/filling with a compound/patch system designed for subfloors.
– Big uneven areas / structural dips: Consider an underlayment/plywood approach or additional subfloor support so the base stays rigid (not just “skinned over”).
Quick comparison: leveling options that actually match the defect
| Method | Best for | Why it works | Main risk if misused |
|---|---|---|---|
| Sanding/grinding highs | Localized high ridges and lumps | Maintains plank support without adding thickness | Over-sanding can create new lows or break edges |
| Patch/fill low spots | Dips, tool marks, seam depressions | Feathered edges prevent ridges and rocking | Wrong thickness/feathering can crack or debond |
| Underlayment/plywood layer | Broad unevenness or recurring dips | Restores stiffness before the hardwood is installed | Poor fastening/flat laying can create movement at panel edges |
A practical flatness benchmark to keep you honest
According to NWFA installation guidance, subfloors should meet flatness requirements (commonly referenced as within 3/16 inch over 10 feet for wood flooring). Because bedroom hardwood systems vary, always defer to your specific hardwood manufacturer’s flatness tolerance.
Subfloor Flatness Check Results for Bedroom Hardwood (10-ft Straightedge)
| # | Measured deviation (in / 10 ft) | Typical cause in bedrooms | First leveling move | Plank risk if ignored | Installation readiness |
|---|---|---|---|---|---|
| 1 | ≤ 1/8 | Minor surface wear | Spot skim/patch as needed | Low | Proceed ✓ |
| 2 | 1/8 to 3/16 | Seam depressions / localized dips | Fill lows, feather edges | Moderate | Proceed with spot leveling ✓ |
| 3 | 3/16 to 1/4 | Panel unevenness or sag over a span | Patch more extensively; re-check | High | Level again (recommended) ✗ |
| 4 | 1/4 to 3/8 | Broad uneven section or joist-related issue | Consider underlayment/plywood approach | Very high | Stop & correct support ✗ |
| 5 | 3/8 to 1/2 | Structural dip, moisture-driven movement, or broken subfloor planes | Investigate cause; patch alone isn’t enough | Extreme | Do not install hardwood ✗ |
| 6 | Localized “lifts” at seams | Loose subfloor panels or missing fasteners | Tighten/fasten first, then patch highs/lows | High (rocking) | Fix stability, then level ✗ |
| 7 | Visibly crumbling/failed surface | Moisture damage or deteriorated subfloor layers | Replace damaged boards before leveling | Very high (debonding) | Repair substrate ✗ |
This table is a practical, measurement-based “map” for interpreting straightedge results in bedrooms; always confirm your hardwood manufacturer’s flatness tolerance and the leveling product’s allowable thickness and substrate requirements.
Prep the room so the leveling material can actually work
The best leveling mix in the world won’t perform if the room isn’t prepped correctly. As of 2026, most failures still trace back to skipped cleaning, loose subfloor movement, or using a primer/thickness approach the compound was never designed for.
Proper substrate prep (clean, stable, correct primer) is required for patch and leveling materials to bond reliably.
Loose subfloor movement should be corrected before leveling, because compounds can’t prevent flex that causes squeaks and plank separation.
Remove barriers and eliminate loose contamination
Before you apply any leveling system:
– Remove baseboards/quarter rounds if needed for access.
– Scrape or remove tack strip residue and any debris that can prevent adhesion.
– Vacuum thoroughly (not “sweep and move on”), because dust is a bonding enemy.
Repair movement before you cover it
If a subfloor squeaks when stepped on, it’s often telling you the base is flexing. Tighten subfloor fasteners and replace damaged boards first. From there, you can patch and fill knowing the base won’t keep shifting.
Follow the leveling product’s surface prep rules
Every compound or underlayment system specifies:
– whether you need a primer
– allowable moisture conditions
– which substrate types (plywood/OSB/concrete) are accepted
– maximum thickness per pour/pass
Treat those instructions as non-negotiable. This is where DIY installs commonly diverge: people use “whatever self-leveler is on hand” without matching primer and thickness requirements to their substrate.
Level the subfloor step-by-step
The most reliable sequence is measure → correct highs and lows → cure fully → re-measure. If you’re doing this in 2026, build in time for dry/cure and plan for at least one re-check cycle—because it’s easy to correct one area and accidentally create another transition ridge.
Correcting high spots first is often easier because grinding/sanding reduces contact issues that occur when planks bridge uneven areas.
Rechecking flatness after each major pass prevents “locking in” new unevenness beneath the finished hardwood.
Step 1: Mark zones, then start at the highest points
Use your straightedge marks to create a map of high and low zones. Start at the high spots because reducing highs typically restores support without building up thickness.
Step 2: Use the right technique for each defect type
– Small low spots: Apply patch/filler in the recommended thickness. Feather edges to match the compound’s instructions.
– Larger areas: Use a self-leveling underlayment/compound only if it’s specifically intended for that substrate and within its thickness range.
– Base rigidity issues: If the subfloor flexes, consider securing layers or adding an underlayment/plywood system so the hardwood sits on a stable plane.
Step 3: Re-check flatness after sanding and after curing
After sanding/grinding, vacuum and wipe so you’re not measuring dust. After patch/compound cures, repeat the straightedge test—especially around seams and transitions, where small changes become “ridges” under planks.
According to ASTM E1155, straightedge-based flatness measurement is used to quantify deviation patterns so you can verify whether corrections actually meet tolerance.
Confirm readiness for bedroom hardwood installation
Before you install underlayment and hardwood, confirm that the corrected surface is flat, stable, and moisture-compatible with your entire flooring system. In most bedroom installs, this final check is what prevents gaps along board edges and the “click/rock” feeling people notice later.
Patch/leveling materials require full cure time before flooring installation, or residual movement can cause debonding or uneven support.
Bedroom hardwood performance depends on both flatness and moisture conditions, so the moisture barrier/underlayment must be compatible with the leveling layer.
Cure fully and verify flatness again
– Let leveling materials cure exactly as directed (temperature and humidity affect cure).
– Re-run the flatness check once more, focusing on:
– seams you leveled
– doorway thresholds
– areas under future bed/headboard loads
Ensure moisture conditions match the hardwood system
Hardwood is sensitive to moisture movement. Verify conditions for your specific product: some systems require moisture testing and/or a compatible moisture barrier. If you’re using underlayment, confirm it won’t conflict with the leveling compound (for example, by relying on a bond or slip behavior the compound can’t provide).
According to NWFA wood flooring moisture guidance, wood flooring installation should account for moisture equilibrium and relative humidity so the flooring can remain dimensionally stable after installation.
What can go wrong (and who should pause)
If you skip the “why,” leveling can become an expensive bandage. The most common problems in bedrooms are overbuilding with compound, covering movement instead of fixing it, and using the wrong product for the substrate or thickness.
Overbuilding low areas can create new ridges that plank edges mirror, causing visible height differences and gaps over time.
Leveling over an unstable or moving subfloor often fails because the underlying flex continues after the patch cures.
Common failure modes to watch for
– Overbuilding low areas: Adding too much material can create ridges that telegraph through hardwood.
– Ignoring subfloor movement: Squeaks tied to flex usually require fastening/support fixes before leveling.
– Wrong product for the job: Patch/leveling systems have specific substrate acceptance and thickness limits. Skipping primer/moisture/acceptance specs can lead to cracking or debonding.
– Feathering mistakes: Abrupt edges can become pressure points where planks don’t fully seat.
When you should pause DIY
Skip DIY if:
– the subfloor shows structural damage,
– squeaks recur after fastening,
– you see widespread dips that suggest joist spacing/support issues,
– or moisture problems are ongoing.
In those cases, correcting the cause is more important than finishing the leveling layer.
Pros/cons snapshot (so you know what you’re trading off)
| Approach | Pros | Cons / limitations |
|---|---|---|
| Sand highs + patch lows (spot leveling) | Targets only the defects; usually minimal height buildup | Not ideal for broad structural dips; needs multiple cure/recheck cycles |
| Underlayment/plywood system (support correction) | Restores rigidity when the base flexes or dips broadly | More labor; requires correct fastening/layout to avoid new seams or movement |
Quick leveling checklist (scan/save)
A final straightedge check right before installation helps you catch transition ridges and seam issues introduced during leveling.
Cure time and compatibility (primer/moisture barrier) are as important as flatness, because incomplete cure can still move under load.
| Task | What to look for |
|---|---|
| Flatness check | Mark high spots and low spots across the whole bedroom install area |
| Stability repair | No loose subfloor panels; squeaks tied to movement are fixed first |
| Correct method chosen | Sand highs, patch/fill lows, or add/secure support where needed |
| Product compatibility | Primer/moisture/barrier requirements match the leveling compound instructions |
| Curing + recheck | Full cure time completed and flatness rechecked before hardwood |
| Transition planning | Feather/finish edges so you don’t create ridges at seams |
[Optional FAQ]
Sources
– National Wood Flooring Association (NWFA) installation guidance for wood flooring over subfloors: .
– ASTM E1155 (standard test method(s) related to measuring floor flatness): .
– Your chosen leveling compound/underlayment manufacturer’s installation instructions and product data sheet (primer, substrate acceptance, moisture, allowable thickness, cure time): .
– Your hardwood flooring manufacturer’s installation instructions for required subfloor flatness/tolerances and moisture requirements: .
Leveling a bedroom hardwood floor isn’t just prep—it’s performance insurance. Measure flatness across the whole room, correct highs by removing material, fill lows with the right subfloor-rated system, and fix any underlying movement before you cure and re-check; if you do that, the finished floor is far more likely to stay quiet, tight, and stable for years.
Frequently Asked Questions
What’s the best way to level existing hardwood floors before installing new bedroom flooring?
Start by checking the subfloor condition and measuring how far out it is using a long straightedge and a level, then map high and low spots. For small uneven areas, you can often use a feather-finish leveling compound to create a smooth, flat surface. If the hardwood itself is uneven or damaged, consider sanding high spots first and then applying a patch/skim layer to prevent telegraphing through your bedroom flooring.
How do I fix low spots in hardwood floors before laying bedroom flooring?
Clean the surface thoroughly and remove any loose finish, dust, or debris so the leveling compound bonds properly. Mark the low areas, then mix and apply a floor patch or self-leveling underlayment rated for your floor type and thickness requirements. After it cures, recheck flatness with a straightedge and sand or skim again if needed to reach the smooth surface your new bedroom flooring requires.
Why is it important to level hardwood floors before installing flooring in a bedroom?
Bedrooms are high-visibility areas, and any unevenness can cause gaps, squeaks, rocking planks, or premature wear in the new flooring. Flatness issues can also interfere with proper locking mechanisms for engineered or laminate floors, leading to separation over time. Taking the time to level helps ensure a solid installation and a smoother, more durable result.
Which leveling method works best for uneven hardwood floors—sanding, patching, or self-leveling underlayment?
Use sanding for localized high spots, especially if the hardwood is otherwise structurally sound and only slightly out of plane. Choose a patch or floor-leveling compound for shallow dips and spot imperfections where you can control thickness build-up. Opt for a self-leveling underlayment only when the subfloor/hardwood surface is stable and the unevenness is widespread enough to justify a more uniform leveling approach.
How much floor leveling is required before installing bedroom flooring over hardwood?
The required amount depends on your new flooring manufacturer’s flatness tolerance, but most require the surface to be very smooth with minimal deviation across the room. A common approach is to measure variations across several points and aim to correct low/high areas until the floor meets the spec (often in the range of about 1/8 in over several feet). Always verify the requirement in the installation instructions, then confirm with a straightedge after leveling and curing before you proceed.
📅 Last Updated: October 16, 2026 | Topic: How to level a hardwood floors before installing bedroom? | Content verified for accuracy and freshness.