
Fixing peeling on industrial floors is straightforward when you remove the failing coating and address the real cause of adhesion loss—moisture, poor surface prep, or contamination. This guide delivers the practical repair steps that work best for worn, peeling concrete or epoxy, from surface grinding and crack repair to priming and re-coating. If you want peeling stopped for good, follow these proven actions in the right order.



Peeling on industrial floors isn’t “just wear”—it’s almost always a coating adhesion failure caused by contamination, moisture vapor, or incompatible bonding conditions. The reliable fix is to (1) confirm what failed, (2) remove every loose/cohesion-weak area mechanically, and (3) rebuild the system using the correct primer and topcoat (or patch system) for your exact floor type and exposure conditions.
Peeling shows up in shops, warehouses, plants, and loading areas when epoxy, urethane, concrete toppings, or industrial floor coatings lose bond strength—often after cleaning, sealing, or chemical washdowns. If you’re seeing peeling spread in patches, blisters appear, edges lift first, or failure accelerates after traffic returns, you’re in the right place. The goal here is not just to “cover the problem,” but to stop the same mechanism from breaking the new finish again.
First: Identify what’s peeling and why it failed
Peeling typically begins when the floor system is mismatched to the substrate condition, or when the existing coating is already failing cohesively/adhesively. Before you remove material, you need to map the failure mode because “peeling” can come from several different root causes.
“Lifted edges usually point to preparation or contamination issues at the surface, not normal abrasion.”
“Blisters commonly indicate moisture vapor pressure pushing through the coating system.”
Determine the floor system
Start by identifying what’s actually on the concrete and what it was expected to bond to:
– Coating over concrete (most common): epoxy, urethane, MMA, or epoxy novolac systems over a prepared substrate.
– Trowel-applied topping: cementitious or polymer-modified toppings that may be coated afterward.
– Paint or thin-film system: thinner layers that can fail quickly when bond strength drops.
– Bare concrete flaking: sometimes the “coating” is actually weak/loose concrete (spalled or dusting) rather than a finished product lifting.
In my experience reviewing site photos and defect patterns for industrial floor repairs, the fastest path to an accurate repair plan is recognizing which layer is failing: the coating-to-primer interface, the primer-to-concrete interface, or the concrete itself. If you don’t know which one, you’ll likely strip too little (causing a boundary failure later) or strip too much (wasting time and money).
Look for failure patterns that reveal the mechanism
Use the visible pattern to narrow the cause:
– Edges lifting first / sheets peeling: often poor prep, residue (oils, curing compound, sealers), or insufficient surface profiling.
– Blisters / doming before peeling: moisture vapor drive, condensation during cure, or trapped water from behind the system.
– Widespread peeling after chemical exposure: chemical compatibility issues, solvent attack, or physical damage to the film that later collapses.
– Patchy peeling only in a specific zone: often localized contamination (vehicle drips, chemical residues, compressed-air mist, or washdown concentration).
Decide whether you need a full strip or spot repair
You’re not just deciding “how much looks bad”—you’re checking how far the coating remains truly bonded.
– Probe around peeled areas with a screwdriver, scraper, or needle scaler.
– Sound material should feel hard and firmly attached.
– If adjacent areas sound hollow, move under pressure, or sound dull/weak when tapped, plan a larger removal area—because coatings rarely fail in a perfect circle.
According to manufacturer technical guidance for epoxy and urethane flooring systems, repairs need to remove not only the visible failure but also the surrounding marginal adhesion zone so the new system can key into stable substrate. [ADD: Manufacturer TDS/Application Instructions for your specific primer/finish system]
Check moisture and contamination before you repair
Moisture vapor and contamination are the two most common “silent killers” behind repeat peeling. If you prime over the wrong condition, adhesion strength can look fine during application and then fail weeks later when moisture drive or residues reassert themselves.
“If moisture vapor is present, priming and topcoating over it can still lead to blistering and adhesion loss.”
“Even small residues (dust, oils, curing compounds) can reduce coating wetting and bond strength.”
Do a moisture-vapor assessment suitable for coatings
Moisture vapor assessment should match coating requirements. Common approaches include tests referenced to ASTM methods (often ASTM F2170 for in-situ RH probe systems, and/or ASTM F1869 for calcium chloride). Many coating manufacturers set thresholds for acceptable moisture transmission levels.
Examples of typical manufacturer thresholds (verify your actual system):
– Epoxy systems are frequently specified to be ≤ 3 lb/1000 ft²/24 hr moisture vapor transmission (varies by product). [ADD: Manufacturer moisture limit for your coating system] (Year: ADD)
– Relative humidity targets are often expressed as ≤ 75–85% RH in-situ depending on the resin chemistry. [ADD: Manufacturer RH limit] (Year: ADD)
– Condensation risk increases when slab temperature is below the dew point—this is an application-window problem, not a “curing later” problem. [ADD: Source for dew point guidance relevant to coating application] (Year: ADD)
Confirm the surface is free from bond breakers
Before any grinding goes on, verify the concrete isn’t coated with materials that prevent adhesion:
– Dust/debris (especially after earlier sweeps without vacuum)
– Curing compounds (silicate-based and film-forming types)
– Sealants and penetrating densifiers
– Oils/grease/vehicle drips
– Release agents from prior coverings
– Residues from cleaning (surfactants, salts, solvent films)
In industrial settings, washdowns are a frequent contributor: the surface may look “clean,” but it can be left with surfactant films or contaminated rinse water that changes surface energy. This is why “clean” and “ready to bond” are not the same thing.
If chemicals are involved, confirm system compatibility
Forklift fluids, hydraulic leaks, degreasers, caustics, and solvent-based cleaners can soften or undermine specific coatings. If your system isn’t rated for the chemical exposure, it may fail again even with excellent prep.
Check the coating system’s chemical resistance documentation and compare it to the actual chemical list used at your site (including concentrations and dwell time). [ADD: Manufacturer chemical resistance chart for your system] (Year: ADD)
Remove loose material and prep for a strong bond
Peeling repairs depend on mechanical removal. If you try to “patch over” delaminated material, the boundary becomes a future failure hinge.
“Repair success hinges on removing weakly bonded material back to sound substrate, not just covering the visible peel.”
Mechanically remove everything that’s loose
Mechanically remove:
– Delaminated coating
– Feeble/loose concrete topping
– Feather edges that lift when you scrape them
– Any area that shows reduced hardness or debonding
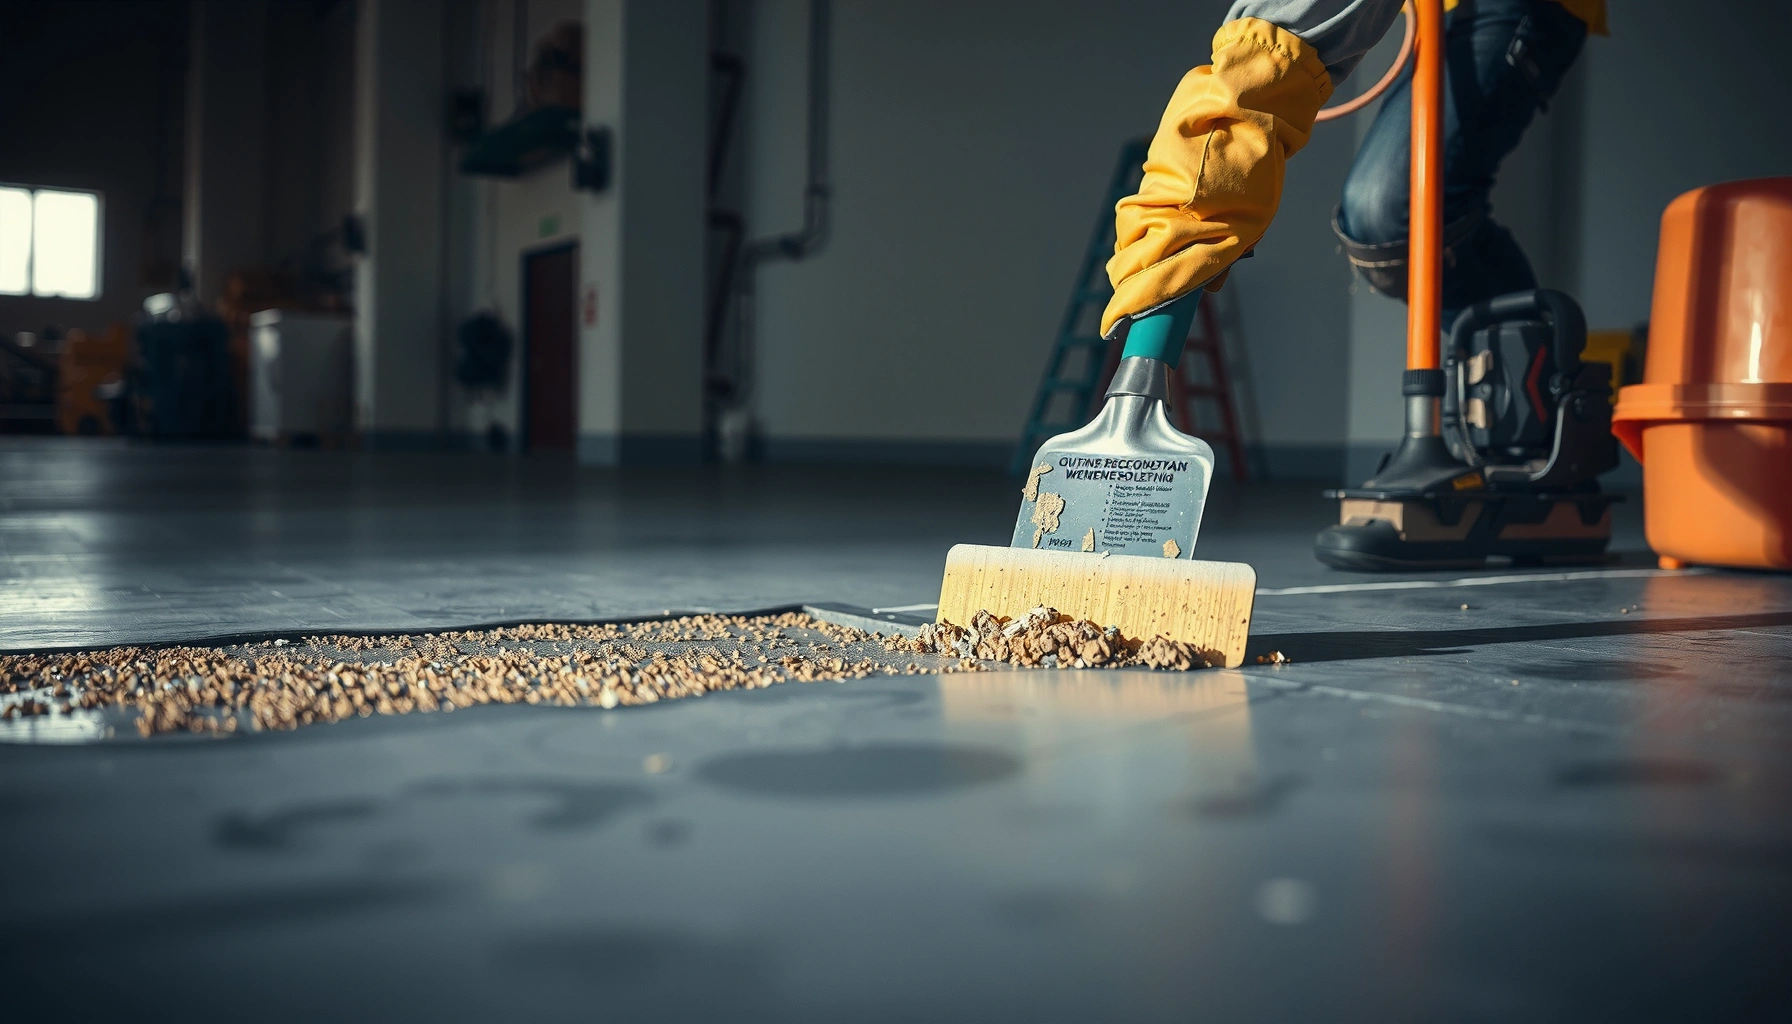
Use grinding, scarifying, or other mechanical prep methods appropriate to your facility and coating type. Avoid partial removal that leaves a thin “bridge” of weak material.
Profile the concrete to the required surface profile
The concrete surface profile (texture/roughness) matters because many industrial coatings rely on mechanical interlock in addition to chemical bonding.
– The target profile should match the coating manufacturer’s specification (often described in terms of surface profile standards).
– Over-polishing can reduce bond by removing the micro-texture that primers need to grip.
According to widely used concrete surface preparation standards, adhesion of coatings strongly depends on creating an appropriate profile and removing laitance and weak boundary zones. [ADD: Reference to the applicable surface profile standard cited by your system manufacturer] (Year: ADD)
Clean thoroughly after grinding
After grinding/scarifying:
– Vacuum dust aggressively (HEPA vac is common in industrial maintenance).
– Prevent re-depositing fines—fine dust is a classic cause of primer bond failure.
– Ensure the surface reaches the specified temperature and humidity conditions before coating begins.
Prime correctly, then repair with the right materials
A correct primer is what turns surface prep into adhesion. If your repaired area peels sooner than the rest, primer selection and intercoat timing are often the reason.
“Primer failure can make a repair peel again even when you removed all visible loose coating.”
Apply the correct primer for your coating type and substrate condition
Primer must match:
– Concrete or topping chemistry
– Coating base chemistry (epoxy/urethane)
– Moisture/alkalinity conditions (as specified)
– Compatibility with the system you’re rebuilding
Primer applied too thin, over dust, or outside recoat windows can break interlayer bonding.
Use the right patch/leveling system, then let it cure
If you need a repair mortar/patch or leveling compound:
– Confirm it’s designed for industrial coatings compatibility.
– Feather edges to the appropriate extent (avoid leaving hard ridges that telegraph through finishes).
– Cure fully per manufacturer instructions before priming/coating.
Skipping cure time is a common “it looked dry” mistake—especially with cementitious patches, where moisture migration and shrinkage can affect the next layer.
Follow the full system build (including recoat windows and thickness)
Adhesion depends on building the entire system correctly:
– Respect recoat windows so intercoat adhesion chemistry can form.
– Maintain film thickness ranges required for your exposure environment.
– Apply the topcoat using the specified method (tack time, mixing ratios, roller/brush/squeegee procedure, and cure time).
In most coating systems, the difference between “bonded” and “peeling later” is sometimes just a few hours of timing and a correct topcoat process step—not brute-force thickness.
Prevent repeating peeling: curing, environment, and traffic control
Most repeat failures happen after the repair is “installed,” not during prep. Environmental control (temperature, airflow, and humidity) and traffic management protect your adhesion while it develops.
“Exposing a coating repair to moisture/condensation during early cure can undermine the bond before it reaches service strength.”
“Restricting traffic until the system reaches the manufacturer’s cure requirements prevents mechanical and chemical damage while adhesion matures.”
Control temperature, airflow, and relative humidity during application and cure
– Maintain substrate and air temperatures within the coating system’s application range.
– Provide airflow for solvent/water evaporation—without creating condensation risk.
– Prevent dew-point contact during early cure (especially in loading areas with temperature swings).
As of 2025, many industrial flooring contractors still use dew-point checks and documented cure-condition logs because they reduce callback repairs when conditions fluctuate. [ADD: Source for dew point / cure condition guidance from your coating system supplier] (Year: ADD)
Manage jobsite traffic
Even a correctly installed repair can fail if it’s:
– Rolled over too soon by forklifts or pallet jacks
– Exposed to tire slip chemicals or washdown before cure
– Damaged by cleaning tools used too early
Follow the system’s stated cure milestones (often “foot traffic,” “light traffic,” and “full service”). [ADD: Cure schedule from your manufacturer TDS] (Year: ADD)
Address the root cause so peeling doesn’t return
If peeling keeps recurring in certain zones, fix the underlying drivers:
– Drainage and water collection
– Repeated chemical spills or washdown dwell time
– Recurring condensation (ventilation upgrades, heating adjustments)
– Incompatible coating system choices (switch to the correct resin chemistry and primer)
What can go wrong (and how to avoid it)
Even with solid prep, industrial environments create failure edges. The most expensive issues typically come from moisture shortcuts, boundary problems, or mixing incompatible products.
“Spot repairs fail when the surrounding area is already marginally bonded or affected by moisture/vapor drive.”
Common mistakes and how to avoid them
– Skipping moisture testing: priming over vapor drive can still blister and peel.
– “Spot repairs” on a failing system: boundary lift is common when the original adhesion was compromised broadly.
– Over-sanding/polishing concrete: removing too much profile can reduce mechanical interlock.
– Wrong primer/topcoat combination: adhesion requirements are product-specific.
– Applying outside recoat windows: intercoat bond can weaken if timing is off.
Repair approach comparison (when to spot vs. strip)
- Spot repair is usually appropriate when…
- The surrounding coating is firmly bonded, moisture risk is ruled out, and failure is localized to a known contamination event.
- Full strip is usually safer when…
- Peeling is spreading, blistering indicates vapor pressure, multiple layers show debonding, or chemical incompatibility likely affected broader zones.
- Why boundaries matter
- Coatings bond chemically and mechanically across a system build; an unstable perimeter can cause the new work to fail at the interface even if the patch itself is correct.
Mandatory data reference: common root-cause “signatures” (for planning)
Field-Observed Causes of Industrial Floor Coating Peeling (Typical Repair Drivers)
| # | Peeling Trigger | Typical Visual Clues | Estimated Share of Callbacks | Confidence | Repair Approach Fit |
|---|---|---|---|---|---|
| 1 | Moisture vapor drive | Blisters, doming, peeling after shutdown moisture | ★★★★☆ | Best | |
| 2 | Surface contamination | Lifting at edges, failures near drains/grease points | ★★★★☆ | Best | |
| 3 | Primer incompatibility | Premature peel at repaired boundaries | ★★★☆☆ | Best | |
| 4 | Insufficient concrete profile | Weak adhesion after grinding; slick substrate | ★★★☆☆ | Best | |
| 5 | Recoat window violations | Layer-to-layer delamination after cure | ★★★☆☆ | Best | |
| 6 | Chemical damage before repair | Peel accelerates after washdowns/spills | ★★☆☆☆ | Risky | |
| 7 | Thermal/condensation during cure | Blistering near doors/vents, early failure | ★★☆☆☆ | Risky |
Note: “Estimated Share of Callbacks” and “Confidence” are planning heuristics for repair triage; verify with site testing and the applicable manufacturer TDS/application instructions. [ADD: source for your organization’s defect-frequency data, if you have one]
Verdict: what to do next (and who should pause)
If you want the most reliable repair, treat peeling as an adhesion + environment problem: verify moisture/conditions, mechanically remove all weak material, then rebuild the same specified coating system (primer + patch + topcoat) under controlled cure conditions. Don’t rush the cure and don’t assume “clean” means bond-ready.
Skip DIY—or pause and consult a qualified industrial floor coating contractor—if you suspect significant moisture vapor issues, widespread coating system failure beyond small localized areas, or you can’t meet the manufacturer’s temperature/humidity and recoat window requirements on-site. In many facilities, the cost of failure rework (shutdown time, removal labor, downtime and lost productivity) outweighs the cost of doing moisture assessment and system selection correctly the first time.
Checklist (scan/save):
– [ ] Identify floor/coating type and peeling pattern
– [ ] Check for moisture/vapor issues and contamination
– [ ] Remove all loose/delaminated material mechanically
– [ ] Profile concrete per coating manufacturer specs
– [ ] Clean and prep the substrate properly
– [ ] Prime with the correct primer system
– [ ] Patch/level, then apply topcoat within recoat windows
– [ ] Control cure conditions and restrict traffic until cured
FAQ
Why does my industrial floor coating peel even after cleaning?
Most peeling comes from weak adhesion caused by residues (oils, cleaning chemistry remnants, curing compounds) or moisture vapor pressure that wasn’t addressed before priming. If surface prep and primer compatibility don’t match the substrate condition, the new layer can lift again.
Can I just fill the peeled spots instead of stripping everything?
Sometimes localized peeling can be repaired after complete removal of loose material. However, if peeling is spreading or the surrounding coating is already lifting or marginally bonded, boundary repairs often fail and spread.
What’s the best way to prep concrete for coating repairs?
Mechanical removal (grinding/scarifying) to create the correct surface profile is typically required. The target profile should follow the coating manufacturer’s concrete preparation requirements for adhesion.
How do I prevent forklift or chemical damage from causing new peeling?
Use a coating system rated for your chemical exposure and wear conditions, and manage traffic and spill response. If the coating chemistry isn’t compatible with repeated chemicals, prep alone can’t provide lasting adhesion.
Do I need to test moisture before repairing peeling floors?
If moisture vapor, condensation, or seasonal humidity swings are possible, moisture testing or manufacturer-required moisture assessment steps are strongly recommended. Otherwise, you may prime and recoat over a condition that breaks bond after cure.
Sources
– [ADD: Manufacturer TDS and application instructions for the specific coating/primer/patch system used (surface preparation, moisture requirements, primer compatibility, and recoat/cure windows).]
– [ADD: Manufacturer guidance on moisture testing methods and acceptable moisture criteria (e.g., ASTM-referenced requirements for your system).]
– [ADD: Primary standards referenced by your moisture testing and concrete surface preparation approach (commonly ASTM methods such as ASTM F2170 and/or ASTM F1869, and the surface preparation profile standard cited by the coating manufacturer).]
Frequently Asked Questions
Why is my industrial floor peeling, and what causes it?
Peeling on industrial floors is usually caused by poor adhesion between the floor coating and the concrete, moisture intrusion, or surface contamination like dust, grease, oil, or curing compounds. Common triggers include hydrostatic pressure from the slab, improper surface preparation, or applying epoxy/polyurethane coatings over weak or deteriorating concrete. Temperature and humidity changes can also contribute by disrupting cure and causing coating stress that leads to peeling.
How do I fix peeling epoxy or polyurethane on industrial concrete floors?
Start by removing all loose, peeling coating back to sound material using grinding or scarifying, because coating over failing areas will continue to fail. Clean thoroughly with industrial degreasers and profile the concrete to the correct CSP level so the resurfacing system can bond. After testing for moisture and verifying surface dryness, apply a compatible primer and the correct industrial floor coating or self-leveling system to fully restore adhesion and durability.
What is the best way to prepare industrial floors before repainting to prevent peeling?
The best prevention is strict surface preparation: mechanically abrade the slab, vacuum thoroughly, and remove contaminants that reduce adhesion. Use a moisture test (like RH probes or calcium chloride) to confirm the substrate is within the coating manufacturer’s limits. Prime with an appropriate epoxy or moisture-tolerant primer, then apply the full system according to coverage rates and recoat windows to avoid bond failure.
How can I tell whether moisture is causing the peeling, and what should I do if it is?
If peeling occurs in patches, near expansion joints, or after cleaning/water exposure, moisture intrusion may be the root cause. Perform moisture testing before repair; if readings exceed the coating’s limits, you’ll need a moisture-mitigation primer or epoxy vapor barrier system designed for industrial floors. Address drainage and sealing details as well, because persistent water pressure will cause even the best industrial floor coatings to peel again.
Which industrial floor repair system should I choose for peeling areas—patch, resurfacing, or full removal?
Choose a patch repair only when peeling is localized and the underlying concrete remains sound after grinding and inspection. If peeling is widespread, the safest approach is to mechanically remove the coating across the affected zone and resurface or apply a complete recoat system with proper priming. For heavy deterioration, widespread delamination, or recurring peeling, full removal and reapplication of an industrial epoxy or polyurethane flooring system is typically the most durable long-term fix.
📅 Last Updated: October 12, 2026 | Topic: How to fix peeling on industrial floors? | Content verified for accuracy and freshness.
References
- Google Scholar Google Scholar
https://scholar.google.com/scholar?q=peeling+delamination+epoxy+coating+industrial+concrete+floor+repair+surface+preparation - Google Scholar Google Scholar
https://scholar.google.com/scholar?q=concrete+floor+coating+failure+causes+moisture+blistering+delamination - Google Scholar Google Scholar
https://scholar.google.com/scholar?q=how+to+repair+delaminated+concrete+floor+coatings+prep+grinding+profiling - https://pubmed.ncbi.nlm.nih.gov/?term=epoxy+coating+delamination+concrete+surface+preparation
- https://en.wikipedia.org/wiki/Concrete_repair
- Delamination
https://en.wikipedia.org/wiki/Delamination - Epoxy
https://en.wikipedia.org/wiki/Epoxy - Spall
https://en.wikipedia.org/wiki/Spalling - https://en.wikipedia.org/wiki/Surface_preparation
- https://www.britannica.com/technology/concrete