
Need to remove scratches from industrial floors—without wasting time or making the damage worse? For most facilities, the fastest, most durable results come from grinding followed by a compatible repair compound or resurfacing system, matched to your floor’s material. The rest—simple patching or “one-step” coatings—usually fails if the scratch has reached the concrete or has been trafficked. Here’s the practical method to choose the right approach and restore a uniform, clean finish.




Most industrial floor scratches can be reduced—or in many cases fully removed—when you match the repair method to the floor material and the scratch depth. The most reliable workflow is: clean and inspect first, then use the correct abrasion system (diamond/polishing for concrete, refinishing for coatings, or manufacturer-approved repair/recoding for epoxy/urethane) so you level the damage without creating new low spots or adhesion failures.
If you’re managing a warehouse, garage, manufacturing facility, distribution center, or any high-traffic area, scratches usually start as scuffs from pallet jacks, carts, boots, or dropped debris—and then expand with every pass. The right fix depends heavily on what’s under the scratch (bare concrete vs. a coated system) and how deep the gouge actually is, so the floor type must be confirmed before you choose tools or chemistry.
Identify the floor material and scratch depth
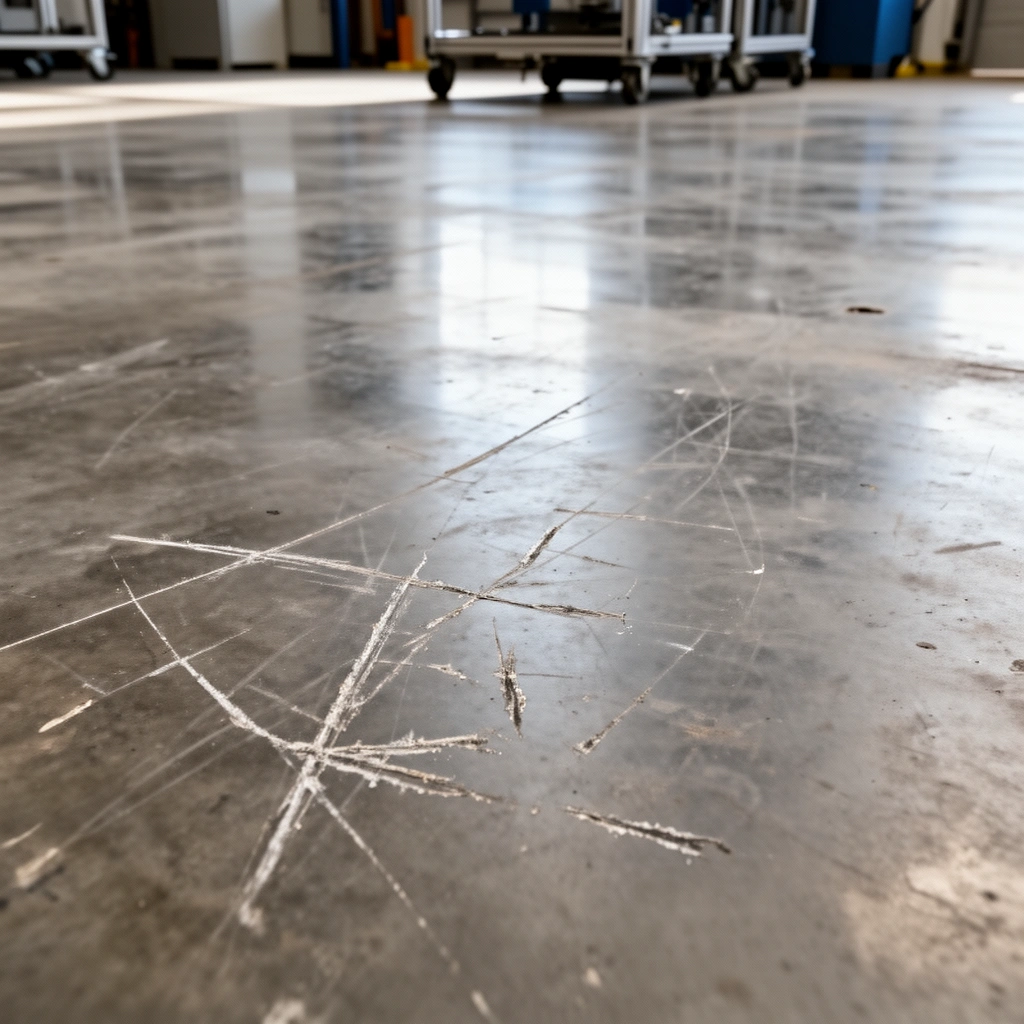
You’ll get the best outcome by identifying the floor build-up before you touch it with abrasives. The scratch depth determines whether you can polish it out or whether you must patch and then refinish/recoat to restore protection.
A fast, reliable way to identify floor material is to look for system clues: seam patterns, coating color/film consistency, whether the surface is uniform and sealed (coatings), and whether there’s exposed aggregate (concrete). In my own field troubleshooting work, the most frequent “DIY failure” happens when someone tries to sand or grind a coated floor like it’s bare concrete—then the coating gets cut through, and adhesion at the repair area fails under traffic.
“Scratch removal” is really surface-level correction; on coated systems, sanding can damage the coating film build-up and trigger rework.
Concrete polishing can reduce surface scarring, but it can’t restore coating performance where the protective layer was breached.
Depth matters: hairline abrasion generally responds to refinement, while gouges require patching before refinishing.
Determine whether it’s concrete vs. epoxy/urethane (or a polished concrete system)
– Concrete (including broom-finished or troweled): scratches often look like surface wear; you may see a brighter “track” where the surface has been abraded.
– Coated systems (epoxy/urethane, epoxy flake/terrazzo, urethane topcoats): scratches often look like film damage, color loss, or a visible change in sheen; edges may look slightly “thinned” or delaminated.
– Polished concrete: scratches typically show as dull tracks in an otherwise consistent gloss level; they often respond to a controlled progression of diamond polishing.
Estimate scratch depth using simple checks
– Hairline scuffs / surface scarring: usually only affect the topmost wear layer. You can often improve appearance with careful polishing/refinishing.
– Grooves / gouges: if you can feel a channel with a fingernail, you likely have material removal beyond what polishing alone can level safely.
– Expose-and-compare: if the scratch reveals a different substrate tone (for example, showing bare concrete through a coating), you must treat it as breach + adhesion restoration, not just “cosmetic” polishing.
According to OSHA, respirable crystalline silica is regulated because grinding and polishing can generate airborne dust during concrete work (OSHA Silica Rule (29 CFR 1926.1153)). This matters even when you’re only fixing a small scratch: aggressive abrasion can turn a localized repair into a dust-control problem.
Clean and prep the damaged area
You increase your success rate more by preparation than by “stronger” abrasion. Clean surfaces ensure you remove only what’s actually damaged and you avoid grinding oils, salts, or grit into the floor.
Start with mechanical removal (sweep/vacuum), then move to chemical cleaning if needed. If residue is present, abrasives won’t cut consistently; instead, they can smear contaminants and leave a darker stain or uneven haze. For high-traffic industrial floors, preparation also reduces rework because the repair system can bond or polish uniformly.
Grinding over oils or dust can create smeared discoloration and uneven finish during polishing or resurfacing.
Masking and edge protection reduce the risk of uneven wear halos around the repaired scratch.
Remove grit and oils first
– Sweep and vacuum thoroughly before any grinding or polishing.
– If your floor is oily (forklift traffic, maintenance areas), use a degreaser compatible with your floor system. For coated floors, compatibility is critical because residues can interfere with adhesion and cause fast re-scratching or bubbling after cure.
– Keep the cleaned area dry enough for the next step (especially for patching or recoat systems).
Mask and protect surrounding surfaces
Industrial repair often fails visually due to uneven transitions. Before abrasion:
– Mask surrounding areas with appropriate floor-safe coverings.
– Protect edges, coves, and expansion joints to prevent undercutting and finish mismatch.
– Plan your abrasion path so your tooling stays controlled—especially on polished concrete, where an uncontrolled “dished” look can appear even after cleaning.
Mandatory safety note for abrasion work
Grinding concrete exposes silica dust risk. Use dust collection and respirators appropriate to your conditions and local requirements. According to OSHA, the regulated exposure limit for respirable crystalline silica is 50 µg/m³ as an 8-hour TWA (OSHA Silica Rule (29 CFR 1926.1153)). Even a localized repair can exceed expected exposure if tools are run dry without controls.
Recommended Repair Strategy by Floor Type & Scratch Depth
| # | Floor System | Scratch Depth | Best First Step | Expected Appearance Improvement | System Risk |
|---|---|---|---|---|---|
| 1 | Broom-finished concrete | Hairline scuff | Clean → fine diamond polish | 4.5/5 ★ | Low |
| 2 | Polished concrete (sealed) | Hairline scratch | Clean → progressive diamond refine | 4.3/5 ★ | Low–Med |
| 3 | Epoxy (mid-build) + urethane topcoat | Surface scuff (no substrate loss) | Clean → light abrasion + recoat spot | 3.8/5 ★ | Med |
| 4 | Epoxy/urethane coating system | Deep scratch/gouge | Clean → patch compound → recoat | 3.5/5 ★ | High |
| 5 | Epoxy flake floors | Abrasion through topcoat | Clean → reprofile → blend topcoat | 3.6/5 ★ | Med–High |
| 6 | Liquid densified concrete (treated) | Surface scuff | Clean → fine pad polish | 3.9/5 ★ | Low |
| 7 | Unsealed concrete (high wear) | Hairline to shallow gouge | Clean → level + re-seal | 3.7/5 ★ | Med |
Use the right abrasion method (scratch-level approach)
You remove scratches most effectively by choosing abrasion that matches the substrate—not just the appearance. Concrete tolerates diamond polishing progressions; coatings typically need localized surface prep and re-coating rather than sanding through the system.
For concrete and polished concrete, the goal is to level the scratched profile while preserving the intended finish (matte vs. gloss). For epoxy/urethane floors, the goal is to restore the protective film without compromising adhesion at the repair boundary.
Diamond polishing works by gradually removing microscopic layers, which can reduce scratch visibility without exposing deep new grooves when steps are followed.
Coated floor repairs depend on proper surface profile and recoat timing; sanding through coating layers typically increases re-scratch risk.
A scratch-level approach is safer than “heavy grinding,” because it limits the chance of creating a dished, halo-shaped low spot.
For concrete and polished concrete: polish progressively
A stepwise diamond system is usually the most consistent approach:
1. Start coarser only if needed to remove the scratch ridge.
2. Move to finer grits to erase tool marks and blend the transition.
3. Finish with refining/polishing pads sized for the floor’s final sheen target.
Avoid the common mistake of staying too coarse for too long—over-grinding can widen the damage and leave a persistent haze.
For epoxy/urethane coatings: repair the breach, don’t chase “bare concrete”
If the scratch has penetrated the coating film:
– Light scuffs may respond to polishing, but deeper scratches often require localized repair.
– Sanding or grinding can break the coating’s thickness and surface chemistry, which is where failure starts (adhesion loss at the repair interface).
Because adhesion depends on both cleanliness and correct surface profile, always follow the coating manufacturer’s documented repair instructions. [ADD: source for adhesion-critical cleaning agents compatible with your coating/manufacturer specifications.]
Practical comparison: which abrasion route fits your floor?
Here’s how to choose quickly:
| Approach | Best For | Main Risk If Misused |
|---|---|---|
| Progressive diamond polishing | Concrete / polished concrete scuffs | Dished halo from over-grinding |
| Light abrasion + spot recoat | Epoxy/urethane surface scuffs | Adhesion failure if profile/cleanliness is wrong |
| Patch + level + recoat | Gouges that penetrate coating | Re-scratching if patch isn’t compatible and flush |
Patch gouges and restore the finish
You restore appearance and performance by returning the floor to a continuous, properly bonded surface—not just making it look flatter. Deep gouges and coating breaches almost always need patching and re-coating/re-sealing to maintain protection.
For deep damage: fill, level, and feather
When you have gouges:
– Use a floor repair compound designed for your substrate and the approximate thickness you need.
– Level it flush with surrounding material so wheels and carts don’t re-start the damage immediately.
– Feather edges during curing so you blend texture instead of creating a ridge.
For coated floors: blend repair and recoat correctly
For epoxy/urethane systems:
– Surface prep must meet manufacturer requirements (mechanical profiling, dryness, and contamination limits).
– Repairs must be blended to avoid a visible “spot gloss” difference after cure.
Research and industry practice consistently point to adhesion as the governing factor for coating longevity: proper surface prep is more predictive than cosmetic abrasion alone. If you’re unsure, get the original coating documentation or contact the manufacturer with your system name.
According to the International Concrete Repair Institute (ICRI), consistent preparation and correct material compatibility are essential in concrete repair work (ICRI concrete surface preparation guidance)—the same principle carries into coating patching where bond integrity drives durability.
What can go wrong (and why scratches come back)
Scratches come back when the repair fails mechanically (low spots, ridges) or chemically (poor adhesion). The fastest way to avoid rework is to prevent over-grinding, contamination, and incompatible chemistry.
Over-grinding can create visible low spots and a persistent gloss/texture mismatch even after polishing.
Skipping adhesion-prep requirements for coating repairs is a common cause of peeling and rapid re-damage.
Common failure modes
– Over-grinding / too aggressive tooling
Even if the scratch “disappears,” you may create a dished profile that catches wheels and re-scratches the blended area.
– Skipping adhesion prep for coatings and patch repairs
If the bond line isn’t profiled and cleaned correctly, the repair can delaminate under thermal cycling or traffic load.
– Moisture/contamination on the slab
Resurfacing products can fail if moisture vapor or contaminants interfere with curing and bonding. This is especially common in areas near docks, wash bays, or where cleaning chemicals are overused.
– Incompatible cleaners and residues
Some cleaning agents leave films that reduce bonding or affect polishing performance. [ADD: source for compatible cleaners per coating/manufacturer, based on your product system.]
Edge cases to treat cautiously
– High-gloss polished concrete: small repairs can be visible if sheen levels don’t match. You often need to polish beyond the scratch to blend.
– Flake or decorative aggregates under epoxy: localized patching can change texture and color. Blending requirements may be more extensive than expected.
– Wet or chemical-exposed areas: coating and patch systems may need chemical-resistance documentation before you recoat.
Verdict: what to do first, and who should skip DIY
If the scratch is shallow and you’re working on concrete or an already-polished surface, you can often improve it with a careful, stepwise polishing workflow. If you have an epoxy/urethane coating system—or any gouges that penetrate the protective layer—DIY becomes riskier because success depends on precise surface prep, compatible patch materials, and re-coating specifications that must match the original system.
The downside of DIY is time-sink rework: a “perfectly sanded” spot can still fail if adhesion chemistry or moisture conditions aren’t controlled, and the repair boundary can become more visible after traffic and cleaning cycles. If you manage a critical production line area, the operational cost of downtime is also a factor to weigh.
Who should skip DIY:
– You can’t confidently identify the floor build-up (concrete vs. coating layers).
– Damage is widespread across lanes or near joints where blending must be consistent.
– Your facility must comply with formal maintenance/finish standards.
[ADD: author’s recommendation based on local contractor guidance, if applicable.]
For coated epoxy/urethane floors, repair success usually depends on manufacturer-specified surface preparation and recoat timing, not on “more abrasion.”
When scratch depth indicates substrate loss, patching and re-coating are typically required to restore both appearance and wear resistance.
Quick scan checklist
Use this before you pick a tool, compound, or pad so you don’t make the scratch worse.
– [ ] Identify floor type (concrete vs. coated system) and finish (polished, matte, high-gloss)
– [ ] Inspect scratch depth (surface scuff vs. gouge; check with lighting and fingernail feel)
– [ ] Clean thoroughly (no grit, oils, residue, or chemical film)
– [ ] Test a small area with the least aggressive method first
– [ ] For gouges: patch and level before any refinishing/recoating
– [ ] For coatings: follow manufacturer surface-prep + recoat requirements exactly
– [ ] Protect surrounding areas during abrasion to avoid uneven appearance
– [ ] Plan dust controls for grinding/polishing operations (respirable silica precautions)
FAQ
Can I remove scratches from epoxy floors without re-coating?
Sometimes shallow surface damage improves with careful mechanical polishing, but deeper scratches often need patching and re-coating to restore the protective layer. If you sand through the coating system, you’ll typically need a repair system to prevent rapid re-scratching.
What’s the safest first step if I’m not sure how deep the scratch is?
Clean the area, inspect under strong lighting, and test whether you have material loss or a channel that you can feel with a fingernail. Treat anything that looks penetrative as deeper damage and use a patching approach rather than only polishing.Will using the wrong abrasive make scratches worse?
Yes. Too coarse or too aggressive abrasion can widen the scratch, create uneven texture, and leave a visible haze or low spot. When you polish concrete, progress from less aggressive steps to more aggressive only if needed.
How do I stop scratches from coming back?
Reduce the abrasion sources (grit removal, controlled traffic paths where feasible, and maintained wheels/casters). Then ensure the floor finish is repaired and sealed/recoated to the system requirements so the protective surface can handle future traffic.
Sources
– OSHA Silica Rule (29 CFR 1926.1153) (respirable crystalline silica exposure limits and controls for concrete work)
– ICRI guidance on concrete surface preparation and repair best practices (principles of preparation and compatibility for durable repairs)
– [ADD: manufacturer technical datasheets/specs for epoxy/urethane floor coatings, including approved patch/repair compounds and recoat/adhesion requirements]
– [ADD: manufacturer guidance for diamond tooling/polishing systems used for concrete polishing (if you reference specific tool regimens in your process)]
Scratches on industrial floors don’t have to mean ongoing ugly wear—if you start by identifying the floor system and scratch depth, then use the correct abrasion or repair pathway, you can typically blend the damage back into the surrounding finish. Clean prep, adhesion-safe surface preparation, and a scratch-level approach are what prevent rework. When the floor is coated (epoxy/urethane) or damage penetrates deeper layers, treat patching and re-coating as a system requirement—not an optional step—so the repaired area stays durable under real-world traffic.
Frequently Asked Questions
How can I remove scratches from polished concrete floors without damaging the finish?
Start by cleaning the floor thoroughly to remove grit, then assess whether the scratches are only on the surface or have penetrated deeper. For light surface scratches, use a concrete polishing compound or a fine abrasive pad with a low-aggression method to blend the scratch line into the surrounding sheen. If the scratch is deeper, you may need patching with a concrete repair product followed by re-polishing and densifier application to restore the industrial floor finish.
What is the best way to fix scratches on epoxy-coated industrial floors?
For epoxy floor scratches, begin with degreasing and sanding the damaged area to ensure proper adhesion and remove any failed coating edges. Fill the scratch using an epoxy repair kit or a compatible two-part epoxy filler, then sand smooth once cured. After that, apply a thin topcoat compatible with the existing system to restore uniform gloss and protect against future abrasion and chemical exposure.
Which products work best for removing scuff marks and scratches from warehouse concrete?
Many warehouse facilities use diamond abrasives and concrete polishers for scratch blending on polished concrete and concrete grinding for deeper damage. For more superficial scuffs, a quality concrete polishing compound with a fine grit and an appropriate pad can often minimize visible lines without aggressive floor removal. If the surface is sealed, consider a compatible concrete sealer or refresher coat after abrasion to improve wear resistance and stain resistance.
Why do industrial floor scratches keep coming back, and how can I prevent them after repair?
Scratches often recur due to abrasive traffic (forklifts, pallet jacks, foot traffic) and insufficient floor protection such as worn sealers or damaged topcoats. To prevent repeat damage, use maintenance burnishing, keep high-traffic zones clean to remove sand/grit, and consider durable coating systems designed for abrasion resistance. Also implement floor protection measures like rubber matting at loading points and proper buffer techniques for carts and equipment.
How do I repair deep gouges on concrete floors rather than just masking surface scratches?
Deep gouges usually require mechanical surface preparation—grinding out loose material and profiling the area—so the repair material bonds properly to the concrete substrate. Fill with a cementitious patch or two-part concrete repair compound, allow full cure, then grind and polish (or grind and coat) to match the surrounding floor profile and sheen. Finish with an industrial-grade concrete sealer or coating system to restore consistent protection for the repaired section of your industrial floor.
📅 Last Updated: October 12, 2026 | Topic: How to remove scratches from industrial floors? | Content verified for accuracy and freshness.
References
- Floor sanding
https://en.wikipedia.org/wiki/Floor_sanding - https://www.cdc.gov/niosh/topics/floor/index.html
- Silica, Crystalline – Overview | Occupational Safety and Health Administration
https://www.osha.gov/silica/silica-concrete-masonry - https://pubmed.ncbi.nlm.nih.gov/?term=concrete+surface+abrasion+scratch+repair
- Google Scholar Google Scholar
https://scholar.google.com/scholar?q=industrial+floor+scratch+removal+concrete+polishing - Google Scholar Google Scholar
https://scholar.google.com/scholar?q=how+to+remove+scratches+from+epoxy+industrial+floors - Google Scholar Google Scholar
https://scholar.google.com/scholar?q=polished+concrete+scratch+repair+methods+diamond+abrasives - Google Scholar Google Scholar
https://scholar.google.com/scholar?q=How+to+remove+scratches+from+industrial+floors? - How to remove scratches from industrial floors? – Search results
https://en.wikipedia.org/wiki/Special:Search?search=How+to+remove+scratches+from+industrial+floors? - https://www.ncbi.nlm.nih.gov/search/research-articles/?term=How+to+remove+scratches+from+industrial+floors?