

Want to install around stairs commercial floors without costly mistakes or uneven transitions? This step-by-step guide shows the fastest, most reliable method—layout, subfloor prep, fitting the perimeter, and finishing tight around the stair edges. You’ll get a clear workflow that works for real jobsite conditions, so the floor looks right and performs for the long haul.
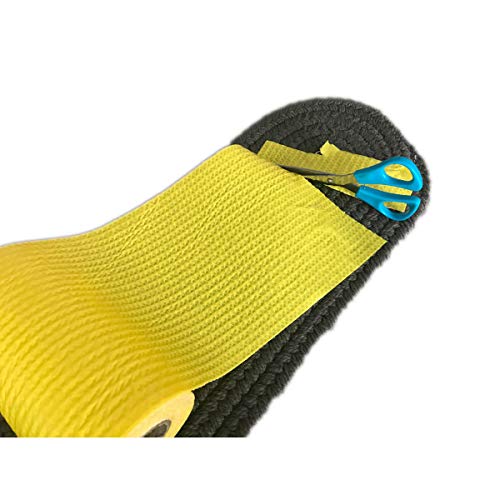



Installing around stairs in commercial floors is mostly about creating tight, consistent transitions at each tread and riser, then locking the finish so edges won’t lift under traffic. Start by measuring every tread/riser carefully, planning your transition layout (including reducers/trim if needed), and using the correct adhesive/fastening system for your flooring type.
This guide is for facility managers, flooring installers, and contractors working in high-traffic commercial spaces where stairs create tricky edge lines, thresholds, and elevated risk of moisture/impact failures.
Plan the layout before you cut anything
The fastest way to avoid callbacks on stair detailing is to commit to your transition strategy before you cut any flooring. If you decide where the nosing line finishes and what trim or reducer covers the vulnerable edge, your cuts become repeatable and your layout stays consistent across every tread.
In commercial stair detailing, layout planning is what determines whether the flooring edges land under trim (protected) or in the open (wear-prone).
Accurate tread/riser measurements are essential because even small height or projection differences can telegraph as visible gaps at the nosing line.
A staged installation plan—field first, stair edges last—reduces patchwork cuts and makes it easier to keep reveal lines straight.
– Measure stair geometry (tread depth, riser height, nosing projection) and confirm every stair matches or note variations before you order materials.
In many commercial buildings, stairs look uniform but aren’t. Take measurements from multiple treads (for example, the first, middle, and last flight) so you can spot systemic variance—often caused by renovation work, releveling, or differential settlement.
– Decide your transition method up front: continue the field across steps, use stair-nosing/edge trim, or treat each step as a separate “run” depending on your flooring system.
“Continue the field” can look seamless, but it shifts the burden onto precise edge bonding. Trim-and-nosing approaches shift the burden to a mechanically durable edge line—usually a better choice when the stair will see heavy rolling loads, carts, or abrasive traffic.
– Dry-fit and mark reference lines on site so the pattern stays square and the edges land where trim can fully cover gaps.
Use a laser or long straightedge to establish a consistent reference line along the stair run. Then mark: (1) tread front/nosing line, (2) riser top line, and (3) where your reducer/edge trim will sit.
ADA dimensions you can use to sanity-check your stair geometry
Even if you’re not certifying the stair itself, ADA/ICC dimension ranges provide a useful baseline for what “normal” stair geometry tends to look like. This helps you catch outliers before they become installation defects.
ADA 2010 Stair/Handrail Dimensions That Affect Floor Edge Detailing
| # | Stair element | Dimension limit | Why it matters at treads/edges | Reference |
|---|---|---|---|---|
| 1 | Max riser height | 7.75 in (196 mm) | Controls riser cut height repetition | ADA 2010 |
| 2 | Min riser height | 4 in (102 mm) | Helps detect outlier treads that can cause edge gaps | ADA 2010 |
| 3 | Min tread depth | 11 in (279 mm) | Affects how far the flooring edge can sit before wear | ADA 2010 |
| 4 | Landings between stair flights | ≥ 36 in length | Determines where your field transitions should break | ADA 2010 |
| 5 | Handrail height | 34–38 in (864–965 mm) | Influences where tread/riser finishes can interfere with grasp clearance | ADA 2010 |
| 6 | Handrail clearance from wall | ≥ 1.5 in (38 mm) | Protects edges where trim meets wall-adjacent flooring | ADA 2010 |
| 7 | Vertical grasp space impact | ~ 2 in clearance (grasp geometry) | Avoids trim buildup at stair edge lines that can violate clearance | ADA 2010 |
These are dimension baselines drawn from ADA 2010 accessibility guidance, included here as a practical “sanity check” when you verify stair geometry on site. [ADD: cite ADA Standards for Accessible Design (2010), stair and handrail dimensions]
Prep the stairs for a clean, stable substrate
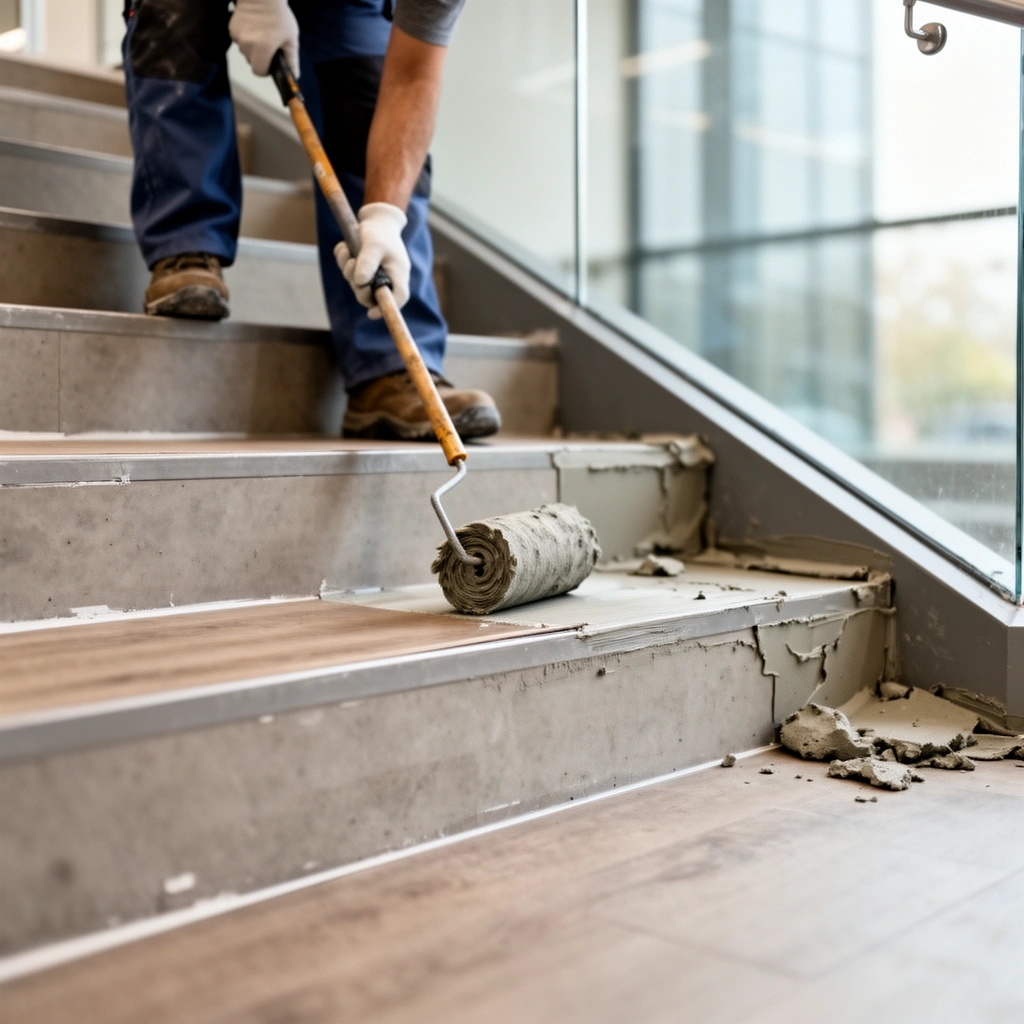
The right answer for commercial stair installs is: treat the substrate as the actual foundation of your flooring system, not just the thing you glue to. Once the stairs are sound, smooth, and compliant with moisture requirements, tight stair transitions become achievable.
Flooring manufacturers typically require specific surface preparation and moisture compliance; ignoring those requirements increases the odds of edge lift and seam failures.
Uneven risers and loose substrates are common causes of visible pattern steps and open edges at nosing lines.
Acclimation (when required) helps stabilize dimensional movement so stair cuts don’t loosen after installation.
– Remove old flooring/adhesive residue and verify the surface is solid, smooth, and properly prepared for your flooring manufacturer’s requirements.
In commercial stairs, residue can be more than cosmetic—soft adhesive or patch compounds can deform under repeated footfall and cart traffic, telegraphing as lifting edges.
– Address common substrate issues early: uneven risers/treads, loose material, cracking, or inconsistent height changes.
Repair inconsistencies before you start laying flooring. If you try to “make the flooring fit,” you’ll often end up with thinner bonding lines at the edges, which is where failures begin.
– Confirm moisture/alkalinity requirements (only based on your flooring system instructions) and acclimate flooring as required before installation.
Moisture management is not one-size-fits-all. Follow the specified testing method and limits in the manufacturer’s technical documentation, and document results for warranty traceability.
A quick “substrate readiness” comparison installers can use
When you see stair edge problems in the field, you’re usually choosing between (a) fixing the substrate or (b) changing detailing. Here’s how those decisions typically break down:
| Problem you see at stair edges | Likely root cause | Better first move |
|---|---|---|
| Edge is lifting after a few weeks | Inadequate prep, poor adhesive transfer, or wrong edge trim | Correct bonding approach + follow manufacturer stair trim requirements |
| Pattern “steps” look worse near nosings | Risers/treads vary more than assumed | Re-measure + repair inconsistent stair heights before install |
| Gaps widen after installation | Movement from moisture/temperature or wrong clearance | Re-check acclimation + expansion clearance spec |
Install the flooring up to the stair edges (and protect the reveals)
The most reliable approach is to install the main floor areas first, then finish stair edges with the transitions you planned. This keeps the stair line from becoming a patchwork seam and helps you control expansion and reveal placement.
Finishing stair edges intentionally (with planned trim/reducers) is usually more durable than relying on precise “freehand” exposed edges.
Adhesive systems specify trowel size, open time, and curing/dwell times; following them improves edge bond reliability under impact.
Stairs experience more movement and abrasion than flat floors, so expansion/clearance rules deserve extra attention at edge lines.
– Install the main floor area first so stair edges can be finished cleanly with planned transitions rather than “patchwork” cuts.
This sequencing also gives you a chance to confirm that your field layout is square before you start repeating stair-specific cuts.
– Maintain consistent expansion/clearance as directed for your flooring type, especially near stair edges where movement and impact are higher.
If your flooring system allows/uses expansion clearance, keep the clearance consistent at the stair interface. Inconsistent clearance can show up as rippling reveals and edge lift at high-wear points.
– Use the manufacturer-approved adhesive and application method (trowel size/coverage, dwell times, and curing limits) so the edge bonds properly and stays flat.
Even the best stair trim won’t prevent failure if the adhesive fails to transfer at the edge. Follow coverage rate guidance and respect curing limits before reopening to heavy traffic.
Work each step: treads, risers, and nosing transitions
The core install answer for around-stair floors is: treat each tread and riser edge as a critical detail, then cover the nosing line with a system-approved edge solution. If the edge is protected and the cut alignment is repeatable, stair installations perform like a commercial-grade system—not a cosmetic retrofit.
Most visible stair-flooring failures concentrate at the nosing line because it’s the first edge to absorb impact and abrasion.
Dry-fitting stair pieces at the nosing reference line is a practical control step for alignment before final bonding.
Using stair-specific nosing/trim solutions transfers wear away from the flooring core and into a mechanically supported edge component.
– Cut pieces to match the tread/riser geometry, then dry-fit to check alignment at the nosing line—this is where most visible mistakes happen.
Pay special attention to nosing projection: if the nosing changes even slightly from one step to the next, the same cut template may not work across the whole flight.
– Use stair-specific edge solutions (stair nosing, corner trim, or transition strips) to cover the vulnerable edges and reduce wear from foot traffic.
Choose stair trim based on the flooring type and manufacturer compatibility. Corner trims are often the difference between “edge lift” and “edge durability.”
– Press/secure progressively and keep joints tight where the stairs will see repeated impact; follow the flooring system rules for seam placement and stagger (if applicable).
If your flooring system specifies seam placement, keep to it. On stairs, seam placement isn’t aesthetics—it’s where flex and stress concentrate.
Pros/cons: common stair transition detailing strategies
Different detailing approaches can be valid; the trade-off is where you accept risk—at the cut edge or at the trim line.
| Detailing method | Pros | Cons |
|---|---|---|
| Protected nosing/edge trim | Best edge durability; predictable finish line | More components to coordinate; requires accurate trim height setup |
| Field-continuation across treads | Seamless visual continuity | Exposed edges can lift if bonding isn’t perfect |
| Separate “runs” per step | Easier to match variable stairs | More joints; more opportunities for misalignment if not templated |
What can go wrong (and how to avoid it)
The quickest way to reduce stair-edge failures is to identify which failure mode you’re seeing and correct the underlying system mistake—adhesion, substrate, clearance, or detailing. Stair failures rarely come from one cause; they come from skipping one critical control step.
Edge lift at stair nosings commonly traces back to inadequate adhesive coverage, insufficient surface prep, or skipping manufacturer-required trim.
Pattern “steps” often indicate stair-to-stair geometry variation that wasn’t measured before committing to cuts.
Widening gaps over time usually point to expansion/clearance mis-specification or failure to follow acclimation requirements.
– Lifting edges at stair nosings: usually caused by incorrect adhesive, inadequate surface prep, poor coverage, or skipping required edge trim.
Fix typically involves correcting bonding method first (trowel/coverage/dwell) and restoring the correct trim solution, not just re-gluing the edge.
– Visible steps in the pattern: caused by assuming every tread/riser is identical—measure and account for variation before you commit to cuts.
If the stair geometry varies, you may need step-specific templates rather than one “universal” cut set.
– Gaps that widen over time: typically a clearance/expansion issue or flooring installed without required acclimation/conditions.
When gaps widen, it’s often movement plus weak edge support—meaning the edge needs protection and the installation needs compliance.
– Uneven transitions between flat areas and stairs: happens when you don’t plan where reducers/trim will sit or when substrate height differences aren’t addressed.
Transitions should be planned as a system detail, including how the reducer height interacts with tread thickness.
Verdict / tip: do this in-house only if you can follow the system specs
If you’re comfortable installing to manufacturer instructions (especially adhesive/trim requirements and moisture/prep rules), installing around stairs can be straightforward and durable. If your stairs are inconsistent, the substrate is questionable, or you don’t have a clear transition plan for the nosing and edges, you’ll likely end up with lifting seams and ugly reveals—so consider using an installer experienced with commercial stair detailing. [ADD: downside specific to your flooring type, e.g., “certain click-lock systems may require a different stair detailing approach,” based on the product documentation.]
Quick checklist: stair-floor install readiness
– [ ] Measure each tread and riser (and flag any out-of-spec variation)
– [ ] Confirm flooring type requirements: prep, moisture limits, acclimation, adhesive/fastening rules
– [ ] Plan transitions/edge trim locations before cutting
– [ ] Dry-fit tread/riser pieces at nosing lines for alignment
– [ ] Maintain required clearance and expansion gaps
– [ ] Use manufacturer-approved trim/edges to protect seams from wear
– [ ] Follow curing/dwell times before heavy traffic
FAQ
What flooring types are easiest to install around stairs?
It depends on the system, but generally the most forgiving approach is one that uses stair-nosing/edge trim designed for the product—check your flooring manufacturer’s stair detailing guidance. [ADD: your flooring type (LVP, vinyl tile, laminate, engineered wood, carpet tile, etc.) so we can tailor the steps.]
Do I need stair-nosing or can I leave exposed edges?
In many commercial installs, stair-nosing/edge trim is recommended or required to protect vulnerable edges from impact and lift. The correct answer depends on your flooring system specifications—always follow those instructions.
How do I handle small variations between stairs?
Plan measurements stair-by-stair and use dry-fits before final cuts. If variation is significant, you may need to correct substrate issues rather than forcing flooring to conform.
What’s the biggest cause of gaps on stair edges?
Usually expansion/clearance mistakes, insufficient bonding at edges, or inadequate substrate smoothness. Verify requirements for clearance and adhesive/coverage in the product documentation.
Sources:
– [ADD: manufacturer installation instructions/spec sheet for your specific flooring type (adhesive method, prep/moisture limits, acclimation, stair detailing/edge trim requirements)]
– [ADD: manufacturer guidance on stair nosing/transition systems compatible with your flooring]
– [ADD: any relevant standard your flooring system references for commercial installations—only if you can identify it from your product documentation]
– ADA Standards for Accessible Design (2010), stair and handrail dimension requirements
Frequently Asked Questions
How do you measure and plan flooring around stair treads in commercial spaces?
Start by measuring each stair tread width and depth, including any nosing overhang, and note the consistent pitch from tread to riser. Plan the layout so seam locations avoid the most visible edges and high-traffic impact zones, and account for expansion gaps required by the flooring manufacturer. For commercial stair applications, consider creating a template for bullnose or stair nosing profiles so cuts match across multiple levels.
What is the best way to cut and fit commercial flooring around stair nosing and risers?
Use the right blade for the material—diamond blade for porcelain or concrete prep surfaces, and a fine-tooth blade for resilient flooring—to ensure clean, non-chipping edges. Dry-fit each tread and riser piece first, then mark cut lines using the stair tread template so angles and curves align with the nosing. Apply thin-set or the manufacturer-approved adhesive for the specific commercial floor type, and back-roll or set firmly to prevent hollow spots that can lead to lifting in heavy traffic.
Why do stair-step transitions and seams matter for safety and durability?
Flooring at stair edges is exposed to repetitive foot traffic, moisture, and impact, so improper transitions can cause trip hazards and premature wear. Seams that land on stair nosing areas are more likely to separate, so stagger joints and use stair-rated finishing profiles where needed. A correct installation also supports slip resistance requirements common in commercial building standards and helps prevent water intrusion at risers.
Which underlayment or subfloor preparation is recommended for installing around stairs commercial floors?
Begin with a flat, stable subfloor—address dips, high spots, and any loose flooring before installation. For resilient or engineered flooring, choose the underlayment or subfloor system specified by the manufacturer, including moisture mitigation if the area is prone to humidity. Around stair transitions, ensure adhesive coverage or bonding requirements are met and avoid compressible layers in areas that require rigid support for consistent tread/riser alignment.
What’s the safest adhesive and finishing method for installing flooring around stair edges in commercial buildings?
Use adhesives and fasteners rated for commercial installations and for the flooring material type, following the required trowel size and open time. For stair edges, finish with a stair nosing profile (bullnose or metal stair tread) that provides a robust wear surface and helps maintain slip resistance. Finally, verify alignment and adhesion on each tread, then clean and cure fully before reopening the area to foot traffic to reduce the risk of peeling or edge lifting.
📅 Last Updated: October 12, 2026 | Topic: How to install around stairs commercial floors? | Content verified for accuracy and freshness.
References
- Google Scholar Google Scholar
https://scholar.google.com/scholar?q=commercial+resilient+flooring+installation+around+stairs - Google Scholar Google Scholar
https://scholar.google.com/scholar?q=ceramic+tile+installation+on+stairs+commercial+guidelines - Google Scholar Google Scholar
https://scholar.google.com/scholar?q=install+vinyl+flooring+around+stair+treads+and+risers+best+practice - Redirecting…
https://www.ada.gov/2010ADAstandards_index.htm - 1910.22 – General requirements. | Occupational Safety and Health Administration
https://www.osha.gov/laws-regs/regulations/standardnumber/1910/1910.22 - 1910.25 – Stairways. | Occupational Safety and Health Administration
https://www.osha.gov/laws-regs/regulations/standardnumber/1910/1910.25 - https://www.tcnatile.com/resources/technical-bulletins/
- https://www.iso.org/standard/67393.html
- Google Scholar Google Scholar
https://scholar.google.com/scholar?q=How+to+install+around+stairs+commercial+floors? - https://en.wikipedia.org/wiki/Special:Search?search=How+to+install+around+stairs+commercial+floors?