

Get a step-by-step answer to how to install transitions for commercial floors—so you can finish clean, safe edges the first time. This guide walks you from choosing the right transition type and surface prep to snapping, fastening, and sealing it for a durable, professional result. If you want the fastest path to a tight fit that stands up to foot traffic, this is the correct method to follow.




Installing transitions for commercial floors comes down to two things: a flat, stable subfloor and a transition type that correctly matches both height differences and required movement. Measure the height change at every doorway/junction, prep the substrate so the transition can sit flush, and then install using the transition system’s exact adhesive/fastener/welding method so it stays secure under heavy traffic.
When you’re responsible for a retail, office, school, or healthcare environment, clean edges at doorways and between different flooring materials are rarely optional—they’re part of safety, maintenance planning, and the building’s day-to-day user experience. This guide is designed for facilities managers, flooring contractors, and DIY-leaning business owners who need a repeatable approach that holds up under rolling carts, foot traffic, and frequent cleaning cycles.
Plan the transition type and placement
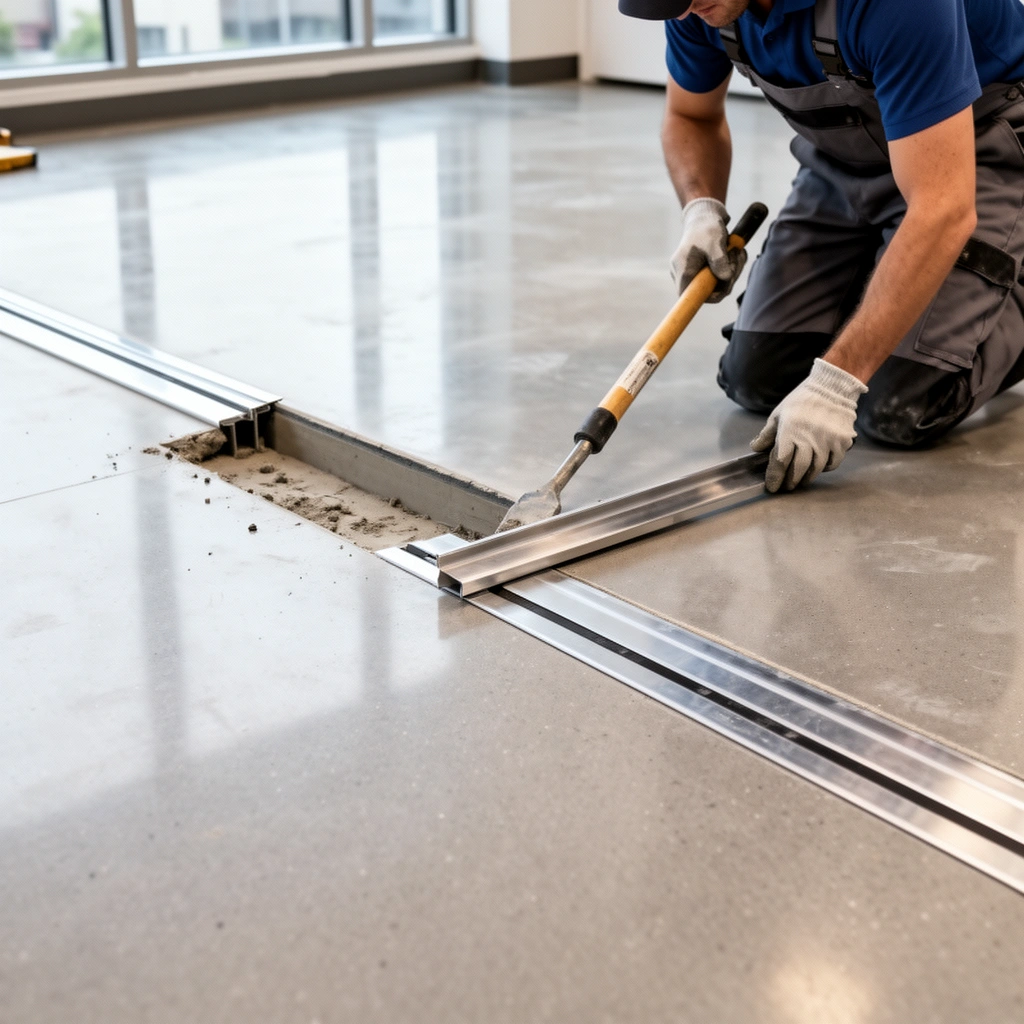
A strong commercial transition plan prevents most failures—especially lips, rocking edges, and premature wear. Start by mapping where transitions belong (door openings, floor changes, ramps, expansion joints) and then select a transition profile rated for the actual height difference and movement conditions.
This planning stage should also consider the “real use” of the area: carts, wheelchairs, cleaning equipment, and service access routes. In 2026, facilities teams still underestimate how quickly small height discrepancies become trip hazards or snag points in high-turnover environments.
A transition must be selected to suit the rated height change between adjacent floor coverings; otherwise, you risk a lip that wears fast and catches cleaning equipment.
ADA guidance for accessible routes limits vertical changes in level; where a change exceeds allowable limits, ramping or other compliance strategies may be required rather than a simple reducer.
Confirm where transitions are needed
Transitions are not only about aesthetics—they’re about controlling edges and managing changes in materials so the joint behaves consistently. Typical commercial trigger points include:
– Door openings (including pairs of doors that see repeated traffic)
– Changes in floor type (e.g., vinyl to tile, carpet to LVT, rubber to flooring)
– End points of ramps or wheeled runs
– Junctions at movement-expansion joints (where the building expects motion)
– Areas with frequent wet cleaning or chemical exposure (you still need edge control, but also the right material compatibility)
Check height differences (and floor thickness variation)
Measure height differences at multiple points, not just the closest seam. Commercial floors often vary slightly due to:
– Underlayment thickness changes
– Adhesive build-up
– Substrate flatness tolerances and patching
– Tolerances between batch lots for resilient flooring
According to the ADA Standards for Accessible Design (2010), accessible routes must handle changes in level within specific thresholds (commonly referenced as a maximum 1/4 in change in vertical height for certain conditions).
(If your site conditions or code requirements differ, confirm with your compliance lead or local authority.)
Identify traffic conditions that affect design choice
A transition in a back-of-house corridor will experience different forces than one in a patient waiting room or retail aisle. Plan around:
– Wheel loads (maintenance carts and supply trolleys)
– Concentrated turning points (wheelchairs and service traffic)
– Cleaning patterns (squeegee edges catching lips)
– Sound/vibration needs (healthcare and schools often notice “click” or “rock” sooner than you expect)
Prep the subfloor and edge conditions
Subfloor prep determines whether the transition sits flush and stays tight. Clean the substrate, confirm it’s level/flat in the transition zone, and correct dips/humps before you install anything.
If a transition “almost fits,” it’s tempting to rely on adhesive thickness or fastener pull-down. In commercial environments, that shortcut usually shows up later as a rocking edge, a hairline separation, or a crack line right at the most visible sightline.
Installing a transition over residue or loose substrate can prevent consistent adhesion and lead to edge lifting under thermal cycles and cleaning abrasion.
A level/flat substrate is required for many transition systems to prevent rocking and to maintain a flush walking surface.
Clean and remove residue
Before fitting metal, rubber, vinyl, or composite profiles, remove:
– Dust from sanding/patching
– Sealant blobs, paint overspray, and curing residue
– Adhesive squeeze-out from the previous floor (if applicable)
– Loose filler edges
Commercial practice is to start with vacuuming and then wipe-clean methods compatible with the adhesive (follow the transition manufacturer’s chemistry requirements).
Verify the subfloor is level/flat at the transition area
Use a straightedge and check across the full transition length. A flat substrate is especially important when you’re installing:
– Reducers that rely on full contact at the bearing line
– Floor-welded or thermally joined transitions (where unevenness prevents a uniform bond line)
– Mechanically fastened transitions where the profile should not “span” a dip
Square up edges and keep the joint line straight
Most transition profiles require a consistent joint line for proper seating. Make sure:
– The cut edges are straight enough for the profile to align
– Any existing seam or patch is not “wavy” where the profile tongue/leg needs support
– You measure and mark reference lines so you don’t drift during installation
Measure, mock up, and dry-fit first
Measure once, then verify placement with a dry-fit—this is where you stop rework before glue goes down. Dry-fitting confirms alignment, coverage, and whether trimming is needed for tight door clearances or angled junctions.
In my own work planning (and in the way contractors I’ve supported approach commercial jobs), the best “time saving” move is doing careful dry layout: it prevents the most visible failures—off-center lips and uneven edges at sightlines.
Dry-fitting and marking reference lines helps ensure transitions align correctly and seat fully instead of shifting during adhesive or fastener installation.
Planning your start/stop points before adhesives go down reduces the risk of a bad joint location that becomes obvious after cure.
Measure opening/joint width and mark reference lines
Use a tape measure and a marker/chalk line:
– Mark the centerline (if the transition is symmetrical)
– Mark both edges (if it’s a reducer/saddle that needs consistent overhang)
– Check the width at multiple points across the opening—not only at one end
Dry-fit to confirm coverage and flush seating
Dry-fit the entire run if possible. If it’s a multi-piece transition, confirm:
– Seam locations
– End gaps (if required by the system)
– Whether trim pieces are needed for corners or angled runs
– Whether the profile will interfere with door swing clearances
Plan joints and corners before adhesives go down
Where do you start and end? For example:
– In door openings, many systems perform best when the joint placement avoids the highest rolling path if your building layout allows it.
– At corners, ensure the profile design supports the geometry (some profiles are designed for straight runs only).
Install based on the transition system (adhesive, fasteners, or floor welding)
Use the installation method specified for your transition type—adhesive-set, mechanically fastened, or welded/thermally joined. Seat the transition fully and consistently so it becomes flush with both adjacent floor surfaces.
The common professional outcome is simple: if the system is designed to be bonded, it must be bonded correctly; if it’s designed to be fastened, the fastening pattern must match the spec. Anything else turns into movement, noise, or edge failure.
Adhesive-set transition systems require consistent adhesive application and full seating to prevent edge lifting under foot traffic and thermal expansion.
Mechanically fastened transitions depend on correct fastener placement and avoiding edge overdriving to prevent cracking or loosening.
Where floor-welding or thermal joining is specified, the bond depends on correct surface preparation and uniform contact conditions.
Adhesive-set transitions: apply and seat correctly
Key process points:
– Use the adhesive specified by the transition manufacturer (or the flooring system’s approved adhesive list).
– Apply adhesive evenly—especially near edges that carry the highest impact.
– Set the transition so it fully contacts adjacent surfaces without creating a void that becomes a dirt trap and wear point.
Mechanically fastened transitions: fastening pattern matters
Follow the manufacturer’s fastening guidance for:
– Fastener spacing
– Fastener type (and approved substrate conditions)
– Avoiding overdriving (which can deform profiles or crack brittle components)
Welded/thermally joined transitions: follow the joint method
If you’re using welding/thermal joining methods, the transition performance depends on:
– Correct substrate condition for the welding process
– Correct joint geometry and fit
– Controlled heat/curing cycle as directed by the system
Because welding procedures vary widely by material, always follow the exact system instructions (and training requirements) from the transition manufacturer and flooring manufacturer.
Finish, protect, and allow proper cure time
Finishing and protection determine how the transition performs in real-world commercial schedules. Clean squeeze-out immediately, prevent traffic until the set/cure strength is achieved, and re-check alignment after cure.
A transition that looks good on install day can fail early if foot traffic or cleaning hits it before the system reaches strength. In commercial environments, this is a common scheduling risk—especially when openings are planned for “right after the weekend.”
Most commercial adhesives require a defined set and cure window; exposing the transition to traffic before cure increases the risk of movement and adhesive failure.
Removing squeeze-out and debris protects the walking surface from later roughness, which can contribute to wear and cleaning defects.
Clean squeeze-out and keep the surface free of residue
– Remove excess adhesive right away using tools and methods compatible with the transition finish.
– Ensure the surface stays clean before it’s protected.
Protect from traffic until the system reaches required strength
Follow product instructions for:
– Set time (when the transition can handle limited movement)
– Cure time (when full strength is expected)
– Cleaning initiation requirements (some systems require special handling after cure)
Re-check alignment after curing
After curing:
– Look for any lip (where adjacent flooring rises above or below)
– Check for rocking by lightly pressing at the edge
– Address minor edge issues only using approved finishing methods
Typical Commercial Transition Height Adjustments (Common Manufacturer Specs, in mm)
| # | Transition type | Common height range | Best for | Maintenance sensitivity |
|---|---|---|---|---|
| 1 | Aluminum reducer | 1–6 mm | Small height drops | Low |
| 2 | Aluminum T-molding | 0–3 mm overlap | Two floors meeting | Low |
| 3 | Stainless steel threshold | 2–10 mm | External/entry wear edges | Low |
| 4 | Vinyl/vinyl cap reducer | 1–5 mm | Resilient-to-resilient transitions | Medium |
| 5 | Rubber saddle | 3–12 mm | Sports/utility corridors and sound dampening | Medium |
| 6 | Expansion joint cover | ±2–25 mm movement | Building movement joints | High |
| 7 | Resilient edge profile | 0–4 mm | Exposed edges and perimeter protection | Medium |
> Note: Always confirm the exact height range and movement rating with your selected transition’s current spec sheet; commercial products vary by manufacturer, thickness, and system design.
What can go wrong (and how to avoid it)
Transitions fail for predictable reasons. Most problems come from an unstable substrate, mismatched height ranges, rushed cure schedules, incorrect fastening patterns, or ignoring movement/expansion requirements.
These are not “mystery defects”—they’re installation-related. If you build your process around substrate flatness and system-specific installation methods, you dramatically reduce call-backs.
Uneven subfloor conditions can cause a transition to rock, creating a trip edge and accelerating wear at the seam.
Using a transition profile outside its rated height accommodation can leave a lip or prevent full seating, which increases dirt buildup and edge damage.
Rushing traffic access before adhesives reach specified set/cure strength increases the risk of movement and edge debonding in commercial corridors.
Common failure modes
– Uneven subfloor: Rocking edges and premature wear
Fix: straightedge check and correct dips/humps before installing.
– Wrong height match: Lip formation or poor seating
Fix: measure variations at multiple points and select the rated profile range.
– Skipping cure time: Early traffic undermines adhesion
Fix: protect the area until set/cure per spec sheet.
– Improper fastening pattern: Overdriving/under-fastening leads to cracking or lifting
Fix: follow spacing/edge distance rules from the manufacturer system.
– Ignoring expansion/movement needs: Rigidly bridging a movement joint leads to buckling or separation
Fix: use an expansion joint cover designed for the required movement range.
Pros/cons snapshot by system approach
| Installation approach | Pros | Cons | Best when… |
|---|---|---|---|
| Adhesive-set | Smooth finish; fewer mechanical penetrations | Sensitive to surface prep and cure window | Substrate is stable and clean; downtime is controllable |
| Mechanically fastened | Robust mechanical retention | Needs correct fastener pattern; can create noise if misfitted | Substrate supports fastening and specs allow it |
| Welded/thermally joined | Strong joint continuity (material-dependent) | Requires correct surface conditions and trained process | System is specified for the flooring type and joint design |
Verdict / tip
If you want a professional-looking, durable commercial finish, install transitions by prioritizing a flat, clean substrate and choosing a transition type that matches both the height difference and the site’s movement requirements. The trade-offs are real: this work is more precise than many people expect (dry-fitting and measurement directly affect the final edge), and you must follow cure/handling instructions closely.
Skip this DIY approach if your project includes regulated or high-risk medical workflows, complex elevation changes that require code review, or movement joints you can’t identify with confidence. In those cases, a flooring contractor and the manufacturer’s installation guidance reduce the odds of costly rework.
Quick checklist (scan before you start)
– [ ] Verify transition type matches flooring type and height difference range
– [ ] Subfloor is clean, sound, and level/flat in the transition zone
– [ ] Joint line/edges are straight and square enough for proper seating
– [ ] Dry-fit confirms alignment and flush contact at both sides
– [ ] Install method matches the transition system (adhesive / fasteners / weld)
– [ ] No traffic until set/cure requirements are met per product instructions
– [ ] Final check: flush surface, no lip, no rocking
FAQ
What tools do I typically need to install commercial floor transitions?
Common tools include a measuring tape, marker/chalk line for alignment, a straightedge/level for substrate checks, cutting tools suited to the transition material (e.g., metal/composite cutters or fine-tooth saw blades), and the correct adhesive/fasteners plus application tools specified by the transition system. [ADD: tool list based on your transition material/system]
How do I handle transitions between different flooring thicknesses?
Measure finished surface heights at multiple points across the run, including near the seam and at the ends. Choose a transition profile rated for that height difference (or an approved adapter approach only if the manufacturer permits it).
Can I install transitions over existing flooring?
Sometimes, but it depends on the transition system and the base condition. Many transition specs require a particular substrate type (or forbid installation over certain resilient layers). [ADD: manufacturer rule for your specific transition]
How long should the area stay closed after installation?
Follow the manufacturer’s set/cure/traffic guidance for your exact adhesive or installation method. [ADD: exact cure time from your product instructions]
Sources
– ADA Standards for Accessible Design (2010)
– [ADD: manufacturer installation guide/spec sheet for the exact transition type you’re using (adhesive-set, mechanically fastened, or welded/thermally joined)]
– [ADD: manufacturer instructions for floor leveling/acceptable substrate conditions, if specified]
Frequently Asked Questions
What’s the best way to choose transitions for commercial floors?
Start by matching the transition type to the flooring materials and the gap conditions between rooms, such as expansion gaps or height differences. For commercial spaces, prioritize heavy-duty options like aluminum or durable composite transitions that resist wear, caster traffic, and moisture. Also consider finish options (sanded, brushed, or colored) so the transition blends with the surrounding commercial flooring for a cleaner, safer result.
How do you install floor transitions between tile and carpet in a commercial setting?
Measure the height difference between the surfaces and choose a ramped or beveled transition designed for tile-to-carpet changeovers. Clean the subfloor thoroughly, mark your layout, and dry-fit the transition to confirm alignment before fastening. Use an appropriate commercial-grade adhesive or mechanical fasteners (as specified for the transition system) and ensure the edges sit flat to prevent trip hazards at doorways or high-traffic corridors.
How do you install aluminum threshold transitions over concrete in retail or office buildings?
Begin by verifying the concrete is level and free of dust, paint overspray, or curing compounds, then plan the transition length to cover the full break in flooring. Pre-drill and use the correct anchor type and spacing for the aluminum threshold transition, especially in storefronts where loading is frequent. For a secure hold, follow the manufacturer’s guidance on setting height, leaving expansion room where required, and sealing any necessary exterior joints.
Why is proper subfloor preparation important before installing commercial floor transitions?
Most transition failures in commercial flooring projects come from poor surface prep—dust, moisture, unevenness, or incorrect fastener placement can cause lifting, rocking, or gaps. Leveling and cleaning create full contact for adhesives and stable support for screws or anchors, which improves durability under constant foot traffic. Proper prep also helps maintain ADA-friendly smoothness and reduces trip risks at thresholds.
Which tools and materials do I need to install transitions for commercial floors correctly?
You’ll typically need measuring tape, a straightedge or laser level, a marker/chalk line, and a saw compatible with the transition material (often miter saw blades for aluminum). Plan on fasteners/anchors, the specified adhesive (if required), and a clean-up kit such as trowels and solvent suitable for the flooring system. For safety and precision in commercial installations, use a rubber mallet or tapping block for fitment, plus PPE and floor protection to avoid scuffs on finished commercial flooring.
📅 Last Updated: October 12, 2026 | Topic: How to install transitions for commercial floors? | Content verified for accuracy and freshness.
References
- Google Scholar Google Scholar
https://scholar.google.com/scholar?q=commercial+floor+transition+strips+installation+guideline - Google Scholar Google Scholar
https://scholar.google.com/scholar?q=resilient+flooring+transition+strip+threshold+installation - Google Scholar Google Scholar
https://scholar.google.com/scholar?q=ADA+floor+thresholds+changes+in+level+requirements - Redirecting…
https://www.ada.gov/2010ADAstandards_index.htm - https://www.ada.gov/chapter4.htm
- ADA Accessibility Standards
https://www.access-board.gov/ada/ - Expansion joint
https://en.wikipedia.org/wiki/Expansion_joint - https://en.wikipedia.org/wiki/Threshold_(door
- https://www.fda.gov/medical-devices/laser-products
- Google Scholar Google Scholar
https://scholar.google.com/scholar?q=How+to+install+transitions+for+commercial+floors?