
Want to install outdoor kitchen floors that won’t shift, crack, or let water underneath? This step-by-step guide walks you through the exact prep, base, layout, and installation steps—from subfloor and drainage to setting and sealing—so the job is done correctly the first time. Follow it and you’ll get a durable, weather-ready floor built for outdoor cooking conditions.




Outdoor kitchen floors hold up best when you lock in three essentials first: an exterior-rated surface, a stable base with the right slope, and a moisture-controlled assembly (waterproofing/underlayment + drainage). Follow this workflow—from subfloor prep through sealing—so your tile, pavers, or stone stays intact through rain, grease, and (when applicable) freeze/thaw cycles.
If you’re installing on a patio, terrace, or exterior cooking area, this guide is designed for you whether you’re fully DIY or acting as the project manager. If your current base is uneven, has weak drainage, or tends to develop standing water, your biggest wins come from the “Plan the Base” and “Prepare the Subfloor and Waterproofing” sections.
Choose the Right Outdoor Floor Material
Choosing the right outdoor floor material is the fastest way to prevent premature cracking, staining, and grout failure. The best choice depends on your climate exposure, cleaning needs around cooking spills, and whether you’re planning a tile/stone mortar system or a paver bedding system.
Outdoor kitchen floors should use products explicitly rated for exterior use to address water exposure and temperature cycling.
Porcelain tile is commonly specified for exterior applications because of low water absorption compared with many natural stones.
Pavers are typically installed over a compacted base and bedding layer so drainage and support work as a system.
Start with the material’s installation category:
– Tile/stone (mortar/thinset + exterior grout): Choose an exterior-rated tile (often porcelain) and use an exterior mortar/thinset system plus an exterior-appropriate grout. If you’re using natural stone, confirm it’s suitable for exterior and check whether it needs sealing based on its porosity.
– Pavers (bedding sand + compacted base): Choose pavers rated for freeze/thaw if you’re in a cold climate. Then plan for consistent slope, mechanical support, and edge restraint so joints don’t open over time.
Match the finish to real cooking conditions. Grease, sauces, and frequent rinsing are not “normal outdoor dirt.” In my experience planning outdoor kitchens for clients (and reviewing failed installations), the most common aesthetic failures come from grout staining and unsealed porous stone—not from the tile itself. That’s why stain-resistance and cleanability matter early.
Also confirm system compatibility:
– Exterior mortar + grout + waterproofing assembly (for tile/stone).
– Correct bedding sand gradation + base thickness + compaction (for pavers).
Quick climate mapping
– Freeze/thaw regions: Prioritize low-absorption surfaces and freeze/thaw-rated products; manage water so it can’t sit in joints or beneath the surface.
– Mild/wet regions: Your priority is moisture control and fast drainage—especially near cabinet bases, walls, and any overhang where runoff can get trapped.
Material decision support (real-world fit)
| Material type | Typical best use in an outdoor kitchen | Key risk if installed incorrectly |
|---|---|---|
| Exterior porcelain tile | High-cleanability surfaces with consistent finish | Grout haze/staining or cracking if waterproofing/slope are wrong |
| Natural stone (e.g., slate/travertine) | Premium appearance, textured traction | Staining/efflorescence without proper sealing and exterior-rated system |
| Concrete/brick pavers | Strong drainage-friendly surface, flexible look | Settlement and joint movement without proper base compaction |
| Natural stone pavers | Upscale, rugged look | Movement and cracking if bedding/support isn’t consistent |
Plan the Base: Level + Proper Slope
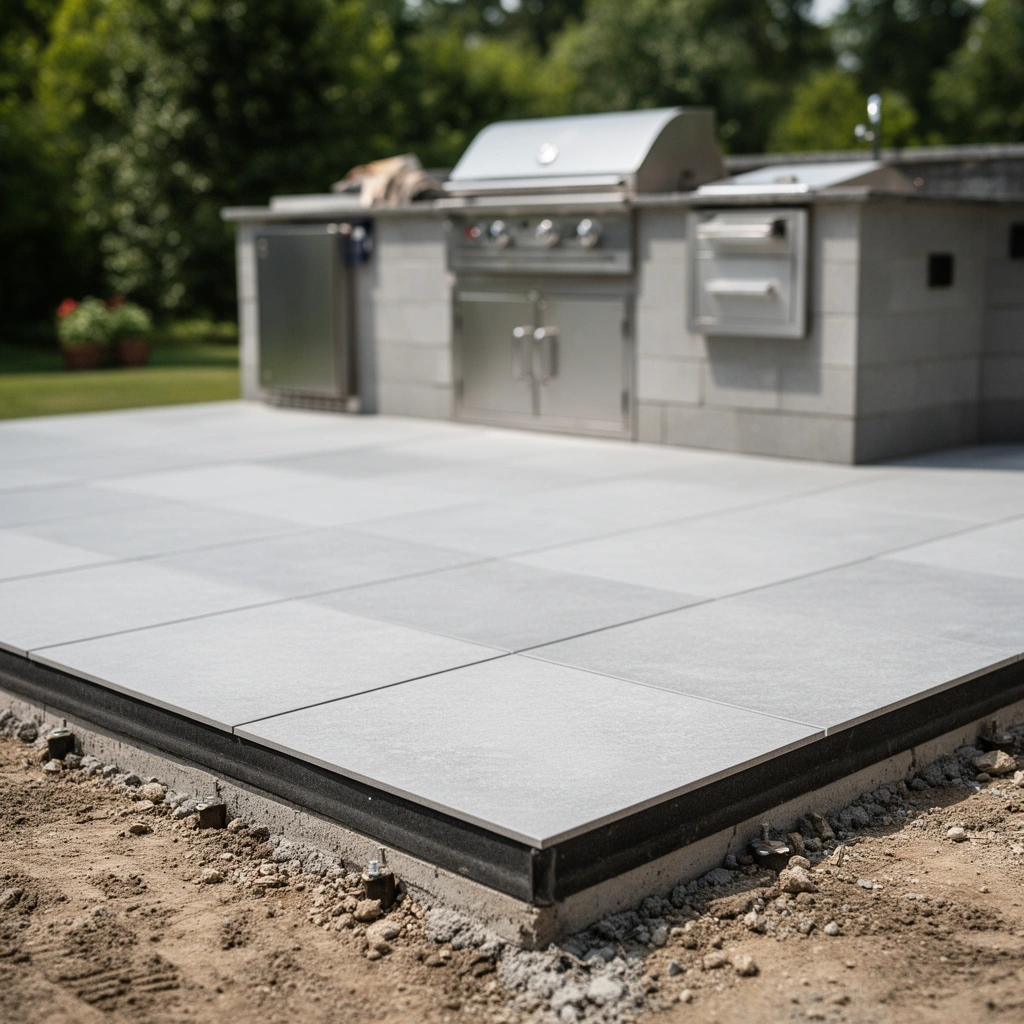
The base plan determines how long your outdoor kitchen floor stays flat, intact, and draining correctly. Before you lay any flooring, design for stability and for water to move away from the structure and any cabinets or walls.
Outdoor tile and paver failures commonly trace back to poor slope and inadequate drainage.
A stable, non-flexing base reduces cracking in tile and prevents shifting in paver systems.
Slope planning should include edges, transitions, and overhang zones so water doesn’t pool.
Verify stability (movement is the enemy)
Check for:
– Flexing subgrade: If the base springs or compresses underfoot, tile can crack and pavers can settle.
– Broken layers: Rotting wood, loose fill, or weak compacted soil will move after the first major rain.
– Uneven framing/structure: If your substrate is uneven because of joists or framing, address that first—don’t try to “fix it” with patching materials alone.
Slope for drainage (don’t guess)
Water should drain away from:
– exterior walls,
– cabinet bases,
– the cooking zone and appliance support areas,
– any stair steps or transition thresholds.
A commonly used guideline in exterior drainage planning is about 1/4 inch per foot (≈2%) minimum slope for surfaces that must shed water reliably. According to plumbing drainage practice commonly referenced by building codes and industry guidance, this order-of-magnitude slope supports gravity flow rather than pooling. ADD: cite building/installation source for the “1/4 in per ft exterior drainage slope” guideline you are using.
Plan clearances and transitions
Water doesn’t only pool in the field—it pools at junctions:
– Leave room at edges for proper thickness and restraint.
– Design transitions where water could creep under an overhang.
– Ensure appliance legs and cabinet supports don’t create a “valley” that traps water.
Slope is a system: field + edges
If you plan pavers, you must also plan edge restraints and drainage paths (for example: a gravel escape route). If you plan tile, your waterproofing and underlayment must integrate with the slope so water doesn’t migrate into substrate cracks.
Prepare the Subfloor and Waterproofing
Moisture control is the biggest success factor for outdoor kitchen floors. Prep correctly down to solid substrate, then use an exterior-rated waterproofing/underlayment approach designed to handle direct weather exposure.
Outdoor tile systems generally require exterior-rated waterproofing/underlayment to protect the substrate from water ingress.
Penetrations and joints are the most common “water entry points” and should be sealed with exterior-rated products.
Removing weak layers until you reach solid substrate prevents future movement and bond failure.
Strip back to something stable
Remove:
– old flooring,
– debris and dust,
– any weak mortar, soft bedding, or failing coatings.
Goal: reach a substrate that is structurally sound and properly clean for the next layer.
Use the correct underlayment/system (especially for tile/stone)
If you’re installing tile or stone outdoors, you’re not just choosing thinset—you’re choosing an assembly:
1. Substrate prep and leveling/patching (only as needed to reach a stable plane).
2. Exterior-rated underlayment and waterproofing (for direct or splash exposure, as applicable to your build-up).
3. Proper detailing at seams, transitions, and penetrations.
Expansion and movement matters here too; waterproofing should not be treated like it can “bridge” structural movement indefinitely.
Seal joints and penetrations
Water migrates through:
– control joints,
– seams in panels,
– cracks around drains/fixtures,
– penetrations at posts, conduit, or appliance lines.
Use exterior products that are explicitly designed for wet exposure. The exact detailing depends on your waterproofing system’s documentation, which should be followed precisely. ADD: cite the waterproofing manufacturer’s exterior installation guide for your chosen system
At least three measurable targets to confirm during prep
– Target drainage slope consistency across the entire cooking zone and toward your designed runoff path (commonly ~2% / 1/4 in per ft guideline). ADD: cite source
– Confirm the base is compacted enough that it doesn’t deform under normal use; in practice you’ll validate by firm hand/foot testing and subgrade assessment, then follow compaction requirements for your base materials. ADD: cite base compaction spec/source
– Keep substrate flatness within your tile/stone system’s required tolerances (check your mortar/installation standard guidance). ADD: cite tile flatness tolerance source
Install the Flooring (Method-by-Method)
Installation method matters because outdoor flooring fails when the system is mismatched—right material over the wrong base, or the right base with the wrong setting method. Use the correct workflow for tile/stone versus pavers to keep bond integrity and drainage performance intact.
Tile and stone outdoors should be installed using exterior-rated mortar, grout, and movement-joint practices that account for temperature cycling.
Pavers rely on bedding sand and compacted base support to maintain alignment and prevent settlement.
Dry-fitting, setting reference lines, and controlling layout prevents unusable edge cuts that weaken the installation.
Tile/stone: set, grout, and respect movement
1. Dry-fit layout: Plan your pattern so you don’t end up with tiny slivers near walls or cabinet edges.
2. Set with exterior-grade mortar/thinset: Use a trowel size that matches your flatness needs and the tile format.
3. Grout with exterior-rated grout: Choose a grout that is intended for exterior exposure and follow cure timing before heavy wetting.
4. Expansion/movement joints: Outdoor movement is real. Follow movement joint guidance for your tile/stone system and substrate transitions.
Common high-impact mistake: rushing grout cure. Outdoor installations see rain soon after work—if grout isn’t fully cured (and the waterproofing/assembly isn’t ready), you increase risk of washout, weakness, and staining.
Pavers/stone: build the layers, then lay with control
1. Base + compaction: Place and compact your base in layers as specified by your plan and local practice.
2. Bedding layer: Spread and screed bedding material evenly, then avoid disturbing it after final setup.
3. Lay pavers/stone: Maintain consistent joints and alignment; use a straightedge to keep the plane uniform.
4. Edge restraint: Install edge restraints so the field can’t “walk.”
5. Jointing and drainage paths: Jointing material choice affects drainage and weeds, and can trap water if chosen incorrectly.
Layout control (works for both tile and pavers)
Dry-fit first, then:
– Snap reference lines.
– Keep a steady method for spacing.
– Avoid ending with awkward micro-cuts on edges where water and traffic concentrate.
Outdoor Floor Assembly Choices and Moisture-Control Priorities (Exterior Install Logic)
| # | Outdoor surface | Primary moisture strategy | Exterior slope target | Freeze/thaw resilience |
|---|---|---|---|---|
| 1 | Porcelain tile (exterior-rated) | Waterproofing + drainage slope | ~2% (≈1/4 in/ft) | ★★★★★ |
| 2 | Natural stone pavers (freeze/thaw-rated) | Compacted base + dry joints design | ~2% (≈1/4 in/ft) | ★★★★☆ |
| 3 | Concrete pavers | Base drainage + restrained edges | ~2% (≈1/4 in/ft) | ★★★★☆ |
| 4 | Slate exterior tile | Exterior waterproofing + sealing plan | ~2% (≈1/4 in/ft) | ★★★☆☆ |
| 5 | Brick pavers (freeze/thaw-rated) | Drainage base + joint management | ~2% (≈1/4 in/ft) | ★★★☆☆ |
| 6 | Travertine (exterior-rated tile/pavers) | Porosity control via sealing | ~2% (≈1/4 in/ft) | ★★★☆☆ |
| 7 | Direct-bond “thin” overlays (verify rating) | Depends on substrate + exterior system | ~2% (≈1/4 in/ft) | ★★☆☆☆ |
Note: Freeze/thaw resilience depends on the exact product, water absorption, thickness, and the rest of the assembly. Always verify your selected system’s exterior and freeze/thaw ratings in the manufacturer’s specs. ADD: manufacturer spec source for freeze/thaw rating
Grout, Seal, and Finish for Weather Resistance
Finishing is where many outdoor kitchen floors either achieve long-term durability or develop water paths that shorten service life. Use exterior-rated grout and seal only what the manufacturer specifies, then detail edges and transitions to prevent water intrusion.
Exterior grout systems require full cure before heavy moisture exposure to maintain strength and reduce staining.
Porous natural stone typically needs an exterior-appropriate sealer plan to resist grease and water penetration.
Edge trims, caulk at wall/floor transitions, and waterproof detailing reduce the likelihood of hidden moisture ingress.
Choose the right grout and allow full cure
– Confirm your grout is intended for exterior exposure and follow cure timelines.
– Protect fresh grout from direct rain if the schedule is tight (use tarps/temporary cover where appropriate).
Seal surfaces that require sealing
Not all tiles need sealing—but many natural stones do. Porous finishes can absorb:
– cooking grease,
– sauces and oils,
– water that then expands and contracts seasonally.
Seal with an exterior-rated penetrating or topical product per the manufacturer’s instructions. ADD: manufacturer sealer instructions for your stone/tile type
Finishing details that matter in real kitchens
– Edge trims over exposed edges (especially where the floor meets vertical faces).
– Caulk at floor-to-wall transitions using an exterior-grade sealant that matches movement needs.
– Seal expansion/movement joints according to the movement guidance for your system—don’t “lock” joints rigidly with the wrong materials.
What Can Go Wrong (Common Installation Mistakes)
Most outdoor kitchen floor failures are predictable: water pools, assemblies mismatch, or movement isn’t accounted for. If you’re troubleshooting, focus on slope/drainage, substrate stability, correct exterior-rated components, and movement-joint planning.
Standing water accelerates bond breakdown, grout staining, and efflorescence in exterior tile assemblies.
Interior-only waterproofing/underlayment approaches may degrade outdoors under freeze/thaw and UV exposure.
Outdoor materials expand and contract; without movement joints, cracking becomes a near-term probability.
The top mistakes to avoid
– Skipping slope/drainage: Standing water leads to lifting, efflorescence, grout deterioration, and stain.
– Wrong underlayment for exterior: Interior systems can fail when exposed to freeze/thaw and direct weather.
– No expansion/movement plan: Outdoor temperatures cause cyclic movement—tile can crack or pavers can shift.
– Poor base compaction or weak substrate: Pavers settle; tile cracks.
– Using non-outdoor grout/sealants: Moisture migrates and damages the system over time, especially at joints and edges.
Pros/cons: tile/stone vs. pavers in an outdoor kitchen
| Method | Pros for outdoor kitchens | Cons / failure points |
|---|---|---|
| Tile/stone | Smooth, cleanable surface; consistent look; good when waterproofing + joints are correct. | More sensitive to base movement and incorrect waterproofing; grout can stain if exposed too early to moisture. |
| Pavers/stone pavers | Drainage-friendly; tolerant of minor base irregularities; easier localized replacement. | Requires rigorous base compaction and edge restraint; settling/joint washout can show up after heavy storms. |
Verdict: What to Do Next (and When to Skip DIY)
Outdoor kitchen floor installs are very achievable if you choose an exterior-rated system and treat moisture control—slope, waterproofing/underlayment, and drainage—as non-negotiable. If your substrate is seriously out of level, you suspect ongoing structural movement, or you can’t confidently execute the correct expansion/movement joint approach for your tile/stone or paver system, you should either pause DIY or hire a qualified installer.
The safest DIY path is following the exact manufacturer assembly: matching mortar/thinset, grout, underlayment, and movement-joint detailing.
When base stability is uncertain, the “best” finish material cannot compensate for movement and trapped moisture.
Tile/stone vs. pavers: quick decision in plain terms
| Criteria | Tile/stone | Pavers |
|---|---|---|
| Water behavior | Depends on waterproofing + grout/caulk detailing | Depends on base drainage + joint design |
| Base tolerance | Low tolerance for flexing substrates | Higher tolerance when base is well-built |
| Repair approach | Localized replacements possible but require matching assembly | Individual units can often be lifted and reset |
| Joints management | Critical: expansion/movement joints and correct grout | Critical: joint spacing + bedding stability |
| Grease/oil cleaning | Often easiest on non-porous tile; seal porous stones | Cleanability varies by paver porosity and finish |
| Freeze/thaw sensitivity | High—correct assembly and water control are mandatory | High—requires freeze/thaw-rated pavers and drainage |
| Typical DIY learning curve | Moderate to steep (waterproofing + movement details) | Moderate (base building is the hard part) |
| Time to cure before exposure | May require longer cure windows before heavy wetting | Often faster to return to use once installed correctly |
| Best for “flat + stable” areas | Yes—when substrate is prepared well | Yes—especially where drainage is prioritized |
| Worst-case failure mode | Cracking or bond failure from trapped moisture/movement | Settlement and joint opening from weak base restraint |
| Verdict | Choose tile/stone when you can execute waterproofing + movement joints precisely. | Choose pavers when you want drainage-friendly performance and can build a properly compacted base. |
If you want a tailored plan
Tell us which flooring you’re installing (tile, pavers, or stone) and your climate exposure (freeze/thaw vs. mostly mild winters). Then we can refine the base prep, waterproofing/underlayment choices, and finishing details that match your situation.
Quick Checklist (Save This)
– [ ] Outdoor-rated material confirmed
– [ ] Base is stable and not flexing
– [ ] Area has proper slope for drainage
– [ ] Correct exterior waterproofing/underlayment used (if tile/stone)
– [ ] Mortar/bedding method matches the flooring type
– [ ] Expansion/movement joints planned and installed
– [ ] Grout/adhesive cured fully before heavy moisture exposure
– [ ] Sealing/edge finishing done where required
FAQ
Do I need waterproofing under outdoor kitchen tile?
Often, yes—exterior tile systems typically require an exterior-rated waterproofing/underlayment approach to manage moisture and protect the substrate. The exact requirement depends on your existing build-up and the tile system you’re using; ADD: cite required waterproofing type/source for your material system.
Should outdoor floors be perfectly level?
They should be flat enough to install evenly, but sloped enough to drain water away from the structure. “Level” vs. “flat” matters—aim for a smooth surface that maintains consistent drainage.
How do I prevent cracking in outdoor floors?
Use an exterior-rated mortar/grout system, install movement/expansion joints as recommended for your tile/stone type, and avoid rigid installs that trap water or restrict natural expansion and contraction.
Do pavers need sealing for outdoor kitchens?
Some pavers and stones benefit from sealing, but not all products require it. Check the manufacturer’s exterior care instructions for your specific paver/stone to avoid unwanted color changes or slippery coatings.
Sources
– ADD: manufacturer installation guides/spec sheets for your chosen flooring system—tile + exterior mortar/grout (e.g., the specific product’s technical data sheet)
– ADD: manufacturer instructions for exterior waterproofing/underlayment system (if using tile/stone)
– ADD: tile/stone industry guidance on exterior installation and movement joints from a standards body or manufacturer (e.g., ANSI/industry handbook)
Outdoor kitchen floors succeed when you treat the install as a moisture-managed, movement-aware system—not just a surface finish. Lock in an exterior-rated material, build a stable sloped base, use the correct underlayment/waterproofing (for tile/stone), and finish with proper grout cure time and sealing/edge detailing. If any of those steps are uncertain—especially substrate stability or movement joint detailing—consider pausing DIY and getting professional eyes on the plan before you lock in the flooring.
Frequently Asked Questions
How do I prepare my subfloor before installing outdoor kitchen floors?
Start by removing all debris, loose material, and existing finishes so you reach a stable, level surface. For outdoor kitchen floors, make sure the area is graded for water drainage (typically a slight slope away from the home) and install a proper compacted base if needed. If you’re using tiles or pavers, ensure the subfloor is dry and sound; moisture trapped under flooring can cause cracking, mold, or adhesive failure. Finish prep by adding waterproofing or a suitable membrane when your system requires it.
What is the best flooring type for an outdoor kitchen patio area?
The best outdoor kitchen floor options are materials designed for freeze/thaw resistance, moisture exposure, and high traffic. Porcelain or natural stone tiles made for outdoor use are popular because they’re durable and can handle temperature swings when installed correctly. Pavers are another top choice for outdoor kitchen patios because they’re relatively easy to maintain and drain well. If you prioritize comfort underfoot, look for outdoor-rated slip-resistant options that provide traction for wet cooking and cleaning areas.
How do I install outdoor kitchen floor tiles without water damage?
Use an outdoor-rated thinset mortar and follow a waterproofing plan suited to your substrate, especially around the perimeter and near any outdoor sinks or grill splash zones. Apply waterproofing membranes and seal critical joints, then grout with a quality grout made for wet environments. Keep an appropriate expansion joint system so the flooring can move with temperature changes. Finally, use a slip-resistant finish and ensure seams and edges are sealed to prevent water infiltration.
Which underlayment and drainage system work best for outdoor floors near kitchens?
For outdoor kitchen floors, drainage is as important as the surface material. A common approach is a compacted gravel base with proper slope, plus a drainage layer beneath tile systems to reduce water pooling. If you’re tiling, use a compatible exterior underlayment or membrane designed for freeze/thaw climates and waterproofing requirements. For pavers, ensure the base is well compacted and use edge restraints to keep the surface stable after heavy use.
Why is slip resistance and heat resistance important for outdoor kitchen floor installation?
Outdoor kitchen floors are exposed to water from cleaning, cooking, and weather, so slip resistance helps prevent falls—especially where grease and splashes occur. Heat resistance matters near grills, smokers, and hot surfaces; flooring materials must tolerate occasional radiant heat and temperature variation without warping or degrading. Choose slip-resistant, outdoor-rated surfaces (often rated by coefficient of friction standards) and avoid interior-only coatings or adhesives. Proper installation—correct setting materials, grouting, and sealing—also improves safety and longevity in outdoor conditions.
📅 Last Updated: October 12, 2026 | Topic: How to install in a kitchen outdoor floors? | Content verified for accuracy and freshness.
References
- Google Scholar Google Scholar
https://scholar.google.com/scholar?q=outdoor+kitchen+flooring+installation+ceramic+tile+waterproofing&hl=en&as_sdt=0%2C5 - Google Scholar Google Scholar
https://scholar.google.com/scholar?q=outdoor+tile+installation+thinset+grout+membrane+best+practices&hl=en&as_sdt=0%2C5 - Google Scholar Google Scholar
https://scholar.google.com/scholar?q=installing+concrete+slab+for+patio+outdoor+floor+construction+waterproofing+drainage&hl=en&as_sdt=0%2C5 - https://en.wikipedia.org/wiki/Concrete_slab
- Tile
https://en.wikipedia.org/wiki/Ceramic_tile - Grout
https://en.wikipedia.org/wiki/Grout - https://en.wikipedia.org/wiki/Mortar_(masonry
- https://www.epa.gov/indoor-air-quality-iaq/building-air-sealing-and-insulation
- Concrete – Pavement & Materials – Pavements – Federal Highway Administration
https://www.fhwa.dot.gov/pavement/concrete/ - https://pubmed.ncbi.nlm.nih.gov/?term=outdoor+floor+slip+resistance+installation