
How to install around stairs outdoor floors without gaps, rocking boards, or drainage problems? This guide lays out the best, step-by-step install method for tackling stair stringers and treads outdoors—starting from prep and waterproofing, then moving to cutting, fastening, and sealing. If you want the cleanest finish that holds up to rain, freeze-thaw cycles, and foot traffic, follow this approach.




If you’re installing outdoor flooring around stairs, the key is planning the cuts and transitions so every tread and riser gets proper support, drainage, and a clean edge. Start by measuring each tread/riser, choose a compatible outdoor-rated underlayment/substrate, then finish with weather-resistant trim or edge pieces to seal the perimeter.
If your stairs wobble, crack, or drain poorly, fix the stair base first before you add tile, stone pavers, vinyl planks, or outdoor wood-look flooring. Outdoor steps create odd angles, multiple edges, and repeated wetting—so the “flooring” problem often starts with the stair structure and water path.
Plan the Layout (Measure Treads, Risers, and Runs)
Plan your stair layout first so you avoid tiny slivers and mismatched tread noses. Measure every tread depth and riser height, then decide where you’ll “break” the visible lines so the most noticeable cuts look intentional.
A stair tread/riser layout is essentially a small sequence of repeatable rectangles—until corners and stringers change the geometry.
Dry-fitting stair pieces before mortar/adhesive is the only practical way to confirm overhang at the tread nose and how transitions meet at corners.
Outdoor stair failures often come from water trapping at edges, so your layout must preserve drainage paths, not just clean lines.
Measure the stairs like a template job (not like a straight run)
Measure each tread depth (front edge to back edge) and each riser height (top of one tread to top of the next). On outdoor stairs, don’t assume the steps are identical—freeze/thaw, past repairs, and settlement can create subtle differences. In my experience helping homeowners plan these layouts, the “one step that’s 1/8 in off” is usually what turns a neat plan into uneven tread noses after installation—so building a measurement list per step is time well spent.
Then measure each run (the horizontal length of the tread surface) and the overall stair width where the flooring will land on each step face.
Control the most visible cut lines (“break lines”)
Decide in advance where your cuts will land along the stair stringers (the side framing or slopes that define the steps). A common tactic is to keep the longest, flattest reference edges unbroken and put the tighter, more complex cuts where they’re less noticeable—often near the stringer edges.
Plan slope and drainage with the geometry in mind
Outdoor flooring still needs drainage. For stair applications, it’s not enough to say “it drains”—you need to ensure water doesn’t pool at:
– the tread nose (front lip),
– perimeter edges where water finds a seam,
– junctions where a horizontal tread meets a vertical riser.
According to common exterior tile best-practice assemblies (TCNA-style water management approach), the system needs a controlled fall/slope and continuous drainage plane rather than relying on grout lines as “water channels” ( [ADD: TCNA or manufacturer guidance for exterior tile water management slope/fall]). If you can’t establish reliable fall, the right next step is substrate repair—not thicker mortar.
Quick planning math tip: write down the usable tread surface size for each step after accounting for spacing, trim thickness, and any transitions. Then convert that into how many full pieces you can place before you accept a cut.
Prep the Surface and Build a Stable Base
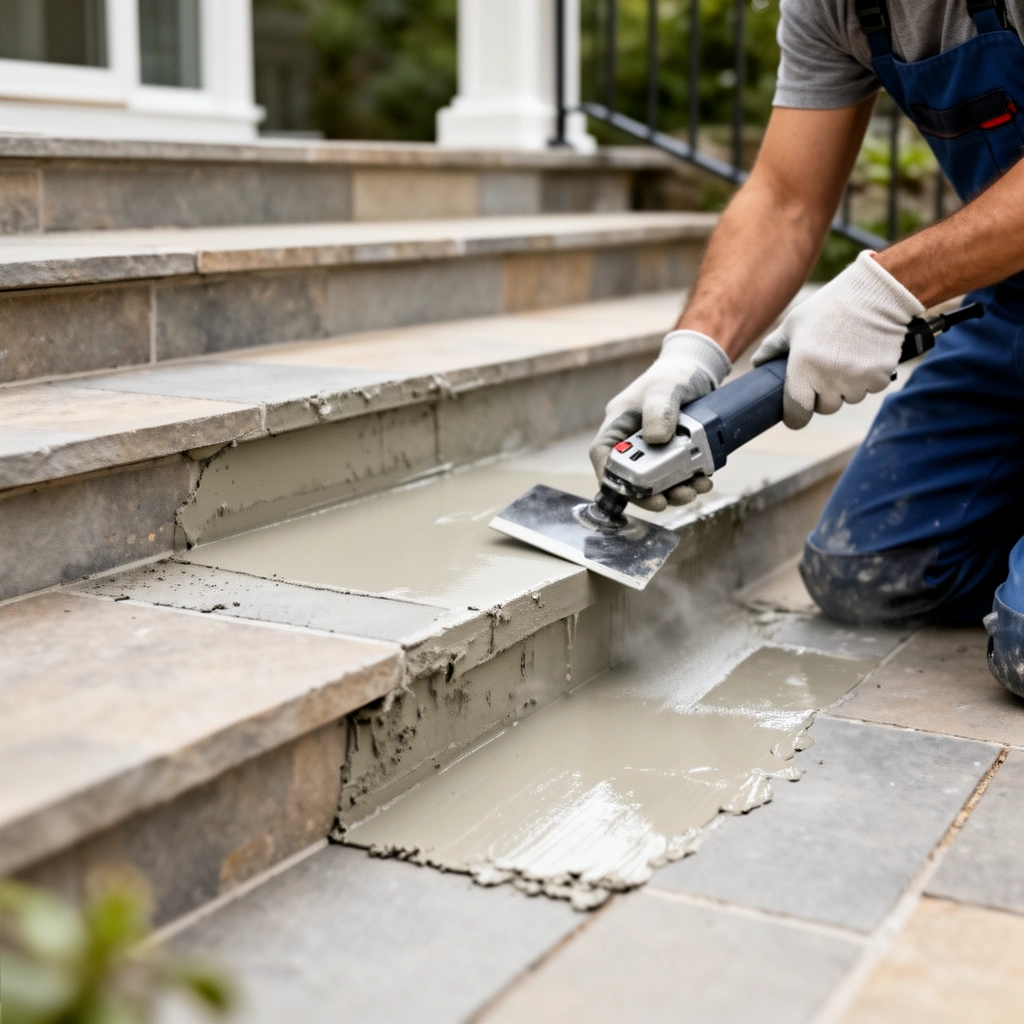
Build a stable, flat base before you think about the “look” of your stair flooring. If the substrate isn’t solid, your tile joints can crack, pavers can rock, and planks can pull away at edges.
Most outdoor flooring systems fail at the interface—between the stair substrate and the chosen mortar, membrane, leveling base, or fastening method.
For tile/stone, an outdoor-rated underlayment or waterproofing/membrane assembly is not optional if water exposure is expected.
If the stair framing or concrete top is moving, you must address structural movement before installing any finished flooring surface.
Confirm flatness for the system you chose
Different materials tolerate unevenness differently. Pavers require a proper leveling base and compaction so they interlock and don’t shift. Tile/stone typically require a flatter substrate and consistent mortar thickness. Outdoor planks often require a specific installation plane (and many plank manufacturers restrict unsupported spots, especially around stairs).
If you’re not sure what flatness tolerance applies, follow the specific installation requirements for your flooring system assembly (underlayment type, mortar/thinset system, and allowed substrate variation).
Clean, remove loose material, and install the required layers
Remove loose concrete, failing coatings, debris, and old adhesive residue that can weaken bond. Then install the required exterior underlayment/membrane (if your flooring system specifies one). For tile/stone, the membrane or exterior waterproofing approach is generally part of a complete assembly—using an incompatible membrane or skipping a required bond coat is a common reason outdoor tile lifts.
Fix the stair base where failure usually starts
Before installing around stair risers/treads, check these items:
– Movement: Does any step rock, flex, or spring when stepped on?
– Cracking/spalling: Are there deteriorated concrete edges or rebar exposure?
– Drainage blockage: Are there clogged weep holes, clogged gaps, or debris sitting at the stair base?
If the stair framing is moving, you’re not really “installing flooring”—you’re adding a decorative surface over an unstable structure.
Choose the Right Method: Tile/Stone vs Pavers vs Plank
Choose your stair flooring method based on how each system manages water, expansion, and edge sealing. Your best option is the one that matches your stair structure and the drainage realities of outdoor steps.
Tile/stone relies on an exterior-rated mortar system and a full waterproofing/water-management assembly—not just grout and thinset.
Pavers depend on a properly built base (graded, compacted layers) so step edges don’t settle or shift over time.
Outdoor planks must be installed as a system—following expansion gap rules and the manufacturer’s requirements for stair suitability.
Tile/stone: plan for the whole waterproofing assembly
For tile and stone outdoors, you generally need:
– exterior-rated thinset/mortar system,
– appropriate backer/support (as required by the assembly),
– sealed perimeter edges and transitions,
– a membrane/waterproofing approach compatible with your tile system.
Key term: thinset is the cementitious mortar used to bond tile to a substrate. In exterior stair applications, the specific “type” and system compatibility matter because water exposure is continuous, not occasional.
Pavers: build the base like it’s the flooring
Pavers look forgiving, but the performance is largely decided below the surface:
1. Build and compact the correct base layers.
2. Establish proper slope/fall for drainage.
3. Cut pavers cleanly for tread noses and step edges.
4. Maintain reliable interlock along the step geometry.
Outdoor planks/boards: confirm they’re rated for stairs
Not every “outdoor-looking” product is designed for stair applications. Many vinyl or wood-look systems specify:
– minimum installation conditions,
– expansion/contraction spacing,
– whether stairs require fastening/locking adjustments,
– acceptable transitions and edge sealing methods.
If the manufacturer doesn’t call out stair installation, treat that as a red flag.
Best Outdoor Stair Flooring Method by Water/Support Needs (Decision Guide)
| # | Outdoor Stair Method | Tread/ Riser Support | Drainage Edge Tolerance | Cut Complexity | Weather Resistance | Installer Risk |
|---|---|---|---|---|---|---|
| 1 | Exterior tile over approved membrane | ★ ★ ★ ★ ★ | Medium | High | ★ ★ ★ ★ ★ | Low–Med |
| 2 | Stone tile over approved membrane | ★ ★ ★ ★ ☆ | Medium–High | Very High | ★ ★ ★ ★ ★ | Med |
| 3 | Concrete pavers on compacted base | ★ ★ ★ ★ ★ | High | High | ★ ★ ★ ★ ☆ | Med |
| 4 | Natural stone pavers (exterior grade) | ★ ★ ★ ★ ☆ | High | Very High | ★ ★ ★ ★ ★ | Med |
| 5 | Outdoor-rated porcelain/ ceramic step treads | ★ ★ ★ ★ ☆ | High | Low–Med | ★ ★ ★ ★ ★ | Low |
| 6 | Outdoor wood-look planks (manufacturer-rated) | ★ ★ ★ ☆ ☆ | Low–Medium | Med | ★ ★ ★ ★ ☆ | High |
| 7 | Generic indoor vinyl/ laminate (not rated) | ★ ☆ ☆ ☆ ☆ | Low | Low | ★ ☆ ☆ ☆ ☆ | Very High |
Notes: “Installer Risk” is a practical DIY likelihood of problems tied to edge sealing, movement tolerance, and whether the system is explicitly exterior-rated. Always defer to your product’s installation instructions.
Cut and Dry-Fit Around Stair Edges
Cutting outdoor stair flooring is mostly geometry work. You’ll get cleaner results by templating each tread and riser and dry-fitting the assembly before you commit mortar/adhesive.
Templates are the fastest way to prevent “looks fine in the shop” failures when stair geometry varies from step to step.
Dry-fitting confirms the tread nose overhang and ensures transitions don’t trap water at corners.
Outdoor stairs require edge details (trim/flashing/sealing) because even a well-cut floor still needs perimeter water management.
Use templates for each unique step shape
Start with a material template (cardboard, thin foam, or template plastic) for one tread and one riser. If the stair run has multiple widths or turns, create separate templates for:
– the first step (often the reference point),
– middle steps (if dimensions change),
– the last step near the landing,
– side edges where stringers create angles.
Dry-fit for overhang, spacing, and corner transitions
When dry-fitting, look specifically at:
– the tread nose (does it overhang consistently?),
– riser line alignment (are risers plumb and straight?),
– grout/joint spacing (for tile),
– how the system meets at corners and along the sides.
Plan transitions that can tolerate weather
At the top landing and along side edges, you’ll need a transition detail designed for outdoor exposure—commonly a trim piece, edging profile, or flashing/sealant system. The goal is to prevent water from infiltrating the substrate behind the flooring.
According to general exterior waterproofing principles used in tile assemblies (water must be directed away from seams), perimeter edges must be sealed with compatible materials rather than relying on caulk “somewhere” ( [ADD: manufacturer or waterproofing guidance on perimeter sealing compatibility]).
Install the Flooring and Seal Transitions
Install the flooring as a controlled sequence: establish a fixed reference line, set the stair pieces step-by-step, then seal every water-exposed transition. In outdoor stair builds, the finish quality is less about speed and more about uninterrupted support and perimeter sealing.
Starting from a consistent reference point (often the top tread or a fixed edge) reduces cumulative alignment errors across multiple steps.
Exterior-rated adhesives/mortars are part of a system—use the approved trowel size and mixing/application method stated in the instructions.
Sealing the perimeter joints and edges is where outdoor stair flooring most reliably gains long-term water resistance.
Use approved mortars/adhesives with correct application
For tile/stone, use the exterior-rated thinset/mortar system and follow:
– approved substrate preparation,
– mixing ratio and pot life,
– trowel notch size,
– required coverage (often described as full back-buttering or specific coverage percentages in manufacturer directions).
For pavers, you’re often working with a leveling base and jointing material rules—follow those exactly, including compaction requirements and edge restraint details.
For planks, follow the manufacturer’s fastening/sealing and expansion guidance around stairs. Outdoors, boards expand and contract; if you “tight fit” without gaps where required, you can get buckling or joint separation.
Seal transitions and perimeter edges that trap water
Use weather-resistant trim/edge pieces and sealants compatible with your materials. Seal all perimeter joints where water can enter:
– flooring-to-stringer interfaces,
– vertical riser edges,
– transitions between tread surfaces and landing surfaces,
– any penetrations (rail brackets, anchors).
For exterior tile assemblies, movement joints and waterproofing at changes of plane are especially critical. If your system includes an expansion joint strategy, follow it rather than filling everything with grout.
What Can Go Wrong (Common Mistakes on Outdoor Stairs)
Outdoor stair flooring goes wrong for predictable reasons. Most problems trace back to drainage, movement allowance, substrate support, or using interior-only materials in an exterior environment.
Skipping drainage details can cause water to pool under edges, leading to lift, efflorescence, and failure of bond lines.
Ignoring expansion/contraction rules can crack tile, debond mortar, or buckle planks even when the installation looks correct at day one.
Installing without dry-fit on stairs often creates uneven tread noses and misaligned risers that are difficult to correct after setting.
Common mistakes to avoid
– Skipping drainage: even a small blocked pathway at the base or a sealed seam that should breathe can trap water.
– No expansion strategy: tile movement joints and outdoor plank expansion gaps are system requirements, not optional finishing touches.
– Relying on “tight” cuts: stair geometry varies; tight, unforgiving cuts can force misalignment and prevent proper edge detail fit.
– Poor substrate support: flex in the tread or riser planes shows up as cracked grout lines, loose tiles, or worn seams.
– Using interior materials: adhesives, underlayments, and trim products can be rated for interior-only conditions—outdoor use changes freeze/thaw and moisture exposure.
Troubleshooting when something’s already off
If you see hollow spots, movement, or persistent pooling, stop and address the base. Overlaying a failure at the surface usually doesn’t fix the underlying water pathway or structural issue.
Verdict / Tip (What I’d Recommend and When to Skip)
DIY is realistic for outdoor stair flooring when you follow a manufacturer-specific exterior system end-to-end—especially membranes/underlayment, mortar/adhesive, edge sealing, and expansion guidance. Skip DIY (or bring in help) if you find structural movement in the stair framing, significant concrete deterioration, or recurring drainage problems at the stair base.
The “right way” for stairs is the method that matches the full system instructions for exterior exposure and stair transitions.
When the base moves or water pools, surface installation details can’t compensate for a failing drainage or substrate condition.
If the installation calls for a specific membrane, flashing, or movement-joint strategy, you need to treat it as mandatory—not optional.
Downsides to know upfront: stair cutting and templating take longer than straight-run flooring, and outdoor sealing details are unforgiving—once edges are wrong, water intrusion can accelerate failure. If your steps are irregular (multiple angles, landings, or inconsistent risers), plan extra time for templates and test fits.
If you’re using a multi-part exterior system, the “right way” is whatever that system’s instructions require for stairs and transitions, because stair failures often come from the base and sealing details—not the top surface.
Quick Checklist (Scan Before You Start)
– Measure: each tread depth + riser height + stair widths (and note any step-to-step variation)
– Decide: method (tile/stone, pavers, or outdoor planks) that’s explicitly rated for exterior/stairs
– Prep: flat, solid substrate; correct outdoor underlayment/membrane if required
– Plan cuts: one template per unique tread/riser shape; dry-fit first
– Install: use approved exterior-rated mortar/adhesive/fasteners and required application methods
– Seal/trim: weather-resistant edges and all perimeter joints where water can enter
– Final check: confirm spacing/alignment and drainage paths are clear
FAQ
Do I need a special underlayment or membrane for outdoor stairs?
Often yes—especially for tile/stone—because outdoor flooring needs water management. Use the manufacturer’s instructions for your exact system and assembly to confirm what’s required and where it applies.
How do I handle expansion gaps around stair edges?
Follow the flooring system’s outdoor expansion/contraction guidance. Don’t “lock it in” with tight joints—use the specified spacing and compatible trim/edge details.
What’s the best way to cut flooring for stair treads and risers?
Make templates for each unique tread and riser shape, then dry-fit before adhesive or mortar. This reduces the risk of uneven tread noses and mismatched risers.
Can I install over old outdoor flooring on stairs?
Only if the existing surface is sound, properly prepared, and the new flooring system allows it. If you find loose layers, uneven areas, water damage, or structural movement, remove the old material and rebuild the base.
Conclusion
Installing outdoor flooring around stairs is less about choosing a pretty surface and more about managing three fundamentals: correct geometry (treads, risers, and transitions), a stable exterior-rated base assembly, and reliable water control at edges and joints. If you measure carefully, use the right system components for outdoor exposure, and seal the perimeter exactly as specified, your stair flooring will hold up far longer—especially on tricky angles and multi-edge step designs.
Frequently Asked Questions
How do I measure and plan outdoor flooring around stairs before installing?
Start by measuring each tread and riser, then map the stair edges, stringers, and any landing areas. Use a chalk line or laser level to confirm square lines and consistent slopes so your outdoor floor tiles or pavers won’t “float” at the stair nosing. Plan for expansion gaps and drainage by noting where water will run and how far away from the stairs you want the flooring to extend.
What’s the best way to cut and fit pavers or tiles around outdoor stair steps?
Use the right cutting tools: a wet saw for ceramic/porcelain tile or a masonry saw/snap cutter for pavers, and a tile trim angle for clean stair edges. Dry-fit pieces first, then cut riser and tread sections separately to maintain tight seams and a consistent pattern. Leave small expansion gaps at transitions and use exterior-rated grout or paver joints designed for freeze-thaw conditions.
Which underlayment and base should I use for stairs and outdoor floors?
Outdoor stair flooring typically needs a stable, well-draining base such as compacted gravel over a proper subbase, especially for pavers. For tile, use an exterior cement backer board or a waterproofing system rated for outdoor wet areas. Make sure the base is graded correctly for drainage so water doesn’t pool at the stair edges, which can cause lifting, cracking, or uneven settling.
Why do outdoor stair floors fail near the steps, and how can I prevent it?
Most failures happen due to poor drainage, inadequate slope, movement from an unstable base, or missing expansion joints. Water that collects at the stair nosing or along side edges freezes and expands, loosening grout or pavers. Prevent this by using exterior-grade materials, sealing where appropriate, installing proper joint spacing, and ensuring the substrate is compacted and firmly bonded.
How do I finish the edges and transitions where outdoor flooring meets stair treads?
Finish stair edges with an exterior stair edging trim, bullnose tile, or paver edging to create a durable, slip-resistant boundary. Use a consistent transition at landings and between different materials (like tile to concrete) using an expansion-cap or flexible exterior sealant. For safety and longevity, choose slip-resistant surfaces and keep the stair nosing slightly protected from direct water exposure.
📅 Last Updated: October 12, 2026 | Topic: How to install around stairs outdoor floors? | Content verified for accuracy and freshness.
References
- Google Scholar Google Scholar
https://scholar.google.com/scholar?q=install+outdoor+tile+around+stairs - Google Scholar Google Scholar
https://scholar.google.com/scholar?q=exterior+stair+surface+slip+resistant+installation - Google Scholar Google Scholar
https://scholar.google.com/scholar?q=paver+installation+steps+outdoor+stair+nosing - Redirecting…
https://www.ada.gov/2010ADAstandards_index.htm - https://www.osha.gov/slips-trips-and-falls
- https://www.cdc.gov/niosh/topics/slips/
- https://en.wikipedia.org/wiki/Stair
- Stair nosing
https://en.wikipedia.org/wiki/Stair_nosing - Tile
https://en.wikipedia.org/wiki/Tile - https://en.wikipedia.org/wiki/Outdoor_flooring