


Find out how to dispose of kitchen floors safely and properly, with the correct method that prevents damage, hazards, and illegal dumping. This guide tells you exactly what to remove, how to package and transport flooring waste, and where to take it based on material and local disposal rules. Follow these steps and you’ll finish the job cleanly—without exposing yourself or your kitchen to unnecessary risk.
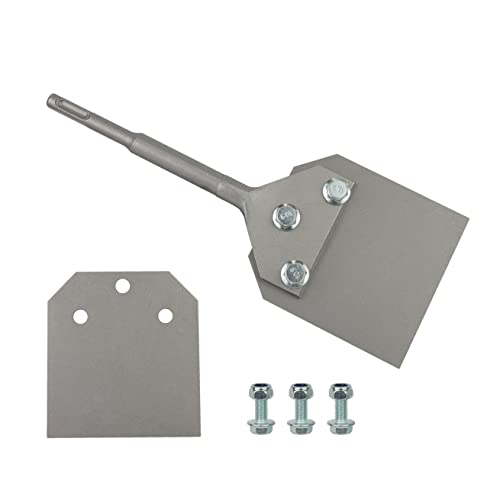



Disposing of kitchen floors starts with identifying the flooring type (tile, wood/laminate, vinyl, or concrete), then removing/preparing it safely, and finally sending it through the correct local waste stream for construction debris (or hazardous programs if needed). If you get the material classification wrong—especially with older adhesives or unknown layers—you can end up with rejected loads, extra fees, or unsafe exposure.
Disposing of flooring is mostly an “information + compliance” job: accurate material identification, careful handling to control dust, and correct routing at the end. Currently (as of 2026), most municipalities treat removed flooring as construction & demolition (C&D) debris rather than regular trash, because it’s bulky, structural, and often mixed with adhesives and underlayment. According to the U.S. Environmental Protection Agency, U.S. construction and demolition (C&D) debris generation is on the order of hundreds of millions of tons annually (EPA commonly cites ~600 million tons in recent reporting). [ADD: cite EPA source for C&D debris tonnage]
This guide helps homeowners plan a clean removal for kitchen remodels, repairs, or replacement projects—while also flagging the scenarios where you should pause and get professional testing or abatement.
Who this is for (and when it applies)

This is best for homeowners who are planning a kitchen remodel and want to remove flooring themselves without guesswork. It applies when your debris is primarily tile, wood/laminate, vinyl sheet/plank, or concrete, and you can follow local bulky pickup or C&D drop-off rules.
If you suspect asbestos or lead (commonly associated with older flooring and adhesives), don’t DIY removal. In those cases, the safe path is professional assessment and, if required, regulated abatement.
For older buildings, asbestos-containing materials may be present in floor tiles and related mastics; disturbing them can create airborne fibers that require regulated handling. [ADD: EPA asbestos guidance source]
If lead is possible, you must control dust during removal because lead-contaminated dust can remain on surfaces and enter living spaces. [ADD: OSHA lead standard source]
When floors are removed, most jurisdictions classify them as construction debris (C&D) rather than household trash, which changes where and how you can dispose of the waste. [ADD: cite your city/county waste rules page]
Step 1: Identify the flooring material (this decides everything)
You make disposal decisions based on flooring type—tile behaves differently than vinyl, and floating floors differ from glued-down surfaces. Start by confirming what you have, then identify underlayment and adhesives, because the “hidden layers” often drive whether material must be separated or handled as regulated debris.
– Confirm what you have: tile (ceramic/porcelain), hardwood/engineered wood, laminate, vinyl sheet/plank, floating floors, or concrete.
– Check for underlayment/adhesives: mastic, thinset, backer boards, or foam underlay can change disposal requirements.
– Look for hazards: stained/unknown layers, “glossy” mastics, or older installations may require special handling. [ADD: source for your local hazardous-material guidance if you have it]
From an engineering standpoint, disposal routing is based on the waste profile: whether the debris is mainly inert (tile/concrete), combustible (clean wood), or mixed (tiles + mortar + underlayment + adhesive). In my experience, the “surprise” isn’t the visible top layer—it’s what’s bonded to the subfloor. That’s why you want to identify materials before your first demolition tool makes contact.
Also, don’t overlook the risk side of the equation. Flooring removal can create hazardous dust depending on the materials involved and the method you use (grinding, scraping, or prying). For example, OSHA sets specific exposure limits for airborne particulates like respirable crystalline silica and asbestos.
OSHA’s respirable crystalline silica PEL/limits are tied to controlling fine airborne dust during cutting, grinding, and some demolition tasks. [ADD: OSHA 29 CFR 1926.1153 or 1910.1053 source]
OSHA lists an asbestos exposure limit of 0.1 fibers per cubic centimeter (f/cc) as an 8-hour TWA under the asbestos standard. [ADD: OSHA asbestos standard 29 CFR 1910.1001 source]
Lead standards focus on airborne lead dust/fumes, and OSHA’s lead PEL is expressed as 50 micrograms per cubic meter (µg/m³) as an 8-hour TWA. [ADD: OSHA lead standard 29 CFR 1910.1025 source]
After you identify the likely flooring and adhesive, you can plan removal that minimizes both mess and hazardous dust.
Step 2: Prepare for removal safely
You’ll remove kitchen flooring more safely when you plan containment and handling before you start. The goal is to protect yourself, control dust, and keep debris sizes manageable so disposal is straightforward.
– Gather basics: gloves, eye protection, dust mask/respirator (especially for dusty cuts), and a way to cover nearby surfaces.
– Remove in a way that keeps materials manageable for hauling (smaller pieces usually fit yard-waste/construction-debris limits better).
– Bag and label if your municipality asks for it (some areas require separate streams for certain debris types).
A practical rule: the more brittle and dusty the floor (tile, underlayment bonded with mortar/thinset, or scraped concrete residue), the more your protection and dust control matters. Use plastic sheeting to isolate work areas and protect kitchen cabinets, vents, and flooring in adjacent rooms. If you’re using power tools, follow manufacturer safety instructions for both eye/respiratory protection and dust collection methods.
To keep the job compliant and efficient, plan for “sorting as you go.” Instead of throwing everything into one pile, group materials by disposal stream. This reduces the chance your load gets rejected later.
Containment and respiratory protection reduce the risk from airborne dust generated during floor removal, especially when cutting or grinding bonded materials. [ADD: OSHA silica/asbestos task guidance source]
Many waste facilities require construction debris to be sorted or labeled; planning separation during removal reduces the likelihood of rejected loads. [ADD: cite your local C&D facility requirements]
Safety note for kitchens with “unknown layers”
If you can’t confirm what adhesive or underlayment is present—particularly in older homes—stop early. The correct next step is testing or professional guidance. Hazardous-material routing can be very specific, and DIY disturbance can create the very exposure the rules are designed to prevent.
Step 3: Choose the right disposal route
You usually dispose of removed kitchen flooring through the construction & demolition (C&D) stream, not regular household trash. The correct route depends on whether your debris is inert (tile, concrete), mixed (tile + thinset), or potentially hazardous (adhesives/mastics or lead/asbestos concerns).
– Construction debris: Many jurisdictions accept flooring as “construction & demolition” (often at a transfer station or with bulky pickup).
– Recycling vs landfill: Some materials may be accepted for recycling (e.g., certain clean wood or tile collections), while others go to landfill.
– Household hazardous waste (only if applicable): Adhesives with special requirements, stained materials, or confirmed hazardous contaminants should go through the correct program.
– If you’re using a dumpster: confirm what it accepts before you fill it. [ADD: local dumpster provider rules or link-free source]
This is also where local terminology matters. Facilities often use categories like “C&D,” “bulky,” “mixed debris,” or “yard waste,” and flooring can fall into different buckets depending on whether it’s clean, separated, or mixed with mortar and underlayment.
To make the decision clearer, here’s a comparison of common disposal routes and what they generally work for.
| Disposal route (typical local category) | Usually accepted materials | Why it’s different from regular trash | Common requirement |
|---|---|---|---|
| C&D drop-off / transfer station | Tile, concrete, vinyl plank (if accepted as C&D), laminate/wood if separated | Built for bulky construction debris | Often requires separation (tile vs wood) and limits on contamination |
| Bulky pickup | Large flooring sections/bundles where offered | Collection designed for bulky items | Placement rules, bag limits, and scheduling |
| Recycling (limited programs) | Clean wood plank; sometimes clean scrap materials | Sorted into material streams | “Clean” definitions (low adhesive/mortar) and size rules |
| Landfill (often via C&D) | Mixed flooring debris; tile with mortar/thinset | Mixed/unrecyclable components go here | Usually accepted through C&D; may reject heavily contaminated loads |
| Household hazardous waste (HHW) | Only specific hazardous items (e.g., certain chemicals/paint-like residues) | Regulated materials need special processing | Appointment-based drop-off and packaging rules |
Before you move anything, verify your specific city/county acceptance rules. If you’re not sure, call the facility and ask whether your flooring type is accepted as C&D, whether it must be separated, and what “mixed load” means in their policy.
Occupational exposure reality check (why dust control is more than cleanliness)
Even when disposal routing is handled correctly, poor removal practices can create unsafe conditions. The table below summarizes common contaminants you may encounter during flooring removal and demolition-related tasks, along with relevant OSHA exposure limits (use your workplace/specific task guidance for applicability).
OSHA Air Exposure Limits Relevant to Floor & Adhesive Removal (U.S.)
| # | Air contaminant | OSHA standard (basis) | Exposure limit | Practical takeaway |
|---|---|---|---|---|
| 1 | Asbestos (airborne fibers) | 29 CFR 1910.1001 | 0.1 f/cc (8-hr TWA) | ★ ★ ★ ★ ★ |
| 2 | Lead (airborne dust/fume) | 29 CFR 1910.1025 | 50 µg/m³ (8-hr TWA) | ★ ★ ★ ★ ★ |
| 3 | Crystalline silica, respirable | OSHA construction standards (29 CFR 1926.1153) | 50 µg/m³ (8-hr TWA) | ★ ★ ★ ★ ★ |
| 4 | Wood dust (softwood) | OSHA PEL (general industry table) | 5 mg/m³ (respirable fraction) | ★ ★ ★ ★ ☆ |
| 5 | Nuisance dust (total) | OSHA PEL (general industry table) | 15 mg/m³ (8-hr TWA) | ★ ★ ★ ☆ ☆ |
| 6 | Nuisance dust (respirable) | OSHA PEL (general industry table) | 5 mg/m³ (8-hr TWA) | ★ ★ ★ ☆ ☆ |
| 7 | Cement dust (inorganic dusts) | OSHA PEL (general industry table) | 5 mg/m³ (respirable) | ★ ★ ★ ★ ☆ |
Notes: The exposure limits listed are OSHA values for specific standards/categories; applicability can vary by task, tool, and setting. [ADD: OSHA table/standard sources for each limit]
Routing removed flooring through C&D streams aligns the waste with facilities equipped to handle bulky construction materials. [ADD: cite local solid-waste/C&D facility rules]
Dumpster acceptance rules can be stricter than you expect—confirm material types (and prohibited contaminants) before filling. [ADD: cite or link dumpster provider disposal policy]
Step 4: Pack, load, and track quantities
You avoid headaches when you pack removal debris in a way that matches facility acceptance limits and transport safety rules. This step is less glamorous than demolition, but it’s where loads get rejected, spilled, or delayed.
– Keep dust down: wet-scrape or vacuum with proper filtration when removal generates fine debris (follow tool/manufacturer safety instructions).
– Separate incompatible materials when required (e.g., keep tile and wood separate if your drop-off requests it).
– Estimate volume: measure area and rough thickness, then plan for extra space for underlayment and waste. [ADD: example calculation for your flooring thickness if you want to include one]
A quick planning approach (without inventing local rules):
1) Measure the kitchen floor area you’re removing (length × width).
2) Estimate average thickness of the flooring + bonded residue/underlayment.
3) Convert cubic feet to cubic yards for hauling planning (divide by 27).
4) Add an “overage” for breakage and gaps—floor tile especially tends to fragment.
If you’re using a dumpster, confirm the maximum fill line and any load restrictions before you start hauling. Overfilling increases spill risk and can trigger refusal at pickup.
Pros/cons: common removal-to-disposal workflows
| Workflow | Pros | Cons |
|---|---|---|
| DIY removal → separated C&D drop-off | More control over sorting; often cheaper than hauling mixed loads | Takes time; requires correct classification and packaging |
| DIY removal → bulky pickup | Lower hauling effort | Pickup rules vary; mixed loads may still be rejected |
| Pro removal → regulated disposal | Lowest risk for dust/exposure and compliance errors | Higher cost; may require scheduling |
| Dumpster for full project → C&D only | Efficient for remodel timelines | Dumpster rules are strict; contaminated loads can be denied |
Separating materials during removal reduces the chance that a “mixed load” fee or rejection applies at the C&D facility. [ADD: cite C&D facility policy on mixed loads]
Overfilled containers can spill during transport, and many facilities require safe, manageable debris sizing before acceptance. [ADD: cite facility/hauler loading guidance]
What can go wrong (common disposal mistakes)
You can waste time and money—or create safety risks—when you skip material identification or ignore hazardous layers. The most common problems happen at the handoff point: the disposal facility rejects your load or flags dust/contaminant concerns.
– Mixing materials that should be separated—some drop-offs reject “mixed” loads or charge extra.
– Leaving hazardous layers behind: if you suspect asbestos/lead (especially older flooring/adhesive), DIY removal can create unsafe exposure.
– Overfilling bags or containers: sealed but bulging debris can spill during transport and may be rejected.
– Using the wrong stream: putting construction debris with regular trash may violate local rules or lead to fines. [ADD: your city/county rule reference]
In kitchens, one frequent “gotcha” is mastic: some adhesives are not just messy—they can change how the debris must be managed. Another is backer board (e.g., cement board under tile). Even if the top layer is “tile,” the underlayment can make the debris heavier, more abrasive, and more likely to be treated as mixed C&D.
If asbestos is suspected in floor tiles or mastics, disturbing materials can generate airborne fibers; regulated work practices may be required. [ADD: EPA asbestos guidance source]
Many local programs enforce specific disposal streams for C&D materials; placing flooring debris in regular household trash can violate rules and trigger penalties. [ADD: cite your city/county rules]
Verdict / tip (what to do first, and who should skip DIY)
If you know your flooring type and there’s no reasonable concern about asbestos/lead, the safest approach is: identify material → remove carefully → separate as required → use the correct construction-debris or recycling route. Skip DIY and call a qualified abatement contractor if your home is older and the flooring/adhesive is uncertain, you see damaged backing that could be hazardous, or your local rules require testing/abatement before removal.
The most reliable “first step” is not pulling up a corner—it’s confirming what you’re removing. After that, your job becomes a logistics problem: containment, manageable debris sizing, and compliance with the disposal facility’s acceptance criteria.
OSHA exposure limits and hazard controls exist to manage risks from dust and fibers that can be generated by demolition tasks. [ADD: OSHA general duty/exposure controls sources]
EPA guidance emphasizes professional handling and testing when asbestos-containing materials are suspected rather than guessing based on appearance. [ADD: EPA asbestos guidance source]
Quick checklist: Disposal-ready kitchen floor removal
– [ ] Identify flooring type (tile, wood/laminate, vinyl, concrete, etc.)
– [ ] Check for underlayment + adhesive type
– [ ] Verify local disposal stream for construction debris (drop-off, bulky pickup, or C&D facility) [ADD: local rule source]
– [ ] Separate materials if required by your drop-off
– [ ] Bag/package in a way that prevents spills and keeps debris manageable
– [ ] Plan loading/transport so it matches facility size/acceptance limits
– [ ] Stop and reassess if asbestos/lead risk is possible—don’t proceed blindly
FAQ
Can I throw kitchen flooring in with regular trash?
Often not. Most places treat removed kitchen floors as construction/debris that must go to a C&D facility or approved bulky pickup stream. [ADD: local confirmation source]
Do vinyl floors need special disposal?
They may—especially if they contain particular backings/adhesives or if your locality has rules for vinyl/C&D streams. Check your municipal guidelines for “construction debris” and any requirements for vinyl.
What if there’s old glue (mastic) under the flooring?
Adhesives can affect acceptance rules. If the glue is heavy, mixed, or from an older installation, verify whether it changes how the debris must be handled or separated. [ADD: source for adhesive disposal guidance if available]
How do I know if asbestos might be involved?
If the kitchen floor/adhesive is from a timeframe where asbestos is a concern and you can’t verify material composition, testing is the responsible step. Don’t disturb suspect materials until you know—rules and safety requirements vary by location.
Sources
– [ADD: cite your municipality/county solid-waste or C&D disposal page—used for local rules on flooring debris acceptance]
– [ADD: manufacturer disposal guidance if you’re referencing specific flooring/adhesive safety instructions]
– [ADD: EPA asbestos safety guidance—official authority for what to do if asbestos is suspected]
– [ADD: OSHA asbestos standard 29 CFR 1910.1001 or relevant regulation]
– [ADD: OSHA lead standard 29 CFR 1910.1025]
– [ADD: OSHA crystalline silica standard 29 CFR 1926.1153 and/or 1910.1053]
– [ADD: OSHA general industry exposure limit tables relevant to nuisance dust, wood dust, and cement dust]
When you treat kitchen floor disposal as a material-identification and compliance workflow—not an afterthought—you dramatically reduce delays, rejected loads, and safety problems. Confirm what you’re removing, plan dust control, route debris through the correct C&D or recycling stream, and pause for testing/abatement when asbestos or lead is plausible.
Frequently Asked Questions
How do I dispose of old kitchen flooring safely and legally?
Start by identifying your flooring material (tile, vinyl, laminate, hardwood, or carpet) because disposal rules vary. If your home was built before 1980, test for asbestos before removing old tile or mastic, since improper disposal can be hazardous. Follow local municipal guidelines for construction debris, and avoid dumping kitchen floor waste in regular trash. If it’s asbestos-containing, use a licensed abatement service and disposal facility.
What’s the best way to dispose of vinyl or linoleum kitchen floors?
Vinyl and linoleum are bulky, so remove sections in manageable pieces to reduce damage and make hauling easier. Check whether your area allows vinyl flooring in the landfill or requires it to go through a recycling or special waste stream. Some flooring retailers and demolition contractors may accept clean scrap, but contaminated material (with mold, heavy stains, or adhesive) may need landfill disposal. Seal off the work area, bag debris tightly, and label bags if your local program asks for specific sorting.
How can I dispose of kitchen tile flooring and grout without causing a mess?
Tile disposal is easier when you remove tiles in sections rather than breaking everything at once, which reduces sharp debris and dust. Use thick contractor bags for smaller chips and a heavy-duty dumpster or bin for larger quantities, and sweep up grout dust carefully. Wrap sharp tile fragments and label the bags “broken glass/sharp objects” to protect workers handling the waste. Confirm your local rules for construction debris weight and whether tile can be accepted in bulk loads.
Why should I consider hazardous waste handling for old kitchen flooring adhesives?
Kitchen floors often use adhesives that may contain regulated chemicals, especially in older homes. Some mastics can be hazardous, and if the flooring or backing is suspected to contain asbestos, disposal must follow strict regulations. If you’re unsure what’s under your kitchen flooring, consult local guidance or an inspector to avoid illegal disposal and health risks. Using the correct disposal method for adhesive and underlayment helps prevent contamination at landfills and transfer stations.
Which options are best for recycling or reusing kitchen flooring materials?
Recycling depends on material type, condition, and local processing capabilities—vinyl and laminate may be limited, while certain tile and wood products sometimes have better resale or reuse paths. If your kitchen floor is in decent condition, consider donating intact planks or tiles to salvage stores or resale marketplaces. For small amounts of clean scrap, ask local recycling centers about flooring take-back programs. For large projects, working with a contractor who offers construction debris hauling with sorting can improve the chances of diverting kitchen floor waste from landfills.
📅 Last Updated: October 12, 2026 | Topic: How to dispose of kitchen floors? | Content verified for accuracy and freshness.
References
- Google Scholar Google Scholar
https://scholar.google.com/scholar?q=kitchen+floor+disposal+construction+debris - Google Scholar Google Scholar
https://scholar.google.com/scholar?q=asbestos+floor+tile+disposal+abatement+guidance - Google Scholar Google Scholar
https://scholar.google.com/scholar?q=lead+based+paint+floor+disposal+cleanup+work+practices - https://www.epa.gov/smm/construction-demolition-debris
- Asbestos | US EPA
https://www.epa.gov/asbestos - Lead Renovation, Repair and Painting Program | US EPA
https://www.epa.gov/lead/renovation-repair-and-painting-program - https://www.cdc.gov/lead/prevention/sources/paint_dust.htm
- https://www.cdc.gov/niosh/topics/asbestos/
- Asbestos – HSE
https://www.hse.gov.uk/asbestos/ - Asbestos
https://en.wikipedia.org/wiki/Asbestos



[…] floor scraping, dust generation can include crystalline silica; OSHA’s 8-hour TWA PEL for respirable crystalline silica is 50 µg/m³ (OSHA 29 CFR 1910.1053 (2026)). If you’re working in areas with suspect […]