


Learn how to install underlayment under kitchen floors with a step-by-step process that tells you exactly what to do and in what order. If you’re dealing with a subfloor that’s uneven or a hard surface that needs quieter, softer underfoot feel, this guide walks through prep, layout, seam spacing, and fastening so it lays flat and holds up. By the end, you’ll know the correct underlayment type to use and the fastest way to install it without bubbles, gaps, or misalignment under your flooring.




Installing underlayment under kitchen floors is mostly about three things: correct subfloor prep, correct seam/vapor-barrier handling, and fastening (or not fastening) only where your specific product allows. If you match the underlayment to your flooring type and follow the manufacturer’s seam and moisture requirements, the floor will feel solid and perform as intended—especially in a high-traffic, moisture-prone kitchen.
If your kitchen is on a concrete slab or a wood subfloor (or you’re installing over an existing subfloor system), the “right” method can change based on the underlayment type and your flooring material. This guide walks you through a practical, step-by-step approach and highlights the kitchen-specific details that often cause problems later. Always check the underlayment + flooring manufacturer instructions first, then align your install plan with those requirements.
Choose the Right Underlayment for Your Kitchen Floor
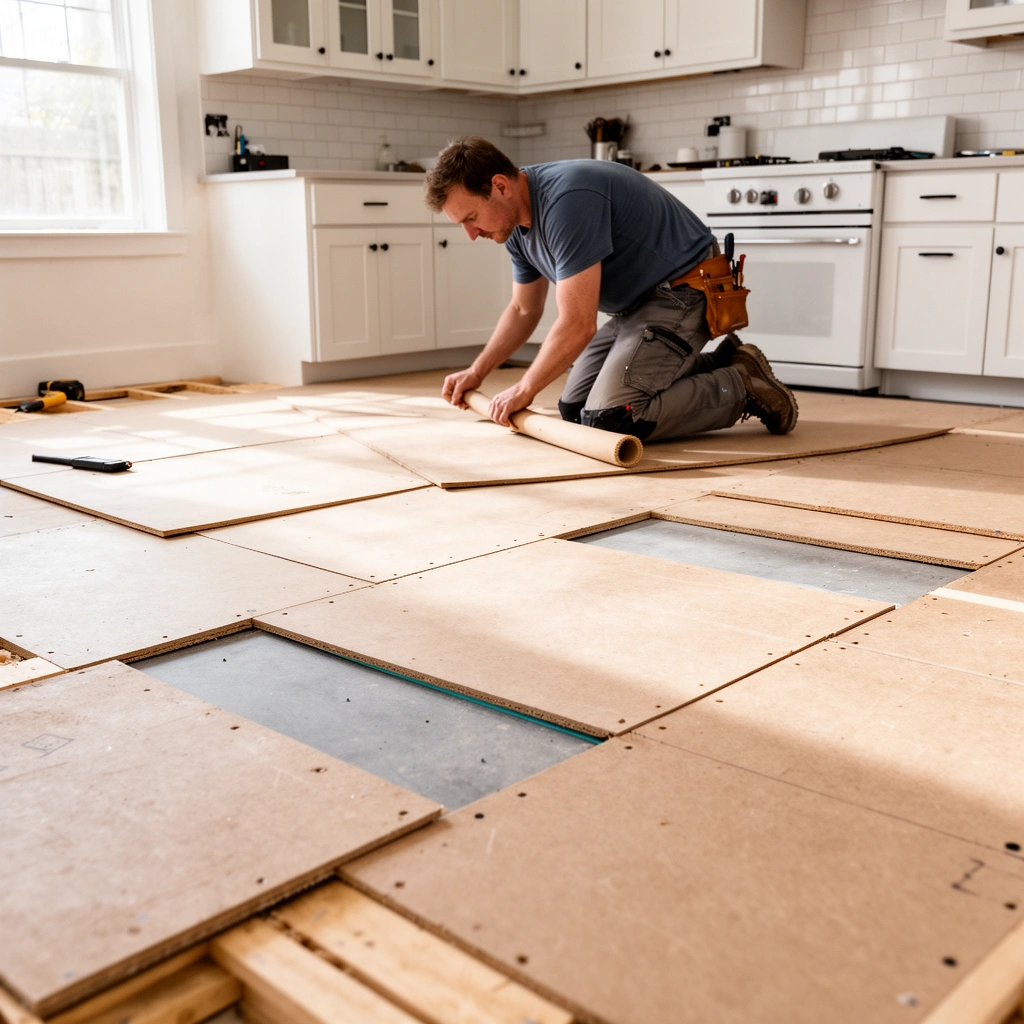
The best underlayment for a kitchen is the one that matches both your flooring system and your moisture conditions. In practice, that usually means choosing the right cushioning level for laminate/LVP (luxury vinyl plank) or click systems, while ensuring the vapor barrier approach is correct for slab-on-grade versus wood subfloors.
For a concrete slab, underlayment often needs a built-in vapor barrier or a separate moisture barrier—depending on what the flooring manufacturer requires. For a wood subfloor, the priority may shift toward sound control and smoothness while still protecting the flooring from everyday kitchen humidity swings. This is also where you confirm whether your underlayment is “floating-floor compatible,” meaning it should not be over-nailed or stapled beyond approved zones.
“Kitchen floors fail most often at seams, edges, and moisture interfaces—not because the foam is ‘wrong.’” Always validate your underlayment’s seam method and vapor-barrier plan in the installation instructions.
“Attached vapor barriers and separate poly sheeting are not interchangeable.” The correct approach depends on whether your underlayment and flooring are designed as a matched system.
Key selection factors to verify on your product docs:
– Match the underlayment to your flooring type. Laminate and click-lock LVP often require specific compressibility limits so the joints don’t flex under load. Engineered hardwood may use underlayment only where permitted (and sometimes none).
– Confirm vapor barrier requirements. Over concrete, the underlayment may need a specific vapor barrier thickness (commonly poly sheeting measured in mils) and seam sealing method.
– Follow fastening rules exactly. Many underlayments are designed to float; fastening can reduce performance or create weak points.
Concrete-slab moisture anchor points (use these to compare to your instructions):
According to common industry guidance for floating floors, expansion gaps are often specified around 1/4 in (6 mm) at walls and fixed vertical surfaces ([ADD: source for the exact value you’re following, e.g., NWFA or your flooring manufacturer]). According to ASTM F2170 moisture testing methods, results help determine whether to install as-is or mitigate moisture ([ADD: source for how your flooring system interprets ASTM F2170 numbers]). And in many underlayment systems, poly vapor barriers are often 6-mil minimum in slab applications—confirm your product spec ([ADD: source for your required mil thickness]).
Underlayment Options for Kitchen Floors (Typical Spec Ranges)
| # | Underlayment type | Typical thickness | Vapor barrier | Kitchen fit score | Warranty risk if misused |
|---|---|---|---|---|---|
| 1 | Attached-pad laminate underlay | ~1.5–3.0 mm | Usually product-defined | ★★★★★ | Low |
| 2 | Cushion foam roll (laminate/LVP) | ~1.0–2.5 mm | May be separate layer | ★★★★☆ | Med |
| 3 | Foam + integrated vapor film | ~2.0–4.0 mm | Integrated | ★★★★☆ | Low–Med |
| 4 | Cork/composite underlayment | ~2.5–5.0 mm | Often separate needed | ★★★☆☆ | Med–High |
| 5 | Thin felt pad (limited systems) | ~2.0–3.0 mm | Usually not a vapor barrier | ★★★☆☆ | High (slab) |
| 6 | Poly sheet vapor barrier + foam/roll pad | ~6 mil poly + pad | Poly film primary | ★★★★★ (slab) | Low |
| 7 | Rubber underlayment (sound-focused) | ~1.5–4.0 mm | Often separate needed | ★★★☆☆ | Med |
Note: The ranges above are typical categories; your exact underlayment spec (thickness, vapor barrier method, seam overlap) must match your product instructions and warranty requirements.
Prep the Subfloor (This Makes or Breaks the Install)
The best underlayment install starts with a subfloor that is clean, stable, and flat. Underlayment can cushion minor irregularities, but it cannot reliably fix loose boards, significant dips, or structural movement—which is exactly what kitchen environments tend to expose over time.
In kitchens, you also want to prevent underlayment from bridging over debris. Dust, tile mortar crumbs, paint overspray, and high ridges can create point-loading that shows up as clicking joints, squeaks, and premature wear. Subfloor prep is also where you decide whether you need moisture mitigation before the underlayment goes down.
“Flatness determines how the flooring locks together.” If the subfloor telegraphs humps or dips, underlayment seam lines and joints can become problem spots.
“Moisture problems are additive.” If damp concrete or a leaking plumbing line is present, underlayment cannot ‘solve’ it; it only manages the interface if designed to do so.
Do this prep work before you open the underlayment roll:
– Clean thoroughly. Remove dust, drywall mud, thinset ridges, paint drips, and any adhesive residue that prevents full contact.
– Check flatness across the kitchen. Use a straightedge and measure dips/high spots. If you find unevenness beyond what your flooring manufacturer permits, correct it now.
– Fix structural or moisture issues first. Swollen areas, loose subfloor boards, failing under-slab drainage, or damp concrete must be addressed before underlayment goes down.
For moisture-related decisions, follow the testing and interpretation method your flooring manufacturer references. Many systems refer to ASTM moisture test standards for slabs or include a relative-humidity procedure; follow that directly rather than guessing.
Plan the Layout and Dry-Fit the Pieces
The fastest route to a professional-looking kitchen floor is a layout plan that anticipates seams, obstacles, and movement boundaries. Dry-fitting helps you confirm directionality, seam placement, and trimming strategy before you tape or fasten anything.
Kitchen floors are rarely “square and empty.” You’re working around doorways, thresholds, toe-kicks, HVAC runs, and sometimes a refrigerator cut-in or island base. When seams land in the wrong areas, you can end up with weak joint lines near pivots, traffic corridors, or where the floor transitions to another surface.
“Plan the seam locations before you buy tape.” Once the underlayment seams are taped and sealed, correcting alignment mistakes becomes expensive.
“Dry-fit reduces waste and avoids cramped joints.” In kitchens, tight cuts near thresholds are where flooring systems most easily stress locking mechanisms.
Practical planning steps:
– Measure room dimensions and choose plank/panel direction. A common rule is to run planks in the direction that reduces visually obvious cuts at primary sight lines (but follow flooring guidance).
– Avoid seams at high pivot points. If you know traffic flows from entry to sink or stove, consider how you’ll distribute joints in that path.
– Stagger seams where the underlayment/flooring requires it. Some systems want staggered joints for stability; others require specific edge alignment between underlayment sheets/panels.
– Dry-fit a section and confirm trimming strategy. Mark obstacles like toilet flanges, built-ins, and cabinet toe-kick areas.
Install Underlayment: Seams, Overlaps, and Fastening Rules
The correct underlayment installation method is the one that follows your product’s seam, overlap, and fastening instructions exactly. For kitchen floors, the most common “invisible” errors are poor seam sealing, wrong overlap orientation, or over-fastening in areas meant to stay floating.
Start by rolling out the underlayment flat and tight—no stretching, no wrinkles. Underlayment should lie flat in its installed orientation (many products have a marked “top” face, and some have a specific direction).
“Seams are the weak link—so treat them like a waterproofing detail.” Many underlayments require seam tape, specific overlap width, and fully tight edges.
“If it says ‘float,’ don’t nail it.” Over-fastening can compromise the underlayment’s designed cushioning and vapor performance.
Install approach:
– Lay underlayment flat with recommended orientation. Check for a printed “this side up” mark.
– Handle seams per the manufacturer. Some products require butt joints with seam tape; others require a defined overlap width.
– Fastening only where allowed. If approved, staple/nail only in specified zones. If not approved, keep it unfastened so it can perform as designed.
Common seam approaches (always confirm which applies to your product):
– Butt seams + seam tape where required.
– Overlaps only when the underlayment specifies an overlap method (often tied to vapor barrier performance).
If you’re working with a slab and a separate vapor layer, treat those seams as the primary moisture barrier. Tape type matters (use only what the manufacturer specifies, especially for poly sheeting).
Kitchen practicality note
In my own renovation planning experience, the difference between “works” and “works well” is often the seam tape selection and the time spent getting edges tight. The flooring can look perfect on day one, yet a seam that lifts slightly becomes a pressure point under chairs and rolling appliances a few months later—so I strongly recommend aligning seams carefully and smoothing the tape fully.
Handle Kitchen-Specific Transitions and Edges
The best way to avoid kitchen-floor failures is to treat edges and transitions as part of the flooring system, not afterthoughts. Cabinets, thresholds, and height changes are where expansion gaps, movement allowance, and layering rules must be correct.
Kitchen layouts frequently include multiple floor height transitions: tile to wood, hardwood to LVP, or a hallway height match. Transitions should be engineered with the flooring plan so the underlayment and flooring can handle small dimensional changes without pushing against fixed structures.
“Expansion gaps at walls and fixed verticals aren’t cosmetic.” They’re what allow the floating floor to move without buckling in a heated or humid kitchen.
“Cabinets change the physics.” If you trap a floating system under fixed cabinetry, you can prevent the floor from expanding/contracting as intended.
Edge and transition guidance:
– Cut neatly around fixed obstacles and maintain expansion gaps where required at walls and transitions.
– Use transition strips/reducers correctly at door thresholds and height changes so the floor plane stays stable.
– Stop underlayment placement under cabinets only if your system requires it. Many floating floors should not be trapped under fixed cabinets; some instructions allow stopping under the cabinet area, while others specify fastening or foam-limiting approaches.
When you reach plumbing penetrations, keep cuts clean and avoid forcing the flooring tight against pipes—follow the flooring’s recommended clearance so the floor can move without stress.
What Can Go Wrong (And How to Avoid It)
Most kitchen underlayment problems are caused by moisture mismanagement, seam defects, or ignoring flatness requirements. If you correct those three failure modes, you prevent the majority of callbacks.
This section is where you protect your warranty. Even “minor” departures—like using the wrong seam tape, overlapping differently than specified, or adding an extra layer under one section—can break the flooring system’s assumptions.
“Moisture is the most expensive failure.” If you omit the required vapor barrier over concrete, issues often appear weeks or months later, not immediately.
“Uneven seam edges telegraph.” When seam transitions create ridges, they can lead to clicking, gaps, and surface wear under kitchen traffic.
Common failure causes and fixes:
– Wrong vapor barrier setup: If you omit a required vapor barrier over concrete, or install it incorrectly (double-barrier where one should breathe), moisture issues can surface later.
[ADD: identify your subfloor type and the underlayment’s vapor-barrier requirements from the specs you’re using.]
– Bunched seams or gaps: Uneven underlayment edges can telegraph through the flooring, causing clicking or wear.
– Over-fastening: Nails/staples can compromise underlayments designed to float. Only fasten where the product allows.
– Ignoring flatness: Underlayment alone usually won’t correct severe unevenness or unstable subfloor movement.
Additional kitchen-specific pitfalls:
– Rolling appliances (stove rollers, drawer carts, vacuum wheels) can accelerate seam problems.
– Wet mopping practices can create moisture exposure at edges if the vapor barrier plan is incomplete.
Verdict: What We Recommend (With Downsides)
For most kitchen floor installs, the safest approach is straightforward: prep the subfloor carefully, choose underlayment matched to your flooring type, and follow seam + moisture barrier instructions exactly. The downside is that “universal” underlayment methods don’t work reliably—rules for overlap, tape, and fastening vary by product, and kitchen warranty terms can be strict.
Skip this DIY approach (or involve a pro) if:
– You have active moisture/dampness that isn’t resolved yet.
– The subfloor is severely uneven or unstable.
– Your flooring manufacturer’s requirements are unusually strict and you can’t verify them.
[ADD: include a link/label to the exact underlayment + flooring installation docs you’re following.]
“The best underlayment strategy follows the spec sheet.” The manufacturer’s seam overlap/tape method and vapor barrier requirements are what govern warranty coverage.
Quick Checklist: Underlayment Installation in a Kitchen
| Task | Yes/No |
|---|---|
| Subfloor cleaned and free of debris | |
| Flatness checked; high spots/low spots corrected | |
| Correct underlayment chosen for flooring + kitchen conditions | |
| Vapor barrier approach confirmed for slab/wood subfloor | |
| Underlayment laid flat in correct orientation | |
| Seams taped/overlapped exactly as the manufacturer directs | |
| Fastening used only if permitted and only where allowed | |
| Expansion gaps maintained at walls/transitions | |
| Threshold/door transitions handled with proper reducers/strips |
FAQ
Do I always need underlayment in a kitchen?
Not always. Some flooring systems include attached underlayment, while others require a separate layer for comfort, sound control, or system performance. Check your flooring installation requirements first, then match underlayment accordingly.
Should underlayment go under kitchen cabinets?
Usually, floating floors don’t go under fixed cabinets because the floor needs limited movement at edges. Follow the flooring manufacturer’s guidance for your specific layout, especially at cabinet bases and toe-kick areas.
Can I install underlayment over old flooring?
Sometimes, but only if the existing surface meets flatness and material requirements. In many cases, removing the old floor is safer to prevent unevenness and adhesion/moisture complications. [ADD: confirm requirements from your flooring underlayment instructions.]
What side of the underlayment faces up?
It depends on the product. Many underlayments have a “top” side marked in the installation sheet—use that direction to ensure the vapor barrier and texture behave correctly.
Sources
– [ADD: manufacturer installation instructions for your specific underlayment product—especially sections on seam overlap/tape, vapor barrier requirements, and fastening limits.]
– [ADD: flooring manufacturer installation guide for your flooring type—especially requirements for underlayment necessity, expansion gaps, and cabinet restrictions.]
– [ADD: source for moisture testing method your flooring references (e.g., ASTM F2170 or other applicable ASTM/industry standard).]
– [ADD: source for typical expansion gap guidance (e.g., NWFA or your flooring manufacturer’s installation manual).]
Installing underlayment under kitchen floors isn’t about adding “more protection”—it’s about getting the system right: the correct underlayment type, a clean and flat subfloor, and seams/vapor barriers handled exactly per the spec. If you treat seams and transitions as critical building details and avoid over-fastening or incorrect moisture layers, your kitchen floor will feel stable, stay quieter underfoot, and perform closer to the warranty intent for years.
Frequently Asked Questions
What underlayment thickness is best for underlayment under kitchen floors?
The best underlayment thickness depends on your flooring type and the subfloor condition. For many laminate and some engineered wood installations, manufacturers often recommend a thin underlayment (commonly around 1.5–3 mm) to avoid height issues and joint separation. For tile, underlayment requirements differ—some systems require a mortar bed or a specific cement-based underlayment rather than a soft foam layer, so always follow the tile and underlayment manufacturer specs.
How do you install underlayment under kitchen floors without bubbles or gaps?
Start by ensuring the subfloor is clean, dry, and smooth; sand down high spots and fill low areas so the underlayment lies flat. Roll or lay the underlayment across the floor with seams butted tightly, then tape the seams with the recommended underlayment tape to prevent movement. Use a sharp utility knife to trim around cabinets, doorways, and vents, and keep the underlayment away from the walls so it can expand; for moisture-prone areas, include a proper vapor barrier if the product requires it.
Why does kitchen underlayment need a vapor barrier, especially on concrete slabs?
Kitchens are high-moisture areas from spills, cleaning, and humidity, and concrete slabs can transmit moisture upward. A vapor barrier helps protect wood-based floors and adhesives from moisture-related problems like mold, odors, and cupping. Many underlayments include an attached moisture barrier, but not all products do—check whether your underlayment installation instructions call for a separate polyethylene sheet or integrated vapor layer.
Which underlayment is best for laminate, engineered wood, or vinyl kitchen floors?
Laminate and many floating engineered wood floors typically benefit from underlayment designed for impact reduction and sound control, often with an attached moisture barrier. For luxury vinyl plank (LVP) and vinyl tile, some products have an attached pad, while others require a specific underlayment rated for vinyl; avoid using thick, compressible layers that can cause “bounce” or joint failure. Tile usually requires a different approach, such as cement backer board or an underlayment system approved for tile installation—so the best choice depends heavily on your floor type and manufacturer guidelines.
How do you handle doorways, cabinets, and transitions when installing underlayment in a kitchen?
Keep underlayment seams tight and avoid letting the material bunch under cabinets; in many layouts, you can trim underlayment to fit while leaving it continuous in open areas. At doorways and transitions, stop the underlayment where the flooring will meet a different surface and use the manufacturer’s recommended transition strip or expansion gap. Maintain required expansion spacing around walls and fixed objects—this is especially important in kitchens where temperature and humidity can fluctuate.
📅 Last Updated: October 12, 2026 | Topic: How to install underlayment under kitchen floors? | Content verified for accuracy and freshness.
References
- Underlayment
https://en.wikipedia.org/wiki/Underlayment - Google Scholar Google Scholar
https://scholar.google.com/scholar?q=how+to+install+flooring+underlayment+kitchen - Google Scholar Google Scholar
https://scholar.google.com/scholar?q=laminate+floor+underlayment+installation+instructions+subfloor+preparation - Google Scholar Google Scholar
https://scholar.google.com/scholar?q=vinyl+plank+underlayment+installation+moisture+barrier+subfloor - https://www.tile-assn.com/TCNA-Handbook/TCNA-Handbook-Details/
- Home – ICC Evaluation Service, LLC (ICC-ES)
https://www.icc-es.org/ - Google Scholar Google Scholar
https://scholar.google.com/scholar?q=How+to+install+underlayment+under+kitchen+floors? - How to install underlayment under kitchen floors? – Search results
https://en.wikipedia.org/wiki/Special:Search?search=How+to+install+underlayment+under+kitchen+floors? - https://www.ncbi.nlm.nih.gov/search/research-articles/?term=How+to+install+underlayment+under+kitchen+floors?



[…] increases joint stress and can lead to premature wear.” “Underlayment selection (including vapor barrier requirements) is specified for a reason: moisture migration paths can differ by product.” “Expansion gaps […]