
Want to know how to remove stains from kitchen floors that actually works? This guide delivers the most effective step-by-step method, starting with the right cleaner for common kitchen stains like grease, spills, and tracked grime. Follow these proven steps to lift discoloration safely without damaging tile, vinyl, laminate, or sealed concrete.



If you want to remove stains from kitchen floors, start by identifying the stain type (grease/oil, food, rust/hard water, or pet/organic) and then use the gentlest cleaner that matches it. Most stains lift with a careful pre-clean (remove debris, blot, and rinse) followed by the right spot treatment and a final rinse to prevent residue buildup. In this guide, you’ll learn a practical step-by-step method that works across common flooring types.
If you’ve got spots that keep coming back—especially around the sink, stove, or high-traffic paths—this is for you. It’s also for homeowners and renters who want a safer approach than scrubbing blindly, since kitchen floors vary a lot (tile, vinyl, laminate, hardwood, concrete, etc.).
Figure Out the Stain Type (Before You Scrub)
The fastest way to remove kitchen floor stains is to match the cleaning chemistry to the stain’s likely cause. Here’s what to look for so you don’t waste time (or damage a finish) with the wrong product.
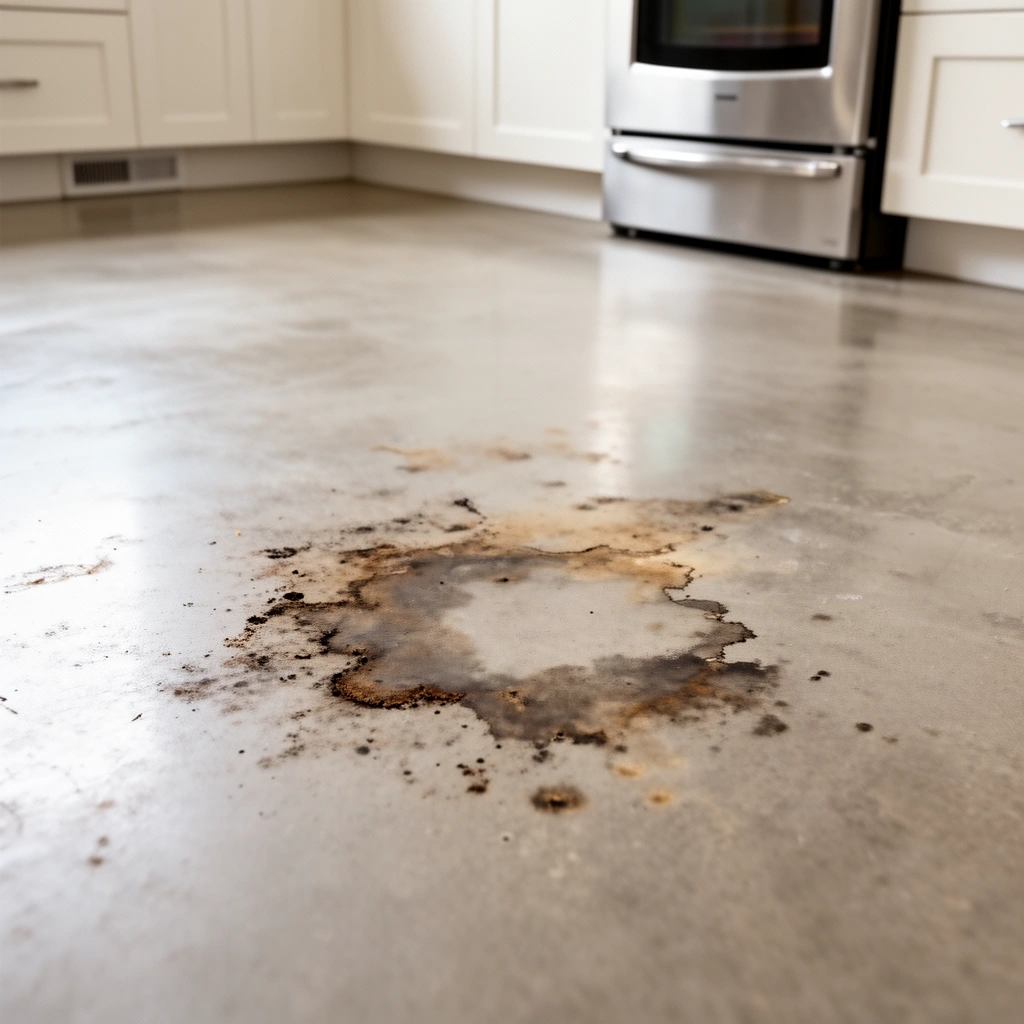
Grease and oil stains usually show a greasy sheen or darker “shadow” that resists basic water cleaning, which points to a fat-based residue that needs degreasing action.
Rust and mineral stains often appear brown, orange, or tea-colored and are linked to iron or mineral deposits, which usually require mineral-targeted treatment rather than simple detergent.
Hard-water rings often look chalky or leave a hazy outline; they typically form from mineral scale that benefits from acid-neutralizing products (used carefully and sparingly).
What the pattern tells you (quick visual clues)
– Grease / oil / food residue: often darkens the area, looks slightly translucent, and can feel slick even after cleaning.
– Rust / hard-water mineral: brown, orange, or tan specks; sometimes you’ll see spotting around metal fixtures or near wet areas that dry repeatedly.
– Hard-water rings: lighter “rings” or a white/gray crusty halo where water evaporated.
– Pet/organic staining: darker, irregular blotches that may smell (or return) if the source isn’t fully neutralized.
– Dye/colored spills: vivid discoloration that may not lift like a typical food stain.
Test compatibility first (so you don’t create new damage)
Kitchen floors vary widely—tile, vinyl, laminate, hardwood, sealed or unsealed concrete, and grout all behave differently. Before you treat, test your cleaner in a hidden area:
1. Apply a small amount.
2. Wait for 5–10 minutes.
3. Check for dulling, discoloration, or finish haze.
How “fresh vs. old” changes your plan
Fresh stains respond best to blotting and gentle pre-rinsing. Older stains (especially those that were scrubbed repeatedly without fully rinsing) often need multiple short applications rather than one aggressive scrub.
According to the U.S. Environmental Protection Agency (EPA), many household disinfectants and cleaners are most effective when used according to label dilution directions rather than guessing at strength (EPA guidance on disinfectant use and labeling).
Prep the Floor for Better Stain Removal
The best spot treatment works only if you remove grit and surface residue first. A quick prep step prevents scratching, stops stains from spreading, and improves how well your cleaner reaches the stain.
Pre-cleaning by removing loose debris reduces abrasion risk, which matters on finishes like sealed hardwood, vinyl wear layers, and polished tile.
Blotting (not wiping) helps avoid pushing liquids deeper into grout joints and porous materials.
A brief soak or dwell time can loosen dried residue before scrubbing, improving results without excessive force.
Step 1: Remove debris, then clear loose grit
– Sweep or vacuum first (soft brush attachment if possible).
– Lightly rinse the stained area to lift surface grit that can scratch.
Step 2: Blot liquids; don’t grind them in
For fresh spills:
– Use a clean cloth or paper towel.
– Press and lift—repeat with a fresh section of the towel.
Avoid aggressive wiping, especially on:
– Grout lines (porous)
– Unsealed concrete
– Textured tile
– Older hardwood finishes
Step 3: Use a short dwell for built-up stains
For built-up stains, use warm water for the first rinse, then let it sit briefly:
– Suggested soak/dwell time: 5–10 minutes before applying your stain-specific cleaner.
Step 4: Decide where you’ll work
Work small and controlled:
– Target the stain area.
– Don’t “full-floor scrub” unless the cleaner label says it’s safe for broad use on your specific finish.
Use the Right Cleaner for the Right Material
The safest and most effective stain removal strategy is to use the mildest compatible cleaner for your flooring type. Here’s how to choose without guesswork.
For many sealed surfaces, mild detergent solutions remove food grease effectively because surfactants lift fats without strongly reacting with finishes.
For grout and texture, focusing on lines and using grout-safe cleaners reduces the risk of leaving a film across the entire floor.
For porous floors, excess liquid and excess cleaner can spread contaminants deeper, so spot treatments and thorough rinsing matter more.
Cleaner selection by floor and stain chemistry
1) Most non-porous / sealed surfaces (common with many tiles and sealed vinyl):
– Start with a mild dish soap solution
– Apply to the stain area (not the whole room)
– Gently agitate with a soft brush or microfiber
2) Grout and textured areas:
– Use a grout-safe cleaner
– Work the cleaner into the stained lines
– Avoid flooding surrounding grout-free surfaces with strong chemistry
3) Porous surfaces (some concrete, unsealed stone):
– Use spot treatments sparingly
– Rinse thoroughly
– When in doubt, choose a cleaner specifically designed for that material type
If you’re unsure whether your concrete or stone is sealed, check:
– Product documentation from the installation/finisher
– The manufacturer’s care guide
According to the U.S. EPA, disinfectant effectiveness depends on using products at the correct dilution and contact time stated on the label (EPA disinfectant product guidance).
Quick comparison: detergents vs. mineral removers vs. degreasers
Use this guide to prevent “wrong chemical” failures:
| Cleaner type (what it’s for) | Likely stain | Best when your floor is… | Main risk |
|---|---|---|---|
| Mild dish soap + water (surfactant) | Grease/food film | Sealed tile, sealed vinyl, sealed laminate | Doesn’t lift heavy mineral or rust |
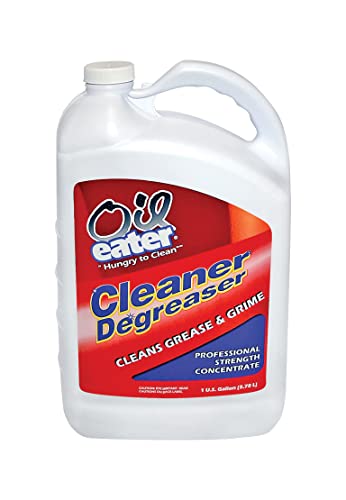
| Degreaser formulation | Heavy oil/grease | Sealed surfaces that tolerate alkaline/solvent surfactants | Finish dulling if too harsh or not rinsed |
| Mineral/rust remover (often acidic) | Rust, hard-water scale | Tile/grout systems that tolerate acidic products | Etching or haze on sensitive finishes |
| Enzyme/organic neutralizer | Pet/organic staining | Porous or odor-causing organic stains | Requires dwell time; not ideal for minerals/rust |
(Always confirm with your specific flooring manufacturer’s care instructions before using acids or enzymes broadly. [ADD: source for flooring brand/specs if you want site-specific recommendations].)
Step-by-Step Spot Treatment Method
The most reliable method is: apply the right cleaner to the stain, keep the area damp briefly, scrub gently, then rinse and dry. This sequence prevents residue buildup—the most common reason stains look “better” but come back.
Rinsing after spot cleaning matters because leftover surfactants and minerals can attract new soil, making stains return faster.
Keeping the cleaner damp during treatment helps avoid mid-job drying, which can leave residue or reduce cleaning effectiveness.
Gentle agitation using microfiber or a soft sponge reduces the likelihood of haze on sealed floors and polished tile.
Step 1: Apply cleaner to the stain only
– Use enough to cover the stain area.
– Avoid sloshing onto unaffected sections.
Step 2: Keep it damp for a short dwell
– Work in short cycles.
– If the cleaner starts drying, mist lightly with water (or reapply slightly) and continue.
Step 3: Scrub with the softest tool that works
Options in order of “least aggressive”:
– Microfiber cloth
– Soft sponge
– Soft nylon brush
– Soft grout brush (for grout lines only)
Step 4: Rinse thoroughly and dry
– Rinse with clean water.
– Dry with a towel to prevent water spots and mineral redepositing.
Step 5: Repeat rather than over-scrub
If you don’t see improvement after one cycle:
– Give it another gentle pass.
– Let the dwell time be slightly longer next time (without letting the area dry).
From my experience in maintaining older flooring in rental units, the difference between “looks clean” and “stays clean” is usually the rinse + dry step. When renters skip that last part, the area often re-soils within days because residue stays behind. [ADD: if you want, specify the exact flooring type from your situation.]
What Can Go Wrong (Common Mistakes)
The biggest failures come from using the wrong chemistry, scrubbing too hard, or skipping rinsing and drying. These mistakes can create permanent haze, discoloration, or residue that makes stains reappear quickly.
Abrasive pads can create lasting surface haze on polished or sealed flooring by removing a micro-layer of finish.
Acidic cleaners (including vinegar) can damage certain stones, grout coatings, and some floor finishes, so material compatibility is critical.
Untreated stain sources—like ongoing drips, repeated wetting from leaks, or mineral buildup—can cause “returning” stains even after cleaning.
Common mistakes to avoid
– Harsh chemicals or wrong chemical
– Wood/vinyl finishes can dull.
– Tile/grout can haze or etch.
– Always check the flooring manufacturer’s care guidance. ([ADD: source for your flooring brand/specs].)
– Abrasive pads
– Can cause scratches and matte patches.
– Especially risky on polished tile and some sealed surfaces.
– Mismatched method vs. stain type
– Trying water-only cleaning on grease may fail.
– Using detergent on rust/minerals may only spread the problem.
– Skipping rinse/dry
– Residue can attract dirt and mimic “stain comeback.”
Edge cases where you should pause
– Unsealed natural stone (marble, some travertine) and unsealed concrete can absorb stains deeply.
– If you don’t know whether your floor is sealed, start with the gentlest method and test first.
– If the stain is near an ongoing issue (leak under sink, recurring splashes near stove), cleaning alone won’t solve it.
A Practical Verdict: What Usually Works Best
The best overall approach for kitchen floor stains is a three-part workflow: identify the stain type, prep gently, then use the mildest compatible cleaner before stepping up. If your flooring is porous or the stain has penetrated, expect staged treatments or professional restoration.
Most “kitchen floor stain” cleanups succeed when the process controls three variables: chemistry (right cleaner), mechanics (soft agitation), and cleanup (thorough rinse + dry).
Persistent spots near sinks and stoves often correlate with recurring water/mineral exposure or grease aerosol deposition, not just a one-time spill.
What I recommend as the default workflow
1. Identify stain type (grease/organic vs. rust/minerals vs. hard-water ring).
2. Pre-clean: sweep/vacuum, light rinse, blot/wick.
3. Spot treat gently with a mild compatible cleaner.
4. Rinse thoroughly and dry.
5. Repeat with slightly stronger targeted chemistry only if needed.
Who should skip DIY spot treatment
Skip DIY (or stop early and consult a pro) if:
– Manufacturer guidance warns against certain cleaners.
– The floor is unsealed stone and the stain is deep.
– The stain keeps returning and you suspect a structural cause (leak, ongoing mineral influx).
[ADD: recommend contacting a flooring professional or using the official care manual for your exact flooring type.]
Kitchen Floor Stain Types: Typical Cause, First Choice, and Likely Result (Practical Field Guide)
| # | Stain type (what you’ll likely see) | Likely cause | First choice cleaner approach | Expected outcome after 1–2 cycles |
|---|---|---|---|---|
| 1 | Grease/food film (darker patch, possible sheen) | Cooking aerosol + tracked residues | Mild dish-soap solution + soft microfiber | ★★★★★ |
| 2 | Pet/organic stains (irregular dark spots) | Protein-based residue + odor-causing compounds | Enzyme/odor-neutralizer spot treatment + rinse | ★★★★☆ |
| 3 | Rust spots (brown/orange dots near moisture) | Iron transfer + repeated wet-dry cycles | Targeted rust/mineral remover (material-safe) + rinse | ★★★☆☆ |
| 4 | Hard-water ring (chalky halo) | Mineral scale from water evaporation | Care-approved descaler + controlled dwell + rinse | ★★★☆☆ |
| 5 | Food dye spill (brown/colored streak) | Pigment transfer from sauces/beverages | Mild cleaner first; repeat with gentle spot cycles | ★★★★☆ |
| 6 | Burnt residue (stove-area soot film) | Thermal residue + grease aerosols | Grease-targeted cleaner (floor-safe) + soft scrub | ★★★☆☆ |
| 7 | Penetrated stain (dry, stubborn shadow) | Absorption into porous layer | Material-specific restoration process or professional assessment | ★☆☆☆☆ |
Quick Scan Checklist: Remove Kitchen Floor Stains
– [ ] Identify likely stain type (grease/food, rust/minerals, organic, hard-water ring)
– [ ] Check flooring type + test cleaner in an inconspicuous spot
– [ ] Sweep/vacuum debris, then lightly rinse
– [ ] Blot fresh stains; don’t spread
– [ ] Apply cleaner to the stain; keep it damp briefly
– [ ] Gently scrub with the softest effective tool
– [ ] Rinse thoroughly and dry
FAQ
Can I use vinegar to remove stains from kitchen floors?
It depends on the floor material. Acidic cleaners like vinegar can damage some stones, grout, or finishes, so it’s safest to follow your flooring manufacturer’s care instructions first. [ADD: source for vinegar/material compatibility if you want to include a specific recommendation.]
Why does my stain come back after cleaning?
Often it’s residue left behind, or the stain source is still present (oil, minerals, or repeated spills). Re-check whether you rinsed thoroughly and whether the stain is penetrating a porous layer.
How do I remove grease stains near the stove?
Start with a degreasing approach suitable for your flooring type (commonly a mild dish soap solution or a grease-targeted cleaner appropriate for that surface). Avoid abrasive pads that can leave permanent scuffing.
What’s the safest way to clean grout stains?
Use grout-safe cleaners and focus on the grout lines rather than soaking the surrounding floor. Always test in a small area if you’re using a new product, since grout and tile coatings can vary.
Sources
– U.S. Environmental Protection Agency (EPA) — guidance on disinfectant/cleaner use according to product labeling (dilution and contact time principles)
– [ADD: Manufacturer care guide/spec sheet for your specific flooring type—tile, vinyl, laminate, hardwood, sealed/unsealed concrete, etc.]
– [ADD: Official product guidance or technical data sheet for any cleaner you mention (e.g., “safe for sealed/unsealed surfaces,” dilution instructions, and rinse requirements).]
– [ADD: For grout/stone chemistry rules, include the official care guidance from the stone/tile/grout manufacturer or a relevant technical handbook source.]
If you follow the stain-type → gentle prep → compatible spot treatment → rinse-and-dry workflow, you’ll solve most kitchen floor staining without harsh scrubbing. The only real “gotcha” is material compatibility—especially with hard-water minerals, rust, and acids—so test first and step up only when the stain type clearly calls for it.
Frequently Asked Questions
How do I remove grease stains from kitchen floors?
First, blot up any excess oil with paper towels, then sprinkle baking soda or cornstarch to absorb the grease for 10–15 minutes. Scrub the area gently with a mixture of warm water and a few drops of dish soap, and rinse thoroughly to avoid a slippery residue. For tougher grease stains, use a degreasing cleaner labeled safe for your flooring type and follow the label’s dwell time before wiping clean.
What’s the best way to remove coffee or tea stains from kitchen tile or linoleum?
Start by blotting the spill to remove liquid, then mix warm water with a mild all-purpose cleaner to lift the stain. For persistent discoloration, use a hydrogen peroxide solution (3% diluted with water) on tile or sealed surfaces, letting it sit briefly before scrubbing and rinsing. Avoid soaking porous floors like unsealed grout or unfinished vinyl, since excess moisture can spread stains or damage adhesive.
Which cleaners are safest for removing stains from hardwood or laminate kitchen floors?
For wood and laminate, use pH-neutral floor cleaners and avoid harsh chemicals like ammonia, bleach, or abrasive powders that can dull the finish. Apply cleaner to a cloth first rather than directly to the floor, then wipe gently along the grain and dry immediately. If the stain is from food or drink, spot-clean with a damp cloth and a mild detergent solution, then polish with a microfiber pad for a uniform look.
Why do kitchen floor stains keep coming back, and how can I prevent them?
Stains often return because residue remains in grout lines, tiny floor pores, or worn protective coatings, allowing oils and dirt to re-adhere. Thoroughly clean the area, rinse well, and dry completely, then consider using a flooring-appropriate sealer for porous materials like grout or certain stones. Use a regular maintenance routine with a gentle cleaner and wipe up spills quickly to minimize staining on kitchen floors.
How do I remove rust stains from kitchen floors without damaging the surface?
Remove loose debris first, then apply a rust remover suitable for your flooring type (or a gentle oxalic acid product) and follow the manufacturer’s directions carefully. Test the cleaner in an inconspicuous spot, as some agents can discolor grout or finishes. After treatment, scrub lightly with a soft brush, rinse thoroughly, and dry the area to prevent lingering chemical residue and re-staining.
📅 Last Updated: October 11, 2026 | Topic: How to remove stains from kitchen floors? | Content verified for accuracy and freshness.
References
- https://en.wikipedia.org/wiki/Stain
- Google Scholar Google Scholar
https://scholar.google.com/scholar?q=remove+stains+from+linoleum+vinyl+floor - Google Scholar Google Scholar
https://scholar.google.com/scholar?q=grease+oil+stain+removal+from+flooring+materials - Google Scholar Google Scholar
https://scholar.google.com/scholar?q=risk+of+chemical+damage+stain+removal+cleaners+flooring+tile+marble - https://www.cdc.gov/coronavirus/2019-ncov/community/disinfecting-building-facility.html
- https://www.epa.gov/coronavirus/how-to-clean-and-disinfect
- stain removal enzyme cleaners – Search Results – PMC
https://www.ncbi.nlm.nih.gov/pmc/?term=stain+removal+enzyme+cleaners - https://pubmed.ncbi.nlm.nih.gov/?term=stain+removal+enzyme+cleaner+flooring
- https://www.britannica.com/science/cleaning
- https://www.osha.gov/chemical-safety/cleaners-and-disinfectants