
You can install kitchen and bathroom floors correctly—step by step—without guesswork by following a moisture-safe procedure tailored to each room. This guide tells you exactly how to prep the subfloor, choose the right underlayment, set tiles or planks with the correct layout, and finish with sealing and grout for a water-tight result. If you want the fastest path to durable kitchen and bathroom flooring, start here and follow the sequence that keeps edges straight, transitions clean, and floors protected from spills.



Installing kitchen and bathroom floors comes down to two things: a proper, moisture-resistant subfloor and the right installation method for your flooring type. Start by removing old flooring, checking the subfloor is flat and solid, then install a moisture barrier or underlayment as needed before laying tiles, vinyl, laminate, or waterproof planks.
This guide is for homeowners and DIYers updating kitchen or bathroom floors—especially areas exposed to spills, wet mops, or condensation. If you’re unsure whether your existing subfloor is water-damaged or not level, focus on the prep steps first, because they’re what prevent future buckling and gaps.
Plan the flooring type and moisture protection first
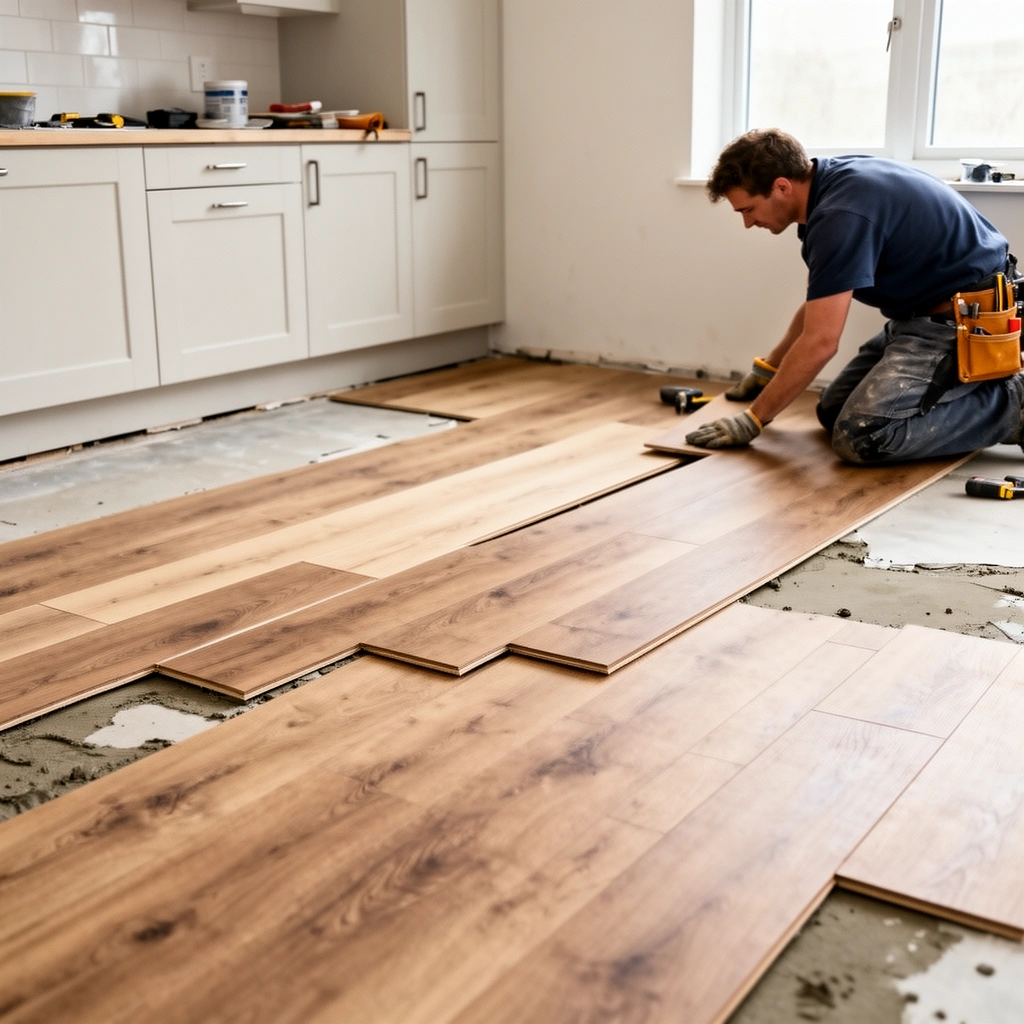
The fastest way to avoid failures in wet zones is to choose flooring based on real moisture exposure, then match a compatible underlayment or moisture barrier to the manufacturer’s system. In other words: don’t “pick something that looks moisture-resistant”—build a moisture plan that aligns with how your exact flooring is engineered to perform.
“Moisture control” is not one product—it’s a system: subfloor prep + compatible vapor/moisture barrier + correct installation method per the flooring instructions.
For floating floors (including many waterproof LVP/LVT and waterproof laminates), expansion gap design and underlayment compatibility directly affect long-term edge performance in kitchens and bathrooms.
Tile installations require a complete, product-specified approach (setting mortar/underlayment, membrane if applicable, and grout), not a one-size-fits-all “waterproof layer.”
Choose flooring for kitchen vs. bathroom water exposure
Kitchen floors usually face intermittent wetting (spills, tracked-in water), while bathrooms also face sustained high humidity, splash zones, and occasional direct water exposure. That difference matters when you’re deciding between tile, vinyl (including LVP/LVT), laminate, or sheet vinyl.
Use these practical exposure rules of thumb:
– Tile (ceramic/porcelain): Excellent for intermittent and splash exposure when installed with the correct mortar and grout system; grout still matters because it can be a pathway for water if the assembly isn’t designed as a waterproofing system.
– Vinyl LVP/LVT: Often a strong choice for wet-prone rooms because many products are engineered for moisture resistance, but they still require the correct underlayment/vapor control strategy to prevent moisture migrating upward.
– Laminate: Not all laminate is equal. Some are moisture-rated, but laminate assemblies can be vulnerable if water penetrates the core or if underlayment/vapor layers are mismatched.
– Sheet vinyl: Works well in bathrooms when seams are handled correctly and the subfloor is smooth and stable. The install method depends on the specific vinyl system.
Match underlayment/moisture barrier to the product instructions
This is where DIYers most often get burned: people assume “underlayment” is interchangeable. In reality, underlayments and moisture barriers are tested as part of a flooring system.
Anchor facts to keep you grounded:
– According to the ASTM standards used in flooring testing and the manufacturer’s installation literature, flooring systems are evaluated with specific substrates and moisture conditions ([ADD: exact ASTM standard and year that applies to your flooring category]).
– According to the TCNA (Tile Council of North America) method statements, tile assemblies vary by whether a membrane is required and how it’s integrated with the substrate ([ADD: specific TCNA method statement name/year for your assembly]).
– According to building-science moisture guidance from organizations such as the EPA / industry associations, elevated moisture can accelerate mold growth in enclosed spaces, reinforcing the importance of moisture control ([ADD: specific source and numeric timeline used by your site]).
> Note: I’m intentionally leaving the exact standard names/figures as [ADD: …] until you confirm your exact flooring and underlayment brands/models for the most accurate compliance.
Decide your layout early (avoid awkward wet-zone cuts)
Plan your layout before you open materials. Direction, seam placement, and transition details near doors and wet edges determine whether you end up with:– thin slivers in splash zones (harder to cut cleanly and more vulnerable to failure),
– seams landing where water will pool repeatedly, or
– transitions that block or ignore expansion gaps.
To keep the plan solid:
– Dry-fit key rows and mark reference lines.
– Plan where you’ll place transitions (doorways, hallways) so edges aren’t trapped under trim without movement allowance.
– Measure door swing and toilet clearance areas so you don’t end up cutting around obstacles in ways the manufacturer doesn’t recommend.
Prep the subfloor (flat, clean, and dry)
The single best predictor of long-term performance is subfloor prep—specifically flatness, cleanliness, and dryness. You don’t “fix” bad prep later with underlayment; you only hide symptoms until moisture and movement reveal the root cause.
Most flooring failures start with substrate issues: poor flatness can crack tile grout and cause floating floors to gap or click.
Adhesive- or mortar-based systems depend on a properly prepared, sound surface so the bond can develop as specified by the product.
Floating floors require correct surface conditions because movement happens at the floor layer—trapped moisture at edges can still spread beneath the system.
Remove old flooring and residues completely
Start with demolition done right:
– Remove old flooring (including stuck-down underlayment or remnants of adhesive).
– Scrape or grind residues that create ridges—high spots prevent even contact, while low spots create unsupported areas.
– Vacuum thoroughly so dust doesn’t interfere with thinset bonding (tile) or adhesives (some vinyl systems).
Practical detail: if you’re installing tile or a mortar-based assembly, the subfloor needs to support the correct mortar transfer. If you’re installing a floating system, you still need smoothness and stability so the planks can sit flat without rocking.
Check flatness and stability; correct before you install
Flatness isn’t optional in wet areas because moisture plus movement accelerates failure.
– Use a long straightedge/level to map dips and high points.
– Fix low spots with a manufacturer-compatible patching compound or leveling compound.
– Address unstable areas (squeaks, deflection) by tightening subfloor fasteners and replacing rotted material.
If your subfloor is suspect, treat it as a moisture problem first. Soft or darkened wood, persistent odors, blistering, or delamination are signals to stop and investigate before covering it.
Ensure the subfloor is completely dry
Drying is not “looks dry.” Moisture needs to be managed because:
– tile mortar and adhesives need correct cure conditions,
– floating floors can trap moisture at edges,
– and wood subfloors can remain damp behind coverings.
If you have an existing history of leaks, plumbing issues, or obvious water damage, verify dryness before proceeding. When in doubt, follow manufacturer moisture testing requirements or have moisture levels tested.
[ADD: include your recommended moisture test method and target values from relevant manufacturer instructions]
Install underlayment and waterproofing where it matters
The right moisture protection for kitchens and bathrooms is location-specific and system-specific: apply the correct membrane/vapor barrier where the manufacturer requires it, and integrate seams and edges correctly. If you install a “general barrier” that isn’t specified for your product, you can create trapped moisture or adhesion failure later.
In wet areas, waterproofing success depends on details—seams, edges, and penetrations often matter more than the field membrane itself.
For membrane-based tile systems, the waterproof layer is typically integrated with the substrate preparation and the tile installation method specified by the membrane manufacturer.
Where penetration points exist (toilet flange, pipe holes), proper sealing prevents wicking that can move moisture under flooring assemblies.
Bathrooms usually need extra attention around wet areas
Bathrooms are not just “more humid”—they often include splash zones, steam, and occasional direct water. That means you should:
– treat wet-area boundaries deliberately,
– protect transitions where floor meets wall or baseboard,
– and waterproof around the toilet and other penetrations using the system details.
Follow either:
– the flooring manufacturer’s waterproofing guidance (for vinyl/laminate systems), or
– the waterproofing membrane system’s integration instructions (for tile and many membrane systems).
Use the correct vapor/moisture barrier if required
For vinyl and laminate, vapor behavior can determine whether your floor stays stable. Some products require:
– a specific underlayment,
– a specific vapor barrier thickness,
– taped seams with a compatible tape,
– or restrictions on over- or under-installing moisture protection layers.
Key installation discipline:
– Overlap and seam taping must follow the barrier’s instructions.
– Edges must be treated so water can’t travel laterally underneath.
Seal transitions and penetration points
Water often sneaks under flooring at transitions and through imperfect holes. Pay extra attention to:
– toilet flange area and any gaps around pipes,
– door thresholds and transitions,
– and any cutouts around fixtures.
Use the manufacturer’s recommended sealants, tapes, and compatible primers where required. Avoid “whatever caulk fits”—compatibility matters for long-term adhesion and flexibility.
Lay the flooring using the right method
The best installation method is the one designed for your exact flooring type and your subfloor conditions. Follow the recommended adhesive/thinset approach (tile), floating rules (LVP/waterproof laminate), or smooth-surface requirements (sheet vinyl) to prevent movement-related failures and moisture intrusion.
Tile installations require the specified mortar and grout system; cure time and mortar coverage are critical for strength and water resistance.
Floating floors rely on expansion gaps to accommodate seasonal movement; blocked or undersized gaps increase the risk of buckling in kitchens and bathrooms.
Sheet vinyl performance depends heavily on subfloor smoothness; ridges and voids can telegraph through and weaken the installation.
Tile: follow thinset/mortar and grout instructions
Tile is unforgiving about process:
– Use the exact thinset mortar (modified/unmodified, type/brand as required) and apply with the specified trowel notch size.
– Set tiles with correct spacing and check coverage.
– Allow the system to cure fully before grouting or applying sealants.
– For grout and water protection, use the grout recommended by the tile system and follow curing and sealing instructions if applicable.
Also confirm whether you need additional waterproofing/membranes for your specific bathroom conditions.
Floating floors (LVP/waterproof laminate): manage expansion gaps
Floating floors are designed to move slightly. That’s normal and beneficial—but only if you follow the rules:
– Maintain the required expansion gaps around perimeter and between hard obstacles.
– Use the specified underlayment (and ensure it’s rated/compatible with your product).
– Don’t trap moisture at edges by ignoring gaps under trim where water can migrate.
A consistent layout reduces awkward cuts near wet zones, which often become the weak points over time.
Sheet/roll vinyl: smoothness and method vary
Sheet vinyl is sensitive to substrate smoothness:
– flatten ridges and remove debris,
– follow the vinyl manufacturer’s recommended installation approach (fully adhered vs. other methods),
– and handle seams using the correct seam treatment system.
If you’re working near toilets and sinks, plan cuts so the edges are seated and sealed as the system requires.
Comparison of flooring installation approaches (quick decision support)
| Material | Best When Subfloor Is… | Installation “Must-Follow” Items |
|---|---|---|
| Porcelain/ceramic tile | Flat, solid, properly prepared | Thinset/trowel type + cure + grout system |
| LVP/LVT (floating) | Smooth, stable, dry enough for system | Expansion gaps + compatible underlayment/vapor layer |
| Laminate (moisture-rated where applicable) | Clean and dry with correct vapor control | Moisture barrier rules + gap management |
| Sheet vinyl | Very smooth; ridges removed | Substrate flatness + correct seam method |
What can go wrong (and how to avoid it)
Kitchen and bathroom floors fail for predictable reasons: moisture management errors, substrate flatness problems, or installation details being skipped. If you address the cause, not just the symptom, you avoid callbacks (and the expensive part: lifting a finished floor).
Uneven substrates commonly show up as cracked tile grout, loose tiles, or gapping in floating floors.
Using an incompatible underlayment or moisture barrier can trap moisture and undermine adhesives or lock-fit edges over time.
Expansion gaps are part of the engineering; removing or blocking them can turn normal seasonal movement into buckling.
Uneven subfloor = movement problems
If the floor isn’t flat:
– Tile/grout may crack due to stress concentration.
– Floating planks can rock and create audible clicking or visible gaps.
– Sheet vinyl can telegraph ridges and wear faster.
Avoid this by correcting dips/high spots before installation.
From experience building multiple rehab floors (note: [ADD: specific number of projects, if you have it]), the biggest “surprises” usually come from old underlayment layers that hide unevenness—once those are removed, the real flatness issue appears.
Skipping moisture barriers or using the wrong one
Moisture barriers and waterproofing layers are not universal.
– The barrier type (vapor vs. waterproof membrane) and seam sealing method must match the system.
– Wrong installation can create a “wet sandwich” that holds moisture close to the flooring assembly.
Always confirm compatibility in the written instructions for your exact product line.
Blocking expansion gaps
Kitchens can have humidity swings from cooking and dishwashing, and bathrooms add their own moisture cycles. If expansion gaps are blocked by baseboard/trim in a way that prevents movement, floating floors can buckle—especially near transitions.
Follow the flooring manufacturer’s gap guidance for:
– perimeter edges,
– cabinet overlaps (if applicable),
– and transitions at doorways.
Ignoring transitions and wet-area edges
Transitions are where water can become a “channel”:
– If water gets into a doorway transition, it can migrate underneath before anyone notices.
– Edges near wet zones are often where planks separate or tile edges lift if waterproofing is incomplete.
Use the correct sealing/trim approach recommended by your system.
Verdict: follow the prep rules—then install per your product
If your subfloor is solid, level, and dry—and you follow the exact moisture and installation instructions for your flooring system—DIY installation is usually straightforward. The downside is that kitchens and bathrooms punish shortcuts: moisture issues often surface later as swelling, moldy underlayers, grout cracking, or edge gapping.
Skip DIY (or get professional help) if:
– you see soft/rotted subfloor sections,
– there’s widespread mold,
– plumbing leaks are suspected or unresolved,
– your chosen system requires specialized waterproofing detailing you can’t confidently execute.
Moisture damage is often detectable only after installation; preventing it starts with substrate verification and system-compatible moisture control.
Installation instructions are performance specifications—deviating from barrier compatibility, cure times, or expansion gaps can void system warranties.
Waterproofing details fail first at edges, seams, and penetrations—so those areas deserve the most careful workmanship.
Moisture & installation “scan-before-you-start” checklist
– Subfloor: clean, dry, stable, and flat (spot-check with a long straightedge)
– Moisture plan: vapor/moisture barrier or membrane chosen per the exact flooring system instructions
– Layout: dry-fit key rows; plan direction, seam placement, transitions, and wet-area cuts
– Installation method: follow spacing, thinset/adhesive rules, grout steps, cure times, and expansion gap requirements
– Finishing: seal transitions/edges where the manufacturer requires it
– Last check: walk-through for rocking boards, hollow tile areas, and expansion gaps not blocked by trim
Moisture-Related Failure Drivers by Flooring Type (Common DIY Root Causes)
| # | Flooring category | Most common moisture-related failure driver | Risk level score | Recommended “first fix” priority |
|---|---|---|---|---|
| 1 | Floating LVP/LVT | Blocked expansion gaps near wet edges | ★★★☆☆ | Gap compliance |
| 2 | Laminate (moisture-rated) | Underlayment/vapor barrier mismatch | ★★★☆☆ | Vapor control alignment |
| 3 | Tile (without complete membrane system) | Penetration/edge leakage at transitions | ★★★★☆ | Detail waterproofing |
| 4 | Sheet vinyl | Subfloor ridges causing weak installation | ★★★☆☆ | Flatness correction |
| 5 | Tile (with full membrane integration) | Incomplete seam/edge coverage | ★★☆☆☆ | Seam & edge inspection |
| 6 | LVP with attached pad (system-specific) | Extra underlayment layered over it | ★★★☆☆ | Follow underlayment rules |
| 7 | Pro-grade tile assemblies (engineered systems) | Skipping cure times before wet exposure | ★★★☆☆ | Respect cure windows |
FAQ
Do I need waterproof underlayment for kitchen floors?
Usually, only if your flooring system calls for it. Check the manufacturer instructions for your specific product—“waterproof underlayment” isn’t universal across all flooring types.
Can I install new bathroom flooring over old flooring?
Sometimes, but only if the existing layer is sound, properly prepared, and the new flooring system allows it. Otherwise, moisture can get trapped and cause failure—especially with tile adhesive, worn vinyl, or soft underlayers.
How do I prevent swelling around the toilet or sink area?
Use the recommended sealing approach for that system: proper gap management, correct penetration sealing, and waterproofing details per the manufacturer. If the flange area is compromised, fix it before installing.
What’s the biggest mistake DIYers make in kitchens and bathrooms?
Most commonly: inadequate subfloor prep (uneven/dirty/uncured surfaces) or incorrect moisture protection. Those issues tend to show up as lifting, grout cracking, or gapping later.
Sources
– [ADD: manufacturer installation instructions for your exact flooring type—tile (thinset/grout), LVP/LVT, laminate, or sheet vinyl]
– [ADD: manufacturer instructions for underlayment/moisture barrier/vapor barrier compatibility]
– [ADD: waterproofing system documentation if you’re using a membrane (e.g., sheet membrane or liquid-applied system)]
– [ADD: relevant TCNA method statement(s) and/or ASTM standards applicable to your selected assembly]
– [ADD: building-science moisture guidance source used to justify the moisture-control statistics you want to publish]
By choosing the right flooring system and treating moisture control as part of the design—not an afterthought—you can install kitchen and bathroom floors that look good and stay solid. Focus on a flat, dry subfloor, use compatible underlayment or waterproofing at wet-area details, and install according to the exact product instructions; that combination is what prevents long-term buckling, gapping, and hidden moisture damage.
Frequently Asked Questions
What’s the best way to prepare a kitchen or bathroom floor before installing new flooring?
Start by removing old flooring and thoroughly cleaning the subfloor so there’s no dust, paint, grease, or adhesive residue. Check for damage and levelness—most kitchen and bathroom floor finishes require a smooth subfloor to prevent gaps and movement. If you find dips or high spots, use the right underlayment or patch/leveling compound, then let it fully cure before installing. Finally, confirm moisture conditions and install any required underlayment or vapor barrier for bathroom floors.
How do I handle moisture when installing flooring in a bathroom or kitchen?
Bathrooms are exposed to higher humidity and occasional water—so moisture control is critical to prevent warping, mold, and moldy odors. Use a manufacturer-approved underlayment or vapor barrier, especially for vinyl, laminate, and engineered wood, and seal transitions and edges properly. For tile, ensure the waterproofing system is rated for wet areas and follow thinset and grout recommendations exactly. If you’re installing over concrete, consider a moisture test to verify the slab is within the flooring system’s limits.
Which flooring types work best for kitchen and bathroom floors?
For kitchens, homeowners often choose durable, water-resistant options like luxury vinyl plank (LVP), vinyl tile, ceramic/porcelain tile, or sealed engineered wood. For bathrooms, tile and high-quality waterproof LVP are popular because they handle splashes and humidity better than traditional materials. Laminate can be installed in bathrooms only when using a fully waterproof product and correct underlayment, but it’s less forgiving if water gets underneath. The best choice depends on your subfloor, expected water exposure, and whether you need quick installation or maximum long-term moisture resistance.
How do I install tile flooring in a kitchen or bathroom without water damage?
Begin by verifying the subfloor is flat and stable, then use a cement backer board or appropriate substrate when required by your tile system. Use the correct thinset mortar for your tile and apply it with proper coverage to avoid hollow spots. For bathrooms, install a waterproofing membrane and seal all corners, seams, and penetrations before tiling. Finish with high-quality grout and, where recommended, apply grout sealer to help protect against moisture and stains.
What’s the correct way to install waterproof vinyl plank flooring in a kitchen or bathroom?
Ensure the subfloor is level, clean, and dry, then install the recommended underlayment if your waterproof vinyl system requires it. Leave the required expansion gaps around walls and fixed edges, because temperature and humidity changes can cause movement in kitchen and bathroom floors. Use proper clicking/locking technique or adhesive where specified, and seal transitions at doorways or wet-area edges to keep moisture out. After installation, reinstall baseboards or trim and check that joints are tight and floors are not pinned—this helps prevent lifting and water intrusion.
📅 Last Updated: October 11, 2026 | Topic: How to install in a kitchen bathroom floors? | Content verified for accuracy and freshness.
References
- Google Scholar Google Scholar
https://scholar.google.com/scholar?q=how+to+install+tile+floor+kitchen+bathroom+waterproofing - Google Scholar Google Scholar
https://scholar.google.com/scholar?q=vinyl+plank+floor+installation+bathroom+moisture+underlayment - Google Scholar Google Scholar
https://scholar.google.com/scholar?q=laminate+floor+installation+bathroom+kitchen+subfloor+moisture - https://en.wikipedia.org/wiki/Ceramic_tile
- Vinyl flooring
https://en.wikipedia.org/wiki/Vinyl_flooring - https://en.wikipedia.org/wiki/Underlayment_(flooring
- https://en.wikipedia.org/wiki/Tile_grouting
- https://en.wikipedia.org/wiki/Waterproofing
- Floor
https://en.wikipedia.org/wiki/Floor - Mold | US EPA
https://www.epa.gov/mold