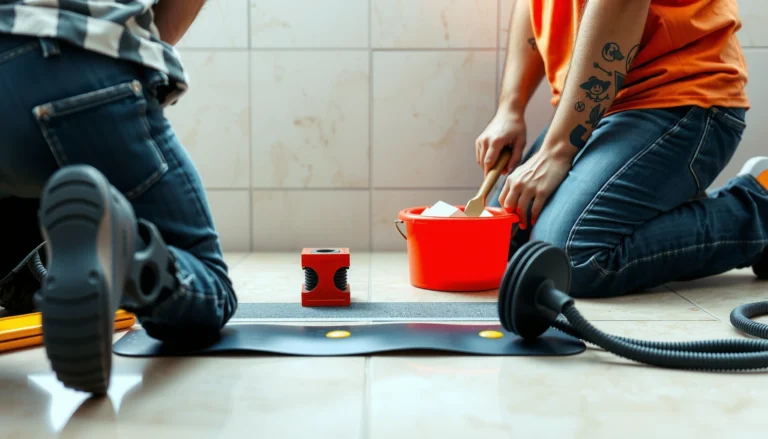
Installing bathroom baseboards is mainly about protecting the floor joint from moisture and allowing your flooring system to do its job (expansion/movement). Measure for the floor-to-wall clearance first, cut and fit the trim cleanly, then seal continuously along the baseboard-to-floor interface and corners to prevent water wicking.




If your bathroom stays humid or gets frequent splashes (especially near a shower), the details at the bottom edge matter as much as the trim’s appearance. This guide is written for homeowners and DIYers installing baseboards on top of existing or newly installed bathroom flooring such as tile, vinyl, or laminate—and who want to avoid gaps, bubbling, or wavy edges at the wall/floor line.
Prep the bathroom floor and walls (measure, mask, protect)
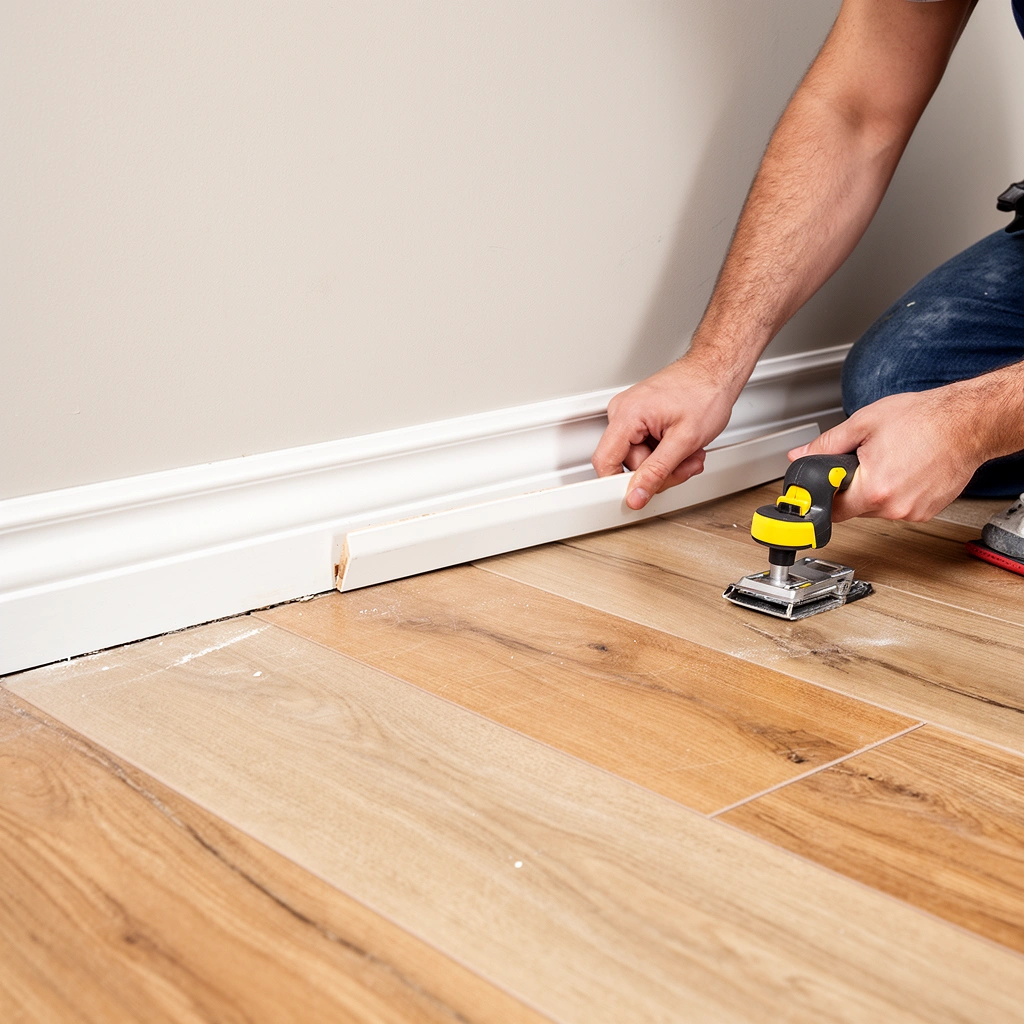
You prevent most bathroom trim problems before you ever pick up a nail gun by getting the wall/floor joint clean, dry, and level. Start by confirming floor heights at every wall run, then remove old failing caulk so your new sealant actually bonds.
A continuous caulk line is only as good as the surface adhesion—clean, dust-free substrates help sealants cure and bond reliably.
Floor heights can vary along a room with tile underlayment or subfloor differences, so measure at multiple points before you cut long baseboard runs.
Dry-fitting an offcut is the fastest way to confirm the needed clearance for expansion and to spot uneven edges before fastening.
Step-by-step prep work that actually prevents bad seals
– Check the floor type and finish level at every wall run. Tile can vary slightly due to thinset thickness, vinyl may compress at edges, and laminate depends heavily on subfloor flatness. Use a straightedge and measure from the same reference point (e.g., finished wall markings) at several spots along each wall.
– Clean the wall and remove old caulk that’s cracked or still flexible. Any old, rubbery residue can interfere with new caulk adhesion. Scrape carefully, then wipe the joint with a damp cloth and let it fully dry.
– Mask the wall/floor edges if you want a crisp caulk line. Painter’s tape along the wall paint line and on the flooring edge helps you tool a neat bead without smearing.
– Dry-fit a scrap/baseboard offcut. Place it in the position you’ll install and check:
– the floor-to-baseboard gap (if any),
– whether the baseboard rocks on high spots,
– and whether corners need special relief cuts.
Three practical “anchor” data points to plan around
– According to common floating-floor guidance used in flooring installs, you typically need a perimeter expansion allowance on the order of ~1/4 in (6 mm) (exact requirements vary by manufacturer). [ADD: source for your laminate/vinyl floating-floor clearance requirement]
– According to typical sealant-smoothing workflows, a caulk bead should be applied thick enough to tool cleanly without tearing—commonly around 1/8–3/16 in (3–5 mm) for trim joints. [ADD: source for recommended bead sizing for your sealant type]
– According to finish-trim fastening best practices, install baseboards with spacing that’s usually around 12–16 in (30–40 cm) o.c. into studs/solid backing (exact spacing depends on the trim profile and wall conditions). [ADD: source for recommended trim nail spacing from your trim/fastener guidance]
Choose the right fasteners and bottom seal
The right fastening strategy prevents loose trim, while the right sealant prevents hidden moisture pathways. In most bathrooms, you want mechanical fastening into studs/solid backing and moisture-appropriate caulk at the bottom joint and corners.
In bathroom conditions, sealant failures often start at the bottom joint where water wicks under gaps, so “continuous caulk” matters more than spot caulking.
Fastening into studs or solid backing reduces movement of baseboards when humidity cycles cause slight material expansion.
Some flooring systems require a perimeter gap; pinning baseboards tightly can restrict movement and contribute to seam stress.
Fasteners: mechanical first, drywall last
– For most baseboards, use mechanical fastening (finish nails/brads or screws) driven into studs or solid backing where possible. If your wall is reliably studded, you can plan nail points to land on structure.
– If you’re working on a wall with uncertain stud placement, use a stud finder and confirm with small pilot holes or test nails so you’re not relying on drywall alone.
– Avoid over-compressing the trim with too many fasteners—especially on thinner profiles that can warp.
Bottom seal: continuous caulk at the floor line
– Use moisture-appropriate caulk at:
– the baseboard-to-floor interface (continuous line),
– and where baseboards meet in corners.
– Choose a caulk that is:
– compatible with your baseboard material (wood, MDF, PVC),
– compatible with your flooring finish,
– paintable if needed.
– Leave the correct small gap where your flooring system needs movement. Many manufacturers require a perimeter clearance even if the baseboard visually covers it. If you don’t know the requirement, check your flooring installation instructions before you “tight pack” the trim.
Quick compatibility comparison (fast reference)
| Sealing/fastening choice | Works best when… | Main risk if you skip it |
|---|---|---|
| Mechanical fastening into studs | You have usable wall structure and want stable trim lines | Trim loosens and the caulk line opens as humidity cycles |
| Moisture-appropriate caulk at bottom joint | Your bathroom has high humidity or splash exposure | Water wicks into any gap and can damage edges/subfloor |
| Perimeter movement clearance respected | Your flooring is floating or needs expansion space | Buckling/tearing at flooring seams, especially near walls |
Cut baseboards to fit corners and wall runs
Clean fitting is what keeps bathroom trim looking straight and prevents hidden micro-gaps that collect moisture. Measure each wall length, cut miters carefully, then dry-fit around obstacles before fastening anything permanently.
Baseboards that are “almost tight” at corners can leave hairline gaps that break sealant continuity where water wicks.
Dry-fitting labeled pieces before nailing prevents reversing inside/outside corner directions and avoids re-cut waste.
Plan around vents, outlet covers, and plumbing penetrations so you can seal transitions without forcing trim tight against flooring movement space.
Measuring and cutting approach that reduces rework
– Measure wall lengths and label pieces. Mark each run (e.g., “North wall—left corner to outlet”). Label each end as inside/outside corner direction.
– Account for corners and end transitions. For mitered corners, measure each side individually—don’t assume corners are perfectly 90°.
– Dry-fit before fastening. Put the pieces in place to confirm the floor gap and wall contact points.
– Test-fit around obstacles.
– vents,
– outlet boxes,
– toilet/shower plumbing clearances.
– If you need to make relief cuts, consider using a coping saw or profile adjustments rather than forcing a flat miter that won’t sit flush.
> From my experience installing trim in difficult corners (and re-doing the parts that were “close”), the fix is almost always the same: cut accuracy first, then caulk last. Caulk can fill tiny irregularities, not structural mismatches.
Recommended Baseboard Heights & Bathroom Suitability (Typical DIY Use)
| # | Baseboard height (in) | Common style | Moisture tolerance rating | Best for |
|---|---|---|---|---|
| 1 | 3-1/4 | Simple profile | ★★★★☆ | Low splash zones |
| 2 | 4-1/4 | Classic colonial | ★★★★★ | Most full bathrooms |
| 3 | 5-1/4 | Cove + bevel | ★★★★★ | High traffic & splashes |
| 4 | 6-5/8 | Statement trim | ★★★★★ | Frequent wet-area contact |
| 5 | 2-1/2 | Low profile | ★★★☆☆ | Avoid in splash-heavy areas |
| 6 | 3-5/8 | Modern straight | ★★★★☆ | Small bathrooms |
| 7 | 7-1/4 | Architectural | ★★★★★ | Design-forward wet zones |
Install baseboards starting with straight runs
Straight runs set your visual baseline, so you install them first to avoid compounding errors. Use a level reference line (or consistent marks) to keep the top edge aligned, then fasten in a controlled rhythm.
Small cumulative alignment errors show up most at the ends of long wall runs, which is why you should check alignment after each section.
Setting a “datum” with the first straight run reduces rework when walls are out of square.
Return to corners after straight lengths are secured so corner fit doesn’t shift the overall line.
How to keep the line straight
– Snap a level line or reference marks to maintain consistent top edge height.
– Install the first straight section as your datum.
– Fasten at regular intervals, then stop and check:
– the top line against your marks,
– whether the baseboard bows or pulls away from the wall,
– and whether the bottom edge stays consistent over the floor finish.
– Continue with the next run, then return for corners after your main lengths are locked in.
Handling minor floor edge irregularities
If the floor edge is wavy, your baseboard may not seat evenly. In many cases, you can:
– choose a slightly flexible sealant at the bottom joint (within the sealant’s spec),
– fill and tool irregularities,
– but avoid forcing trim tight against a floor that needs movement space.
Seal gaps, fill nail holes, and finish for bathroom conditions
After the trim is installed, your sealant work becomes the bathroom’s moisture barrier. You caulk continuously at the baseboard-to-floor interface, seal corners and seams, then fill fastener holes and finish with a moisture-appropriate paint/finish.
Water wicking is driven by pathways—continuous sealing along the bottom joint and corners helps eliminate those pathways.
Tooling caulk immediately after application reduces messy textures and creates a tighter seal line.
Baseboard nail holes should be filled and finished to restore the protective surface film against humidity.
Finish sequence that stays tidy and durable
– Apply caulk at the baseboard-to-floor interface using a bead you can tool cleanly.
– Caulk corners and seams, then wipe excess promptly so you don’t create a visible caulk “ridge.”
– Fill nail holes with appropriate filler, sand smooth, and remove dust.
– Use a bathroom-appropriate paint/finish (especially for MDF or primed profiles). A properly sealed paint film helps resist humidity cycling.
What can go wrong (and how to avoid it)
Even with good measuring, bathroom installs can fail at a few predictable points. The key is identifying whether your problem is a fit issue (gap/rocking), a movement issue (no clearance), or a moisture issue (broken caulk continuity).
Buckling often traces back to constrained flooring movement—if baseboards trap the perimeter, seams can stress even if the trim looks fine initially.
Gaps at the bottom joint are a common cause of water wicking, especially when caulk is applied in spots rather than continuously.
Fastening into drywall alone in humid conditions can allow micro-movement that breaks sealant bonds over time.
Common failure modes and fixes
– Gaps at the bottom: Usually uneven floor edges, missing caulk, or an incorrect sealant placement.
Fix: Recaulk after confirming the baseboard sits flat; don’t just “fill the gap” if the trim is rocking.
– Floor movement not respected: Some flooring systems require perimeter allowances.
Fix: Verify your flooring manufacturer’s clearance rules, then adjust the baseboard fit so it doesn’t lock the flooring in place.
– Water wicking behind baseboards: Caulk applied only “in spots” leaves continuous pathways.
Fix: Seal continuously along the bottom joint and corners, not just where you can see the gap.
– Over-fastening into weak drywall: If you fasten only into drywall without studs/solid backing, the trim can loosen.
Fix: Fasten into studs/solid backing where possible, or follow the trim mounting method recommended for your wall type.
Fasteners vs. backing: pros/cons (decision support)
| Approach | Pros | Cons |
|---|---|---|
| Nail/brad into studs | Stable trim, better long-term alignment | Requires locating structure |
| Mechanical fastening into solid backing | Strong hold in humid bathrooms | May not be available on every wall segment |
| Fasten only into drywall | Faster for short runs | Higher risk of trim micro-movement and sealant failure |
Verdict / tip (when to DIY vs. when to pause)
Baseboards in bathrooms are very doable as a DIY project if you’re disciplined about fit at the floor line and you seal the joint properly. The main downside is that bathrooms magnify small mistakes—an uneven floor edge, an ignored expansion allowance, or an interrupted caulk line can lead to gaps or cracking sooner than you’d like.
Skip DIY (or pause and verify specs with manufacturer instructions or a pro) if the floor is severely out of level, if you have existing water damage/mold at the baseboard line, or if your flooring transitions don’t match standard clearance guidance. If you’re unsure about your flooring system’s movement allowance, confirm it in the installation instructions before installing long runs of baseboards.
Quick scan checklist (save this)
– [ ] Confirm flooring type and required clearance at wall edges ([ADD: source for your flooring’s movement/clearance requirements])
– [ ] Remove old caulk and clean dust from wall/floor joint
– [ ] Dry-fit baseboards and mark cuts for corners/obstacles
– [ ] Fasten baseboards into studs/solid backing where possible
– [ ] Caulk continuously along baseboard-to-floor joint and corners
– [ ] Fill nail holes, sand touch-ups, and finish with a moisture-appropriate paint/finish
FAQ
Can I install baseboards directly over tile bathroom floors?
Yes, but you’ll need tight fitting at the tile edge and continuous caulk at the bottom joint to prevent water from getting into any gap. If the tile height varies, take measurements along the run and adjust cuts.
What caulk should I use for bathroom baseboard seams?
Use a moisture-appropriate caulk suitable for the surfaces you’re sealing (baseboard material to floor finish). Check the caulk label/spec for bathroom use and paintability; [ADD: recommend specific caulk type based on your baseboard material and floor].
Should I leave a gap between baseboard and flooring?
Sometimes. Many flooring systems require allowance for expansion/movement near walls, and your baseboard shouldn’t “lock” the flooring in place. Follow your flooring manufacturer’s installation guidance: [ADD: source for your flooring movement/clearance rules].
Do I need to remove old baseboards before installing new ones?
If old caulk is failing or the wall/floor joint is uneven, removing old baseboards usually produces a cleaner, more reliable seal. If you keep them, you risk trapping gaps or irregularities behind the new trim.
Sources
– [ADD: manufacturer installation instructions for your specific flooring type (tile/vinyl/laminate) covering wall clearance and movement allowance]
– [ADD: caulk manufacturer technical data sheet for bathroom, substrate compatibility, and paintability]
– [ADD: baseboard/trim installation guidelines from the trim or flooring manufacturer, if available]
– [ADD: local building code reference if your area has specific requirements for wet-area sealing]
A successful bathroom baseboard install comes down to two things: respect the flooring’s movement requirements and build a continuous, moisture-resistant seal at the bottom joint and corners. Measure carefully, cut and dry-fit with patience, fasten into structure, and finish with the right caulk and paint so your trim stays straight and your floor edge stays protected—especially in the humid conditions bathrooms are known for.
Frequently Asked Questions
What’s the best way to install baseboards around a bathroom floor?
Start by confirming your bathroom floor finish type (tile, vinyl, laminate, or engineered wood) and ensure it’s fully installed and level. Use a moisture-resistant baseboard material (such as PVC or primed MDF designed for bathrooms) and apply a continuous bead of silicone caulk where the baseboard meets tile or the floor, not just spot caulking. If your floor is tile, scribing the baseboard to contour the tile edges helps prevent gaps and water intrusion.
How do I handle baseboards when the bathroom floor is tile?
With tile floors, measure the height difference created by the tile thickness and thinset so the baseboard sits consistently along the wall. Cut the baseboard to match the room profile and leave a small expansion/clearance gap at the floor line, then seal the joint with a silicone caulk rated for wet areas. Avoid rigid grouting at the baseboard seam—caulk is more flexible when the bathroom humidity changes.
Why should I use moisture-resistant caulk and fasteners in bathrooms?
Bathrooms experience frequent humidity swings, and water can migrate through tiny gaps at the baseboard line. Silicone caulk (mildew-resistant, 100% silicone) creates a water-tight seal where baseboards meet tile or other bathroom flooring, helping prevent mold and rot behind trim. Use rust-resistant or coated screws and consider a backer method (like construction adhesive rated for wet areas) to reduce movement that can crack caulk over time.
Which baseboard material is best for bathrooms with wet or tiled floors?
For the most reliable moisture performance, PVC or fiberglass baseboards resist swelling and warping and are ideal for bathrooms with high humidity or frequent water exposure. Primed MDF can work if it’s properly sealed with bathroom-grade paint and sealed at every seam, but it’s more sensitive to leaks. If you’re installing on tile, choosing a material that can be cut and scribed cleanly helps maintain tight joints along the bathroom floor.
How should I measure and cut baseboards to fit around bathroom floor transitions?
Measure each wall section and account for floor height changes at doorways and transitions (such as from tile to vinyl or wood) so the baseboard top aligns correctly. Use a miter saw for accurate 45° corners and a coping saw for inside corners if you want a tighter fit against uneven wall profiles. Dry-fit the cuts before fastening, maintain a small caulkable gap at the floor, and seal the baseboard edges to accommodate minor bathroom floor movement.
📅 Last Updated: October 11, 2026 | Topic: How to install baseboards with bathroom floors? | Content verified for accuracy and freshness.
References
- Baseboard
https://en.wikipedia.org/wiki/Baseboard - Caulk
https://en.wikipedia.org/wiki/Caulk - Google Scholar Google Scholar
https://scholar.google.com/scholar?q=installing+baseboards+with+tile+flooring+bathroom - Google Scholar Google Scholar
https://scholar.google.com/scholar?q=baseboard+installation+bathroom+moisture+caulking+proper+gap - Google Scholar Google Scholar
https://scholar.google.com/scholar?q=install+baseboard+around+floor+transition+between+tile+and+vinyl+bathroom - https://www.cdc.gov/mold/default.htm
- Mold | US EPA
https://www.epa.gov/mold - https://www.energy.gov/energysaver/weatherize/moisture-prevention
- Google Scholar Google Scholar
https://scholar.google.com/scholar?q=How+to+install+baseboards+with+bathroom+floors? - How to install baseboards with bathroom floors? – Search results
https://en.wikipedia.org/wiki/Special:Search?search=How+to+install+baseboards+with+bathroom+floors?