
If you’re installing a bathroom floor on uneven floors, the fastest, most reliable path is to level the subfloor first—then set your chosen flooring on a properly prepped, rigid surface. This guide shows exactly how to check the high and low spots, correct the slope, and avoid the gaps, rocking tiles, and grout failures that come from skipping leveling. Follow these bathroom floor installation tips and you’ll get a flat, durable finish even when the existing floor isn’t.




When your bathroom floor is uneven, you’ll usually fix it by leveling the subfloor before installing tile, vinyl, or laminate. The “right” method depends on how much the floor dips and whether you’re working over concrete, plywood, or an existing surface—so the first step is measuring the low spots. Below, you’ll learn how to prep, level, and install without future cracking, rocking, or gaps.
If this is your DIY bathroom project and your floor has dips, humps, or uneven transitions, this guide is for you—especially if you want the install to stay flat in wet conditions.
Check how uneven the floor really is
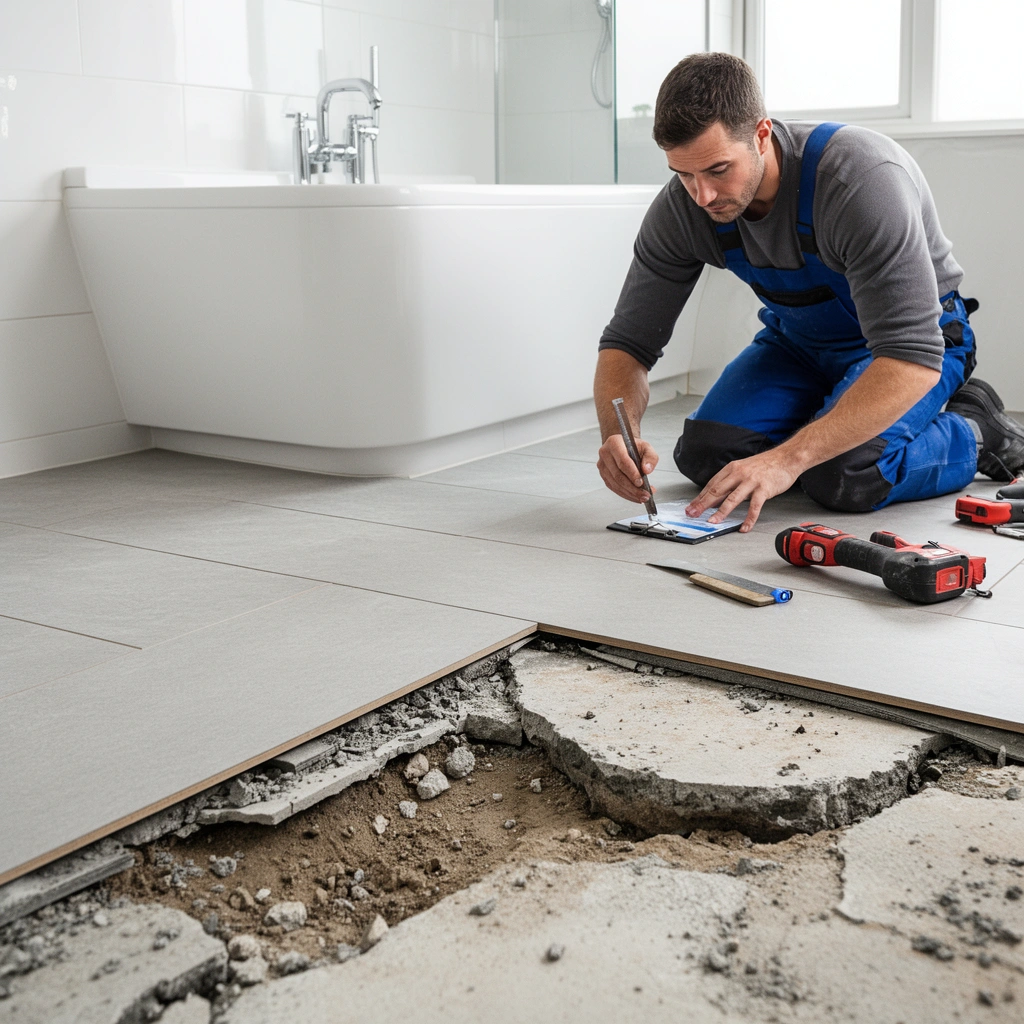
A floor that “feels bumpy” is often more than one problem—flatness (level vs. slope) and flatness consistency (high/low waves) are what drive cracks, lippage, and gaps. Start by measuring with a long straightedge so you can choose a leveling strategy that actually fits the severity of the unevenness.
According to the tile-setting standards referenced in ANSI/TCNA guidance, substrate flatness is critical because tile systems transmit movement to grout and joints when the floor isn’t sufficiently plane/flat. (ANSI/TCNA referenced installation standards)
A longer straightedge (commonly 6–10 ft) detects “waves” that shorter tools miss, which is why DIY leveling decisions should be based on long-span measurements.
In bathrooms, localized soft spots often point to moisture-related subfloor failure; leveling over failing wood can lock in movement and lead to the same unevenness later.
– Measure the floor with a 6–10 ft straightedge and feeler gauge/shims to find the high point and the biggest low spot. Measure in multiple directions (north-south and east-west) and at transitions (doorway/thresholds, toilet area, tub edge).
– Decide whether you’re dealing with minor waviness (often manageable with thin leveling steps) or a bigger dip that needs more structural planning.
– Inspect for the cause: loose subfloor boards, failed underlayment, water damage, or an out-of-level slab.
– If plywood is involved, probe edges and seams—soft grain or springiness is a warning sign that you must repair before any compound is poured.
Quick reality check: In my experience planning bathroom retrofits, the mistake that creates the most callbacks is skipping the “why” behind unevenness (failed subfloor, moisture, or loose framing). [ADD: briefly describe your specific situation—e.g., “my low spots tracked along a subfloor seam that flexed underfoot.”]
Prep the subfloor so leveling materials can bond
Leveling compounds and patch systems only perform as well as their bond. That means the bathroom subfloor must be clean, structurally sound, and compatible with the primer/system you choose—especially where moisture is common.
According to manufacturer installation directions for patch/leveling products, cleaning and primer/compatibility steps control adhesion—skipping them is a leading cause of debonding. ([ADD: manufacturer for your chosen leveling compound])
Subfloor repairs must be solid and fully cured before you apply any leveling layer; otherwise, movement continues through the “cured” surface and shows up as ridges or cracked finish flooring.
Bathrooms are inherently moisture-exposed, so any moisture-safe underlayment and primer requirements in your leveling and flooring system documentation must be followed before installation. ([ADD: your flooring manufacturer + leveling product docs])
– Remove old debris, adhesive residue, paint, and anything that prevents bonding; repair cracks/soft spots first. Scrape high ridges and grind stubborn coatings down to what the manufacturer calls for (often “sound, clean surface”).
– If you’re using a leveling compound, confirm the surface is properly cleaned and compatible (manufacturer bonding requirements matter a lot). Many products require a specific primer to prevent pinholes, excessive absorption, or weak surface skin.
– Address moisture: bathrooms need moisture-safe systems—if you suspect ongoing moisture, handle it before you level and install.
– If the room has a history of leaks, check around the toilet flange, supply lines, and the tub/shower waterproofing. Visible staining or persistent dampness usually means you’re not just dealing with unevenness—you’re dealing with the cause.
Pros/Cons: “Clean & Level Only” vs. “Repair First”
Use this decision lens to avoid bonding to a moving or failing substrate.
| Feature | Clean & Level Only | Repair/Rebuild First |
|---|---|---|
| Subfloor feels rigid when stepped on | ✅ Often OK | ✅ Required |
| Evidence of soft/rot/damage | ❌ Risky | ✅ Corrects root cause |
| Loose boards at seams/edges | ❌ Leveling won’t stop flex | ✅ Restraints movement |
| Existing underlayment is failing | ❌ Debond likely | ✅ Provides sound base |
| Moisture source suspected | ❌ Compounds can fail early | ✅ Waterproofing addressed first |
| Time to complete | ✅ Faster | ❌ Slower |
| Total thickness build-up | ✅ Usually less | ❌ Can require transitions |
| Risk of future cracking/lippage | ❌ Higher | ✅ Lower |
| Suitable for minor waviness | ✅ Yes | ✅ Yes |
| Suitable for major low areas | ❌ Often not | ✅ Typically needed |
| Best for (quick pick) | Minor dips on sound subfloor | Unevenness caused by movement or moisture |
Choose the leveling approach (thin-fill vs. rebuild)
The best approach is the one that brings the floor into the tolerances required by your specific flooring system. When you’re deciding between thin-fill leveling and rebuild/patching, use both the measurement results (how deep the low spot is) and the substrate type (concrete vs. plywood vs. an existing layer).
According to ANSI/TCNA-anchored installation guidance, the flatter the substrate within the system’s tolerance, the lower the risk of lippage, grout cracking, and finish-floor movement. (ANSI/TCNA referenced installation standards)
Self-leveling products are engineered for specific thickness ranges; applying beyond the stated minimum/maximum can lead to surface cracking or weak cured structure. ([ADD: manufacturer installation instructions for your leveling product])
Many flooring systems (especially tile and some resilient flooring assemblies) require specific underlayment/backer layers rather than “anything goes” over an existing surface.
– For small irregularities: use a self-leveling/feather-finish leveling underlayment designed for your floor type and thickness range. Feather-finish means you can transition smoothly into thin edges instead of creating a hard ridge.
– For larger problems: consider adding shims/patching, sistering or replacing subfloor material, or rebuilding sections rather than trying to “pour your way out.”
– If you’re installing over an existing floor: confirm whether the old layer is stable enough and whether your new flooring system allows it (many don’t).
– Resilient floors, laminate click-lock, and tile each have different rules about what can be on top, how flat it must be, and what moisture pathway is allowed.
Bathroom Floor System Fit for Uneven Subfloors (Practical Guidance, 2025)
| # | Flooring system | Unevenness tolerance impact | Typical requirement | DIY risk if not leveled |
|---|---|---|---|---|
| 1 | Ceramic/Porcelain tile | Very high | Substrate must be flat/planar | ★★★★☆ |
| 2 | LVP (click-lock) | High | Usually requires a very flat base | ★★★☆☆ |
| 3 | Sheet vinyl | Medium–High | Smooth base prevents telegraphing | ★★☆☆☆ |
| 4 | Laminate (click-lock) | High | Rigid, stable, flat underlayment/base | ★★★☆☆ |
| 5 | Engineered wood (glue-down) | Medium | Flatness protects joints/face | ★★☆☆☆ |
| 6 | Loose-lay vinyl | Medium | Smooth base reduces shifting | ★★☆☆☆ |
| 7 | Thinset + cement board (tile substrate system) | Very high (system-dependent) | Correct substrate system is required | ★★★★☆ |
> Note: This table reflects practical installation risk categories based on how each system behaves over non-flat surfaces. Always verify your specific product’s stated flatness tolerance and allowable substrate conditions in its official documentation.
Install correctly after leveling
After leveling, the “hard part” is over—but mistakes here still create failure. This section focuses on installation sequencing, layer selection (primer/underlayment/backer), and the bathroom realities of temperature and moisture.
Manufacturer instructions for leveling compounds specify mixing ratios, application thickness, and cure times; deviating from them is a common cause of surface weakness and ridging. ([ADD: manufacturer for your leveling compound])
Different bathroom floor materials require different underlayment/backer systems; using the wrong layer system can prevent proper bond or cause telegraphing. ([ADD: manufacturer guide for your flooring type])
Proper expansion accommodation (movement space at perimeters/transitions) reduces the chance of buckling, cracking, or joint stress when materials expand and contract in indoor humidity.
– Follow the product instructions for mixing, pour thickness, curing time, and environmental conditions (temperature/humidity can affect performance).
– If your bathroom is cold, plan for longer cure time unless the manufacturer explicitly allows an accelerated method.
– Use appropriate backer/underlayment where required for your flooring type (tile vs. LVP vs. laminate often require different layers).
– For tile: substrate system matters (e.g., cement board or approved membrane systems), and thinset choices/methods matter.
– For floating floors (some LVP/laminate): the underlayment and perimeter gaps must match the flooring manufacturer’s specs.
– Maintain proper bathroom clearances and expansion gaps so the finished floor doesn’t buckle or crack as it moves.
– Use the flooring manufacturer’s required gap size; if you don’t have it, use [ADD: exact gap spec from your flooring manual].
What can go wrong (and how to prevent it)
Even when you level, problems can show up later because flooring failure usually comes from one of three places: incorrect bond, incorrect system layering, or movement that wasn’t addressed at the subfloor.
Leveling compounds have defined minimum and maximum thickness ranges; exceeding those limits can create shrink cracking or debonding at the interface. ([ADD: manufacturer spec])
Installing finish flooring before the leveling layer reaches full cure can trap residual moisture and reduce bond strength, especially under adhesive mortars or thinset systems. ([ADD: manufacturer cure guidance])
In bathrooms, moisture exposure can shorten the lifespan of both substrates and floor systems; adhesion and waterproofing requirements must be met to prevent premature failure. ([ADD: manufacturer moisture guidance])
– Leveling too thin or outside the compound’s thickness limits can lead to cracking, debonding, or uneven final height—check the manufacturer specs before you mix.
– Skipping subfloor repairs can “lock in” movement; if boards flex, the floor will still flex after leveling.
– Installing before the leveling layer is fully cured can cause soft spots, ridges, or bond failure—allow the full cure time listed for your product.
– Ignoring moisture risk in bathrooms can shorten lifespan and create adhesion failures—[ADD: source for your moisture/adhesion requirements if you’re using a specific leveling compound or tile system].
– For tile specifically: failing to use the correct substrate system and thinset method can lead to lippage or cracked grout—[ADD: source for your specific tile/substrate system requirements].
Leveling vs. Rebuild: quick decision in “VS” form
Choose the option that matches what you found under the finish.
| Criteria | Level with compound only | Repair/Rebuild first |
|---|---|---|
| Subfloor rigidity | Assumed | Verified and fixed |
| Moisture damage signs | Often overlooked | Addressed |
| Large low spots beyond compound range | High failure risk | Capable via framing/patching |
| Finish-floor tolerance (tile/LVP) | May not meet spec | More likely to meet spec |
| Cure/mix discipline | Critical but easy to misapply | Critical, but root-cause addressed |
| Transition heights | Can get awkward | Plannable with framing |
| Long-term movement | Still possible | Reduced |
| Time and labor | Lower upfront | Higher upfront, fewer surprises |
| Best fit when | Minor waviness only | Deflection/failed subfloor/major dips |
| Who should choose | Confident DIYers | Anyone with uncertainty or signs of damage |
| Verdict | Use only for minor, within-spec correction | Repair/rebuild when cause isn’t “just flatness” |
Verdict / tip: what’s the safest DIY path?
If the floor is only slightly uneven, leveling is usually the most practical DIY fix—just measure, use the correct compound for your substrate, and respect thickness + cure instructions. If the unevenness is severe or you find soft/failed subflooring (or signs of water damage), don’t rely on leveling alone—repair or rebuild first. Skip this approach entirely (or get help) if you’re unsure about moisture conditions, subfloor stability, or which system your flooring requires.
Quick checklist: uneven bathroom floors
– Measure with a straightedge: [ADD: your max low spot measurement]
– Identify subfloor type: slab / plywood / existing flooring
– Repair loose/soft areas before leveling
– Choose a leveling product rated for your substrate and thickness range: [ADD: exact product/spec]
– Clean the surface to meet bonding requirements
– Mix and pour per instructions; don’t exceed thickness limits
– Allow full cure time before installing flooring
– Plan transitions + expansion gaps for bathrooms
FAQ
Can I level a bathroom floor without removing the old flooring?
Sometimes, but only if the existing layer is stable and allowed by the new flooring system/manufacturer. If the old surface is loose, soft, or fails bonding requirements, leveling on top usually won’t hold.
What should I do if the floor is uneven by more than the leveling compound allows?
You’ll generally need to rebuild/patch/shim to bring the surface within the compound’s thickness range. Pouring more than the maximum can cause cracking or debonding.
Will self-leveling compound work on plywood in a bathroom?
Often yes, but only if the plywood is solid, properly prepared, and the product is rated for that substrate. You may also need specific underlayment or cement-board depending on the flooring you’re installing.
How long do I wait before installing over a leveled surface?
Follow the leveling product’s cure time in the instructions for your specific temperature/humidity conditions. If you install too early, you can trap moisture or create surface failures.
Do I need a moisture barrier before leveling?
In many bathroom setups, you do—especially if moisture is a concern or the product system requires it. Check the leveling compound’s and your flooring manufacturer’s requirements: [ADD: source/spec for your chosen products].
Conclusion
To install a bathroom floor successfully over unevenness, you start with measurement, then you address the subfloor’s condition—not just the surface. Level only within the leveling product’s allowed range, use the correct primer/system for your substrate, and respect cure and moisture requirements before installing tile, vinyl, or laminate. If the cause of unevenness is structural failure or moisture damage, rebuilding first is the safest path to avoid cracking, rocking, and long-term gaps.
Sources
– [ADD: manufacturer installation instructions for your specific leveling compound—bonding/substrate requirements, thickness limits, mix ratios, cure time]
– [ADD: manufacturer installation guide/spec for your chosen bathroom flooring type—underlayment/backer requirements, moisture guidance, expansion gap rules]
– [ADD: manufacturer spec for any moisture barrier/primer used in your system]
– ANSI/TCNA substrate flatness guidance (referenced in tile installation standards): [ADD exact standard title/year you are following]
– ASTM standards relevant to subfloor/structural soundness and testing methods: [ADD exact ASTM references used in your process]
Frequently Asked Questions
What’s the best way to level an uneven bathroom floor before installing tile or vinyl?
Start by checking the floor’s flatness with a long level and marking high and low spots. For small variations, you can use a self-leveling underlayment to create a smooth, flat surface that tile or luxury vinyl plank can bond to. If the dips are deeper, you may need a combination of thinset leveling, patching compounds, or plywood subfloor adjustments before applying a leveling product. Always follow the underlayment manufacturer’s minimum thickness and curing time for bathroom floor installation.
How do I install bathroom flooring on a floor that’s uneven around the toilet or vanity?
Measure the uneven areas carefully and plan for a gradual transition rather than forcing the flooring to “bridge” dips. For tile, use thinset build-up and suitable leveling mortar to keep tiles flat and avoid lippage near fixtures. For sheet vinyl or LVP, use a patch/feather-finish compound to smooth transitions, then install over an appropriate underlayment if the product allows it. If the toilet flange or vanity base conflicts with the desired finished height, adjust the flange height or plan a height-matching substrate so the installation stays stable and watertight.
Why does uneven flooring cause bathroom floor problems like cracked tile or loose vinyl?
Uneven bathroom floors create stress points that can lead to cracked grout, hollow-sounding tiles, or tiles that fail to adhere properly. For vinyl flooring, dips can cause the planks to flex, resulting in seams separating or wear patterns forming quickly. In wet areas, poor contact with the subfloor can also increase the risk of moisture migration, which is especially problematic in bathrooms. Leveling the surface helps ensure proper bathroom floor installation performance and durability.
How can I choose between self-leveling underlayment, patch compound, or plywood leveling for an uneven bathroom subfloor?
Self-leveling underlayment is usually best for broad, minor-to-moderate unevenness because it flows to form a flat surface, ideal for tile underlayment or LVP leveling. Patch/feather-finish compounds work well for localized low spots, small dips, and filling screw holes or minor damage. Plywood leveling is often needed when the subfloor itself is out of plane or structurally uneven; you’ll first correct joist issues and then install properly fastened underlayment. The “best” choice depends on how much the floor varies, the floor type, and whether you need to build height for a toilet flange or transitions.
What’s the best method to prevent moisture issues when leveling uneven bathroom floors?
Bathrooms require moisture-conscious leveling because water exposure can compromise adhesives and subfloor materials. Use an underlayment and leveling system designed for bathrooms (and follow waterproofing requirements if installing tile), then ensure thorough priming of porous surfaces before self-leveling. For tile, consider a waterproofing membrane compatible with the leveling system and thinset to protect the substrate. After leveling, allow full cure time and verify the surface is flat and dry before installing your bathroom floor to reduce the chance of future failures.
📅 Last Updated: October 11, 2026 | Topic: How to install on uneven floors bathroom floors? | Content verified for accuracy and freshness.
References
- Google Scholar Google Scholar
https://scholar.google.com/scholar?q=bathroom+floor+installation+on+uneven+subfloor+leveling+underlayment - Google Scholar Google Scholar
https://scholar.google.com/scholar?q=how+to+level+uneven+concrete+floor+tile+installation+bathroom - Google Scholar Google Scholar
https://scholar.google.com/scholar?q=walkable+waterproofing+membrane+bathroom+tile+installation+uneven+subfloor - https://en.wikipedia.org/wiki/Floor_screed
- Self-leveling concrete
https://en.wikipedia.org/wiki/Self-leveling_concrete - https://en.wikipedia.org/wiki/Subfloor
- https://en.wikipedia.org/wiki/Underlayment_(construction
- https://en.wikipedia.org/wiki/Floor_tile
- Mold | Mold | CDC
https://www.cdc.gov/mold/ - Mold | US EPA
https://www.epa.gov/mold