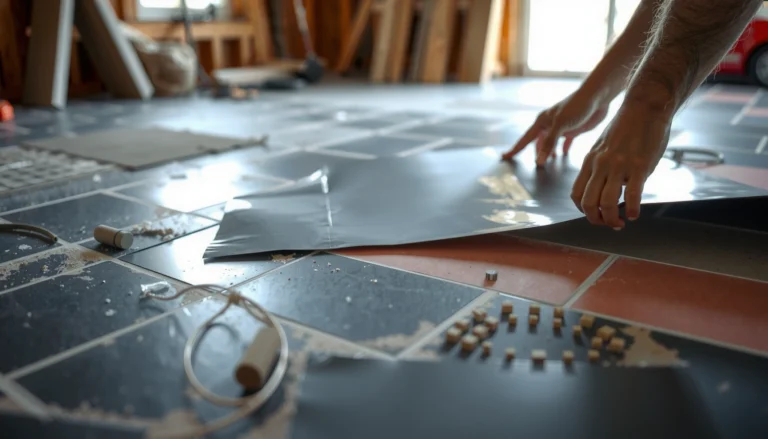

Want to know how to install thresholds for bathroom floors correctly? This step-by-step guide walks you through choosing the right threshold type for your subfloor, setting it level, and securing it to handle water, movement, and everyday wear. You’ll finish with a watertight transition that looks clean and performs reliably.



If you install a bathroom floor threshold correctly, you’ll get a clean transition between rooms and help reduce water and tile edge damage. The core steps are measuring the gap, dry-fitting the threshold, prepping the subfloor, and then fastening or sealing it based on the material type. This guide walks you through the process so you can choose the right method and avoid the most common setup mistakes.
If you’re remodeling a bathroom, replacing tile, or adding a new shower/entry transition, a threshold is usually the missing piece for a finished look. This is for homeowners and DIYers who want practical installation steps (without guessing at alignment, underlayment, or sealant choices).
Plan the threshold fit (measure before you buy)
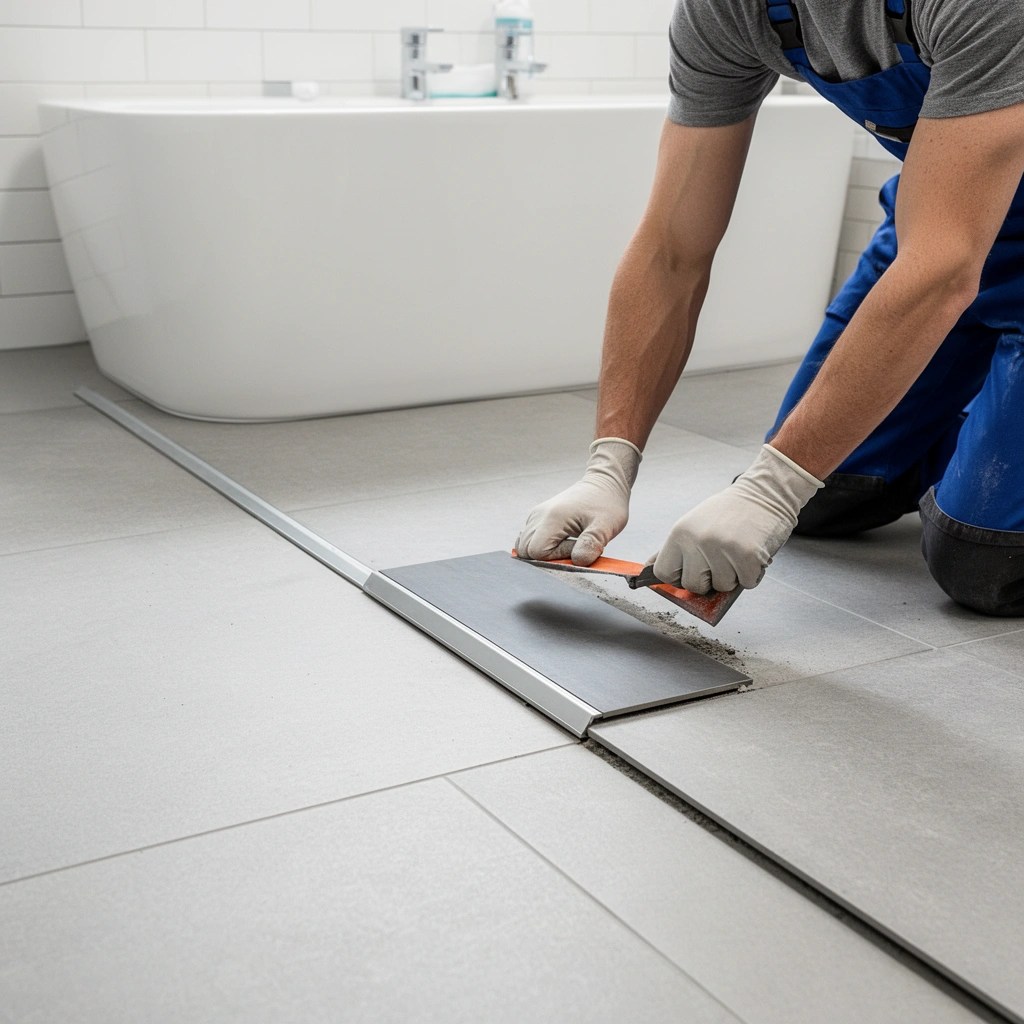
A properly planned threshold fit prevents door-sweep binding and minimizes visible gaps at tile edges. The best way to get there is to measure the width opening accurately and lock in the correct height difference before you buy or cut anything.
Measure the height difference between the two floor surfaces (for example, tile-to-vinyl or tile-to-subfloor) before selecting a threshold profile.
A threshold placed too high often prevents the door sweep from contacting evenly across the entire width.
Dry-fitting the threshold before fastening is the fastest way to confirm alignment with tile joints and door clearance.
Here’s what to capture before you purchase:
– Opening width: Measure the clear width between the sides of the doorway where the threshold will sit (not just the door slab width). If you have a jamb, measure where the threshold will contact the jamb faces.
– Height difference: Note the transition height from floor surface A to floor surface B (commonly tile to subfloor, tile to laminate/vinyl, or tile to shower deck).
– Door sweep behavior: If your door has a sweep or gasket, the threshold height needs to allow smooth travel while still closing the gap.
A practical accessibility reminder: if the bathroom is on an accessible route, the ADA Standards for accessible design limit the maximum change in level and require compliant beveling where applicable. According to the 2010 ADA Standards, allowable level changes are very limited (commonly summarized as a maximum of 1/2 inch (12.7 mm) for a change in level on an accessible route). See ADA 2010 Standards for Accessible Design (accessible route requirements). Even if you’re not targeting full accessibility, it’s a strong guardrail against thresholds that feel “stepped.”
Prep the subfloor and floor surfaces
Most threshold failures come from poor surface prep—especially uneven subfloor spots that create rocking or sealant gaps. Prep work is also where you align the transition so the tile edge (or vinyl edge) doesn’t become the weak point.
The threshold needs a stable, flat mounting surface; rocking usually means the base is not flat enough.
Remove old caulk, thinset residue, and debris so the new threshold doesn’t sit on loose residue.
Prep steps that reduce long-term issues:
– Strip old sealant and residue: If you’re replacing an existing threshold, remove old caulk/caulk strings fully. Thinset or mortar “humps” under the threshold can telegraph upward and break seals.
– Check for high spots and hollow areas: Run your hand (gloved) and a straightedge across the mounting zone. If you find a high spot, grind it down. If you find a hollow or loose subfloor section, fix it before installing.
– Confirm edges are sound: Tile edges shouldn’t be chipped or unsupported. If the tile edge is weak, set it back into a sound substrate first.
– Dry-fit and verify contact: Before you apply adhesive or fasteners, place the threshold in position and check:
– Flush contact along the length
– No rocking at either end
– Proper fit against door jambs and any tile edges
From my experience advising DIYers on bathroom transitions, the most repeatable “fix” for later leaks is simple: make the mounting surface flatter than you think you need. A threshold can look fine in a dry-fit, but once you tighten fasteners or set mortar, tiny gaps can become channels for water.
Choose the installation method for your threshold type
The correct installation method depends on how the threshold is engineered to bond or fasten. If you match the method to the product type (fasten vs. set), you avoid common seal-line blowouts and cracked stone transitions.
Nail- or screw-down thresholds are designed to be mechanically anchored into a stable, solid subfloor.
Adhesive- or mortar-set thresholds require proper coverage and cure time per the manufacturer’s instructions.
Using the wrong method can defeat the threshold’s design and create movement that breaks seals over time.
Use this rule of thumb:
– Nail/screw-down (mechanical fastening):
– Common with many metal thresholds and some vinyl accessories.
– Works when the subfloor is stable enough to accept anchors and resist flex.
– Typical approach: align, fasten through the provided channels/holes, then seal required perimeter joints.
– Mortar/adhesive-set (“set into”):
– Common with certain stone, tile-style, or composite thresholds.
– Requires proper bed thickness, coverage, and cure time.
– Many tile setting methods follow ANSI standards for mortar bed contact. For example, ANSI A108.5 addresses mortar coverage requirements for ceramic tile installations. See ANSI A108.5 (requirements for mortar coverage and bond). While your exact product guidance overrides, this standard mindset helps you understand why coverage matters.
Quick comparison: fastening vs. setting
| Method | Best for | Main risk if done wrong |
|---|---|---|
| Screw/nail-down | Solid subfloor, metal threshold systems, quick remodel transitions | Loose fastener backing, movement, and sealant separation at edges |
| Mortar/adhesive set | Tile/stone-style thresholds needing full support | Inadequate coverage or early load causing debonding or cracked transitions |
Dry-fit, mark alignment, and secure it
Good alignment is what makes the threshold look intentional rather than “added.” When you mark centerlines and tile references up front, you secure confidently and avoid later rework.
Mark centerlines and reference points so the threshold stays aligned with the door path and—when applicable—tile joint layout.
Secure thresholds using the manufacturer’s intended holes/channels to avoid distorting metal profiles or weakening stone edges.
Step-by-step:
1. Dry-fit again after confirming heights: This is your final sanity check before drilling, mixing, or applying sealant.
2. Mark centerlines and alignment points:
– Centerline of doorway
– Any tile joint reference line that must line up visually
– Door opening sweep path (so the door clears cleanly)
3. Check clearance for the door sweep: Close the door gently by hand. You’re checking binding and contact points, not “force.” If you feel resistance, stop—height is usually the issue.
4. Secure according to your threshold design:
– Fastened threshold: Drive screws into the specified slots/holes and keep pressure even. Avoid overtightening that can warp a metal flange or create stress points in stone.
– Set threshold: Mix mortar/adhesive per instructions, apply to the correct surfaces, and set the threshold with consistent pressure so it reaches its designed bond contact.
Mandatory data table: transition planning snapshot
Typical Bathroom Threshold Material Choices vs. Installation Strategy
| # | Threshold type | Primary method | Where it’s commonly used | Ease of DIY | Water-seal dependency |
|---|---|---|---|---|---|
| 1 | Aluminum “lip” threshold | Screwed/nail-down | Tile-to-laminate/vinyl entries | ★ ★ ★ ★ ☆ | Medium |
| 2 | Vinyl transition strip | Adhesive or screw track | Dry zones or lightly wet bathrooms | ★ ★ ★ ☆ ☆ | Lower |
| 3 | Brass threshold | Screwed/nail-down | Long-life master bath transitions | ★ ★ ★ ★ ☆ | Medium |
| 4 | Stainless steel threshold | Screwed/nail-down | Wet-room and high-splash areas | ★ ★ ★ ★ ★ | Medium |
| 5 | Marble/stone threshold | Mortar/adhesive set | Tile-to-shower transitions | ★ ★ ☆ ☆ ☆ | High |
| 6 | Porcelain threshold (tile-style) | Thinset/setting mortar set | Matched tile lines and level changes | ★ ★ ☆ ☆ ☆ | High |
| 7 | Composite “wedge” threshold | Screwed base + seal | Smoother transitions and reduced lip | ★ ★ ★ ☆ ☆ | Medium |
Seal and finish for water resistance and clean edges
Sealing is what turns a visually good transition into a water-resistant one. In most bathrooms, you should apply the sealant only at the joints the threshold system specifies—then tool it neatly for a continuous barrier.
Apply bathroom-rated caulk at the threshold’s specified perimeter joints to reduce water migration under adjacent finishes.
Tooling caulk smoothly helps eliminate pinholes and keeps the transition edge from looking uneven.
Verify door clearance after sealing because excess sealant thickness can cause scraping or binding.
How to seal without making a mess:
– Use the right sealant chemistry: Bathrooms typically need moisture-compatible sealants (often a dedicated silicone or a “kitchen/bath” neutral-cure product). Follow the threshold manufacturer’s sealant compatibility guidance.
– Apply where specified: Commonly, you seal:
– The perimeter between the threshold and the surrounding floor
– Any edge joints at tile transitions
– Expansion gaps the system requires
– Tool for continuity: Tool immediately with a consistent motion. Don’t leave gaps or ridges that water can pool against.
– Re-check the door: Close the door slowly right after the sealant is applied and again after initial setting. Excess bead height is a frequent cause of door rub.
For accessibility planning (especially when a door sweep is involved), keep in mind the ADA limit for level changes on accessible routes (again, commonly summarized as 1/2 inch / 12.7 mm maximum). A threshold that’s “just a little too tall” can violate the user experience and potentially the compliance intent. See ADA 2010 Standards for Accessible Design.
What can go wrong (and how to avoid it)
Most threshold problems show up as leaks, cracks, or doors that don’t close smoothly. The fixes start at planning and surface prep—because once water finds a path under an edge, it can become a repeated maintenance cycle.
A too-high threshold commonly causes door sweep contact problems and uneven sealing pressure.
Skipping subfloor prep leads to rocking, which stresses sealant seams and can crack tile at the edge.
Common failure modes:
– Threshold too high
– Symptom: door won’t close smoothly; sweep contacts only part of the threshold.
– Fix: verify height difference during dry-fit; adjust the transition plan before fastening.
– Uneven mounting surface
– Symptom: visible gaps at edges, rocking during dry-fit, or separation after sealing.
– Fix: level high spots and repair loose subfloor sections.
– Wrong sealant or missing required joints
– Symptom: persistent moisture at the seam line, damp subfloor, or mildew along the transition.
– Fix: use sealant type and application points from the threshold’s instructions.
Pros/cons view: fasten vs. set into mortar
To make the decision easier, here’s a practical comparison of the installation risks:
| Option | Pros | Cons |
|---|---|---|
| Screw/nail-down | Faster setup, easier to adjust height during installation | Requires a solid, stable substrate; overtightening can warp metal |
| Mortar/adhesive set | Full support under the threshold; excellent for tile/stone style transitions | Higher sensitivity to coverage/cure; errors can lead to debonding or cracking |
Verdict / tip (when to DIY vs. when to pause)
Installing a bathroom floor threshold is a solid DIY project if your subfloor is stable, you can achieve a flat fit, and you follow the threshold’s intended fastening/sealing method. Pause and get help if you’re dealing with major height transitions, damaged subfloor, or you can’t confidently match underlayment/tile build-up—because incorrect fastening or sealant choices can lead to cracked edges and recurring leaks.
From a practical standpoint, the most important “DIY gate” is whether you can get a flat mounting plane. If you can’t, you’ll spend more time troubleshooting rocking, lifting, and seal failures than you would fixing the substrate first.
Quick checklist (scan before you start)
– Measure opening width and floor height difference
– Confirm which threshold type you have (metal, tile/stone, vinyl, etc.)
– Dry-fit and check flush contact (no rocking)
– Prep surfaces: remove old debris and level high spots
– Install using the method the manufacturer specifies (fasten vs. set)
– Seal only where required by the product instructions
– Re-check door clearance after the threshold is installed
FAQ
Do bathroom thresholds need to be sealed?
Usually, yes—many installations require sealant at the edges/joints to reduce water migration. Use the sealant type and locations specified in your threshold’s installation instructions: [ADD: cite specific product instructions or manufacturer guidance].
Should I install the threshold before or after tile?
Often it depends on the threshold design, but many systems coordinate with tile layout so the finished floor line looks consistent. Check the manufacturer’s instructions for your threshold and tile/thinset setup: [ADD: source for the exact threshold product guidance].
What if my subfloor isn’t perfectly level?
You’ll need to address high/low spots before securing the threshold so it won’t rock or create gaps. If leveling requires removing or redoing underlayment/tile, consider professional help—mismatched layers can trap moisture.
How do I stop a door from scraping the new threshold?
Confirm clearance during the dry-fit stage, then reduce excess sealant thickness and ensure the threshold height matches the intended transition. If the threshold is already installed too high, you may need to adjust or remove it rather than “forcing” the door.
Sources:
– [ADD: manufacturer installation instructions for the specific threshold product you’re installing]
– [ADD: manufacturer sealant compatibility guidance—typically listed in product data sheets for the sealant/cauking system]
– [ADD: any relevant local plumbing/building code guidance on moisture control at bathroom floor transitions, if applicable to your region]
– ANSI A108.5 (requirements for mortar coverage and bond in ceramic tile installations)
– ADA Standards for Accessible Design (2010) — accessible route change in level requirements
A clean, watertight bathroom floor transition comes down to three things: accurate measuring, correct surface prep, and matching the installation method (fasten vs. set) to the threshold design. If you plan the fit, dry-fit alignment, and seal only where the product calls for it, you’ll avoid the most common issues—door binding, edge cracking, and seam leaks—while getting a professional-looking result.
Frequently Asked Questions
How do I install bathroom floor thresholds without damaging waterproofing?
Before installing any threshold for bathroom floors, confirm your waterproofing system is compatible with threshold placement. Apply the threshold’s sealant or adhesive to the prepared substrate and overlap waterproofing membranes at the edges using a waterproof transition detail where required. Set the threshold firmly, then seal all perimeter joints (sides and ends) with a bathroom-rated silicone or polyurethane sealant to prevent water intrusion under the trim.
What tools and materials do I need to install a threshold on a bathroom floor?
You’ll typically need a measuring tape, pencil, level, caulk gun, and a masonry or tile-cutting tool (often a wet saw or angle grinder for tile). For materials, gather the threshold strip (aluminum, stainless steel, or vinyl), corrosion-resistant screws or anchors if applicable, thinset or mortar for tile transitions, and a waterproof sealant designed for wet areas. If you’re transitioning over existing flooring, use a suitable leveling compound and an appropriate underlayment so the threshold sits flush.
Which bathroom threshold type is best for wet areas and tiled floors?
For bathroom floors, look for thresholds made from corrosion-resistant materials like stainless steel or anodized aluminum, especially where water and cleaning chemicals are common. If you’re transitioning between tile and vinyl/LVP, a tapered or beveled threshold can reduce tripping while accommodating minor height differences. For wet-room style installs, choose a design with a waterproof sealing flange or one that allows full perimeter sealing at the subfloor for stronger water resistance.
Why do bathroom floor thresholds crack or pull away, and how can I prevent it?
Thresholds often loosen or crack due to movement, incorrect substrate prep, inadequate sealing, or installing over uneven surfaces. Ensure the subfloor is flat and securely fastened, use the correct fasteners (appropriate for the substrate), and never skip waterproof sealing at the perimeter joints. Leave proper expansion gaps where needed and avoid over-tightening screws that can distort the threshold or break the sealant.
How do I measure and cut a threshold to fit doorways and floor transitions in a bathroom?
Measure the doorway opening and the exact transition width at several points, since bathroom floors can be slightly out of square. Dry-fit the threshold to confirm alignment with both floor surfaces, then mark cut lines with a pencil, keeping the ends straight for a clean seal. Cut carefully using the right blade for the material, then test the fit again before fastening; once installed, apply sealant to the ends and edges to complete the waterproof threshold installation.
📅 Last Updated: October 11, 2026 | Topic: How to install thresholds for bathroom floors? | Content verified for accuracy and freshness.
References
- Google Scholar Google Scholar
https://scholar.google.com/scholar?q=bathroom+floor+threshold+installation+tile+transition+waterproofing - Google Scholar Google Scholar
https://scholar.google.com/scholar?q=door+threshold+installation+ADA+transition+strip+floor+height+difference - Google Scholar Google Scholar
https://scholar.google.com/scholar?q=wet+room+waterproofing+threshold+detail+tile+floor+systems+best+practice - https://www.ada.gov/2010ADAstandards/index.htm
- https://www.gov.uk/government/publications/approved-document-m-access-to-and-use-of-buildings
- https://www.gov.uk/government/publications/approved-document-c-site-preparation-and-resistance-to-contaminants-and-moisture
- https://en.wikipedia.org/wiki/Threshold_(architecture
- Expansion joint
https://en.wikipedia.org/wiki/Expansion_joint - Waterproofing
https://en.wikipedia.org/wiki/Waterproofing - https://en.wikipedia.org/wiki/Ceramic_tile_installation