
Water damage to bathroom floors is usually preventable by stopping moisture at the source and using the right waterproofing layers. The most reliable approach seals the subfloor and all edges, fixes leaks quickly, and prevents water from lingering on the surface after showers—because even “small” seepage can reach the wood or underlayment over time.


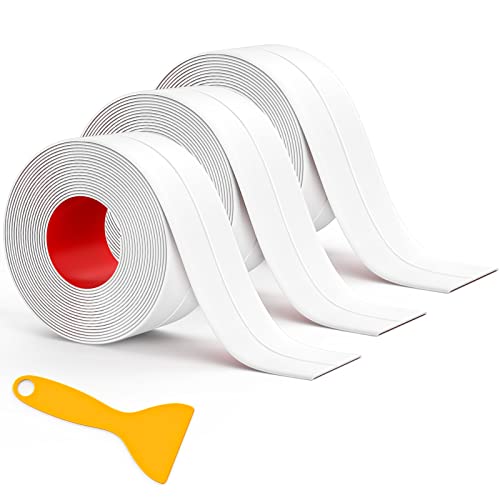

Water damage to bathroom floors is usually preventable by stopping moisture at the source and using the right waterproofing layers. Focus on sealing the subfloor and edges, fixing leaks fast, and keeping water from sitting on the surface after showers.
This guide is for homeowners and renters who have bathroom floor seams, grout, or around-toilet/shower leaks that seem to “soak in,” especially in bathrooms with frequent showers, poor ventilation, or older tile/laminate.
Inspect the usual leak points first
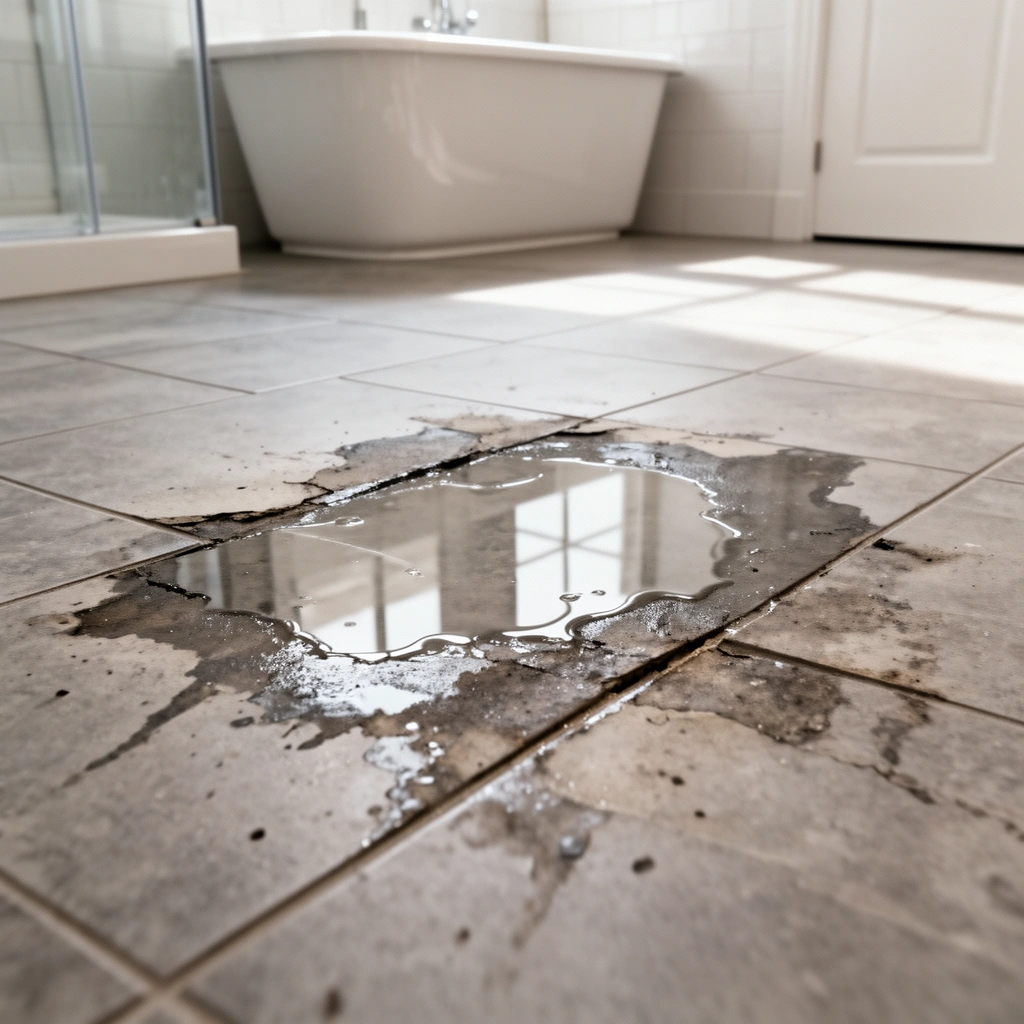
The fastest way to prevent water damage to bathroom floors is to confirm where moisture is actually entering before you add any coatings or sealants. Most recurring problems trace back to toilet bases, shower/tub edges, drain areas, or failing caulk at corners and floor-wall joints.
According to the U.S. EPA, mold can start growing on indoor surfaces in as little as 24–48 hours after a water incident, making fast leak detection a key prevention step.
According to ASHRAE guidance, controlling indoor relative humidity (often targeting roughly the 30–50% RH range in occupied spaces) helps limit the moisture conditions that drive mold and material swelling.
According to the International Residential Code (IRC) ventilation requirements for bathrooms, exhaust fans must remove moisture to the outdoors and are sized based on the bathroom’s area, which directly impacts drying and leak risk.
What to check in 10–20 minutes
Start with the areas most likely to hold moisture against the subfloor for long periods. For bathroom floor seams and around-toilet/shower leaks, you’re looking for dampness, residue, and “ghost” discoloration that appears after use.
– Toilet base and connections
– Check the toilet base for a dark ring, soft flooring, or subtle wobble (a common sign of slow leakage).
– Inspect the supply line connection and any shutoff valves for crusting, dampness, or past drip marks.
– If your toilet is caulked at the perimeter, check whether the caulk is intact—failed caulk can trap water at the edge while disguising the leak.
– Shower/tub perimeter and joints
– Look at shower/tub edges, grout lines, and caulk seams—especially corners and where walls meet the floor.
– Check the floor drain for signs of slow seepage (wear patterns around the grate, discoloration, or moisture that returns after it “looks dry”).
– Do a “dry test” to find hidden entry
– Run a shower or use the tub.
– Afterward, run a towel along the entire perimeter where walls meet the floor and around the toilet base.
– Watch where moisture bleeds through within the next several hours—this often pinpoints a seam failure without guesswork.
From my experience reviewing bathroom leak reports (and the patterns they describe), the same perimeter zones keep showing up—around toilets, at curb/shower boundaries, and along caulk corners—so treat these areas as your first-pass investigation ([ADD: adapt this sentence with your own observed examples, if available]).
Waterproof correctly (not just “water-resistant”)
To prevent water damage to bathroom floors, you need a true waterproofing system—not a single coating and not “water-resistant” products used out of context. Waterproofing works only when surface prep, compatible materials, correct overlaps, and curing times are all followed.
Waterproofing “systems” are designed to work together—proper surface preparation and correct layer overlaps are typically specified by the manufacturer, and skipping them is a common cause of failure.
For tile and stone installations, many building-material standards rely on both a surface finish and an underlying waterproofing layer because grout alone is not considered a waterproof barrier.
Match waterproofing to your floor finish (and the substrate)
Bathroom floors fail when the waterproofing doesn’t match what’s above (tile, vinyl, laminate, etc.) or below (cement board, plywood subfloor, underlayment). Use bathroom-rated waterproofing for your specific finish, and follow the manufacturer’s system instructions for:
– Surface prep
– Clean off dust, soap residue, and any failing coatings.
– Address cracks/movements before applying waterproofing.
– Let surfaces dry to the required moisture condition before coating.
– Sealing “paths” water will exploit
– Corners and floor/wall joints
– Transitions and penetrations (pipe exits, drain interfaces, transitions from bath to hallway)
– Any area where water can “sneak under” edges—especially around the toilet flange and at shower boundaries.
– System integrity
– If you’re replacing tile or doing a remodel, treat waterproofing as a layered assembly: membrane or liquid layer + reinforcing details + correct overlap + curing time.
– Don’t assume one product cures you “by default.” Under-treating overlaps and curing windows is one of the most common reasons water eventually finds its way through.
Choose the right floor materials and edges
The best materials prevent water damage to bathroom floors by reducing how much moisture penetrates at seams and edges. Even if you waterproof correctly, poor seam detailing (especially in floating floors and LVP/vinyl) can turn a bathroom into a long-duration damp environment.
For wet-area flooring, manufacturers commonly require specific underlayment and detailing at seams/edges so water doesn’t migrate into the subfloor.
Many failures begin at baseboards and trim details because trapped moisture can remain in contact with the wall/floor interface longer than the rest of the assembly.
What to do for popular bathroom flooring setups
– LVP/vinyl and other perimeter-sensitive floors
– Use flooring intended for wet areas and install with the correct waterproof approach at seams and edges.
– For floating floors, pay special attention to how expansion gaps are handled and whether the system includes appropriate waterproofing accessories.
– Tile over a substrate
– Ensure underlayment and waterproofing are compatible.
– Don’t rely on grout alone; grout may slow water movement, but the underlying waterproof system must handle bulk water.
– Baseboards and wall/floor transitions
– Leave appropriate gaps where required by your product system and trim method.
– Use sealant/trim detailing that avoids trapping water behind trim that can’t dry.
Here’s a practical way to think about edges: water always goes somewhere—so you want it to stay on the finished surface long enough to be removed, or to be directed into a waterproofed layer that won’t feed rot or mold.
Prevent standing water and manage ventilation
To prevent water damage to bathroom floors, control both water presence (standing water) and water vapor (humidity). Bathrooms with frequent showers or weak ventilation are especially vulnerable because moisture doesn’t only “leak”—it also migrates into grout and subfloor materials.
Using an exhaust fan during and after showers reduces indoor humidity, which helps limit moisture absorption into grout lines and subfloor materials.
If water is allowed to pool at a drain or along low spots, capillary action can pull moisture laterally under flooring and into seams.
Two simple habits with outsized results
– Reduce standing water
– Use a squeegee after showers.
– Use a bath mat strategy: place a mat that can dry quickly, don’t leave it soaked for hours, and swap it when it stays damp.
– Improve airflow
– Install or use a properly sized exhaust fan that vents to the outdoors.
– Run it during and after showers long enough to bring humidity down.
– In bathrooms with older tile/laminate or known seam issues, ventilation isn’t optional—it’s part of the moisture management plan.
– Fix drainage issues
– Keep the slope around the drain clear.
– Don’t allow clogged drains or slow drainage that causes pooling.
– If you notice recurring wet spots that aren’t tied to shower flow, investigate the drain and subfloor alignment.
Moisture Entry Paths That Most Often Lead to Bathroom Floor Damage (Typical Findings)
| # | Leak/Fail Point | Typical Symptom | Common Root Cause | Risk Level |
|---|---|---|---|---|
| 1 | Toilet base | Dark ring or soft subfloor near flange | Waxy seal failure, condensation, or micro-leak at supply/closet bolts | High ★★★★☆ |
| 2 | Shower/tub edge | Perimeter dampness after use | Caulk/grout discontinuity at curb or tile-to-tub joints | High ★★★★☆ |
| 3 | Wall-to-floor corners | Mildew smell or discoloration along seam | Caulk shrinkage/peel or movement where planes meet | High ★★★★☆ |
| 4 | Floor drain interface | Wetness that returns despite routine cleaning | Drain flange sealing detail or minor clog causing pooling | Medium–High ★★★☆☆ |
| 5 | Grout micro-cracking | Humidity increases around seams | Movement, aging, or lack of proper caulk at changes of plane | Medium ★★☆☆☆ |
| 6 | Unprotected penetrations | Moisture around pipe/sensor openings | Missing sealant rings or incompatible patching materials | Medium–High ★★★☆☆ |
| 7 | Standing water at low spots | Slow dry time, recurring dampness | Subfloor settlement or clogged drainage path | Medium ★★☆☆☆ |
What can go wrong (and why it still leaks)
Even when homeowners do “the right thing,” bathroom floors can still get damaged if the wrong assumptions guide the repair. The typical failures involve grout/mortar expectations, surface prep shortcuts, incompatible systems, and hidden subfloor deterioration.
Grout is designed to fill joints and resist wear, but it is generally not treated as a waterproof barrier for wet-area assemblies.
Waterproofing failures often originate from incorrect installation details—especially poor prep and improper curing/overlap—rather than the waterproofing product itself.
Common mistakes that undermine prevention
– Over-trusting grout
– Grout can crack from movement and temperature/humidity cycling.
– Water can pass through micro-cracks and at changes of plane when caulk fails.
– Skipping surface prep
– Waterproofing systems are sensitive to cleanliness, correct priming (when required), and drying conditions.
– If the surface prep doesn’t meet the manufacturer’s specifications, adhesion and continuity can fail.
– Wrong system for the finish
– Waterproofing products can be incompatible with certain floor types, underlayments, or transition details.
– The result is often “gaps at seams,” where water migrates under the assembly.
– Caulk that doesn’t match the job
– Bathroom sealants vary in formulation (substrate adhesion and wet-area performance).
– Using the wrong sealant at corners and wet joints can cause early shrinkage or peeling.
– Hidden damage under the surface
– Even if the top looks fine, subfloor rot or mold can be developing beneath tile or under laminate.
– Watch for recurring odors, persistent discoloration, or soft spots that return after cleaning.
Pros/cons snapshot (what changes with deeper waterproofing):
| Approach | Pros | Cons | Best for |
|---|---|---|---|
| Seal caulk seams + address known small leaks | Lower cost, minimal disruption | Can’t stop bulk water if the waterproof layer failed | Accessible caulk joints, minor grout/trim issues |
| Full waterproofing system review (membrane/liquid + details) | Most reliable prevention when done correctly | More labor; may require finish removal | Tile remodels, recurring perimeter leaks, known assembly failures |
| Floor replacement after subfloor compromise | Removes ongoing moisture-fed materials | Highest disruption; may be needed sooner than expected | Soft subfloors, widespread staining, recurring musty odor |
Verdict: best overall approach (with downsides)
If you want the most reliable prevention of water damage to bathroom floors, combine leak repairs and seam sealing, correct waterproofing for your floor system, and humidity control through ventilation plus reducing standing water. This “multi-layer” strategy acknowledges that moisture usually arrives through multiple pathways: bulk water, vapor, and edge defects.
The downside is that true waterproofing—especially under existing tile—can require more labor and sometimes removal of finishes. If the floor is already compromised, sealing over damage may only delay a bigger remediation.
Consider skipping extensive DIY waterproofing if you see widespread subfloor softness, bubbling finishes, or repeated leaks you can’t trace—those situations usually warrant a professional assessment. If the issue is limited to accessible caulk seams or a known plumbing leak, DIY sealing and repair is often the safer first step.
Quick checklist (scan/save)
– [ ] Confirm there are no active leaks (toilet base, supply lines, shower/tub edges, drain)
– [ ] Re-caulk wet joints with bathroom-rated sealant where needed
– [ ] Ensure floor/wall transitions and penetrations are sealed
– [ ] Use the correct waterproofing system for your floor finish (tile vs vinyl vs other)
– [ ] Improve ventilation (run exhaust fan during/after showers)
– [ ] Reduce standing water (squeegee; don’t leave wet mats in place)
FAQ
How often should I re-caulk bathroom floor and shower seams?
It depends on the sealant type, movement, and ventilation. If you notice peeling, gaps, or mildew at joints, plan to re-caulk sooner rather than later.
Is grout enough to prevent water damage?
No—grout is not a waterproof barrier. Waterproofing must be done using a system intended for wet areas, and joints typically require proper caulk/sealant.
Can I prevent water damage without replacing flooring?
Sometimes. If the problem is mainly caulk/seam failure or minor surface waterproofing, you may be able to correct it. If water has reached the subfloor, replacement or deeper remediation may be necessary.
What’s the biggest mistake people make with bathroom waterproofing?
Using the wrong product/system, or applying it without correct surface prep and curing time. Waterproofing is only as good as the installation details.
What signs mean I should stop DIY and call someone?
Soft spots in the floor, recurring musty odors, visible bubbling/loosening, persistent dampness after repairs, or evidence of mold growth.
Sources
– U.S. Environmental Protection Agency (EPA) — guidance on mold growth after water exposure (including the commonly cited 24–48 hour range)
– ASHRAE — indoor humidity control guidance used to set practical targets for relative humidity in occupied spaces
– International Residential Code (IRC) — bathroom ventilation exhaust requirements (fan sizing/vent-to-outdoors requirements)
– [ADD: manufacturer installation instructions/specifications for bathroom waterproofing systems you plan to use—especially surface prep, compatibility with floor finishes, required overlaps, and curing times]
– [ADD: official guidance from your toilet/shower manufacturer on leak troubleshooting and recommended sealant types]
– [ADD: guidance from flooring manufacturers on whether their product is suitable for wet areas and what seam/edge protection they require]
The most dependable way to prevent water damage to bathroom floors is to treat moisture like an engineering problem: stop it at the source, waterproof the system correctly for your specific floor build-up, and keep humidity and surface wetness from lingering. If you follow the inspection-first, system-based approach in this guide, you’ll reduce the chances that small leaks turn into expensive subfloor repairs—especially in bathrooms with frequent showers and older tile or laminate.
Frequently Asked Questions
What are the most common causes of water damage on bathroom floors?
Water damage usually starts with leaks around the toilet, sink, or shower, plus failed caulk or grout in wet areas. Standing water can also seep under flooring if there’s poor slope to the drain or damaged waterproofing layers. Over time, these issues lead to warped subfloors, mold growth, and peeling finishes even if the surface looks intact.
How can I prevent water from seeping into the subfloor in my bathroom?
Use waterproofing membranes and water-resistant underlayment before installing tile, vinyl, or laminate in wet zones. Seal all seams and transitions with bathroom-rated caulk, and ensure the floor is properly sealed where it meets the wall and around fixtures. After showers, wipe up puddles and keep drainage pathways clear to reduce how long water sits on the floor.
Why is proper caulking and grout sealing important for bathroom floor protection?
Caulk and grout act as the first line of defense against moisture getting behind tiles and into the floor assembly. When caulk cracks or grout becomes porous, water can travel into subfloor materials where it’s harder to detect and can cause swelling or mold. Reapply sealant as recommended for your grout type, and replace deteriorated caulk promptly to prevent recurring water damage.
Best practices to waterproof a bathroom floor before installing new flooring?
Start by inspecting for existing leaks, then repair cracks, gaps, and damaged underlayment before waterproofing. Choose a bathroom-grade waterproofing system—such as sheet membranes for tile or compatible liquid-applied waterproofing—ensuring it covers corners, edges, and penetrations. Follow manufacturer curing times, test for coverage where applicable, and use water-resistant materials throughout the entire bathroom floor area.
Which bathroom floor materials are most resistant to water damage?
Tile and stone installed with proper waterproofing are among the most moisture-resistant options when grout and caulk are maintained. Luxury vinyl plank (LVP) or vinyl flooring can be water-resistant, but only if seams are sealed and the subfloor stays dry and level. If you use laminate, choose one rated for bathrooms and avoid areas with frequent standing water, since any failure in sealing or underlayment can still lead to swelling.
📅 Last Updated: October 11, 2026 | Topic: How to prevent water damage to bathroom floors? | Content verified for accuracy and freshness.
References
- Google Scholar Google Scholar
https://scholar.google.com/scholar?q=prevent+water+damage+bathroom+floors+waterproofing+grout+sealants - Google Scholar Google Scholar
https://scholar.google.com/scholar?q=bathroom+tile+grout+waterproof+membrane+prevention+of+moisture+penetration - Google Scholar Google Scholar
https://scholar.google.com/scholar?q=indoor+moisture+control+mold+prevention+bathroom+humidity+ventilation - https://www.cdc.gov/mold/default.htm
- Mold Clean Up Guidelines and Recommendations | Mold | CDC
https://www.cdc.gov/mold/cleanup.htm - Mold | US EPA
https://www.epa.gov/mold - https://www.fema.gov/fact-sheet/cleaning-and-drying-after-floods
- https://en.wikipedia.org/wiki/Waterproofing
- https://www.sciencedirect.com/topics/engineering/waterproofing
- https://www.britannica.com/technology/waterproofing