
Estimating the cost of basement floors gets straightforward when you know which inputs drive the final number—square footage, slab thickness, demolition, concrete finish, and reinforcement. This step-by-step guide walks you from measurements and material quantities to labor and optional add-ons, so you can price your project with confidence. You’ll finish with a clear cost range and a repeatable method you can use for future estimates.




Estimating basement floor costs comes down to calculating square footage, choosing the right flooring type, and adding the “hidden” extras like moisture control, subfloor prep, and leveling. Start by measuring the area, then estimate material and labor for your selected system so you can build a realistic range—not a single guess. This guide walks you through the breakdown you can use for most basement floor projects.
If you’re planning to finish a basement or replace existing flooring, cost estimates can feel overwhelming because basements vary a lot in moisture risk and surface condition. This is for homeowners, renovators, and small contractors who want a practical way to estimate basement floor cost before getting quotes—without missing major drivers like preparation and drainage.
Concrete Moisture Testing Methods Used for Basement Floor Decisions
| # | Method | Primary Standard | Measured Output | Results Window | Standard Rigor |
|---|---|---|---|---|---|
| 1 | Calcium chloride (cover test) | ASTM F1869 | Moisture vapor emission (lb/1000 sq ft/24 hr) | Typically 60–72 hr | ★★★★☆ |
| 2 | In-situ RH probe | ASTM F2170 | Relative humidity (%) at slab depth | Typically 24–48 hr | ★★★★★ |
| 3 | Thermal-hygrometer screening | (No universal single ASTM) | Ambient RH/temperature readings | Same day | ★★☆☆☆ |
| 4 | Spot concrete surface RH (field) | Manufacturer protocol | Surface moisture indicators | Minutes to hours | ★★★☆☆ |
| 5 | Plastic-sheet test (screening) | Field practice | Condensation/condensate patterns | 24–48 hr | ★★☆☆☆ |
| 6 | Moisture vapor barrier selection | Flooring manufacturer specs | Permeance/approval criteria | Varies | ★★★★☆ |
| 7 | Concrete condition survey | Surface prep guidelines | Cracks, dusting, flatness needs | Same day | ★★★★☆ |
Measure the basement and define the scope
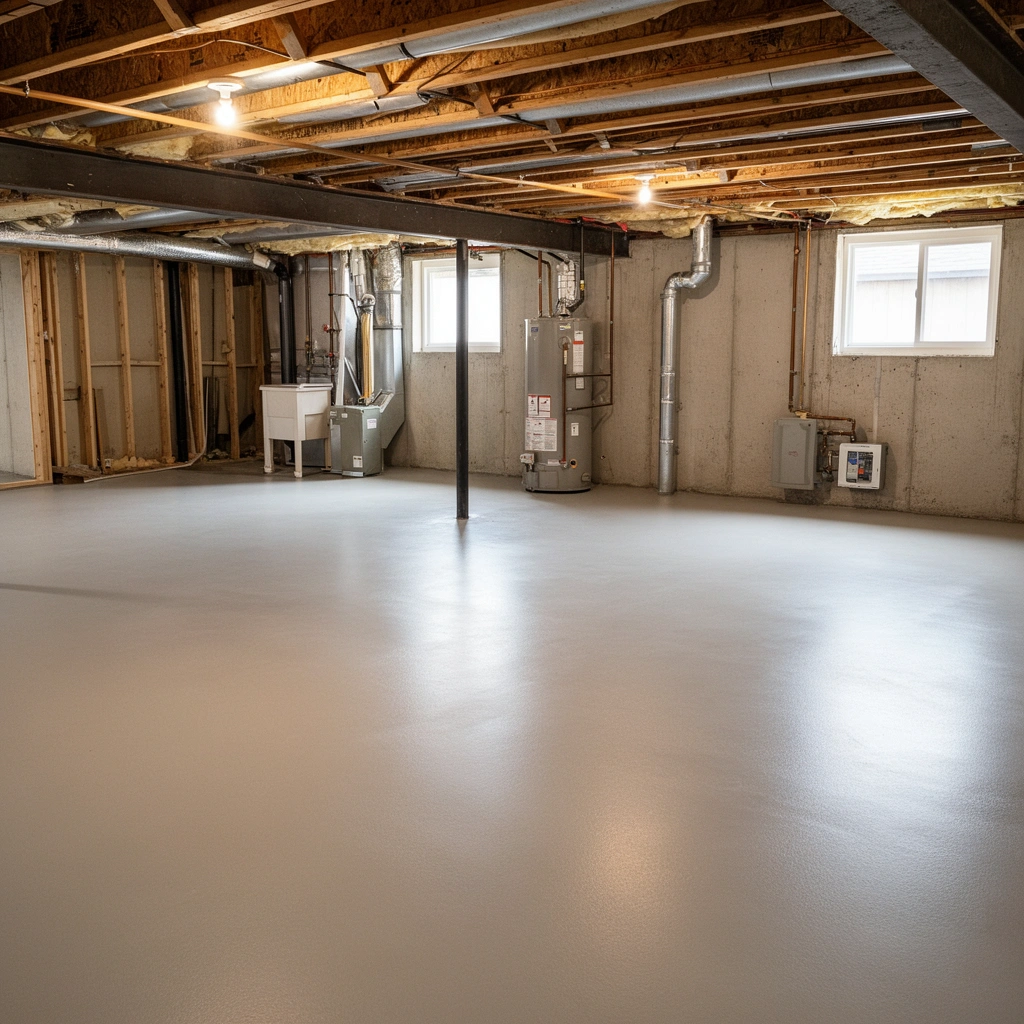
Measure first, because cost per square foot only makes sense when you’re measuring the right area and including the right scope. For basement flooring, “square footage” is your starting point, but the real estimate depends on what’s being removed, corrected, and connected.
For the most common basement estimate workflow, you calculate total coverage area as length × width, then separately account for transitions, stairs landings, and edge details.
If you omit flooring removal or subfloor repair from scope, your per-square-foot number can look accurate while your final total comes in much higher.
What to measure (so your labor line items stay defensible)
– Area to cover (sq ft): Measure each room that will receive flooring and add them up, excluding walls but including closets if they’re finished.
– Layout complexity: Note door openings, hallways, irregular “L” shapes, and any stair treads/landings that require additional cuts and trim.
– Existing conditions: Document whether you’re removing carpet, tile, LVP, glued carpet pad residue, or coatings on concrete.
What to clarify in scope (examples that change price)
Include—on paper—whether your quote includes:
– Removal/demo: hauling, disposal, and any adhesive scraping.
– Repair/leveling: crack repair, patching, grinding high spots, and leveling low spots.
– Moisture system: vapor barrier/underlayment, primers/coatings, or approved mitigation products.
– Transitions and edges: reducer strips, T-moldings, base trims, and expansion gaps where required.
Scope checklist (use in your takeoff)
When you build your estimate range, list each scope item with a yes/no and a cost bucket. If you change scope later, your estimate should move—not surprise you.
Choose the flooring type (this changes everything)
Choose the flooring system after you understand moisture and slab condition, because many basement “failures” are installation-spec failures, not material failures. Your flooring type determines whether you need vapor control, which primers/coatings are compatible, and how sensitive the system is to slab flatness.
A basement floor estimate must align with the flooring manufacturer’s approved substrate conditions, including moisture limits and required primer/vapor barrier systems.
Moisture risk and slab flatness requirements are the two biggest reasons vinyl plank, laminate, and tile can land in different cost tiers even at the same square footage.
When a flooring system requires a specific primer or underlayment, substituting “something similar” often voids warranty coverage.
Compare common basement flooring systems by installation needs
Below is the practical way to think about cost drivers for each category:
– Concrete coatings (epoxy/urethane): Cost can be competitive, but only if prep is strong (grinding/cleaning/priming) and the system is rated for your slab moisture conditions.
– Epoxy/urethane coating systems: They behave like a “managed surface,” but require strict temperature/humidity conditions and proper primer compatibility.
– Vinyl plank/tile (LVP/LVT): Often forgiving on minor unevenness compared with tile, but still needs correct underlayment/vapor protection depending on construction.
– Laminate: Usually needs underlayment and a moisture-managed environment; basements often trigger extra underlayment or mitigation.
– Tile (ceramic/porcelain): Can be very durable, but can be labor-heavy due to layout, thinset, back-buttering, and grout lines.
– Engineered wood: More sensitive to moisture and can require specific vapor control and acclimation practices.
Moisture testing methods (use the right output)
According to ASTM F2170, in-situ RH probes measure relative humidity (%) at slab depth to assess moisture conditions.
According to ASTM F1869, the calcium chloride method reports moisture vapor emission in lb/1000 sq ft/24 hr.
According to ASTM F1869 and ASTM F2170, test results are used to determine whether a flooring system’s moisture limits and mitigation requirements are satisfied.
(If you’re not testing, your estimate should be conservative and treat moisture mitigation as a likely cost line item—not an optional add-on.)
Add the “big cost drivers” beyond materials
Add prep and moisture control early, because they frequently cost more than the flooring itself in basements with uneven slabs or elevated moisture. This section is where you turn “nice-to-have” assumptions into a budget that reflects what contractors actually do on concrete.
Basement slab prep often includes multiple steps—cleaning, grinding, crack repair, patching, priming—so the total prep labor can exceed flooring install labor in difficult slabs.
Many flooring manufacturers require a specific vapor/moisture system; skipping it can lead to adhesive bond failure, cupping, or moldy odor beneath finishes.
Prep cost buckets to include in your estimate
Plan for these categories (even if you expect “light” prep):
– Demo and surface cleaning: removing old flooring residue, dust control, and degreasing where needed.
– Concrete crack repair: routing/patching or crack bridging products depending on crack type.
– Grinding and patching: leveling high spots and filling low areas.
– Leveling compound: only when the flooring system’s flatness needs require it.
Moisture management items to budget
Basements often require one or more of the following:
– Vapor barriers/underlayments: especially for laminate, some engineered wood setups, and many floating systems.
– Primers/coatings: for concrete coatings and some adhesive-based systems.
– Mitigation decisions: if results show elevated moisture, you budget for an approved barrier/coating rather than “hoping.”
> Practical rule: moisture mitigation is rarely a single product. It’s a system—surface prep + primer/coating/underlayment + installation method.
Estimate labor using realistic assumptions
Estimate labor as two buckets—prep labor and install labor—because basements commonly change the prep side more than the install side. Once you separate them, your estimate stays accurate even when you discover more slab issues during demo.
Separating labor into “prep labor” and “install labor” produces better estimates for basements because concrete correction work varies far more than the final flooring install.
Layout complexity (stairs, thresholds, irregular geometry, and transitions) increases install time even when square footage stays constant.
Prep labor: what to count
Prep labor often includes:
– time for dust control and surface cleaning,
– crack repair and patch cure times (which can affect schedule),
– grinding and vacuuming,
– application of primers or moisture systems (including additional waiting periods).
Install labor: what to count
Install labor depends on:
– flooring click-lock vs. glue-down vs. thinset tile,
– number of cuts around posts/closets,
– transition detailing at doorways and adjoining rooms.
Add time for compliance and rework risk
A realistic basement estimate also accounts for:
– manufacturer-required acclimation,
– rework if moisture plan doesn’t match the substrate,
– extra labor for tight rooms and debris handling.
What can go wrong (common estimate mistakes)
Basement floor estimates fail when the estimator treats concrete as “neutral” and the flooring as “the whole job.” The most common problems show up after demo, when the slab condition forces changes.
A “good-looking” concrete slab can still be too dusty, too uneven, or too moisture-affected for the flooring system’s approved installation conditions.
Moisture barriers and primers are rarely optional in adhesive or coating systems; they’re part of the performance spec.
Mistake 1: Underestimating surface prep
Concrete can be:
– out of flatness for tile,
– dusty/delaminating at the surface,
– contaminated with curing compounds or residue.
Mistake 2: Assuming moisture barriers are optional
Even for floating floors, many systems require an approved underlayment/vapor plan. If you skip it, you risk odor complaints and warranty problems.
Mistake 3: Forgetting waste/overage and cuts
Waste is real, especially with tile and plank around irregular layouts.
– For tile, account for more breakage and layout loss.
– For plank, account for stagger patterns and non-parallel walls.
Quick comparison of “what changes your cost”
| Scope factor | Most affected systems | Typical budget impact |
|---|---|---|
| Moisture mitigation | Epoxy/adhesive systems, engineered wood, some laminate installs | Can add a full system (prep + primer/coating/barrier) beyond basic leveling |
| Flatness correction | Tile, engineered wood, glue-down systems | May require grinding + patching or leveling compound |
| Demo and residue removal | Basements with old glued carpet, tile, or coatings | Often the swing factor once adhesives/coatings are encountered |
| Transitions and door thresholds | All systems, especially across multiple rooms | Extra materials + layout time for edging details |
Practical verdict: build a range, not a single number
Build a low–mid–high cost range because basement conditions are inherently variable and prep scope can expand after demo. Then tighten your estimate after slab inspection and after you confirm the moisture requirements in your flooring manufacturer’s installation instructions.
A range-based estimate is more accurate than a single number because moisture mitigation and leveling are common “scope expanders” in basement floor projects.
If active water intrusion or recurring dampness is present, treat drainage and vapor control as prerequisites before selecting finish flooring.
When this step-by-step approach works best
– You’re comparing flooring types (vinyl plank vs. tile vs. coatings).
– You can measure square footage accurately.
– You can inspect the slab and document cracking, dusting, and any damp indicators.
When you should slow down or seek help
Skip “quick estimating only” if you see:
– active leaks or efflorescence that suggests ongoing moisture,
– significant slab cracking with movement,
– persistent dampness without a known cause.
In those cases, you want drainage and moisture mitigation planning first (or you’ll keep paying for rework).
Quick basement floor cost checklist
– ☐ Basement area measured (sq ft)
– ☐ Flooring type selected
– ☐ Removal/demo needed? (yes/no)
– ☐ Moisture plan defined (barrier/coating/primer requirements)
– ☐ Prep needs estimated (grind/level/patch/crack repair)
– ☐ Labor split into prep vs. install
– ☐ Waste/overage allowance added ([ADD: typical waste % used by your chosen installer/material])
– ☐ Include transitions, trims, and leveling compounds ([ADD: line items for your plan])
FAQ
How do I estimate basement floor cost if I’m unsure about moisture?
Estimate with a moisture plan as a separate line item. Start by aligning your plan to the flooring/coating manufacturer’s installation requirements, and treat any moisture mitigation (barrier, primer, or coating system) as part of the spec—not “optional prep.”
Is leveling the same as surface preparation?
No. Preparation can include cleaning, grinding, priming, and patching; leveling is the “build-up” step that improves flatness for the specific flooring system.
Does square footage alone determine the price?
Not usually. Basement pricing changes with layout complexity, slab condition, required primers/vapor barriers, and installation rules (like approved underlayment or adhesive systems).
Should I estimate labor per square foot?
Sometimes, but basements are better estimated by splitting labor into prep and installation and then adjusting for slab condition and layout complexity. Square-foot-only labor often underestimates prep in real basements.
Sources
– ASTM F2170 — Standard Test Method for Determining Relative Humidity in Concrete Floor Slabs Using In Situ Probes
– ASTM F1869 — Standard Test Method for Measuring Moisture Vapor Emission Rate of Concrete Subfloor Using Anhydrous Calcium Chloride
– [ADD: manufacturer installation instructions/spec sheets for your selected flooring type and their requirements for moisture barriers/primers/acceptable slab conditions]
– [ADD: official guidance for concrete slab preparation/flatness and moisture considerations from a relevant flooring or concrete products manufacturer]
– [ADD: local building code or standard references if your region requires permits/inspections for basement finishing]
A basement floor estimate becomes reliable when you treat it like a system: measured area, chosen flooring spec, and documented prep + moisture requirements. Build a low–mid–high range that accounts for the most common “scope expanders,” then tighten the numbers after inspection and after you confirm the exact installation conditions in your flooring manufacturer’s documentation. If you approach the project this way, you’ll avoid the two most expensive surprises: skipping moisture control and under-budgeting slab prep.
Frequently Asked Questions
What factors affect the total cost of basement floor installation?
Basement floor cost is mainly driven by the floor type (concrete slab, epoxy, tile, vinyl, or polished concrete), the square footage, and the basement condition. Site factors like moisture problems, subfloor condition, excavation or leveling needs, and whether you need a vapor barrier or insulation can add significant cost. Labor, local material pricing, and finish complexity (e.g., stamped or decorative concrete) also strongly influence your final basement floor estimate.
How do I estimate the cost per square foot for basement floors?
Start by calculating total square footage (length × width) and then estimate a realistic price range per square foot for your chosen material and finish. For example, plain concrete is typically priced differently than options like epoxy coatings, tile, or luxury vinyl plank that include underlayment. Add line-item allowances for prep work—such as crack repair, leveling, grinding, moisture mitigation, and installing a vapor barrier—to avoid underestimating basement flooring costs.
How much should I budget for moisture-proofing and a vapor barrier in basement floors?
If your basement has dampness, you should budget for moisture mitigation like a vapor barrier, sealers, and possibly a moisture-resistant underlayment depending on the flooring system. Costs increase if you need additional waterproofing, drainage improvements, or concrete crack injection before you can safely install finishes. For accurate basement floor pricing, get a moisture assessment or test for humidity, since remediation needs often determine whether you can use certain flooring materials.
Which basement flooring materials are best for cost, durability, and moisture resistance?
For many homeowners, sealed concrete, epoxy coatings, or basement-ready vinyl flooring are popular because they balance durability and cost while handling typical basement humidity better than unprotected wood. Tile can be durable and moisture-tolerant when installed correctly with proper waterproofing and grout suitable for damp areas. The “best” choice depends on your moisture level and whether you want a smooth finish (epoxy/polished concrete) or a warm surface (vinyl/tile), which will change your basement floor estimate.
Why is proper basement floor prep included in cost estimates, and how do I plan for it?
Prep work—leveling, removing debris, grinding high spots, repairing cracks, and installing a vapor barrier—is often the difference between a long-lasting floor and one that fails early. Even if the base material seems affordable, skipping preparation can lead to peeling coatings, cracked finishes, or tile and vinyl installation problems. When estimating basement flooring cost, request a detailed quote that includes surface prep, moisture control measures, and any necessary underlayment so your total estimate reflects true project scope.
📅 Last Updated: October 11, 2026 | Topic: How to estimate the cost of basement floors? | Content verified for accuracy and freshness.
References
- Google Scholar Google Scholar
https://scholar.google.com/scholar?q=basement+floor+cost+estimation+concrete+slab - Google Scholar Google Scholar
https://scholar.google.com/scholar?q=concrete+slab+cost+estimation+unit+costs+labor+materials - Google Scholar Google Scholar
https://scholar.google.com/scholar?q=construction+cost+estimating+quantity+takeoff+cost+budgeting - https://en.wikipedia.org/wiki/Cost_estimation
- Quantity surveyor
https://en.wikipedia.org/wiki/Quantity_surveying - Concrete slab
https://en.wikipedia.org/wiki/Concrete_slab - https://en.wikipedia.org/wiki/Reinforced_concrete
- https://www.nist.gov/programs-projects/life-cycle-cost-analysis
- WBDG
https://www.wbdg.org/resources/cost-estimating - https://www.fhwa.dot.gov/construction/certification_and_training/estimating/