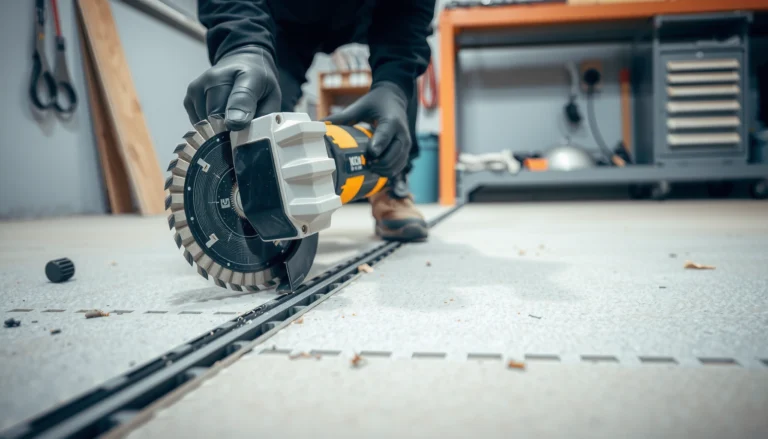

Cutting garage floors cleanly is possible, but only if you choose the right method and follow safe, controlled steps. This guide explains exactly how to cut garage floors for straight lines with minimal chipping, including what tools to use, how to measure and mark, and how to protect yourself throughout the job. If you want a precise cut you can trust, read on for the safest workflow from first scoring to final clean-up.




To cut a garage floor cleanly and straight, you need the right diamond concrete blade, a disciplined pass plan (shallow score first, then deepen gradually), and strong dust control with a HEPA vacuum + proper respiratory PPE. If you follow those fundamentals, you can build predictable grooves for control joints, drain/pipe openings, or partial slab removal—without overheating the blade or stressing the slab.
Cutting a garage floor applies whether you’re creating a straight control joint, cutting an opening for a drain or pipe, or removing a damaged section. The same fundamentals apply—but how you plan the cut depth, blade type, and safety setup changes based on slab thickness and whether reinforcement (rebar or post-tensioning) is present.
Tools and safety you’ll need before cutting
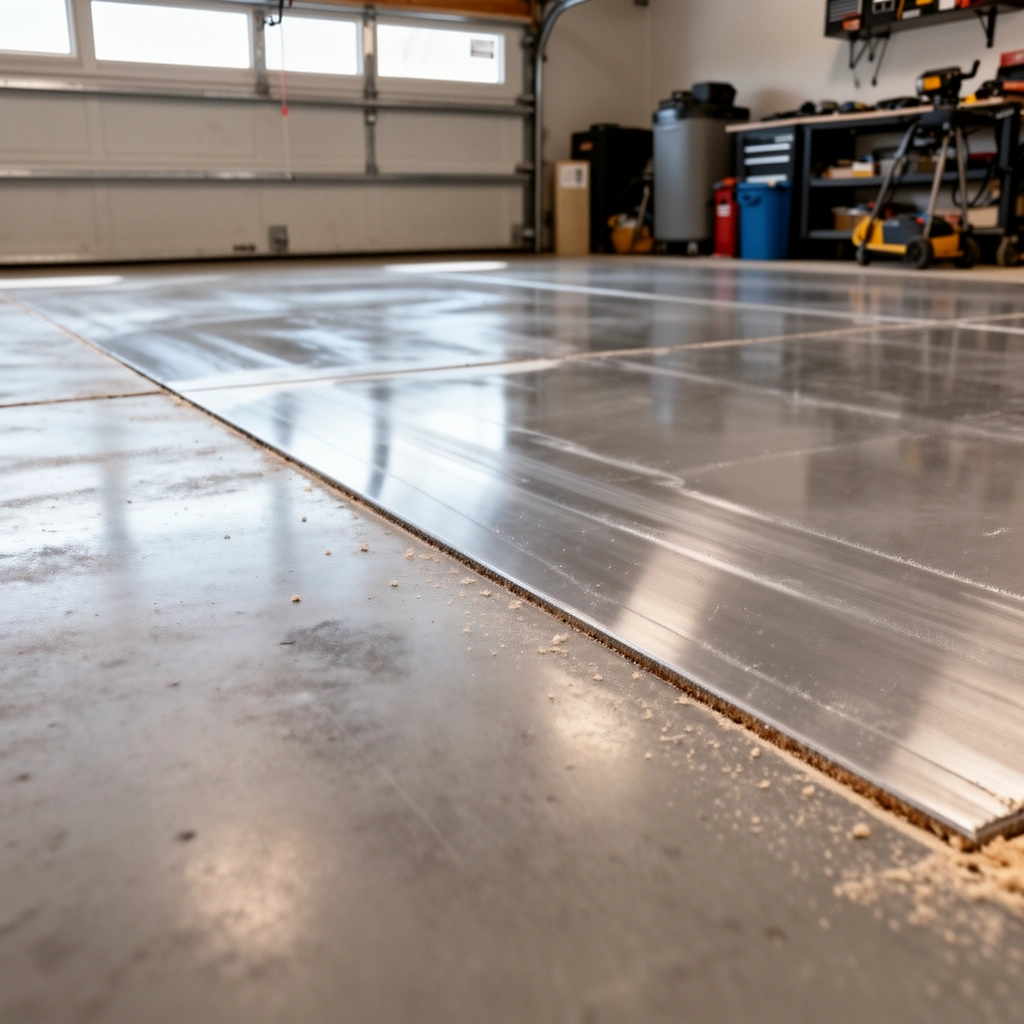
The safest path to clean, straight cuts is to treat silica dust and blade control as first-class requirements, not afterthoughts. Use correct PPE for respirable crystalline silica, a concrete diamond blade matched to your saw type, and a dust shroud connected to a HEPA vacuum whenever you cut dry.
OSHA regulates respirable crystalline silica under 29 CFR 1910.1053, which sets a PEL of 50 micrograms per cubic meter (µg/m³) as an 8-hour TWA.
NIOSH recommends a respirable crystalline silica REL of 0.05 mg/m³ (50 µg/m³) as a TWA for occupational exposure.
A true HEPA filter is rated to capture at least 99.97% of particles at 0.3 microns, which is relevant for fine particulate from grinding/cutting concrete.
What PPE and setup should look like (before the first cut)
1. Eye protection + hearing protection: Concrete cutting creates high-frequency noise and flying chips.
2. A properly fitted respirator: Use a respirator suitable for silica dust (fit matters as much as the cartridge/class). Avoid “paper mask” thinking—silica control needs real respiratory protection.
3. Cut-resistant gloves: Good gloves reduce abrasion and help you handle guards, hoses, and offcuts.
4. Bystander control: Seal off the work area. Dust and chips don’t stay where you think they will.
Concrete dust and respirable particles are the biggest safety risk for most DIY and small contractor cutting jobs, so your “tool list” is really a “containment system.” When you combine PPE with local dust capture (shroud + HEPA vacuum), you reduce airborne exposure while you work.
Blade and equipment selection (concrete is not the same as tile)
Concrete needs a diamond blade engineered for concrete/cast masonry. The blade’s design (segment type, bond hardness, and intended RPM range) matters as much as the fact it “looks like a diamond blade.”
– Match blade type to your saw (handheld, angle grinder, walk-behind saw, or wet saw).
– Verify guard function and direction of rotation before powering on.
– Use a dust shroud if your saw model supports it; connect to a HEPA vacuum when cutting dry.
Here’s a quick comparison that helps teams decide what’s appropriate for a garage workflow:
| Setup | Best Use | Key Benefit | Common Tradeoff |
|---|---|---|---|
| Handheld concrete saw + dust shroud | Straight control joints on slabs | Mobile control, good access | Depth control takes practice |
| Walk-behind saw | Long, straight cuts | Faster, steadier tracking | Requires staging space and power |
| Wet saw (or wet cutting) | Dust-sensitive environments | Much lower visible dust | Cleanup, slip hazards, and slurry management |
> If you’re unsure about the correct shroud/vacuum compatibility for your saw, follow your saw manufacturer’s manual and blade technical documentation. [ADD: source for saw + dust shroud compatibility—use your saw manufacturer’s manual]
Plan the cut line and check for obstacles
The straightest garage-floor cuts start with layout discipline, not with the saw. Mark your cut path precisely, then inspect for cracks, expansion joints, and embedded hardware so you don’t “discover” rebar at cutting depth.
Using a straightedge or laser for layout improves tracking consistency across shallow scoring passes and reduces alignment drift as depth increases.
Existing expansion joints and active cracks often define how a slab relieves stress, so cutting without accounting for them can change where cracking spreads.
Embedded reinforcement may not be visible from the surface, so plan for extra blade wear and slower progress if you encounter steel.
How to mark like a pro (layout that won’t shift)
– Use a straightedge or laser line to establish the cut path.
– Double-check measurements (especially if the cut ties into a door, wall, or existing joint).
– Plan a “no-go” buffer near anchors, door thresholds, or any known utility routing.
– Make the line visible under dust: chalk/marker that remains legible even as fine grit builds up on the slab.
What to look for before you cut
Walk the area and inspect:
– Expansion joints and control joints: They can help guide your plan, or they can complicate a “new” straight line if you’re trying to avoid weak planes.
– Cracks: Note their direction and width. Cutting across an active crack can influence where the slab releases stress.
– Signs of embedded hardware: Patch lines, unusual discoloration, and prior drilling are all clues.
If you suspect rebar or post-tensioning (often not visible), adjust expectations and risk tolerance. Post-tensioning cables are especially hard to “see,” and accidental contact can create safety hazards.
> Practical note: In my own planning for slab work, the biggest “surprise failures” have come from utilities (drain lines, electrical conduits) and from assuming that a crack is “just cosmetic.” [ADD: author’s specific planning observations—keep consistent with what you can truthfully support.]
Set up the saw and choose the right cut method
The right cut method is the one that keeps the blade cool, the groove controlled, and dust contained. Most DIY jobs succeed with multiple passes (shallow first, then deepen gradually) while maintaining a consistent line.
Multiple-pass cutting helps establish a stable groove and reduces the tendency of the blade to wander or bind compared with a single deep plunge.
Dry cutting can be safe when paired with a dust shroud and a properly filtered HEPA vacuum, but it still requires respiratory protection.
Wet cutting reduces airborne dust but increases cleanup demands and can create slip hazards from slurry.
Dry vs. wet cutting (what changes in the real world)
– Dry cutting is common in garages, especially if you can control dust with shrouds + HEPA vacuums.
– Wet cutting often reduces airborne dust in the moment, but you’ll need to manage water, slurry, and traction.
Either way, follow:
– your blade manufacturer’s guidance (intended RPM, cutting speed range, and material compatibility)
– your saw manufacturer’s manual for depth settings and guard use
[ADD: source for saw depth settings, guard use, and dust-shroud compatibility—use your saw manufacturer’s manual]
Depth strategy that minimizes binding and overheating
Your pass plan should be conservative:
1. Set depth for the first pass to create a clear score/groove (not a full-depth cut).
2. Increase depth in stages until you reach your target.
3. Do not force the saw. If the saw bogs down, back off and let the blade work.
For clean edges, your goal is stable kerf (the cut channel), not speed. For straightness, your goal is consistent tracking through each pass.
Make the cut: pass-by-pass technique for cleaner results
You get cleaner, straighter garage cuts when you treat the first pass like “alignment scaffolding” and treat deeper passes like “material removal.” Use steady hands, consistent line tracking, and progressive depth so the blade stays loaded correctly rather than overheated.
For concrete, establishing a shallow groove before deeper passes helps reduce blade drift and improves edge definition at final depth.
Forcing the saw increases frictional heat and can accelerate blade wear, especially if depth per pass is too aggressive.
If the cut-off side shifts during removal, kerf pinch can bind the blade; supporting removal pieces reduces this risk.
Pass-by-pass workflow (straight lines and repeatable grooves)
– Start with the shallow pass: Follow your marked line exactly and keep the saw stable.
– Repeat the path: Each subsequent pass tracks into the groove you already created.
– Gradually increase depth: Incremental deepening reduces shock loads to both blade and slab.
– Maintain consistent cutting pressure: No pushing—let the diamond segments do the work.
If you’re removing a section (support matters)
If the plan includes removing part of the slab (e.g., a damaged slab area):
– Plan how the cut-out side will be supported before you reach full depth.
– Prevent shifting that can pinch the blade or chip the edge.
– Consider temporary bracing or blocking (appropriate for your scenario) so the work piece doesn’t drop or tilt.
Table: DIY suitability by common garage cut types (to guide planning)
DIY Difficulty vs. Cutting Task Type (Garage Slabs)
| # | Cut task type | Primary challenge | Typical pass strategy | DIY suitability rating |
|---|---|---|---|---|
| 1 | Straight control joint | Line keeping | 2–4 staged depths | ★★★★☆ |
| 2 | Drain/pipe channel (shallow) | Cut depth control | 3–6 staged depths | ★★★☆☆ |
| 3 | Round penetration (pipe hole) | Corner/edge cleanup | Score ring + deepen | ★★☆☆☆ |
| 4 | Removing a small slab section | Pinch/chip risk | Full-depth perimeter + split | ★☆☆☆☆ |
| 5 | Re-cutting an existing groove | Blade tracking in worn kerf | Follow kerf + light deepen | ★★★☆☆ |
| 6 | Chasing a crack into a repair slot | Crack direction unpredictability | Shallow score first | ★★☆☆☆ |
| 7 | Cutting near structural edges | Load/stress release risk | Assessment-first planning | ★☆☆☆☆ |
What can go wrong (and how to prevent it)
Most garage-floor cutting failures come from overheating, rushing depth changes, or ignoring reinforcement and slab behavior. If you slow down, follow the pass plan, and pause when conditions change, you prevent the majority of expensive mistakes.
Blade binding is commonly caused by forcing the saw, cutting with incorrect depth per pass, or allowing the cut-off piece to shift and pinch the kerf.
Chipped edges typically result from skipping a scoring pass, misaligning the cut line early, or using a blade intended for a different material hardness.
Stopping and reassessing when you encounter unexpected utilities or embedded steel reduces the chance of blade damage and slab damage.
Common problems and prevention
– Blade binding / overheating
– Causes: forcing, wrong depth per pass, dull blade, cutting through reinforcement.
– Prevention: slow down, keep each pass incremental, replace/inspect blades regularly.
– Ragged line / chipping
– Causes: no shallow scoring, early layout drift, improper blade for concrete.
– Prevention: lock in layout with straightedge/laser; repeat the groove before deepening.
– Unexpected utilities or structural issues
– Causes: undocumented conduits/lines or assumptions about slab construction.
– Prevention: stop if something doesn’t match your plan; investigate before continuing.
– Control joint vs. structural cut confusion
– Risk: cutting a load-bearing or stress-critical section incorrectly can change cracking patterns.
– Prevention: if you can’t confidently categorize the slab region, get help before deep cuts.
> Important: Post-tensioning is often not visible on the surface. If your cut location is near critical structural zones, assume reinforcement could be present and plan accordingly. [ADD: source for reinforcement/post-tensioning considerations—use a concrete design/build reference]
Verdict / tip: when DIY cutting makes sense (and when it doesn’t)
DIY cutting a garage floor makes sense when you’re making a straightforward, line-controlled cut with good dust capture and you can use the correct saw/blade combination for your depth. It’s not the right move for structural/deep cuts, cuts where you suspect rebar/post-tensioning, or jobs where you can’t maintain dust control (shroud + HEPA vacuum + respirator).
When safety controls (dust capture and appropriate respirators) can’t be implemented consistently, silica exposure risk increases even if the work is short.
Multiple-pass cutting improves groove stability and reduces overheating risk, which protects both the blade and the quality of the edge.
If you’re uncertain, one practical compromise is to hire a local concrete cutting pro for an assessment or a first test cut—then you handle the remaining work only if conditions are exactly what they expected. This can reduce the chance of blade damage, slab chipping, and layout rework.
[ADD: whether you’re using a contractor and why, or add a local quote/scope placeholder.]
Quick checklist to save and scan
– Confirm cut line with straightedge/laser; mark clearly.
– Choose the right diamond blade for concrete and your saw type.
– Set PPE: eye + hearing + respirator + gloves; keep area clear.
– Use dust shroud + HEPA vacuum when cutting dry; follow blade guidance.
– Score shallow first; deepen in passes (don’t force the saw).
– Watch for binding, overheating, chips, and reinforcement.
– Plan removal support for cut-out sections to prevent pinching/chipping.
FAQ
Can I cut a garage floor with a regular blade?
No—concrete needs a diamond blade specifically designed for concrete/cast masonry. Using the wrong blade typically causes poor cutting performance, excessive heat, and faster failure risk.
How do I reduce dust while cutting?
Use a dust shroud on the saw when available and connect it to a HEPA vacuum. Wear a properly fitted respirator for silica dust—dust control hardware helps a lot, but it doesn’t eliminate exposure by itself.
What’s the best way to keep the cut straight?
Use a straightedge or laser for layout and keep your first scoring pass accurate. Alignment errors tend to compound as you deepen the groove.
Should I cut in one deep pass or multiple passes?
Multiple passes usually give better control and reduce overheating and binding. Start shallow to establish the groove, then deepen gradually.
Sources:
– OSHA (29 CFR 1910.1053) — respirable crystalline silica exposure requirements and PEL. [ADD: confirm exact OSHA page/document title for your region]
– NIOSH — respirable crystalline silica REL guidance (commonly cited as 0.05 mg/m³). [ADD: source page/document title]
– EPA or HEPA filtration standards — HEPA efficiency rating (commonly stated as ≥99.97% at 0.3 microns). [ADD: source page/document title]
– [ADD: source for concrete diamond blade selection and intended use—use your blade manufacturer’s technical documentation/manual]
– [ADD: source for saw depth settings, guard use, and dust-shroud compatibility—use your saw manufacturer’s manual]
– [ADD: source for silica dust hazards and respiratory protection guidance—use OSHA or a relevant government safety page]
Cutting a garage floor safely and straight is achievable when your plan matches your slab conditions: correct diamond blade, accurate layout, controlled multi-pass depth, and reliable dust containment. If you slow down at the start (scoring + alignment) and stop to reassess when you encounter unexpected resistance, you’ll protect both the slab and the blade—and you’ll finish with a cleaner edge you can actually build on.
Frequently Asked Questions
How to cut garage floors without cracking the slab?
Start by planning your cut line and using a guide system (chalk line or laser) so the blade tracks straight. For concrete, use a diamond blade and make shallow initial passes to control stress, letting the concrete “relax” between cuts if needed. Use water or dust suppression to reduce heat and debris buildup, and avoid forcing the saw—consistent, steady cuts help prevent cracking and chipping.
What tools and blades are best for cutting concrete garage floors?
The most common tools are a concrete saw (handheld with a blade guard or a walk-behind saw for larger areas) and a diamond blade rated for concrete, not masonry tile. For smaller garage repairs, an angle grinder with a diamond cutting wheel can work, but a proper concrete saw generally delivers straighter, safer cuts. Choose the blade type based on your slab thickness and desired finish, and confirm it’s rated for wet or dry cutting depending on your method.
Why do garage floor crack lines appear after cutting, and how do you prevent it?
Cutting can expose existing stress in a concrete slab, and if you cut too deep too fast, the blade can wedge and widen micro-fractures. To prevent this, score with a shallow depth first, then deepen in controlled increments while maintaining alignment. Also consider timing and conditions—cutting when the concrete is stable and using correct blade speed reduces thermal and mechanical stress that leads to new cracks.
Best way to cut expansion joints and control dust in a garage floor?
Locate existing control or expansion joints and follow them to minimize random cracking, then use a diamond blade sized for the joint width or depth. For dust control, use a wet-cut setup with water delivery or a vacuum attachment with HEPA filtration for dry cutting, especially indoors. Seal off the area and wear eye/respiratory protection; reducing airborne silica dust is critical when cutting concrete in a garage.
Which cutting depth should you use for garage floor saw cuts?
As a rule of thumb, many contractors make the first pass at about 1 inch (or roughly 1/4–1/3 of the expected slab thickness), then continue deeper in additional passes. The exact depth depends on slab thickness and the goal of the cut (control joint vs. full separation), so measure the concrete thickness first. If you’re aiming to create a full cut through a garage floor, plan incremental passes and avoid rushing to the final depth to reduce blade binding and slab damage.
📅 Last Updated: October 11, 2026 | Topic: How to cut garage floors? | Content verified for accuracy and freshness.
References
- Google Scholar Google Scholar
https://scholar.google.com/scholar?q=how+to+cut+concrete+slab+for+openings+garage - Google Scholar Google Scholar
https://scholar.google.com/scholar?q=concrete+saw+safety+silica+dust+controls+wet+cutting+vs+dry+cutting - Google Scholar Google Scholar
https://scholar.google.com/scholar?q=concrete+slab+saw+cutting+techniques+diamond+blade+joint+sawing - Silica, Crystalline – Overview | Occupational Safety and Health Administration
https://www.osha.gov/silica/concrete-cutting-sawing-drilling-and-chipping - https://www.osha.gov/crystalline-silica
- https://www.cdc.gov/niosh/topics/silica/construction.html
- https://www.cdc.gov/niosh/topics/silica/default.html
- https://pubmed.ncbi.nlm.nih.gov/?term=concrete+cutting+silica+dust+controls
- https://en.wikipedia.org/wiki/Concrete
- Checking your browser – reCAPTCHA
https://www.ncbi.nlm.nih.gov/books/NBK470361/