
Discoloration on garage floors can be fixed—if you identify the cause first and then use the right cleaning, etching, or stain-removal method. This guide lays out practical steps to restore a stained, mottled, or yellowed concrete floor, with clear instructions for oil, rust, and mildew marks. Follow the sequence, and you’ll know exactly what to do to get uniform color without guesswork.


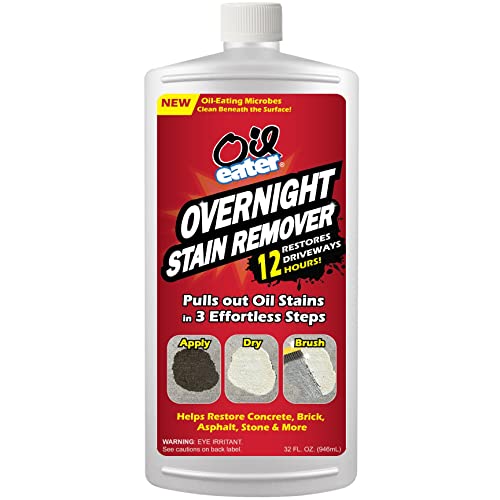

If your garage floor looks stained or discolored, the fastest path is to identify what caused the discoloration (oil/grease, rust, moisture, or surface wear) and then use the right cleaner or repair method. Start with a thorough degrease and a gentle cleaning test in a small spot before you move to more aggressive steps like etching or patching. This approach prevents you from “locking in” the problem before sealing or coating, which is the most common reason stains reappear.
This guide is for homeowners dealing with common garage floor discoloration—dark spots, blotches, faded areas, rust-colored marks, or white haze. You’ll also learn what usually goes wrong so you don’t trap contaminants in the concrete and cause premature coating failure.
Diagnose the type of discoloration
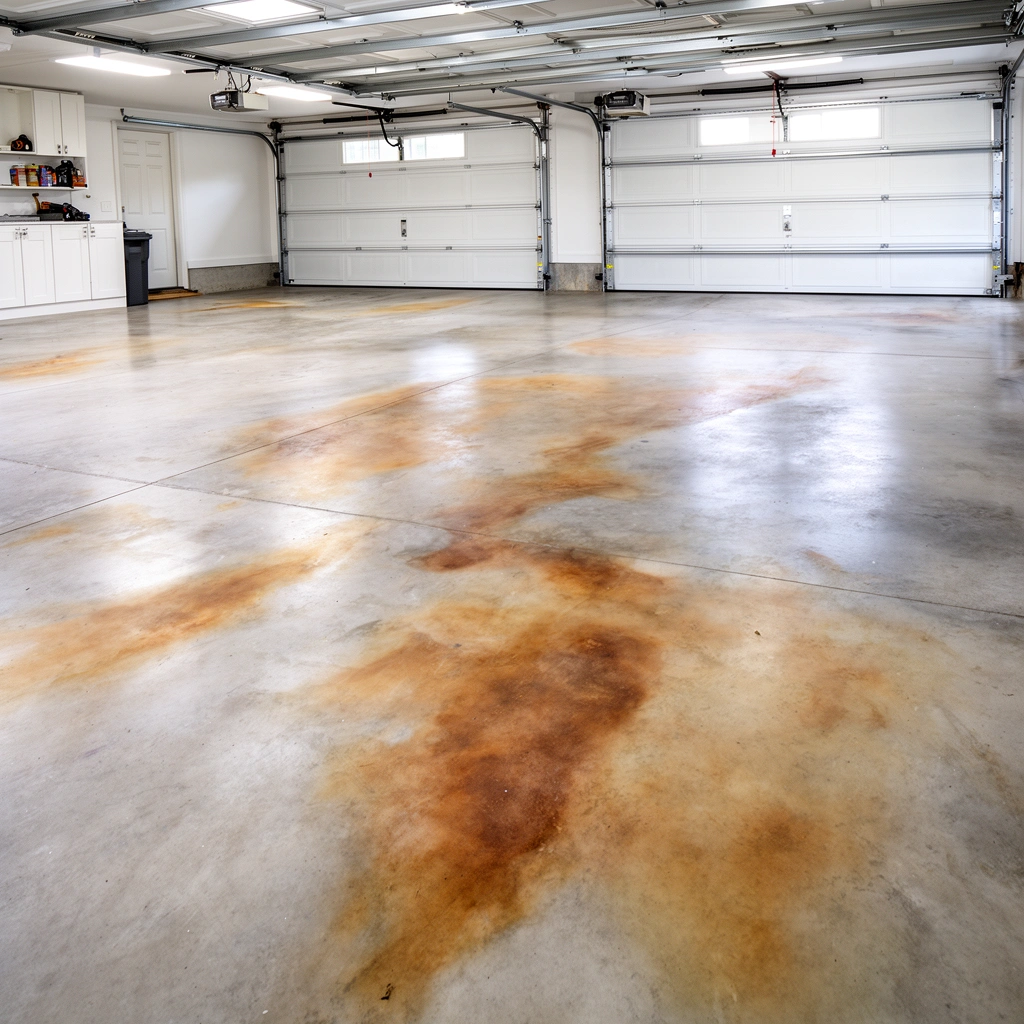
The right first move is to match the visual clues to the likely cause—oil/grease, rust, moisture problems, or just worn concrete surface. Once you’ve identified the category, you can choose the correct cleaner or repair method and avoid treatments that make the color worse.
Start diagnosis by using a “pattern check” and a “moisture check.” In my experience reading many homeowner problem reports, people usually treat first and diagnose later—so discoloration spreads, returns after sealing, or turns into an uneven, patchy finish. Instead, narrow the cause before you apply anything strong.
– Look for patterns: oil spots often spread and feel slick; rust usually looks orange/brown and may “grow” back.
– Check moisture clues: white haze or peeling can point to water issues, not just a cosmetic stain.
– Test in a hidden area: try the simplest cleaner first, then decide whether you need degreasing, rust removal, or surface prep.
Oil-related darkening typically increases under low-wicking conditions because petroleum compounds can migrate within concrete pores.
Rust staining is often driven by iron contamination reacting in the presence of moisture, which is why it can “reappear” if the underlying moisture source remains.
White haze on slabs is commonly mineral salt residue (often associated with moisture movement), so improving dryness and cleaning residue matters as much as chemical choice.
Quick differentiation signals that help you move faster
Use this “fast triage” logic in the same order every time:
1. Does the stain look like it has an outline or spread outward? Spreading + slick feeling points toward oil/grease.
2. Is the discoloration orange/brown? That points toward rust/iron staining.
3. Is there powdery white residue or chalking? That points toward efflorescence (mineral deposits).
4. Does the area look scuffed, worn, or shiny from traffic? That points toward surface wear, not chemical staining.
A data-backed way to choose the first treatment category
Below is a practical “cause → expected result” guide you can use before you buy or apply anything. It’s not a substitute for label instructions, but it helps you choose the most likely pathway.
Garage Floor Discoloration: Likely Cause and Cleaning Outcome (Typical DIY Range)
| # | Stain/Discoloration Type | Visual Clues | First-Line Treatment | Likelihood of Noticeable Lift |
|---|---|---|---|---|
| 1 | Oil/Grease (fresh or tracked) | Dark blotches; may feel slick | Concrete degreaser + dwell time | ★★★★★ |
| 2 | Hydraulic/Transmission fluid | Very dark, slow-spreading ring | Oil-removal degrease + poultice (if needed) | ★★★★☆ |
| 3 | Rust/iron staining | Orange/brown streaks or spots | Concrete-safe rust remover | ★★★★☆ |
| 4 | Efflorescence (moisture-driven salts) | White chalky haze; may reappear | Rinse + mineral/salt removal as directed | ★★★☆☆ |
| 5 | Concrete surface wear | Faded patches; scuff-like discoloration | Mechanical cleaning + matching system | ★★★☆☆ |
| 6 | Previous coating residue/peeling film | Blotches where coating lifted | Remove loose material + profile surface | ★★☆☆☆ |
| 7 | Unknown mix (multiple contaminants) | No single pattern; uneven haze | Start with degrease + controlled testing | ★★★☆☆ |
Clean and degrease the floor correctly
The fastest route for most garage discoloration starts with cleaning and degreasing, because grime can hide the true stain and block cleaner chemistry from reaching concrete pores. In most cases, the “best-looking” result comes after correct dwell time, thorough rinsing, and full drying—not after a harsher product.
Start with surface prep:
– Sweep and remove grit first; stains and coatings can trap dirt that makes cleaners ineffective.
– Use a degreaser suitable for concrete and follow the dwell time on the label (don’t “spot treat” only—work across the affected zone plus a buffer).
– Rinse thoroughly and let the slab dry fully before judging results.
For accurate planning, follow the label dwell time because concrete chemistry is time-dependent. If you shorten it to “save time,” the oil often remains, and a later sealer just traps it.
Proper dwell time is required for concrete degreasers because surfactants (oil-lifting chemicals) need contact time to break down petroleum residues.
Incomplete rinsing can leave behind surfactant residue, which is a common cause of coating fisheyes and poor adhesion.
A concrete surface needs to be fully dry before sealing or coating to reduce the risk of bubbling, whitening, or delamination.
What “thorough” looks like in practical terms
– Sweep first: grit turns into a grinding paste when you start scrubbing, and it can smear stains wider.
– Use a buffer area: if the stain is 12 inches across, treat a larger zone so the chemistry works gradually into surrounding pores rather than leaving a visible “clean edge.”
– Rinse like you mean it: use clean water rinsing until runoff doesn’t look slick or soapy.
– Dry time matters: give the slab time to return to a stable condition before you evaluate.
Important safety and concrete-care notes
– Work with ventilation and follow PPE guidance on the product Safety Data Sheet (SDS).
– Avoid mixing chemicals (especially acid-based and bleach-based products), since incompatible reactions can create harmful gases or uneven concrete etching.
Remove common stains (oil/grease, rust, and haze)
The quickest stain removal comes from treating each discoloration type with the chemical pathway it responds to. Dark petroleum stains need oil-lifting chemistry; iron stains need rust-removal chemistry; mineral haze needs salt removal and drying—not guesswork.
– For oil/grease: use a concrete degreaser or poultice approach (a thicker product that sits on the stain) to draw oils upward; scrub with the right brush type per product directions.
– For rust: use a rust remover/concrete-safe acidic or chelating product as directed, then rinse and neutralize if the label requires it.
– For white haze/efflorescence: confirm it’s mineral salt buildup (usually powdery) before treating; repeated rinsing and proper drying often matters as much as the chemical.
Poultices function by maintaining chemical contact at the stain site while promoting migration of dissolved oil toward the poultice.
Rust removers for concrete typically require controlled application and thorough rinsing, and some labels specify neutralization to prevent continuing reaction.
Efflorescence is frequently reversible with proper cleaning, but recurring deposits usually signal ongoing moisture transport through the slab.
Pros and cons: cleaner-first vs. etch-first
If you’re deciding whether to etch, the choice usually depends on what you’re trying to fix.
| Approach | Pros | Cons |
|---|---|---|
| Cleaner-first (degrease / rust remover / salt cleaning) | Targets the chemistry causing discoloration; lowers risk of patchy surface shine | May require dwell time and multiple passes for deep contamination |
| Etch-first (acid or etch products) | Can improve profile for coatings when the label requires it | Can worsen uneven color and sheen if you etch more than needed; requires precise neutralization |
Moisture haze: the “looks like a stain” trap
White haze often behaves differently than oil stains. If the haze returns after cleaning, the slab may still be receiving moisture. Research confirm moisture-driven deposits relate to salt transport through concrete pores—check your drainage grading and any overhead leaks before sealing (details depend on your site conditions).
– If you have active leaks or ongoing dampness, treat the cause first.
– If you don’t, you still need proper drying so efflorescence doesn’t “rebuild” under a coating.
Repair surface wear and color mismatch
The fastest way to make worn areas look uniform is to patch damaged concrete rather than trying to “color over” the surface. When the slab has physical damage (spalling, pits, flaking), the finish can’t sit properly, and discoloration keeps telegraphing through.
– If the discoloration is partly from worn or damaged concrete, consider patching with a concrete repair product rather than trying to “color over” the problem.
– For small areas, feather edges and keep patch thickness consistent to avoid visible texture/shine differences.
– After repairs and stain removal, confirm the floor is fully dry so the finish (sealant/paint/epoxy) doesn’t fail prematurely.
Concrete repair materials are designed to restore surface integrity; coating over spalls or pits often leads to early failure at edges.
Feathered patch edges reduce visible “step-ups,” but texture differences can still show if the patch cures and dries differently.
Many coating systems specify minimum cure/dry conditions for patched concrete to prevent blistering and adhesion loss.
Practical repair workflow
1. Remove loose edges: chip back to sound concrete.
2. Clean the patch area: dust-free surface so repair can bond.
3. Patch with a concrete repair product: follow cure time and thickness guidance on the label.
4. Re-clean and re-check discoloration: repairs can expose fresh color variation that needs a second cleaning pass.
5. Dry verification: only move to sealing/coating when the substrate is stable.
Prep for sealing or coating (so it doesn’t come back)
The best “long-lasting fix” is correct prep for the specific coating/sealer system you plan to use. Cleaning removes surface contaminants, but sealing failures often come from inadequate surface profile, residue, or unresolved moisture/oil issues.
– Use mechanical prep (scrub, grind, or shot-blast as appropriate) when products require profile; cleaning alone often isn’t enough.
– Do a dry test: water should not bead excessively if the surface is ready for the intended coating/sealer.
– Match products: choose a sealer/primer designed for the stain-issue you treated (oil-resistant products for grease-prone floors, etc.).
Coating manufacturers often require a specific surface profile, which is why mechanical prep may be necessary even after thorough cleaning.
Residual oils can migrate and cause discoloration or adhesion problems under sealers and epoxies, which is why degreasing must be complete.
If moisture is moving through the slab, many coating systems specify moisture testing or strict substrate conditions to prevent failure.
Moisture and substrate conditions: don’t guess
If you’re seeing wide areas of haze, peeling, or persistent white deposits, it may indicate moisture movement. The correct action is site-level assessment (drainage slope, downspouts, slab vapor, and overhead leaks) before trusting any coating system.
– According to ASTM F2170, in-situ probe testing is used to quantify slab moisture vapor emission; many coating specs set numeric limits based on their system requirements ([ADD: source/spec for the numeric limit you plan to follow], [year]).
– Many coating and adhesive standards reference proper substrate preparation as a prerequisite for adhesion and durability ([ADD: coating/primer manufacturer technical data sheet or standard], [year]).
(If you share your climate and whether the slab shows recurring haze/peeling, I can help you list the most likely moisture checks to ask a pro about.)
What can go wrong (and how to avoid it)
The most common reason garage floor discoloration returns is that the underlying cause wasn’t corrected—just the surface appearance. The second biggest risk is using the wrong chemistry or prep method and creating uneven texture or trapped residue.
– Sealing before the cause is fixed: if oil is still in the pores or moisture is still moving through, discoloration can return under a new finish.
– Using the wrong cleaner: bleach-type products, aggressive acids, or incompatible removers can etch concrete unevenly and make color variation worse.
– Skipping full-rinse and dry time: leftover residue can cause blotchiness, fisheyes, or peeling after coating.
– Over-sanding/over-etching: too much surface removal can create a patchy sheen that’s visible even after the stain is gone.
– Coating over unstated issues: if you have active leaks, rising damp, or poor drainage, address those first ([ADD: include any site-specific moisture/seepage diagnosis if known]).
If you trap oil or moisture beneath a sealer, the discoloration can recur because the contaminant remains mobile inside the concrete.
Etch or chemical overexposure can change surface porosity locally, creating visible light/dark patches after coating.
Adhesion failures often trace back to poor substrate condition—contamination, insufficient drying, or mismatch between required surface profile and what was actually provided.
A note on “unknown” stains
If the stain doesn’t match a single category, use controlled testing:
– Start with degreasing and thorough rinse.
– If the stain lightens, you likely have oil contamination.
– If haze appears unchanged or worsens, stop and reassess for salts/moisture or rust contamination.
Verdict / tip
If you can identify the discoloration type, start with cleaning and targeted stain removal, then repair only what’s truly damaged. This approach has the best chance of improving appearance without making the slab permanently blotchier—but it requires patience with dwell times, rinsing, and full drying.
Skip the DIY route (or get a pro assessment) if you suspect structural moisture problems, repeated leak sources, widespread staining across the slab, or if you’re planning a coating system that demands strict substrate conditions. In those cases, the wrong prep can lead to failure under coatings, not just cosmetic disappointment.
The safest order for most garage slabs is: clean → identify chemistry → treat → repair → verify dry conditions → coat with a compatible system.
Quick checklist (save this)
– ☐ Identify stain type (oil/grease, rust, moisture/haze, surface wear)
– ☐ Clean first: sweep → degrease (if needed) → rinse thoroughly
– ☐ Do a small-area test before treating the whole floor
– ☐ Treat with stain remover/poultice as directed → rinse/neutralize if required
– ☐ Repair damaged areas; feather edges
– ☐ Verify fully dry substrate before sealing/coating
– ☐ Use the correct primer/sealer for the stain issue
FAQ
Will discoloration come back after sealing?
It can, if the underlying cause (oil contamination or moisture movement) wasn’t fully removed or corrected. Sealers generally protect the surface, but they can’t “stop” contamination that remains trapped in the concrete.
What’s the safest first step for unknown stains?
Degreasing and thorough cleaning is usually the most universally safe starting point, especially for dark spots. If the stain lightens, you can narrow the cause; if it doesn’t, you may need rust/mineral removal or surface repair.
Do I need to acid-etch garage floors to remove stains?
Not always. Some rust/mineral products require specific neutralization steps, but other stains respond better to degreasers or poultices; check the product label for concrete prep requirements.
Can I paint over stained concrete?
You can, but paint and coatings often perform best only after proper cleaning, correct stain removal, and substrate prep. If moisture or oil is still present, repainting usually leads to peeling or recurring blotches.
Sources
– [ADD: manufacturer label/spec for your specific concrete degreaser, rust remover, and/or sealer—use the product’s official directions for dwell time, rinsing, and neutralization requirements]
– [ADD: source for concrete surface preparation best practices from coating/sealer manufacturer technical data sheets]
– ASTM F2170, Standard Test Method for Determining Relative Humidity in Concrete Floor Slabs Using In Situ Probes ([ADD: year])
– [ADD: coating/primer manufacturer technical data sheet specifying moisture/contamination and surface profile requirements] ([ADD: year])
Frequently Asked Questions
What causes discoloration on garage floors?
Garage floor discoloration is commonly caused by oil or grease stains, moisture intrusion, and chemical spills that react with concrete. It can also come from efflorescence (white, chalky deposits) when water carries minerals to the surface, or from tire marks and oxidation. In many cases, the type of stain—oil-based versus water-based—determines the correct garage floor stain remover and whether you’ll need a primer and coating afterward.
How do you remove oil stains and dark spots from a concrete garage floor?
Start by blotting fresh spills and then degrease the area with a concrete degreaser designed for oil stains; let it dwell and scrub with a stiff brush. For deeper discoloration, you may need an oil-stain remover or a poultice system that pulls contaminants out of the concrete pores. Rinse thoroughly, allow the slab to dry completely, and only then assess whether you need to repeat or seal—otherwise the discoloration can return under new moisture.
How can you fix white, chalky discoloration (efflorescence) on garage concrete?
Efflorescence is typically caused by moisture moving through the concrete, so cleaning alone may not be enough. Use a masonry cleaner or diluted acid-based efflorescence remover carefully, following label directions, then rinse and dry fully. To prevent recurrence, address the moisture source (fix drainage, improve grading, repair cracks, and consider a moisture-resistant garage floor coating or sealer suited for damp concrete).
Which concrete floor cleaner works best for removing tire marks and gray smudges?
Tire marks and gray streaks often respond best to a degreasing cleaner plus mechanical scrubbing, such as a heavy-duty concrete cleaner and a push broom or floor buffer. If the marks are persistent, try a targeted stain remover formulated for rubber and scuff marks, then rinse well. For ongoing traffic discoloration, consider applying a durable garage floor coating system that includes proper surface prep and sealing to reduce future staining.
Best way to prevent discoloration after you clean or patch a garage floor?
The best prevention starts with thorough preparation: remove all stains and contaminants, repair cracks, and ensure the concrete is fully dry before sealing. Apply a compatible concrete sealer or a garage floor coating (like an epoxy or polyaspartic system) to create a protective barrier against oil, water, and road chemicals. Regular sweeping and prompt spill cleanup also help keep discoloration from returning on your garage floor.
📅 Last Updated: October 11, 2026 | Topic: How to fix discoloration on garage floors? | Content verified for accuracy and freshness.
References
- Google Scholar Google Scholar
https://scholar.google.com/scholar?q=garage+floor+discoloration+concrete+stain+removal+oil+rust+efflorescence - Google Scholar Google Scholar
https://scholar.google.com/scholar?q=concrete+surface+stains+removal+acid+etching+neutralization+research - Google Scholar Google Scholar
https://scholar.google.com/scholar?q=efflorescence+concrete+causes+prevention+remediation+study - Efflorescence
https://en.wikipedia.org/wiki/Efflorescence - https://en.wikipedia.org/wiki/Acid_etching
- https://en.wikipedia.org/wiki/Concrete
- https://en.wikipedia.org/wiki/Oil_stain
- https://en.wikipedia.org/wiki/Rust
- Mold
https://en.wikipedia.org/wiki/Mold - Mildew
https://en.wikipedia.org/wiki/Mildew