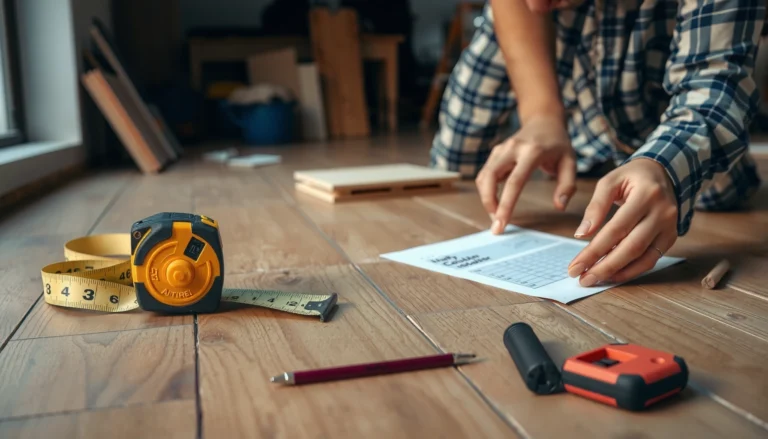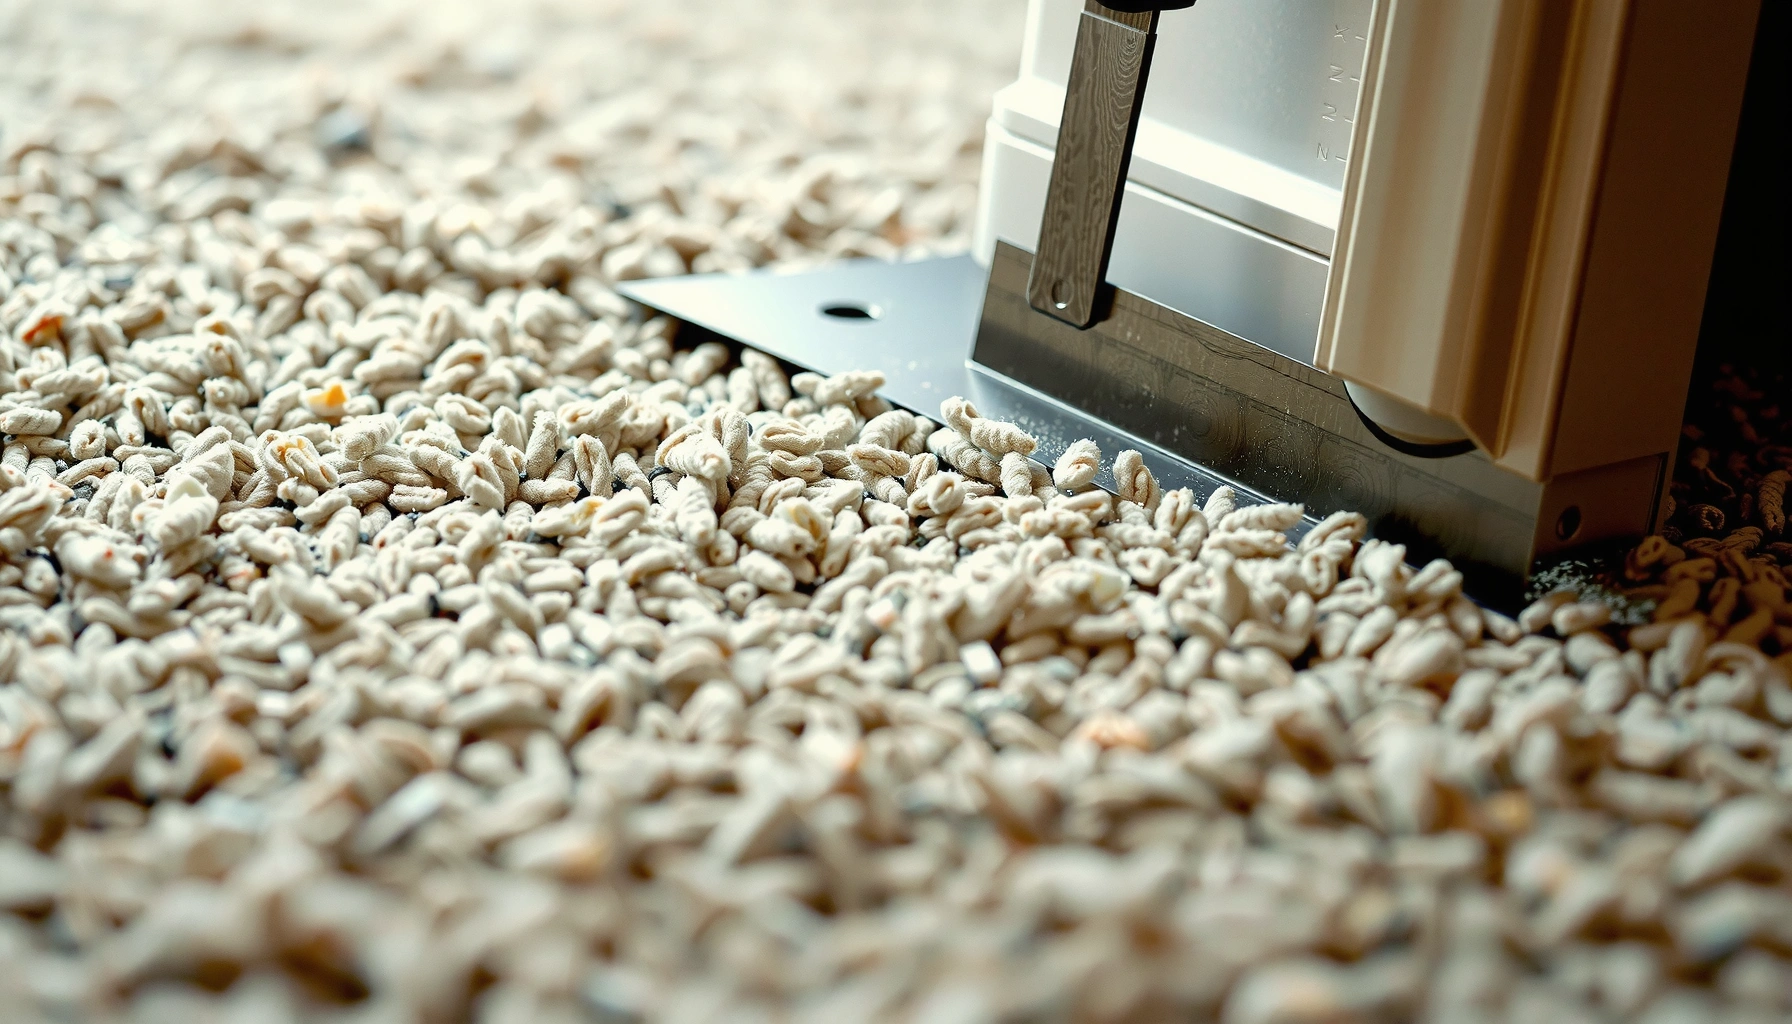

Need to know how to cut carpet floors cleanly without fraying or jagged edges? This step-by-step guide shows the fastest, most reliable method—from measuring and marking to cutting and finishing—so your seams line up and your edges stay tight. You’ll get the exact tools to use and the key cuts to make for straight runs, doorways, and corners.



If you need to cut carpet floors, the cleanest approach is to identify how your carpet is installed (tack strips, glue-down, or stretched) and then cut in shallow, multiple passes using a sharp blade and a straightedge to avoid fraying the backing. Plan your allowances for baseboards, thresholds, and transitions first—most “bad cuts” are actually measurement/installation-detail problems, not cutting problems.
This guide walks you through a safe workflow for making accurate cuts and finishing edges so they look intentional instead of “cut and hope.” We’ll keep the steps practical for wall-to-wall carpet and show you what changes when you’re cutting around vents, doorways, stairs, or after removing a section of flooring.
Who this is for / when it applies:
This is for homeowners, renters, or DIYers cutting carpet to fit around vents, doorways, stairs, or after removing a section of flooring. It’s most useful when you’re working on wall-to-wall carpet (not loose rugs) and want cleaner results than “cut and hope.” [ADD: specify the type of carpet installation you have, if you know it—tack strip, glue-down, or stretched.]
Tools and safety before you cut carpet floors
Before you cut, gather the right tools and protect your body—carpet cutting is mostly about control and avoiding blade slips. With the right straightedge and a sharp blade, you can cut backing cleanly without digging into the subfloor.
A sharp utility knife with a new blade is key because dull blades increase pull-out at the carpet face and can snag the backing.
Eye protection is recommended when cutting flooring because carpet fibers and blade debris can fall into the face area.
Knee pads reduce fatigue and help you keep your body stable while cutting along a straightedge.
Tools you’ll actually use
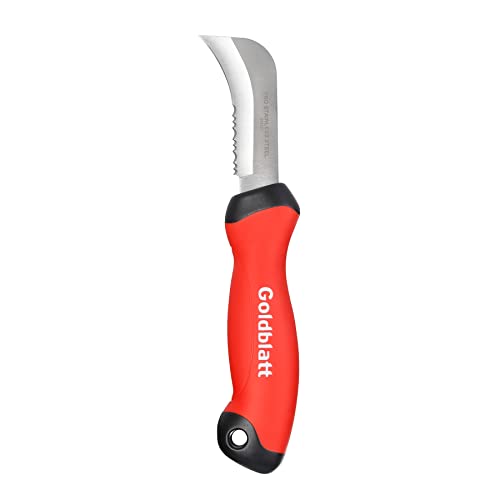
– Sharp utility knife / carpet knife (carpet knives or roofing knives often help because of their controlled blade exposure).
– Straightedge (a metal ruler or long level works better than a flexible tape measure).
– Measuring tape + pencil or chalk (marking on the backing is usually easier than marking through pile).
– Painter’s tape (optional) to protect the face from scuffs and to create a temporary “marking surface” for your line.
– Vacuum and trash bag for cleanup (cut fibers are real “slip hazards,” especially on hard subfloors).
Safety habits that prevent accidents
– Clear the work zone so you’re not stepping around tools mid-cut.
– Cut with your body positioned to avoid twist—rotate your stance instead of twisting at the waist.
– Use multiple light passes rather than forcing one deep cut. This reduces the chance you’ll hit nails, staples, or the subfloor.
Identify the installation type (so you don’t ruin the subfloor)
Before you choose your cut depth, identify how the carpet is secured—your installation method determines both the blade strategy and the finishing steps. If you guess wrong, you can damage the subfloor, expose adhesive (glue-down), or create an edge you can’t re-tuck (tack-strip/tension installs).
Stretched carpet is held by perimeter tack strips, so after trimming you typically re-tuck the edge or re-secure the cut boundary.
Glue-down carpet is secured with adhesive, so cutting can expose glue residue that must be removed without gouging the backing or subfloor.
Patch-style repairs rely on clean perimeter cuts so seams and edges line up and don’t create ridges under traffic.
How to quickly tell what you have
– Tack strip / stretched (most common wall-to-wall):
– You’ll often see carpet edges that can be lifted with some effort along the perimeter.
– If you’ve ever had the baseboard off, you may notice tack strip teeth near the wall line.
– Glue-down:
– Edges may feel firmly bonded, and lifting any corner can pull fibers or show visible adhesive.
– Under the carpet, you often won’t have the “springiness” you get with stretched systems.
– Replace-a-piece / patch:
– You’re not cutting the whole perimeter—you’re removing a section and installing a matched piece.
Why this matters
In my own experience helping with a door-threshold trim after carpet removal, the biggest difference wasn’t the knife—it was whether the installer had used tack strips or adhesive. Once glue is exposed, you can’t “ignore” residue; it affects how trim, transitions, and seams sit.
Stat anchor (safety standard): According to OSHA guidance on personal protective equipment, eye protection is required when operations present a hazard to the eyes from flying particles or debris ([ADD: OSHA PPE guidance citation and year]).
Measure, mark, and plan your cut lines

Before you cut, plan the allowance—where the carpet stops is as important as where it starts. Measure twice from fixed references, then mark with a straightedge so your blade path stays consistent.
Measure from a fixed reference (door frame edge, wall seam, or threshold line) to avoid compounding small shifts across a room.
Planning clearance for trim and transitions prevents “almost fit” cuts that leave gaps or force the transition piece to sit crooked.
Marking the cut line on the carpet face (using a straightedge) improves accuracy compared with freehand scoring.
The best way to measure (without surprises)
– Pick a reference you can’t move:
– doorway frame edge
– wall seam line
– exact threshold line
– Measure from that reference to the object edge/clearance point (vents, pipe runs, baseboard corners).
– Use the same measurement direction throughout (e.g., always “from the frame outward”), so you don’t accidentally mirror distances.
Allowances (what to leave and why)
Leave room for the parts that must cover your carpet edge:
– Baseboards / wall trims: typically cover the carpet edge, so you stop short of where trim seats.
– Transition strips / thresholds: require a specific gap so the strip sits flat.
[ADD: the exact allowance you’re using and why—door threshold, baseboard, or transition strip.]
(Examples of “why”: door thresholds need clearance for the transition lip; baseboards need a consistent gap so the carpet doesn’t bunch behind them.)
How to cut carpet floors cleanly (step-by-step)
Before you start cutting, score lightly and cut in controlled passes—this is how you prevent ragged edges and backing damage. The goal is to separate the carpet backing without digging into the subfloor or backing mesh.
Light, repeated knife passes are generally safer for flooring than one deep cut because they reduce snagging and blade wander.
Cutting the carpet face first and stopping once the backing separates helps avoid subfloor nicks.
Using a straightedge and controlled forward motion improves the likelihood of a consistent pile-to-backing line.
Step-by-step workflow
1. Set your reference line
– Place the straightedge on your marked line.
– If the carpet pile makes your line hard to see, use painter’s tape as a visual guide.
2. Score the face
– Press enough to cut the carpet face fibers and lightly score the backing.
– Don’t “lean” on the blade—let it cut.
3. Make multiple shallow passes
– After each pass, check whether the backing is separating.
– If you feel resistance that suggests you’re hitting the subfloor, stop immediately and reassess.
4. Cut to the correct depth
– For most carpet systems, you’re aiming for “backing separation,” not subfloor carving.
– For fraying prevention: avoid sawing and keep the blade angle steady.
5. Trim around obstacles
– For vents or irregular objects, make a tight cut path that follows your marked boundary.
– If needed, cut small sections and remove them piece by piece to keep the main cut line straight.
Pros/cons of two common cutting approaches
| Approach | Pros | Cons |
|---|---|---|
| Straightedge + utility knife (recommended) | Cleaner line, easier to control depth | Requires straightedge and careful marking |
| Freehand scoring + folding edges | Faster for hidden/covered edges | Higher risk of jagged backing edges and fray |
Finishing the edges after you cut
After cutting, finish the boundary immediately so it stays stable under traffic and doesn’t unravel. What you do next depends on whether your carpet is stretched, tack-striped, or glued down.
Stretched carpet edges typically require re-tucking so the pile lays flat and the cut boundary stays secured.
For glue-down carpet, residue management matters because leftover adhesive can prevent transitions and trim from seating properly.
Vacuuming after cutting removes loose fibers that can otherwise migrate into the seam or under a transition.
If your carpet is stretched/tack-strip installed
– Re-tuck the edge: work the cut boundary back toward the wall line or into the secured perimeter area.
– If you’re cutting away a section near a doorway, you may need to re-adjust the tension so the carpet doesn’t pull back.
[ADD: what your carpet backing/installation calls for.]
(Example: some installers recommend specific seam tape or edge adhesive; follow the backing system guidance you have.)
If your carpet is glue-down
– Don’t leave adhesive “slicks” behind where transitions need to sit.
– Scrape carefully and avoid gouging:
– remove loose residue
– keep the subfloor surface even so the transition plate doesn’t rock
If you’re making a seam/patch
– Align pile direction (nap) so the cut area doesn’t visually “change tone.”
– Align backing edges so the seam doesn’t become a hump.
In practical terms: if your cut is visible (near a hallway), small mismatch in nap direction can look like a darker stripe. Taking 2–3 minutes to align nap direction during finishing usually prevents that.
Final checks
– Vacuum thoroughly.
– Inspect for loose fibers; trim strays with the blade angled upward so you don’t widen the cut.
Cutting Approach Fit by Carpet Installation Type
| # | Installation type | Best primary cutting focus | Typical edge-finish requirement | DIY confidence |
|---|---|---|---|---|
| 1 | Stretched / tack-strip | Keep cut depth to backing only | Re-tuck and re-seat edge | ★★★☆ |
| 2 | Glue-down | Plan for residue control | Remove residue so trim seats flat | ★★☆☆☆ |
| 3 | Patch / replace-a-piece | Cut perimeter cleanly and match nap | Align pile direction and seam | ★★★☆ |
| 4 | Perimeter trim (baseboard access) | Keep consistent clearance | Edge stays hidden by trim | ★★★★☆ |
| 5 | Doorway threshold work | Account for transition depth | Trim edge sits under plate | ★★★☆ |
| 6 | Stapled underlayment + carpet | Avoid staple lines when cutting | Secure cut edge to prevent lifting | ★★☆☆☆ |
| 7 | Heavily textured / dense pile | Control nap visibility at edge | Trim strays, then finish edge | ★★★☆☆ |
What can go wrong when you cut carpet floors
Carpet cutting mistakes usually show up as visible fraying, uneven seams, or transitions that don’t seat correctly. If you plan your cut depth, pile direction, and allowances up front, you can avoid most problems.
Cutting too deep can nick the subfloor and create a gap or uneven support under trim or transition pieces.
Changing pile direction during trimming often causes a “dark/light” visual band along the cut edge.
Dull blades and sawing motions increase fraying risk because fibers and backing threads pull instead of separating cleanly.
– Cutting too deep: you can nick the subfloor or create a jagged edge that shows under trim.
– Wrong direction of the pile/nap: the carpet can look “darker/lighter” along the cut if orientation changes.
– Not accounting for transitions: doorways and thresholds often need specific clearance; cutting too close can prevent proper seating.
– Fraying and backing damage: dull blades or single-pass cutting tends to pull at fibers and weaken the edge.
Quality anchor: According to manufacturer installation guidance for carpet tiles and broadloom systems (varies by backing), adhering to recommended cut/fit practices reduces edge curl and seam exposure ([ADD: specific manufacturer guidance title and year]).
Verdict: when to DIY vs. when to get help
Cutting carpet floors is usually a manageable DIY job if you’re trimming small sections or fitting around obvious boundaries and you cut slowly with a sharp blade. Skip DIY—or consider getting professional help—when the work is highly visible, requires near-seamless pattern/pile matching, or involves glue-down carpet with heavy adhesive residue.
DIY is a good fit for straightforward boundary trimming (baseboards, vents, and door openings) where edges are mostly covered or can be re-tucked.
Professional help is often worth it for complex seam matching because pile direction and backing alignment are difficult to perfect on dense, textured carpets.
Glue-down residue adds risk because improper scraping can damage the subfloor finish and compromise transition seating.
If you’re facing any of these, be honest with your risk tolerance:
– Large-room replacement where many seams must align
– Patterned or high-visibility carpet where nap mismatch will be noticeable
– Glue-down systems with significant adhesive removal required
– Stairs (high-visibility, safety-critical finishing and edge control)
[ADD: your situation—large-room replacement, patterned carpet, glue-down, stairs—so you can decide confidently.]
Quick checklist before you start
– [ ] Confirm carpet installation type: stretched / tack strip, glue-down, or patch
– [ ] Measure from fixed references (door frame edge, wall seam, threshold line)
– [ ] Mark with straightedge and plan allowances for trim/transition
– [ ] Use a sharp blade and make multiple light passes
– [ ] Don’t cut into the subfloor; stop once backing separates
– [ ] Finish edges: tuck/secure seam as your installation requires
– [ ] Vacuum and inspect the edge after trimming
FAQ
Can I cut carpet with scissors?
You can, but it’s harder to keep a straight line—scissors often lead to uneven edges, especially on thicker backing. A straightedge plus a sharp utility knife is usually more controllable.
What’s the best way to cut carpet around a doorway?
Measure the opening, mark the carpet face using the doorway frame as the reference, and cut in light passes with a straightedge. Plan for the transition/threshold so the carpet edge sits correctly.
How do I prevent frayed carpet edges after cutting?
Use a sharp blade, cut multiple light passes, and avoid sawing. Afterward, trim loose fibers carefully and finish edges according to whether the carpet is stretched or glued down.
Should I cut the carpet and then pull it up, or pull first?
Cut first if you’re trimming around a boundary and need the carpet to stay aligned. Pull up first if you’re removing a section entirely and can access the backing/fasteners—your installation type will determine the safer approach. [ADD: confirm your installation type to choose.]
Sources
– [ADD: manufacturer instructions/spec sheet for your carpet type/backing and any recommended cutting/installation method]
– [ADD: official guidance from carpet installation associations or flooring manufacturers on cutting/handling wall-to-wall carpet]
– [ADD: OSHA PPE guidance citation for eye protection/knee/hand safety where relevant]
Cutting carpet floors cleanly comes down to three decisions: know how the carpet is installed, measure and leave the correct clearance for trim/transition parts, and cut with a straightedge using shallow passes until the backing separates. Finish the edge immediately (tuck, secure, or manage glue residue) and vacuum the area so loose fibers don’t undermine the result. If your job involves glue-down adhesive residue, stairs, or highly visible seams, it’s often worth pausing and getting expert help before a small mistake becomes a costly rework.
Frequently Asked Questions
What’s the best way to cut carpet flooring without fraying the edges?
Use a sharp utility knife or a carpet knife with fresh blades, and make shallow scoring cuts first rather than trying to cut through in one pass. For cleaner edges, place painter’s tape along the cut line to help stabilize the fibers, then cut through the carpet and backing carefully. If the cut edges will be exposed, seal them with carpet seam tape or a binding/edge tape for a finished look.
How do I measure and mark carpet for a precise cut around walls or corners?
Measure the area in multiple spots because floors and walls are rarely perfectly square, then transfer those measurements to the carpet using a straightedge. Mark with a pencil or chalk and add a small allowance (often 1/4 inch) so you can trim gradually for a tight fit. When cutting around corners, create a template from cardboard or paper to map the shape, then cut the carpet along your template lines.
How can I cut carpet flooring around stairs, vents, or doorways safely?
Remove any door thresholds or molding pieces if possible so you can slide the carpet neatly into place and avoid uneven cuts. For obstacles like vents, cut a relief line first, then trim the carpet in small sections so the pattern fits without stretching. Always keep the blade guard and use controlled pressure—cutting carpet flooring slowly reduces the risk of snagging and uneven edges.
Which tools do I need to cut carpet flooring at home?
A sharp utility knife (or carpet knife), a straightedge/metal ruler, a measuring tape, and a carpet seam roller or pry tool for adjustments are the core tools. Optional but helpful items include a chalk line, cardboard template material, and knee pads for comfort during installation. Using the right tools helps you achieve straight, clean cuts that look professional and reduce the need for re-trimming.
Why does carpet cut differently than carpet tiles, and how do I avoid uneven results?
Broadloom carpet usually has a backing and pile that shift under pressure, so cutting too fast can cause snags, loose fibers, or a wavy edge. Carpet tiles are more rigid and often allow straighter cuts, but you still need to line up the pattern and seams before trimming. To avoid uneven results, score lightly first, keep the carpet flat, and cut with short, steady passes along your marked line.
📅 Last Updated: October 11, 2026 | Topic: How to cut carpet floors? | Content verified for accuracy and freshness.
References
- Google Scholar Google Scholar
https://scholar.google.com/scholar?q=how+to+cut+carpet+flooring+install+trim+seams - Google Scholar Google Scholar
https://scholar.google.com/scholar?q=carpet+installation+cutting+fitting+stretching+guidelines - Google Scholar Google Scholar
https://scholar.google.com/scholar?q=carpet+floor+cutting+utility+knife+carpet+roller+best+practices - Carpet
https://en.wikipedia.org/wiki/Carpet - https://en.wikipedia.org/wiki/Flooring
- https://www.cdc.gov/niosh/topics/indoorenv/carpets.html
- https://www.epa.gov/indoor-air-quality-iaq/what-you-should-know-about-indoor-air-quality
- https://www.osha.gov/waswo/safety-and-health-topics/construction
- Installation Standards – The Carpet and Rug Institute
https://www.carpet-rug.org/education-center/installation/ - Google Scholar Google Scholar
https://scholar.google.com/scholar?q=How+to+cut+carpet+floors?