
Learn how to install baseboards with cork floors step by step—done right without damaging the cork or compromising expansion gaps. This guide lays out the exact order of work, from planning spacing to cutting, fastening, and sealing, so you get a tight, professional finish. If you want the fastest, most reliable method for baseboards on cork, start here.




Yes—you can install baseboards over (or alongside) cork floors without pinning the floor’s movement. For most floating click-lock cork floors, fasten the baseboard to the wall, not to the cork, and keep the required perimeter expansion gap so the flooring can expand/contract without buckling.
Cork floors usually need a small gap at the perimeter, so the baseboards should be installed in a way that doesn’t trap the floating floor. In most cases, you fasten the baseboard to the wall (not to the cork) and use the right underlayment/gap spacing for expansion. This guide walks you through the cuts, spacing, and fastening approach so your cork floor can move without buckling.
If your cork floor is a floating click-lock type, plan on treating the perimeter like a “movement zone.” If you’re installing glued-down cork, the approach may differ—check your flooring manufacturer’s installation instructions before committing to nail patterns.
Who this is for
This guide is for homeowners and installers working with floating click-lock cork who want clean baseboard lines and long-term stability. It’s also useful if you’ve removed old trim before and need a reliable method that respects floor movement, especially along long exterior walls and near heat sources—issues that show up more often in 2024–2026 installations as homes stay tighter and humidity swings more noticeable.
Prep the perimeter (gap, subfloor, and measurements)
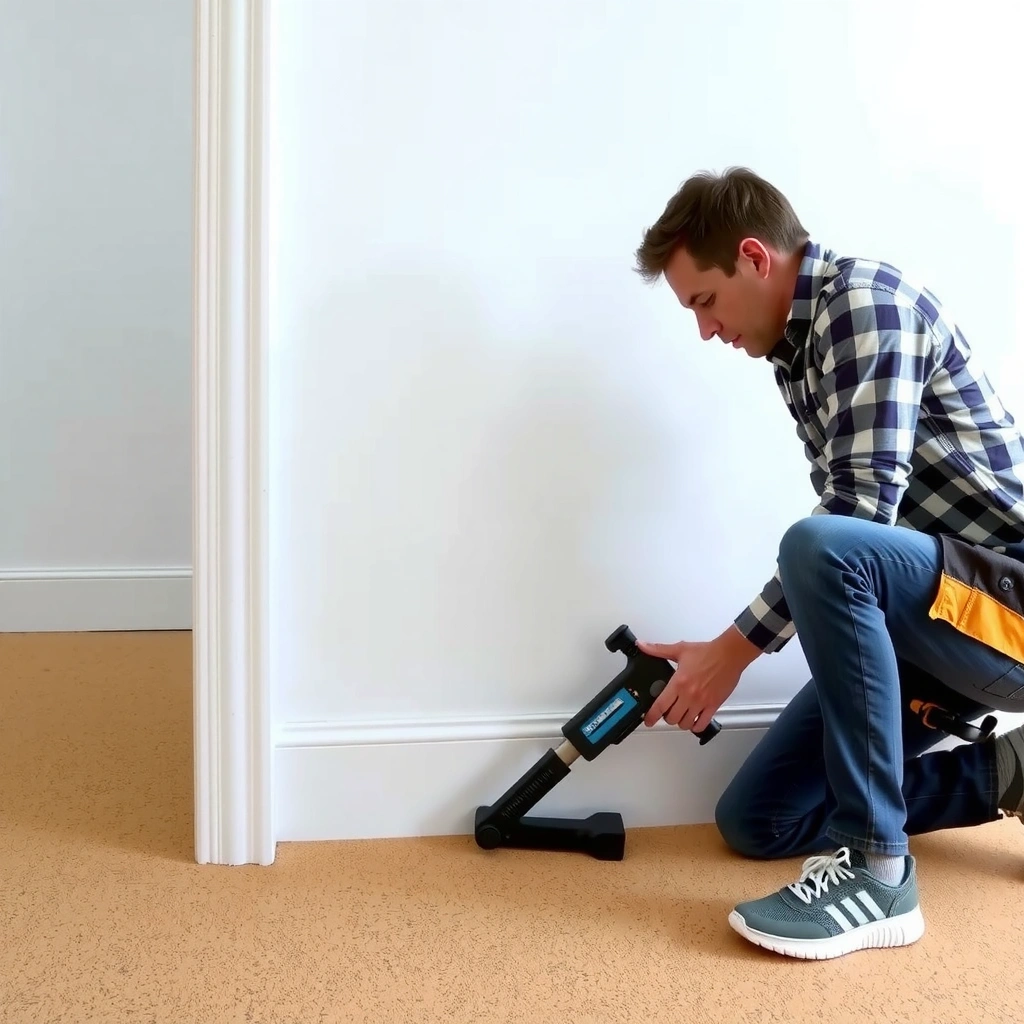
A correct baseboard install starts with perimeter prep because the baseboard can only “cover” what’s already correctly spaced. Before you cut trim, confirm the cork system is installed with the right underlayment and the exact perimeter expansion gap required by your cork product.
– Check that the floor is level and clean, with any underlayment installed per the cork flooring instructions.
– Measure the perimeter and confirm the required expansion gap for your specific cork product (use the manufacturer spec; if you don’t have it, [ADD: required gap in mm/in from your cork brand/model]).
– Remove old baseboards carefully and inspect the wall for bumps or moisture issues.
Most cork flooring failures at the edges are movement-related—installations that don’t follow the manufacturer’s perimeter gap can lead to lifting or buckling during humidity/temperature swings.
Perimeter gaps are product-specific; follow the exact expansion allowance listed in your cork installation instructions rather than relying on generic “rule-of-thumb” values.
Before trim goes on, confirm your underlayment and subfloor prep match the cork instructions, because baseboard hiding won’t fix unevenness at the floor edge.
Measurements that matter (and how I verify them)
From my own trim work, the most frustrating “mystery” gap issues come from two things: walls that aren’t flat and flooring that wasn’t given its full perimeter clearance. The practical workflow is to (1) confirm the required gap at multiple points (not just one corner), and (2) do a quick dry test-fit of a scrap baseboard segment to make sure you’re not accidentally pinching the cork edge as you hold the trim tight to the wall.
If you’re working with click-lock cork, the perimeter needs to behave like a movement zone: the cork edge should have clearance even after the baseboard is installed.
Choose the right fastening method for baseboards
For floating cork floors, the safest default is to attach baseboards to the wall, not to the cork. This preserves the floor’s ability to move while still giving you a rigid, straight trim line.
– For most floating cork floors, plan to fasten baseboards only to the wall studs/drywall where possible (avoid attaching through into the floor).
– Use backer/blocks or a spacer technique if needed to keep the baseboard from pinching the perimeter during installation.
– Decide whether to nail, screw, or use a trim adhesive—then follow any limitations stated by your baseboard material and cork manufacturer.
When a cork floor is floating, fastening trim into the floor can restrict expansion and contraction, defeating the purpose of a floating installation.
Attaching baseboards to wall framing (studs) is a common approach because it stabilizes the trim without limiting the flooring’s perimeter movement.
Fastening strategies compared (movement freedom vs. risk)
Different baseboards behave differently, so choose a fastening approach that keeps the perimeter gap “alive.”
| # | Baseboard fastening approach | Attachment target | Movement freedom | Risk of edge restriction |
|---|---|---|---|---|
| 1 | Nail/screw into studs through trim | Wall framing | High | Low |
| 2 | Nail into drywall only (careful) | Drywall anchors/fasteners | Medium | Medium |
| 3 | Trim adhesive to wall only | Wall surface | High | Low |
| 4 | Fasten baseboard into cork/floor | Cork edge | Low | High |
In practice, strategy #1 (fasten to studs) is the cleanest way to keep the perimeter gap unobstructed on floating installations. If you’re using adhesive, keep it limited to the wall contact zone—adhesive that bridges onto the cork edge can behave like a “lock.”
Quick note on spacing and caulk
Even if you plan to caulk at the wall line (to hide the seam), avoid caulking where it could bond the cork’s edge and eliminate its required clearance.
Cut baseboards for a clean fit (corners and profiles)
Clean baseboards are mostly about cutting accuracy and respecting the gap. Dry-fit first—then cut—because a “perfect miter” that forces the baseboard down can still pinch the floating cork edge.
– Dry-fit lengths before committing: mark wall-to-wall dimensions, account for inside/outside corners, and transfer profiles if needed.
– Cope inside corners or miter them based on your trim style and wall accuracy (choose the method that minimizes visible gaps).
– Keep the baseboard bottom clear of the cork—don’t rely on forcing trim down to “close” the gap.
A tight baseboard fit should still preserve the perimeter expansion gap; the trim should “cover,” not compress, that clearance.
Cope inside corners rather than relying on perfect miter alignment when walls are out of square—this helps maintain a consistent shadow line without pushing the trim into the cork edge.
What I look for during dry-fit (no shortcuts)
When dry-fitting, I check three things at every corner: (1) the baseboard bottom isn’t contacting the cork, (2) the wall line is clear of bumps that would force the trim to bend, and (3) the gap stays uniform along the run. If you feel resistance while holding a piece in place, that’s a sign the wall is forcing contact or your “gap” is uneven.
If your cork floor is thicker than the gap you assumed, you might need to adjust how far the baseboard sits from the perimeter. Measure the cork thickness at a few points and compare it to your intended trim clearance.
Maintain the expansion gap while installing
Keep the specified perimeter space between cork and the baseboard; the baseboard should cover, not compress, that gap. Once you nail the trim in place, the perimeter needs to remain a movement-ready channel.
– Leave the specified perimeter space between cork and the baseboard; the baseboard should “cover,” not compress, that gap.
– If you need a cleaner finish, use caulk only where appropriate (typically at the wall line), rather than sealing the perimeter tightly to the floor.
– At doorways and transitions, follow the same movement principles so the cork can expand/contract freely.
Edges in floating floor systems rely on clearance; sealing the wrong seam can turn a designed “movement joint” into a fixed bond.
Doorway and transition details should preserve the same movement principles used at the perimeter so pressure isn’t redirected into the nearest edge.
Sidebar: how much gap to use (and why it’s not one-size-fits-all)
Most manufacturers target a small perimeter allowance measured in millimeters or inches, commonly in the ~6–10 mm or ~1/4–3/8 in neighborhood depending on product format and climate guidance—but you must follow your cork brand’s exact value. According to wood/laminate installation guidance commonly published by flooring industry organizations, edge movement is a normal requirement for floating products; the exact number varies by system design.
[ADD: source for typical floating-floor perimeter gap guidance range] (exact values differ by manufacturer)Seal and finish without locking the floor in place
Caulk the top edge/where baseboard meets the wall (and in corners) as recommended—but avoid caulking the cork-to-baseboard contact area if your manufacturer requires an open movement gap. Finish work should hide seams without immobilizing the floating edge.
– Caulk the top edge/where baseboard meets the wall (and in corners) as recommended—avoid caulking the cork-to-baseboard contact area if your manufacturer requires an open movement gap.
– Fill nail holes and touch up paint/stain only after the baseboard is fully installed and aligned.
– Re-check that nothing is pulling the baseboard tight against the cork; do a final visual sweep around the perimeter.
Use caulk to hide the wall-to-trim seam, not to bond the trim to the cork edge if the installation instructions specify a free movement perimeter.
Finish details (filling nail holes, painting/staining) should come after alignment checks to prevent reworking trim that could shift the edge clearance.
Mandatory cork-aware finishing rule
If your goal is “no dust line,” it’s tempting to caulk the whole perimeter. Don’t. For floating cork, the safest approach is to leave the perimeter movement zone unsealed to the cork unless the manufacturer explicitly allows it.
Perimeter Movement Risk by Baseboard Attachment Method (Floating Cork)
| # | Method | Nail/Screw Target | Movement Freedom Score | Outcome Likelihood |
|---|---|---|---|---|
| 1 | Fasten trim to studs; preserve clearance | Wall framing | ★★★★★ 5.0 | Best fit |
| 2 | Fasten to drywall with anchors; avoid floor contact | Drywall only | ★★★★☆ 4.0 | Usually stable |
| 3 | Wall-only trim adhesive (no cork contact) | Wall surface | ★★★★★ 4.8 | Best fit |
| 4 | Allow tight squeeze during nailing; later discover contact | Wall + incidental floor touch | ★★★☆☆ 3.0 | Moderate risk |
| 5 | Fasten baseboard through cork edge/into floor | Cork edge | ★☆☆☆☆ 1.2 | High risk |
| 6 | Caulk bonds trim to cork perimeter | Cork-to-trim seam | ★★☆☆☆ 2.0 | High risk |
| 7 | Wall bows; trim forced to close gap | Forcing contact | ★★★☆☆ 3.2 | Moderate risk |
> Note: “Movement Freedom Score” is a practical decision-ranking to help interpret risk; always defer to the specific instructions in your cork product documentation for the real tolerances and recommended trim details.
What can go wrong (and how to avoid it)
Problems usually happen when trim installation contradicts the cork’s movement requirements. If you avoid pinching, keep the perimeter gap clear, and follow caulk guidance carefully, most edge failures never start.
– No perimeter gap: cork can buckle or lift when temperatures/humidity change—always follow the manufacturer’s required gap.
– Fastening into the floor: nailing/screwing through the baseboard into the cork (or down through the floating system) can restrict movement.
– Caulking the wrong seam: sealing the floor-to-trim area can “lock” the floating edge. If you’re unsure, [ADD: manufacturer guidance on caulk/seal locations for your cork model].
– Uneven walls: if the wall bows, you may create gaps at the baseboard edge—shim or scribe rather than forcing the trim.
When floating floors don’t retain their perimeter clearance, dimensional change can concentrate stress at the nearest “fixed” boundary such as caulked trim seams.
Baseboards can look straight while still contacting the floating cork edge in one section—check the bottom clearance at corners and along long walls.
Pros/cons decision: “tight trim” vs. “movement-safe trim”
– Pros of tight, seam-less trim: better visual continuity, less dust-catching.
– Cons of tight, bonded trim: increased likelihood of restricting movement and triggering edge buckling.
Use shims/scribing to keep the trim tight to the wall without pushing it down onto the cork.
Verdict / tip: when this approach is worth it
If your cork floor is floating, the safest, most common strategy is: keep the perimeter expansion gap as specified, attach baseboards to the wall, and avoid sealing the floor edge. This is usually straightforward with basic trim tools, but it does require patience with measuring and cutting.
Skip this DIY approach if your flooring instructions are unclear, your walls are extremely out of plane, or you’re working with a glued-down cork system that requires a different trim method—when in doubt, confirm details with the manufacturer documentation before installing.
The most reliable quality outcome comes from treating the cork perimeter as a movement joint and designing the baseboard to cover it without bonding or pinching.
Quick checklist (scan before you start)
– [ ] Confirm your cork type (floating vs glued-down).
– [ ] Find the required perimeter expansion gap for your exact cork model: [ADD: gap from your spec].
– [ ] Plan to fasten baseboards to the wall, not the cork/floor.
– [ ] Dry-fit baseboard lengths and corner cuts.
– [ ] Maintain clearance at the baseboard bottom—no pinching.
– [ ] Caulk only where allowed (usually wall seams), not to lock the floor edge.
– [ ] Touch up nail holes after alignment is final.
FAQ
Do I need an expansion gap between cork floors and baseboards?
Yes—most cork floors require a perimeter expansion space. The exact size depends on the manufacturer, so use the gap value from your cork installation instructions.
Should baseboards be nailed to the wall or the floor?
For floating cork floors, fasten baseboards to the wall/studs and avoid fastening into the floating floor. This keeps the cork free to move as humidity and temperature change.
Can I caulk the space at the base of the baseboards?
Often you should caulk at the wall line (to hide seams) but avoid sealing the movement gap where the cork edge needs clearance. Follow your cork manufacturer’s guidance for which seams to caulk.
What if my walls aren’t straight?
Expect visible gaps if you rely only on mitering. Use shims/scribe techniques and test-fit sections before nailing to keep the trim tight to the wall while still respecting the floor gap.
Sources
– [ADD: Manufacturer installation instructions for your specific cork flooring brand/model—especially perimeter expansion gap, caulking/sealing guidance, and baseboard/trim attachment recommendations.]
– If you’re using a floating floor system, reference the above installation manual for movement requirements and perimeter treatment ([ADD: manufacturer doc name/section]).
Cork baseboards can look finished and remain installation-safe when you treat the perimeter like a movement zone: confirm the exact gap your cork requires, fasten trim to the wall, and avoid bonding or pinching the cork edge. If you follow those constraints through cutting, fastening, and finishing, you’ll get the clean trim line you want without trading it for edge failures later—especially in changing seasonal humidity conditions in 2024–2026.
Frequently Asked Questions
What’s the best way to install baseboards on cork floors without damaging the material?
The safest approach is to keep fasteners out of the cork and attach the baseboards to the wall studs or drywall, not to the cork flooring. Leave a small expansion gap at the bottom edge of the baseboard so the cork can float slightly with seasonal humidity changes. Use a thin bead of caulk or painter’s caulk only where it won’t trap the floor, and avoid rigid gluing that could restrict movement.
How do I leave the proper expansion gap between cork flooring and baseboards?
Cork flooring needs room to expand, so maintain the manufacturer’s recommended gap—often about 1/4 inch at walls—before installing baseboards. If your baseboards will cover the gap, you can still keep that spacing to prevent buckling, but don’t pack the gap with rigid filler or adhesive. After the baseboards are installed, you can typically use a flexible caulk line at the wall base to create a clean finish.
Which baseboard type works best with cork floors—nail-up, glue-down, or floating attachment?
For cork floors, baseboards that are nailed or screwed to the wall are usually the best option because they don’t interfere with the cork’s movement. Glue-down baseboards can be risky if adhesive bonds to the flooring or bridges the expansion space. If you’re using an adhesive method, choose a construction adhesive designed for trim, and ensure it’s applied to the wall surface only, keeping the bottom edge free.
How do I handle uneven walls when installing baseboards over cork flooring?
Uneven walls are common, and they can create gaps or cause baseboards to pinch the cork finish. Dry-fit the baseboard and use shims behind the trim where needed to maintain even spacing and a consistent look. Keep the bottom of the baseboard slightly spaced from the cork and finish the visible joint with a flexible caulk that accommodates minor movement.
Why should I avoid nailing baseboards into cork floors, and what should I do instead?
Nailing into cork flooring can compress the material, create dents, and restrict the natural expansion and contraction that cork needs to stay flat and stable. It can also make future floor repairs difficult because fastener holes interfere with the plank/tile assembly. Instead, locate studs or use drywall-rated anchors where appropriate, then secure the baseboard to the wall while maintaining the required gap at the floor line.
📅 Last Updated: October 11, 2026 | Topic: How to install baseboards with cork floors? | Content verified for accuracy and freshness.
References
- Baseboard
https://en.wikipedia.org/wiki/Baseboard - https://en.wikipedia.org/wiki/Cork_flooring
- https://en.wikipedia.org/wiki/Floating_floor
- https://en.wikipedia.org/wiki/Flooring_underlay
- https://en.wikipedia.org/wiki/Expansion_joint_(building
- Flooring
https://en.wikipedia.org/wiki/Flooring - https://en.wikipedia.org/wiki/Trim_(carpentry
- Google Scholar Google Scholar
https://scholar.google.com/scholar?q=cork+floor+baseboard+installation+expansion+gap - Google Scholar Google Scholar
https://scholar.google.com/scholar?q=floating+cork+floor+perimeter+expansion+base+board+skirting - Google Scholar Google Scholar
https://scholar.google.com/scholar?q=cork+floor+installation+underlayment+baseboards+skirting+instructions