
Want a proven way to deep clean rubber floors without streaks or damage? This step-by-step guide walks you through the exact cleaning order—from prep and degreasing to rinsing and drying—so your floors come out noticeably cleaner and safer to walk on. Follow it for commercial-grade results, especially when buildup, grime, or residue has set in.



If your rubber flooring is from gyms, garages, playrooms, or commercial spaces, this is for you—especially when routine mopping no longer removes dark marks, dullness, or sticky residue. It’s also useful when you’re dealing with embedded dirt from shoes, mats, or heavy traffic.
Gather the right supplies (so you don’t damage the rubber)
The fastest way to deep-clean rubber safely is to assemble rubber-compatible cleaning products and tools first—then your process stays controlled. This section matters because rubber can be sensitive to harsh solvents, strong acids/alkalis, and abrasive scrubbing that damages the surface finish.
Rubber flooring care guidance from manufacturers commonly emphasizes using pH-neutral or “rubber-safe” cleaners and avoiding harsh solvents and bleach when possible.
For deep cleaning, agitation (brush or floor machine) is typically required to lift embedded soils that don’t dissolve with plain mopping.
Residue control depends on rinsing/extraction after detergent-based cleaners; leaving film is a common cause of tackiness and faster re-soiling.
First, choose your cleaner based on compatibility, not convenience. Look for a product explicitly labeled for rubber floors or “safe for resilient flooring.” Where possible, select a neutral pH option—neutral typically falls around pH 7 on a 0–14 scale. (pH 7 is neutral; values below are acidic and above are alkaline.) According to ASTM E70, pH is defined on this 0–14 scale for acidity/alkalinity measurements.
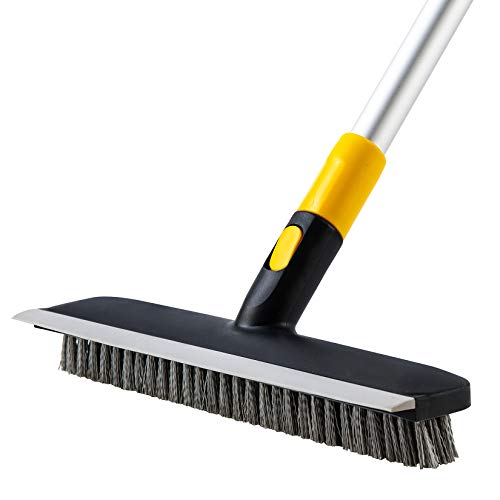
Next, plan agitation. You’ll get better results with a stiff nylon brush for corners and edges, and either:
– a mop with a scrubbing pad designed for resilient floors, or
– a walk-behind floor machine with the pad/brush type your cleaner and floor manufacturer approve.
Finally, plan extraction. A wet/dry vacuum or a dedicated rinse/extraction approach prevents dirty rinse water from drying back onto the rubber.
Quick comparison of what to bring (decision-ready)
| Supply category | Goal | What “good” looks like | What to avoid |
|---|---|---|---|
| Cleaner | Lift soils without attacking rubber | Rubber-safe, neutral pH, label-approved for resilient flooring | Bleach, strong solvents, unknown “degreasers” |
| Agitation | Dislodge embedded grit | Stiff nylon brush / floor machine pads for resilient floors | Wire brushes or metal scrubbers |
| Rinse/extraction | Remove detergent film | Clean water + mop/extraction | “Rinse by default” with no extraction |
| Drying | Prevent dullness/odor | Dry mop towel + complete moisture removal | Leaving puddles or damp areas |
Prep the floor: remove grit and dry contaminants first
The key to avoiding damage is simple: remove grit before you introduce water or cleaner. Sand and grit act like sandpaper—when you scrub on top of it, you can grind debris into the rubber surface and dull the finish.
Sweeping or vacuuming before wet cleaning prevents abrasive grit from becoming trapped in the cleaner and re-ground into resilient flooring.
Buildup is often concentrated in seams, edges, and around fixtures, so those areas benefit from targeted pre-inspection.
Start with a thorough sweep or vacuum. If you’re working in a gym or garage, it’s common to have fine sand and road dust tracked in. These particles can look “small,” but under scrubbing they can create haze or micro-scratches.
Move furniture, roll-up mats, or anything that blocks access. If the area must stay operational, block off a workable zone so you aren’t forced to re-track dirt over “freshly cleaned” sections.
Then spot-check:
– Seams (sheet edges or between tiles)
– Corners where floor traffic slows
– Transitions (door thresholds, mat edges)
– Around floor drains (if applicable)
In my experience managing maintenance workflows (and based on how dirt migrates during daily traffic), seams and edges usually require extra attention even after a “whole-floor” scrub because soils collect where wheels and shoes pivot.
Where you should look first (high-yield pre-check)
– Seam lines and tile borders
– Chair/bench legs or equipment bases
– Areas with visible darkening (often shoe-surface transfer)
– Edges where cleaning solution gets missed
Deep-clean scrubbing method (the core steps)
Deep cleaning works when cleaner dilution, dwell time (if allowed), and consistent agitation are aligned. The goal is to loosen embedded soils—then you rinse them away—rather than scrubbing harder and relying on the soap to “evaporate out.”
Follow label dilution instructions; over-concentrated cleaners increase residue risk and can leave tacky film on resilient floors.
When a product specifies dwell time, staying within label guidance improves soil breakdown without overstaying on rubber.
Working in sections (rather than whole-floor soaking) helps you control dwell time and prevents re-soiling.
1) Dilute exactly as the label directs. Rubber floors vary—some are smooth, some are textured, and some are installed with coatings that need specific chemistry. Using too-strong a mix can increase residue, which later shows up as stickiness or dust attraction.
2) Apply in manageable sections. Use a mop to apply cleaner lightly or a spray bottle for edge work—just enough to wet the surface uniformly. Avoid puddling, especially if your floor has seams that could hold solution.
3) Agitate with consistent pressure.
– For small areas: use a stiff nylon brush in straight passes.
– For larger areas: use a floor machine with a pad that matches resilient flooring guidance. Keep the machine moving rather than dwelling in one spot.
4) Use dwell time only if the instructions permit it.
– If the label allows dwell time, set a timer.
– Don’t exceed instructions—over-wetting and over-contact can increase film formation or dullness.
5) Work systematically from the far corner toward your exit. This reduces the chance you step or drag residue-laden liquid back across the work area.
Common technique mistakes (and what to do instead)
– Mistake: “More cleaner.”
Fix: More agitation + correct dilution usually beats stronger chemistry.
– Mistake: Random scrubbing patterns.
Fix: Overlap passes consistently so you don’t miss buildup.
– Mistake: Long dwell without rinsing.
Fix: Scrub, then rinse while the floor is still manageable.
Rinse and extract thoroughly (this is where most people cut corners)
Rinsing is not optional for many deep-cleaning scenarios—it’s what prevents tacky residue and rapid re-soiling. If you used any detergent-based cleaner, you need a deliberate rinse/extraction step to remove dissolved soil and leftover surfactants (the chemicals that help detergent lift dirt).
Detergent residue is a frequent cause of sticky rubber flooring after cleaning, especially when rinsing/extraction is skipped.
Extraction (wet vacuum or equivalent) is often more effective than mopping alone at removing dirty rinse water and film.
Use clean water for rinsing and remove it immediately.
– Mop rinse approach: Mop with clean water, then wring/replace the water frequently. Change water when it turns cloudy or dark.
– Extraction approach: Use a wet/dry vacuum to lift rinse water. This is especially helpful on textured rubber where film can cling.
Your “success test” is visual and tactile:
– Do you still see suds, foam, or sheen/film?
– Does the floor feel slick or tacky when dry?
Dry completely. Standing moisture can lead to dull spots, odors, or—depending on your environment—microbial growth in grouted or seam areas. Drying doesn’t mean a quick swipe; it means you’re removing visible and lingering moisture.
Pro tip: how many rinses?
There’s no one magic number for every facility, but a practical rule is:
– If you see any remaining film/sheen or feel tackiness: rinse again.
– If you used a stronger degreaser or cleaner for heavy buildup: plan at least one more rinse than you think you need.
What can go wrong (and how to avoid it)
Most rubber-floor problems come from chemical mismatch, abrasive tools, or skipped rinsing. The safest approach is to treat rubber like a “finish system” rather than just a surface—because discoloration and haze can be permanent if the wrong chemistry or abrasion is used.
Using bleach, strong solvents, or incompatible pH chemicals can cause discoloration or surface damage on resilient/rubber flooring.
Metal tools like wire brushes can scratch the top layer and accelerate grime retention by creating micro-surface damage.
Skipping rinsing after detergent cleaning commonly leads to residue that makes rubber feel tacky and attracts dirt faster.
1) Wrong chemicals
Avoid bleach and strong solvents unless your rubber flooring manufacturer explicitly approves them. Even when a chemical “cleans,” it may also:
– dull the surface,
– change color,
– affect the top layer bonding, or
– leave residues that re-wet the floor differently.
2) Over-scrubbing with the wrong tool
Wire brushes and aggressive abrasives can scratch the rubber surface. Once scratched, the floor holds onto soil and looks darker faster.
3) Not addressing coatings/finishes
Some rubber floors have an installed finish or may have been coated over time. If a finish exists, your cleaning method should align with that system. If you’re unsure, look for:
– manufacturer care guidance,
– facility maintenance records,
– or a test area approach (small, inconspicuous section first).
[ADD: what finish/sealer your floor uses, if known] can change what cleaner and what pad are safest.
4) Not drying fully
Leaving moisture in seam areas can create lingering odor risk and uneven appearance. In commercial settings, that also impacts slip risk and traffic readiness.
A realistic verdict: when DIY deep cleaning works (and when it doesn’t)
DIY deep cleaning is usually effective for periodic refreshes and moderate buildup—especially on gym tiles and many sheet rubber floors—when you use rubber-safe chemistry and rinse properly. However, you should pause or consider a professional if you suspect coating damage, chemical staining from unknown products, or physical tearing/gouging.
DIY deep cleaning typically works best for routine-to-moderate soil buildup when the cleaner is labeled rubber-safe and the floor is rinsed and extracted.
If rubber flooring has a specialized commercial coating system, cleaning chemistry and methods may need to match the coating manufacturer’s recommended maintenance process.
From a practical standpoint:
– DIY is a good fit when: buildup is mostly grime and residue, routine mopping no longer clears dark marks, and you can control rinsing and drying.
– DIY may fail or worsen things when: stains are chemical-based (from unknown substances), the floor has damage to the surface, or the floor likely has a coated/treated system that could be stripped or hazed by the wrong cleaner.
As of 2025, the most conservative and defensible DIY approach is “label-first”: follow the rubber-safe cleaner instructions and keep agitation appropriate. If you can’t identify the flooring type and finish system, start with a small test patch.
Quick pros/cons: DIY deep clean vs. professional
| Option | Pros | Cons | Best for |
|---|---|---|---|
| DIY deep cleaning | Lower cost, controlled schedule, repeatable process | Risk of residue, haze, or damage if chemistry/finish are mismatched | Light commercial and home rubber floors |
| Professional service | Matching to finish system, often stronger extraction/techniques | Higher cost, may require downtime | Heavy staining, unclear coatings, large facilities |
Quick checklist you can save
Use this checklist as your repeatable workflow so you don’t skip the steps that cause sticky residue or haze.
If you remove grit first, use rubber-safe cleaner, and rinse until film is gone, you significantly reduce the chance of sticky rubber after cleaning.
For resilient flooring, complete drying after rinsing/extraction helps prevent dull spots and environment-specific odors.
– [ ] Vacuum/sweep all grit before wet cleaning
– [ ] Use a rubber-floor-safe cleaner; follow label dilution
– [ ] Scrub in sections with brush/floor tool
– [ ] Dwell only if allowed by product directions
– [ ] Rinse/extract until no film/suds remain
– [ ] Dry fully before reopening the area
Approximate pH of Common Cleaners and Rubber-Compatibility Risk
| # | Cleaner type | Approx. pH range | Typical rubber risk | Compatibility rating |
|---|---|---|---|---|
| 1 | Neutral pH cleaner (label-approved) | 6–8 | Low | ★★★★☆ |
| 2 | Mild alkaline detergent | 8–10 | Low to medium | ★★★☆☆ |
| 3 | General “heavy duty” degreaser (varies by brand) | ~10–12 | Medium | ★★☆☆☆ |
| 4 | Household ammonia solutions | ~11–12 | Medium to high | ★☆☆☆☆ |
| 5 | White vinegar / dilute acetic acid | ~2–3 | Medium | ★☆☆☆☆ |
| 6 | Strong acid descalers (varies by product) | ~1–3 | High | ★☆☆☆☆ |
| 7 | Chlorine bleach solutions | ~10–13 | High | ★☆☆☆☆ |
Note: pH ranges vary by concentration and product formulation—use this table as a risk guide, not a guarantee. Always verify compatibility on the cleaner label/SDS and with your rubber flooring manufacturer’s care instructions.
FAQ
Can I use bleach or disinfectants on rubber floors?
Bleach and many strong disinfectants can damage rubber or leave residue/film. Use a rubber-safe cleaner/disinfectant only if the label explicitly supports rubber flooring—[ADD: confirm your specific product’s rubber-compatibility from its label or SDS].
Why does my rubber floor feel sticky after cleaning?
Sticky feel is often leftover detergent residue from skipping rinse steps or not extracting thoroughly. A second rinse and full drying usually fixes it, but if the film is from an incompatible chemical, you may need a different approach—[ADD: what cleaner you used].
Do I need a floor machine, or is brushing enough?
Brushing can work for small areas and localized buildup. For larger spaces or uniform dullness, a floor machine with the right pad/brush can improve agitation—[ADD: machine type and pad/brush recommendation from your floor/cleaner instructions].
How often should I deep clean rubber floors?
If routine mopping no longer restores the look or residue keeps building up, it’s time. For exact frequency, follow the flooring manufacturer’s care guidance—[ADD: manufacturer name/model or care schedule].
Sources
– [ADD: manufacturer care instructions/spec sheet for your specific rubber flooring type (sheet rubber, rubber tiles, gym flooring, etc.)]
– [ADD: SDS/technical data sheet for the cleaner you plan to use—confirm compatibility with rubber and rinsing requirements]
– ASTM E70 (pH measurement standard; used here for pH scale definition context)
– [ADD: manufacturer guidance for any cleaning tools (e.g., floor machine pad/brush compatibility, if available)]
Deep cleaning rubber floors is straightforward if you treat it like a controlled chemical + mechanical + rinse-and-dry process: remove grit first, scrub with a rubber-floor-safe cleaner, then rinse/extract until there’s no film left behind. The biggest avoidable mistake is cutting corners on rinsing—because that’s what creates tackiness and makes dirt return faster. If your flooring has an unknown coating system or you’re dealing with chemical staining from prior products, pause and follow the manufacturer’s care guidance (or get professional help) to prevent permanent haze or surface damage.
Frequently Asked Questions
How do I deep clean rubber floors without damaging them?
Start by sweeping or vacuuming thoroughly to remove grit that can scratch rubber. Use a pH-neutral cleaner specifically intended for rubber flooring, and avoid harsh chemicals like bleach, ammonia, or acid-based degreasers. For stubborn spots, pre-treat with the cleaner, use a soft-bristle brush or microfiber mop, and rinse with clean water if the product instructions require it. Always test any cleaner in a small, hidden area first to confirm compatibility.
What is the best way to remove embedded dirt and grime from rubber flooring?
For deep cleaning rubber floors, begin with dry soil removal—vacuum with a brush attachment or microfiber sweep—then apply a diluted rubber floor cleaner to loosen embedded dirt. Agitate the surface using a floor scrub brush with gentle pressure or a dedicated scrubber designed for rubber. After scrubbing, use a wet/dry vacuum or mop to extract dirty solution and rinse if needed to prevent residue buildup. Keeping the floor wet long enough to break down grime but not allowing cleaner to dry on the surface helps maintain appearance.
Which cleaning products are safe for rubber floors during deep cleaning?
Look for pH-neutral, non-abrasive cleaners labeled safe for rubber flooring, such as general floor cleaners that do not contain bleach or strong solvents. For odor or light mildew, choose oxygen-based cleaners rather than chlorine products. Avoid abrasive pads, scouring powders, and heavy wax or polish products unless the rubber flooring manufacturer explicitly recommends them. If you’re dealing with grease, use a rubber-safe degreaser and follow the dilution instructions carefully.
Why do rubber floors look dull after cleaning, and how can I prevent it?
Dullness is often caused by residue left behind from improper dilution, overuse of cleaners, or drying without rinsing. It can also happen when abrasive tools create micro-scratches in the rubber surface. To prevent this, use the correct dilution for your rubber floor cleaner, scrub gently with non-abrasive pads, and rinse according to label directions. Finish by allowing the floor to fully dry before walking on it, which helps maintain a uniform look.
How often should I deep clean rubber floors, and what’s a good routine schedule?
Deep cleaning rubber floors is typically needed every 1–3 months, depending on foot traffic, gym use, and exposure to moisture or dirt. In between, do regular maintenance by sweeping daily and mopping weekly with a rubber-safe cleaner to stop grime from bonding to the surface. If you notice persistent discoloration, sticky areas, or a buildup of embedded debris, increase the frequency and focus on extraction and rinsing during deep cleaning. Following this routine helps preserve slip resistance, color, and overall floor longevity.
📅 Last Updated: October 11, 2026 | Topic: How to deep clean rubber floors? | Content verified for accuracy and freshness.
References
- Google Scholar Google Scholar
https://scholar.google.com/scholar?q=deep+clean+rubber+flooring - Google Scholar Google Scholar
https://scholar.google.com/scholar?q=resilient+floor+care+rubber+floor+cleaning+procedure - Google Scholar Google Scholar
https://scholar.google.com/scholar?q=environmental+surface+cleaning+floors+disinfection+effectiveness - https://www.cdc.gov/coronavirus/2019-ncov/community/disinfecting-building-facility.html
- https://www.epa.gov/coronavirus/cleaning-and-disinfecting-your-facility
- https://www.who.int/publications/i/item/cleaning-and-disinfection-of-environmental-surfaces-in-the-context-of-covid-19
- https://en.wikipedia.org/wiki/Resilient_flooring
- https://www.cdc.gov/infection-control/guidelines/disinfection/
- Checking your browser – reCAPTCHA
https://www.ncbi.nlm.nih.gov/books/NBK174383/ - https://pubmed.ncbi.nlm.nih.gov/?term=environmental+cleaning+floor+disinfection