
Installing a vapor barrier under polyaspartic floors starts with choosing the right barrier and sealing it correctly—because moisture control is what prevents blistering, delamination, and early failure. This guide lays out the exact steps to prep the subfloor, roll and overlap the vapor barrier, tape seams, and protect edges before you pour or install your polyaspartic system. Follow it precisely and you’ll get a tight, continuous moisture barrier that performs predictably.




Installing a vapor barrier under polyaspartic floors is mainly about stopping moisture vapor migration from the concrete before you ever spread coating. If you prep the slab correctly and install a continuous membrane with sealed seams and detailed edges/penetrations, you dramatically reduce common failures like bubbles, blistering, and adhesion loss—especially when your slab’s moisture risk is non-trivial.
If you’re planning a polyaspartic system over a slab (garage floors, basements, or interior slabs on grade), a vapor barrier can be a “quiet” but decisive layer in the assembly. The key point is continuity: a membrane with gaps, unsealed overlaps, wrinkling, or poor perimeter detailing can still allow moisture to bypass the barrier and undermine the coating, even if the field looks covered.
When a vapor barrier is needed under polyaspartic

A vapor barrier is needed when your slab can transmit moisture vapor into the coating system faster than the polyaspartic can tolerate. In practice, that usually means elevated humidity/condensation risk, basements, slabs over questionable moisture conditions, or any situation where your manufacturer requires a barrier for the coating warranty.
A continuous vapor barrier becomes critical when the slab’s moisture vapor transmission rate can drive coating bubbling under polyaspartic systems.
Many polyaspartic warranties tie acceptable installation to moisture testing results and specific substrate assembly requirements, including whether a barrier is required.
Who this is for / when it applies:
This guidance is for contractors, facility managers, and homeowners coordinating polyaspartic coatings over concrete slabs where moisture conditions are uncertain or higher-risk (interior slabs on grade, basements, or older concrete). It’s also for anyone who wants fewer call-backs caused by blistering, loss of adhesion, or premature wear due to moisture movement.
Here’s how to decide, logically and in a defensible way:
1. Start with the polyaspartic system documentation. The coating manufacturer’s moisture requirements and installation specs determine whether a barrier is allowed, required, or prohibited for your conditions.
2. Evaluate moisture risk. If you’ve seen condensation patterns, persistent humidity, prior coating failures, or you’re coating over slabs with history of dampness, you should plan for barrier detailing from day one—not as an afterthought.
3. Plan for full coverage and continuity. A barrier must cover the coated footprint continuously (including transitions). Installing “only where the coating will be” often leaves bypass pathways at edges and corners.
A quick practical note: in many failures, the membrane is either discontinuous or not detailed at penetrations and the floor-to-wall junction. The barrier isn’t just “under” the floor—it’s part of a sealed assembly that must behave like one continuous plane.
Choose the right vapor barrier material and thickness
Choosing the right vapor barrier means matching the membrane type and install method to what your polyaspartic system allows. The “best” barrier on paper can still cause problems if seam treatment, compatibility, or primer/installation details don’t align with the coating manufacturer’s specification.
The coating system’s compatibility spec controls the barrier selection more than generic “plastic sheeting” rules of thumb.
If your barrier relies on tape, adhesive, or overlap geometry, the seam system is as important as the membrane thickness itself.
A manufacturer-approved membrane type helps prevent warranty disputes when moisture issues appear after installation.
In real-world terms, you typically have two categories to consider:
– Thin polyethylene sheets (commonly in the 6-mil range, depending on your project spec and the coating/system approval). These can work when allowed—but only if you can install without punctures and maintain sealed continuity.
– Specialized vapor barrier membranes designed for slab vapor mitigation, often with engineered seam treatments and performance characteristics.
What to verify before you buy
– Compatibility with the polyaspartic system. Some coating manufacturers explicitly state what barrier types/tapes/primers are acceptable. Others require a barrier membrane (not just sheeting). Always follow the coating spec as the “rule set.”
– Installation method requirements. Some systems expect specific adhesives, seam tape, or overlap width. If the membrane needs a particular seam technique to achieve continuity, that technique is part of the system.
– Substrate prep interaction. A barrier is only helpful if the slab prep and coating primer steps don’t puncture, peel, or physically disrupt the membrane continuity.
Concrete data points that matter here
– Many barrier systems use 6-mil (0.15 mm) polyethylene as a baseline thickness in commercial detailing practices (project- and manufacturer-dependent).
– Moisture-vapor mitigation decisions often reference ASTM moisture testing methods like ASTM F2170 (in situ RH) or ASTM F1869 (calcium chloride)—the actual limit values come from your polyaspartic spec, not from guesswork.
– Surface prep is frequently aligned to ICRI profiles (often CSP 3–5 for coatings depending on system design). The barrier doesn’t replace proper prep; it sits beneath a correctly prepared coating substrate.
(See: [ADD: source for ASTM/ICRI profile guidance used by your coating and barrier manufacturer])
Prep the concrete correctly before any barrier goes down
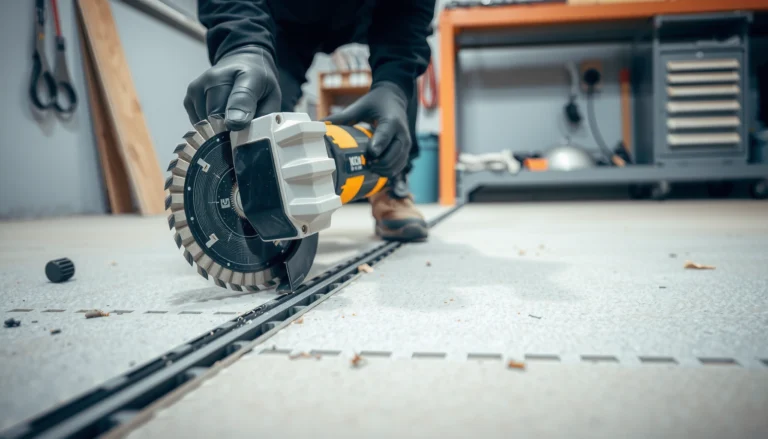
Prep determines whether the coating can bond and whether the membrane can lie flat without stressed seams. Before any vapor barrier is installed, you should mechanically prepare and thoroughly clean the slab per the polyaspartic/coating manufacturer’s required surface profile and cleanliness standard.
A vapor barrier is not a substitute for proper concrete surface profile; polyaspartic coatings still require the substrate profile the manufacturer specifies.
Dust removal and removal of laitance/curing residues are continuity issues for the coating system above the membrane, not just adhesion hygiene.
Direct answer for this step: Do the slab prep first—grinding/scarifying and cleaning—so the membrane can install on a stable, flat substrate with fewer wrinkles, voids, and puncture points.
Key steps:
1. Mechanically prepare to the required profile. Many systems require grinding/scarifying (not just pressure washing). The goal is a consistent surface profile that supports primer and topcoat adhesion.
2. Remove contaminants completely. Dust is the enemy of coating adhesion. Vacuuming is typically preferred over dry sweeping, and you should verify no powdery residue remains.
3. Address cracks, spalls, and irregularities before barrier installation. This matters because the barrier must lie flat. If you bury protrusions or sharp edges under the membrane, you create stress points where punctures and micro-tears can happen later.
From my experience on real job sites, the “fast” approach—cleaning only, skipping profile correction, and then trying to smooth a membrane over bad concrete—creates exactly the conditions that lead to seam failure and edge leakage later. Even if the membrane looks intact at installation, a stressed seam or trapped debris can break continuity under traffic, priming pressure, or material handling.
Also plan the sequence: you want the barrier to go in after the slab is prepped and cleaned, but before priming/patching operations that could damage the membrane.
Install the vapor barrier: continuity, seams, and edges
A successful vapor barrier installation is all about continuity: flat placement, correct overlaps, sealed seams, and properly detailed perimeter edges and penetrations. If any portion of the membrane system is discontinuous, moisture can migrate and compromise the coating performance even if the center of the slab “looks covered.”
Moisture bypass usually happens at seams, penetrations, and perimeter transitions—not in the middle of the membrane.
Overlap seams must be sealed using only the membrane’s specified tape/overlap method to maintain a true continuous barrier.
Penetrations (pipes, anchors, posts) require engineered tie-ins; leaving them unsealed is effectively the same as leaving a gap in the barrier plane.
Installation steps that protect continuity
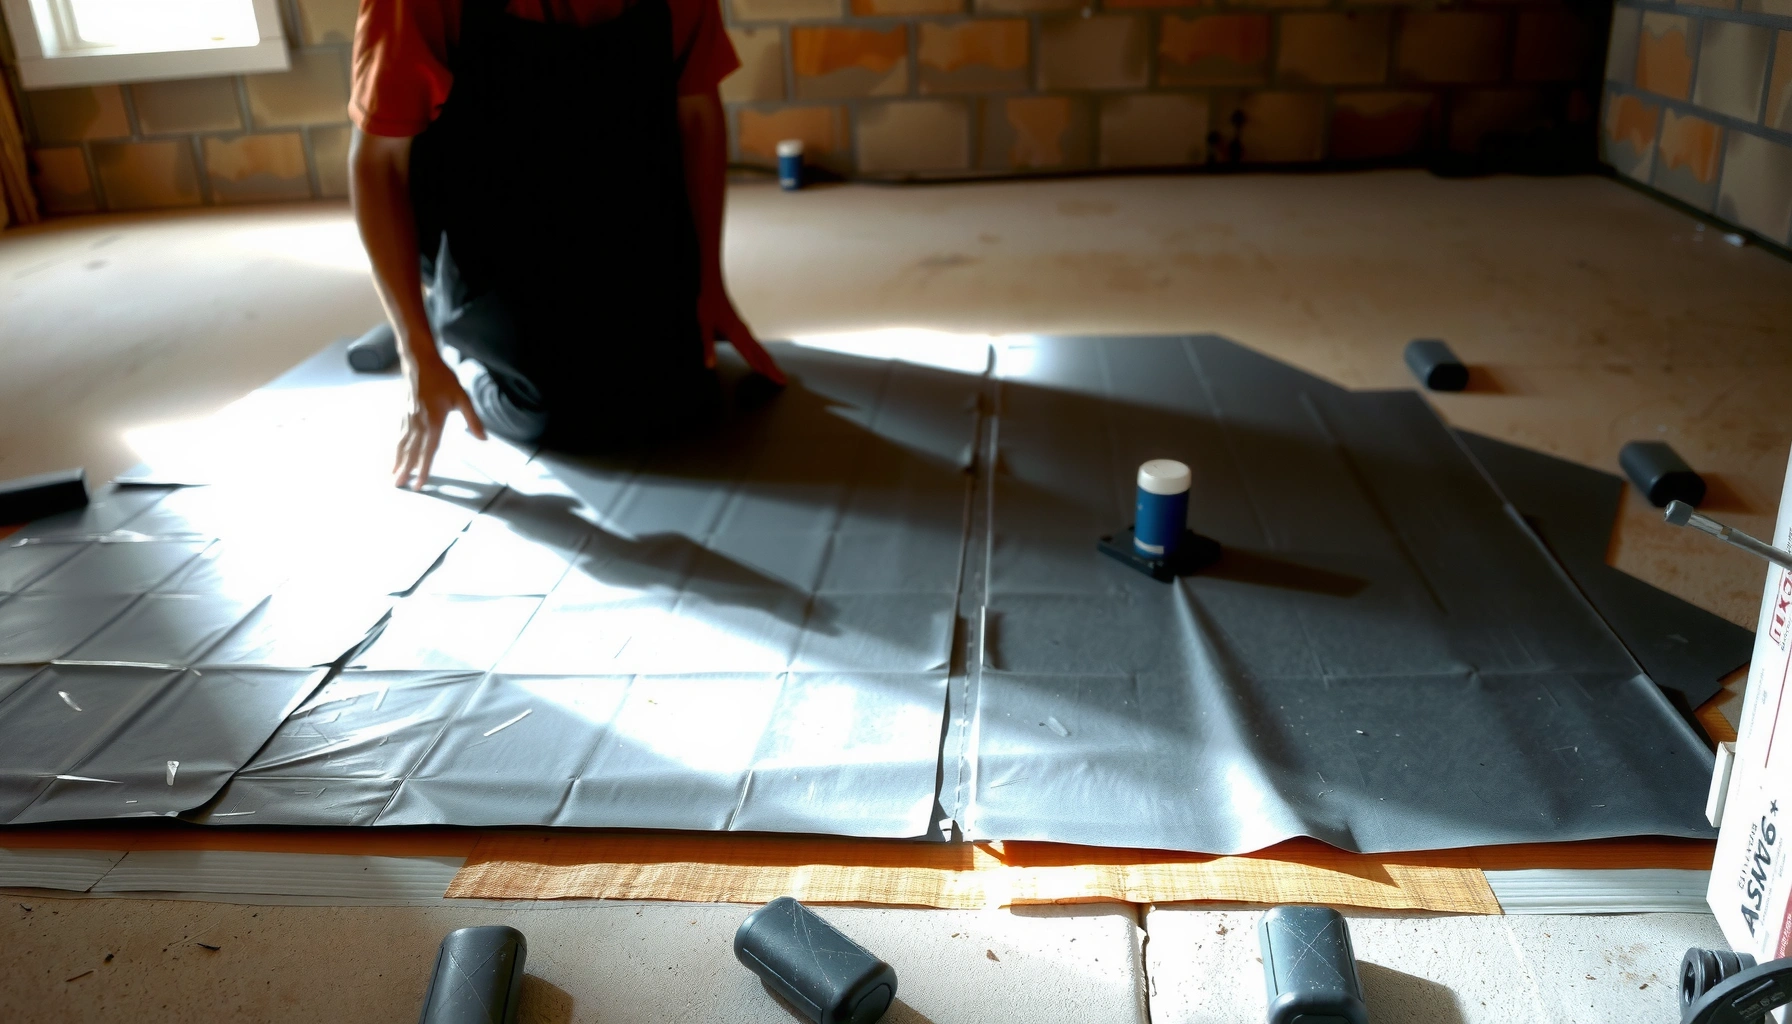
1. Cover the full area without cutting corners. Roll out so the barrier matches the entire coated footprint with extra at edges/penetrations to allow tie-in detailing.
2. Control wrinkles and lifting. Wrinkles and trapped air can become movement points when materials are staged and primers are applied.
3. Seal seams using the specified method. Follow the membrane manufacturer’s overlap dimensions and seam sealing approach (tape type, placement, and pressure requirements). Don’t substitute seam products unless the coating and barrier specs explicitly allow it.
4. Detail edges and transitions. Moisture can migrate through perimeter gaps. At doorways, floor-to-wall junctions, and penetrations, you need a deliberate tie-in approach so the membrane can’t bypass into the coating layer.
Real-world installation quality indicators
– Seams are fully sealed—no fishmouths, lifted tape edges, or dry spots.
– Membrane sheets are not stretched tight over voids that cause future micro-tearing.
– The barrier remains unpunctured during subsequent staging, primer application, and topcoat work.
Below is a practical “what matters most” summary that contractors can use during walkdowns.
Common Vapor-Barrier Failure Points Under Coatings (Typical Field Observations)
| # | Failure Point | What Usually Causes It | How Fast It Shows | Impact on Polyaspartic* |
|---|---|---|---|---|
| 1 | Unsealed seam overlaps | Tape/overlap method not per membrane spec | Weeks to months | ★★★★☆ |
| 2 | Wrinkles/fishmouths in the field | Membrane not smoothed before priming | Days to weeks | ★★★☆☆ |
| 3 | Perimeter bypass at walls | Edge tie-in not detailed/covered | Weeks to months | ★★★★☆ |
| 4 | Unpatched cracks under membrane | Void pathways remain under the plane | Months | ★★★☆☆ |
| 5 | Membrane puncture during work | Tools/ladders/debris damage layer | Immediate to weeks | ★★☆☆☆ |
| 6 | Wrong primer/substrate expectations | Barrier not accounted for in coating spec | Days to months | ★★☆☆☆ |
| 7 | Incomplete area coverage | Membrane stops short of planned perimeter | Weeks | ★★★☆☆ |
Impact ratings reflect likelihood of moisture-related coating performance issues based on typical moisture bypass mechanisms; always defer to your coating/barrier manufacturer specifications.
Apply the polyaspartic system over the barrier (so it doesn’t fail)
Applying polyaspartic over a vapor barrier succeeds when you respect the full assembly spec: barrier installation must be continuous, seams sealed, and the substrate condition must match what the coating system expects. If you rush forward after an incomplete membrane install, the coating can trap moisture pathways and reveal failures as bubbles, delamination, or loss of adhesion.
Polyaspartic performance depends on both moisture control and the exact substrate/primer conditions required by the system manufacturer.
Even a well-installed barrier can fail if subsequent steps puncture, shift, or dislodge the membrane.
Direct answer: Only proceed when you can document that the membrane is continuous and intact, and your concrete surface condition meets the polyaspartic system requirements.
Practical application checks:
1. Confirm barrier continuity and protection. Before priming, walk the floor to verify no lifted seams, no open overlaps, and no obvious punctures.
2. Respect coating compatibility constraints. Some systems specify how primers should be applied over certain barrier types (or whether primers are intended to bond directly to prepared concrete rather than to membrane surfaces).
3. Prevent uplift and movement. During priming and installation, barrier layers can shift if not properly installed or protected. That movement can break seams or open micro-gaps.
Moisture testing still matters here. Even with a barrier, many manufacturers require moisture test targets as part of warranty acceptance.
What can go wrong (and how to prevent it)
Most coating problems under polyaspartic come from moisture bypass routes: seam failures, edge detailing gaps, punctures, or missed moisture testing requirements. Preventing these comes down to documenting continuity and following both the vapor barrier and coating system specs without improvising.
Unsealed seams behave like hidden gutters that route moisture to the coating layer.
Perimeter transitions are where vapor barriers are most often discontinuous, especially at floor-to-wall junctions and penetrations.
Common failure modes (and prevention)
– Unsealed seams/overlaps: Even small gaps can become moisture pathways. Use only the seam method specified for your barrier membrane.
– Poor edge detailing: Detail at walls, corners, and penetrations—not just the main field. Moisture migration commonly shows up at perimeter patterns first.
– Barrier punctures during work: Foot traffic, ladders, and dropped tools can create holes. Protect the barrier and remove sharp debris before priming.
– Skipping moisture testing or manufacturer requirements: If your polyaspartic system requires testing and allowable limits, ignoring it increases the risk of blistering/delamination. Use the required moisture test method and targets documented by your system spec.
– [ADD: exact moisture test method/limit from your polyaspartic manufacturer, if available]
Pros/cons comparison to help you decide how strict to be
- Continuous vapor barrier (done to spec)
- Pros: Reduces moisture-driven bubbling risk; supports longer-term coating performance; helps satisfy warranty expectations when required.
- Cons: Requires careful seam/edge detailing; adds labor; mistakes can be hard to correct after polyaspartic is down.
- No barrier (only when allowed by system spec)
- Pros: Faster and fewer steps; fewer layers to manage.
- Cons: Higher risk if moisture vapor transmission exceeds coating tolerance; failures can appear later and cost more to remediate.
Verdict / tip: do it right, but know when to stop
A properly installed, continuous vapor barrier is one of the best ways to reduce moisture-driven problems under polyaspartic floors—especially when the coating manufacturer requires it or your slab’s moisture risk suggests it’s necessary. That said, a barrier is not automatically “good” in every scenario: using the wrong membrane/tape, installing seams incorrectly, or following a barrier approach the coating manufacturer hasn’t approved can create new failure risks.
If the polyaspartic system does not approve a vapor barrier for your application and moisture profile, adding one anyway can undermine warranty acceptance and performance.
When you can’t meet the barrier continuity and seam/edge detailing requirements, stopping and revising the plan is often cheaper than fixing coating failures.
Who should skip (or pause and get help):
– If you can’t confidently meet the system’s prep/testing requirements (surface profile, dust-free condition, moisture test method/limits).
– If the barrier type or seam tape you plan to use isn’t explicitly approved/compatible in the coating documentation.
– If the project involves complex penetrations/edge conditions without a documented tie-in method.
Quick checklist (scan/save)
– [ ] Verify your polyaspartic system’s requirements for moisture testing and vapor barrier use
– [ ] Mechanically prep concrete to the required surface condition
– [ ] Clean/remove all dust and contaminants
– [ ] Install membrane continuous over full area; prevent wrinkles and lifting
– [ ] Seal seams/overlaps using the membrane-specified tape/overlap method
– [ ] Detail perimeter edges and penetrations (no unsealed bypass paths)
– [ ] Prevent barrier damage during priming/installation
– [ ] Proceed to polyaspartic steps only when conditions match manufacturer specs
FAQ
Do I need a vapor barrier for every polyaspartic floor?
Not always. Many polyaspartic systems require or recommend barriers only when moisture vapor transmission risk exceeds their limits. Check your system’s moisture testing requirements and whether they specify a barrier.
Can I just use plastic sheeting instead of a rated vapor barrier membrane?
Sometimes—depending on what your polyaspartic manufacturer and the sheeting documentation allow. In most systems, you should use a membrane and seam/tape method that are explicitly approved/compatible with the coating system. [ADD: what your coating manufacturer specifies]
Should I seal the seams with tape or can I overlap and leave it alone?
You typically must seal seams/overlaps to keep the barrier continuous. Use only the seam treatment/tape method the membrane manufacturer (and/or coating system) specifies.
What happens if the vapor barrier gets punctured?
A puncture can create a direct moisture pathway, especially if it’s near seams or edges. Repair only if the membrane system documents a compatible repair method; otherwise plan for replacement.
Can I install the vapor barrier myself?
You can—if you can meet the system’s prep/testing/seam detailing requirements and document compatibility. If those details feel uncertain, it’s a good point to stop and have a professional develop an install plan that matches the coating warranty requirements.
Sources
– [ADD: Vapor barrier membrane manufacturer installation instructions (seam overlap, sealing method, and compatibility guidance)]
– [ADD: Polyaspartic floor/coating system manufacturer application spec (moisture testing method, allowable moisture limits, and whether a vapor barrier is required/approved)]
– [ADD: Any referenced concrete surface prep requirements from the polyaspartic manufacturer (cleaning/prep profile)]
– ASTM standards used for planning moisture testing workflows (e.g., ASTM F2170 for in situ RH and ASTM F1869 for calcium chloride), plus ICRI guidance for surface profile verification: [ADD: exact standard references your system requires]
A well-installed vapor barrier is less about adding “another layer” and more about creating a continuous moisture-controlled assembly beneath your polyaspartic floor. If you follow the coating system’s moisture testing and compatibility rules, mechanically prep the slab properly, and build a sealed membrane plane with meticulous seam and edge detailing, you set yourself up for a smoother installation and fewer moisture-related failures down the road.
Frequently Asked Questions
What vapor barrier is best under polyaspartic floors?
For polyaspartic floor systems, a common choice is a 6-mil to 15-mil polyethylene (PE) sheet or an engineered vapor barrier membrane rated for concrete slabs. Look for products specifically intended for concrete moisture control and confirm compatibility with polyaspartic flooring (bond strength and surface prep requirements). If you expect higher moisture vapor transmission, consider a heavier, specialty moisture-control membrane designed for slabs where RH or MVER is elevated.
How do I prepare the concrete slab before installing the vapor barrier for polyaspartic?
Start by cleaning the slab thoroughly—remove dust, paint, curing compounds, grease, and any contamination that could prevent proper sealing. Then repair cracks, spalls, and low spots so the polyaspartic floor will bond and flatten correctly; profile the concrete if your system requires it. Perform moisture testing (like ASTM F2170 or ASTM F1869) so you can choose the right vapor barrier thickness and installation method.
How do I install a vapor barrier correctly under polyaspartic flooring?
Roll out the vapor barrier sheet so it covers the entire floor area plus enough overlap at seams and up the wall perimeter to meet your system design. Overlap seams per manufacturer guidance (often 4–8 inches) and seal them with compatible vapor-barrier tape to prevent moisture migration. At penetrations (posts, pipes, drains), cut carefully and seal with flashing tape or approved gaskets so moisture cannot bypass the barrier, then install the required protection layer or spacing as specified.
Why do sealed seams and wall upturns matter under polyaspartic floors?
Moisture vapor often travels through the weak points of an assembly—especially at seam gaps, penetrations, and edges where the membrane turns up at the walls. If seams aren’t properly overlapped and taped, vapor can reach the polyaspartic resin and contribute to blistering, adhesion loss, or long-term performance issues. A continuous, sealed vapor barrier that wraps the perimeter helps keep the polyaspartic coating system stable and extends floor life.
Which installation method works best for polyaspartic floors with existing slabs or past coatings?
If you have existing coatings, you typically need to confirm they’re compatible and in sound condition—otherwise remove them to reach properly prepared concrete per your polyaspartic flooring requirements. For uneven slabs or difficult transitions, consider using a membrane system designed for conforming installation and proper sealing at edges and penetrations. The “best” approach depends on your moisture test results, slab condition, and whether you can achieve a flat, clean substrate for the vapor barrier and subsequent polyaspartic application.
📅 Last Updated: October 11, 2026 | Topic: How to install a vapor barrier under polyaspartic floors? | Content verified for accuracy and freshness.
References
- Vapor barrier
https://en.wikipedia.org/wiki/Vapor_barrier - Google Scholar Google Scholar
https://scholar.google.com/scholar?q=vapor+barrier+under+concrete+slab+floor+installation - Google Scholar Google Scholar
https://scholar.google.com/scholar?q=concrete+slab+moisture+epoxy+coatings+vapor+barrier+vapor+retarder - Google Scholar Google Scholar
https://scholar.google.com/scholar?q=polyaspartic+floor+moisture+mitigation+vapor+barrier - https://www.cdc.gov/mold/default.htm
- Mold | US EPA
https://www.epa.gov/mold - https://www.energy.gov/energysaver/crawl-space-encapsulation
- https://www.energy.gov/energysaver/crawlspace-moisture
- https://www.who.int/news-room/fact-sheets/detail/household-energy-and-health
- Checking your browser – reCAPTCHA
https://www.ncbi.nlm.nih.gov/books/NBK14064/