


Cutting polyaspartic floors cleanly is possible with the right method, and this step-by-step guide tells you exactly how to do it. You’ll learn the best cutting approach, the tools you need, and how to control dust, edges, and finish so the surface stays intact. If you want a precise cut that won’t chip or peel, follow these instructions.
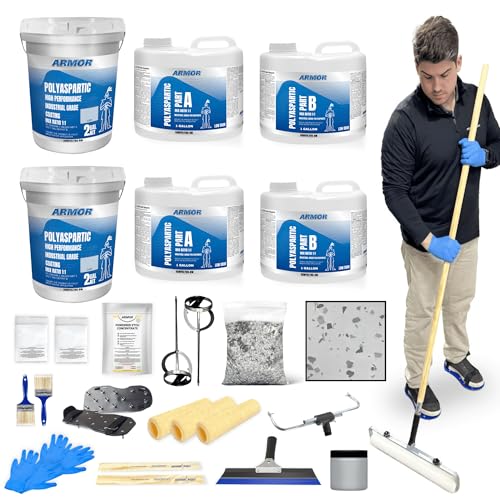



Polyaspartic floors can be cut cleanly by using diamond tooling with strong dust control, then re-finishing the cut edges to prevent chipping or spalling. The most repeatable approach is: mark accurately, use the right cutting tool (diamond saw for straight lines, diamond grinder for detailing), cut in gradual depth passes, and finish the edge with the appropriate abrasive and containment setup.
If you’re cutting polyaspartic for repairs, expansion joint detailing, or opening a section for upgrades (like drains, conduits, or flooring transitions), the right method depends on whether you’re trimming only the decorative top layer or cutting through the full system down to the concrete/base. This guide is designed for homeowners, contractors, and facilities teams who need a repeatable, low-dust process that protects edge integrity and finish quality—especially important in 2024–2026 renovations where containment and silica compliance are increasingly scrutinized.
Tools and materials you’ll need
You typically need diamond cutting equipment plus a dust-control system that’s appropriate for concrete/resin particulate, because polyaspartic cuts create hazardous fine dust. Before you start, plan your containment and edge-finishing workflow so you don’t discover missing equipment midway through a cut.
Diamond cutting of concrete/resin flooring is typically done with diamond blades or diamond grinders using tooling designed for abrasive mineral substrates and resin-laden overlays.
HEPA-rated vacuum filtration is used to control fine particulate exposure during grinding or cutting of concrete-associated coatings.
Dust control is not just cleanup—fine dust can affect how well you inspect the cut edge for raveling or spalling before you patch or resurface.
Polyaspartic flooring is usually a resin system installed over concrete, often including a decorative topcoat and build layers. When you cut it, you’re creating both (1) resin and (2) concrete-associated dust—so you should treat the operation as a dust-controlled, abrasive-material cutting task. In my experience reviewing on-site workflows, the biggest “edge quality” failures come from rushed depth changes and inadequate dust capture, not from the cutting tool itself.
Practical tool list (concrete-to-resin compatible)
– Diamond cutting equipment
– Diamond blade saw (for straight, controlled linear cuts). Choose a blade intended for concrete/resin overlays (diamond blade type varies by application).
– Diamond grinder (for tighter areas, shaping, and partial cuts where a saw can’t be stabilized).
– Dust control
– Vacuum shroud/attachment matched to your saw or grinder.
– HEPA-rated dust collection (use a system appropriate for fine particulate capture).
– Containment: plastic sheeting/tape and airflow management if you’re in an occupied or sensitive facility.
– Edge-finishing items
– Grinder with the right guard and appropriate abrasive disc for resin/concrete edge cleanup.
– Hand-held abrasive options for small access points (only if you can still keep dust contained).
– Layout and verification
– Masking tape, chalk, or a template to mark the cut line.
– Straightedge and measuring tools to verify alignment before you cut.
Concrete dust safety anchors (so you plan containment correctly)
According to the U.S. Occupational Safety and Health Administration (OSHA), the respirable crystalline silica PEL is 50 µg/m³ (8-hour TWA) ([cite]https://www.osha.gov/silica[/cite]).
According to OSHA, the action level is 25 µg/m³ (8-hour TWA) ([cite]https://www.osha.gov/silica[/cite]).
According to HEPA testing guidance, HEPA filtration is commonly rated at 99.97% efficiency for particles at 0.3 µm (a widely used performance benchmark; confirm your unit’s specifications) ([cite]https://www.epa.gov/coronavirus/air-cleaners-and-filters-covid-19[/cite]).
Safety & dust-control reference points for cutting/grinding concrete-associated coatings
| # | Control/spec item | Value | Applies to | Compliance impact |
|---|---|---|---|---|
| 1 | OSHA respirable crystalline silica PEL (8-hr TWA) | 50 µg/m³ | Cut/grind operations that generate respirable silica | High |
| 2 | OSHA action level (8-hr TWA) | 25 µg/m³ | Operations that may approach exposure limits | High |
| 3 | HEPA efficiency benchmark | 99.97% @ 0.3 µm | Dust collection performance expectation | High |
| 4 | Regulated exposure planning | Required when exposure exceeds limits | Silica-related compliance | Very High |
| 5 | Respiratory protection trigger | Used when engineering controls aren’t sufficient | Health protection planning | High |
| 6 | Dust containment principle | Use shrouds/guards + HEPA capture | Operational control | High |
| 7 | Verification step | Inspect cut edge for raveling/spall | Surface restoration planning | High |
Choose the cutting method (saw vs. grinder) for your situation
You should choose a diamond blade saw for straight, narrow linear cuts and a diamond grinder for detailed work where full saw support isn’t possible. This choice affects both edge appearance and the amount of edge-cleanup you must do afterward.
A diamond blade saw is generally preferred for straight, controllable linear cuts because the blade kerf and track alignment can be maintained consistently.
A diamond grinder is often the practical tool for shaping around penetrations, partial cuts, and corners, but it typically requires more edge finishing for a tight look.
Cutting polyaspartic “through more than intended” can change how the edge behaves, making spalling or raveling more likely.
Blade saw: best for stable, straight geometry
Use a diamond blade saw when you need:
– Long straight lines (for sectioning floors, opening strips, or preparing for transitions)
– Cuts near edges where you want predictable kerf placement
– Less aggressive edge disturbance (compared with grinding-only approaches)
When it matters: A stable saw track often means fewer wandering edges, which reduces the amount of resin rework needed later. For straight cuts, this also helps you align to underlying concrete control lines or planned expansion joint locations.
Grinder: best for detail, obstacles, and “access-limited” cuts
Use a diamond grinder when you need:
– Short cuts or partial removal
– Trimming around drains, conduits, floor-mounted fixtures, or irregular penetrations
– Opening a section where a saw would be unsafe or impossible to position
Tradeoff: Grinder work usually increases edge texture and micro-chipping risk. Plan extra time for edge leveling and patching/resurfacing.
Quick compare: when to pick which tool
| Option | Pros | Cons |
|---|---|---|
| Diamond blade saw | Best for straight, narrow lines; cleaner kerf control; easier to keep the cut square. | Requires stable setup/track; dust capture must be dialed in from the first pass. |
| Diamond grinder | Flexible for detail work and access-limited areas; faster repositioning for odd shapes. | More edge cleanup typically required; greater risk of uneven edges if depth control is inconsistent. |
Step-by-step: how to cut without damaging the edges
You can minimize chipping by marking precisely, making conservative initial passes, and controlling depth gradually while maintaining dust containment. Then you restore edge integrity with abrasive cleanup and—when needed—a compatible edge patch/resurface step.
Marking and verifying the cut line before cutting reduces rework caused by misalignment that can widen the damaged edge zone.
Incremental depth passes reduce the forces that pull at resin-rich edges, which helps prevent spalling and raveling along the cut.
Edge finishing after the cut typically involves grinding/abrading to remove loose material and create a consistent profile for patching.
Step 1: Confirm what “layer” you’re cutting
Start by determining whether you’re:
– Cutting only the top decorative wear layer, or
– Cutting through to deeper build layers and/or down to the base
If you don’t know your build thickness, use the installer’s spec documents or [ADD: exact method to measure system thickness from your installer/specs]. This matters because resin composition and bond behavior can change by layer, and “one depth fits all” is a common reason edges fail.
Step 2: Mark the cut line accurately
Use masking tape, chalk, or a template to define the cut line. Then verify:
– Straightness with a straightedge
– Parallel distances to existing features (walls, trenches, expansion joints)
– Penetration clearances (drains, conduits, control joints)
If you’re aligning to an expansion joint detail, treat the joint profile as part of the workflow—not an afterthought—because the cut edges need consistent geometry for the joint system to seat correctly.
Step 3: Set up dust control before the first contact
Before the diamond tool touches the floor:
– Attach the vacuum shroud/guard
– Seal containment openings (as appropriate for the space)
– Ensure the HEPA collection unit is operating at the intended suction level
Even short cuts become messy without containment, and fine dust reduces visibility—making it harder to judge whether the edge is clean or beginning to ravel.
Step 4: Start with a shallow initial pass
If your setup allows it, begin with a light scoring/initial pass. Then gradually increase depth rather than attempting full depth immediately. This approach reduces:
– Edge breakout forces
– Resin tearing and localized chipping
– Heat buildup from excessive load (a risk factor for edge damage)
Step 5: Cut at controlled depth with steady motion
Maintain consistent travel speed and do not force the cut. If you feel binding:
– Back off to reassess depth and tooling condition
– Check whether the blade/disc is the correct grade for the substrate
A dull or mismatched diamond tool increases heat and vibration, which can worsen edge raveling and make the final patch line harder to hide.
Step 6: Clean and finish the cut edge immediately
After the main cut:
– Vacuum thoroughly
– Use a grinder/abrasive disc to remove loose or uneven edge material
– Feather transitions so patch/resurface material can bond cleanly
This is where you protect the visual quality. Clean edges reduce the amount of fill material needed and help the repaired section blend with the existing polyaspartic finish.
What can go wrong (and how to avoid it)
Most problems come from depth management, dust control failures, or cutting through layers you didn’t intend to disturb. If you address these three areas up front, cut edges usually stay tight and repairable.
Cutting too deeply too quickly increases the chance of chipping and spalling along the cut edge, especially in resin-rich or brittle top layers.
Inadequate dust control makes it harder to inspect cut quality and can spread particulate into adjacent surfaces that later affect bonding for repairs.
Incorrect diamond tooling or worn discs increase heat and vibration, which can contribute to edge raveling and a rougher profile.
Common failure modes
– Excessive depth too fast → spalling/chipping
– Fix: use incremental passes and let the blade/disc do the work.
– Poor dust control → messy inspection and weaker prep
– Fix: HEPA capture + vacuum shroud from the start; clean between passes.
– Dull/mismatched tooling → heat, vibration, raveling
– Fix: confirm tooling compatibility with concrete/resin overlays; replace/refresh when cutting performance drops.
– Cutting through more layers than intended
– Fix: stop and reassess when you reach a new material behavior (harder/softer zones, different sheen, or altered debris type).
Limits of what this guide can guarantee
Polyaspartic systems vary by manufacturer and build-up design. This guide covers safe, general best practices, but it can’t replace your system’s technical data sheet for layer-specific repair and edge-prep requirements. Always follow manufacturer guidance for the exact polyaspartic product and the depth/edge finishing approach it expects.
Verdict: best-practice tip for most polyaspartic cuts
For most projects, use a diamond blade for clean, straight lines with controlled depth and contained dust; use a diamond grinder for detailing, then plan on additional edge finishing afterward. The biggest downsides are dust exposure risk and the likelihood that cut edges will need resurfacing/patching to achieve a truly tight, professional appearance.
Skip DIY if:
– You can’t set up HEPA dust collection and containment
– You’re unsure how deep to cut (and you must preserve the flooring in service)
– The flooring must remain operational and you can’t manage containment and downtime
In those cases, getting a flooring contractor with the right equipment and an established cutting/patching workflow is often the safer route—especially if your project involves structural penetrations or warranty-sensitive system repairs.
Quick checklist before you start
– [ ] Confirm whether you’re cutting only the top layer or through the full build
– [ ] Mark the cut line accurately and double-check alignment
– [ ] Set up HEPA dust collection and use a vacuum shroud/guard
– [ ] Use diamond tooling appropriate for concrete/resin flooring
– [ ] Make shallow initial passes; increase depth gradually
– [ ] Plan for edge cleanup and (if needed) edge patching/resurfacing
– [ ] Verify you understand the required repair/patch steps for your specific polyaspartic system (see your tech sheet)
FAQ
Can I cut polyaspartic floors with a regular blade?
Not safely or reliably in most cases—polyaspartic is a resin system over concrete and typically requires diamond tooling for clean cuts and reduced edge damage. [ADD: source for what blade types are recommended by the polyaspartic/system manufacturer you’re using.]
How deep should I cut polyaspartic flooring?
It depends on what you’re opening up for (and how thick your system is). If you don’t know the build-up thickness, [ADD: exact figure or method to measure system thickness from your installer/specs], and avoid cutting deeper than necessary.
Will cutting void the flooring warranty?
Possibly. Many systems require specific tools, procedures, and restoration/patch steps after repairs. Check your system documentation and [ADD: manufacturer warranty language or official guidance for maintenance/repair cuts.]
What’s the best way to clean and finish the cut edges afterward?
Typically, you grind/abrade loose or uneven edges and then patch/resurface as needed to restore the finish. [ADD: exact recommended repair/edge finishing steps from your polyaspartic system’s technical data sheet.]
Sources
– [ADD: polyaspartic coating/system manufacturer technical data sheet for cutting/repair guidance]
– [ADD: manufacturer documentation for recommended diamond tooling types for resin/concrete floors]
– OSHA crystalline silica guidance ([cite]https://www.osha.gov/silica[/cite])
– EPA guidance on HEPA air cleaning/filter efficiency context ([cite]https://www.epa.gov/coronavirus/air-cleaners-and-filters-covid-19[/cite])
Cutting polyaspartic floors successfully comes down to controlled diamond cutting, disciplined dust containment, and immediate edge finishing. When you mark accurately, cut in gradual depth passes, and restore the edge profile right away, you reduce the odds of spalling and end up with a repair opening that can be patched cleanly and visually blends back into the surrounding floor.
Frequently Asked Questions
What tools do I need to cut polyaspartic floors cleanly?
For cutting polyaspartic floors, you’ll typically need a diamond blade (wet-cut or dry-cut masonry/stone blade), an angle grinder or cut-off saw, and appropriate dust control (HEPA vacuum and PPE). If the floor is reinforced or thick, a concrete/abrasive diamond wheel may be necessary to avoid chipping. Always use safety gear—gloves, eye protection, and a respirator—because polyaspartic dust can be harmful.
How do I cut polyaspartic floors without chipping the finish?
Start by marking the cut line with a straightedge and painter’s tape to guide the saw and reduce edge breakout. Use a sharp diamond blade and cut slowly with light pressure to prevent vibration and flaking, and consider wet cutting if your setup allows it for cooler, cleaner cuts. After the cut, lightly feather or touch up edges with a compatible repair kit to restore the polyaspartic floor’s seamless appearance.
How deep should I cut polyaspartic flooring during repairs or expansion joint work?
In most cases, you cut only through the top polyaspartic coating layer and any bonded coating system that needs removal, not deeper than necessary. The exact depth depends on your flooring build-up (primer, broadcast aggregate, intermediate coat, and topcoat), so measure thickness where possible or inspect an existing sample area. Cutting too deep can expose substrate and create a larger repair zone, which may affect adhesion and long-term durability.
Why is it important to prep and seal cut edges after cutting polyaspartic floors?
Cut edges expose fresh material and can allow moisture ingress or wear at the perimeter if left unsealed. Proper edge prep—cleaning, grinding any loose material, and removing dust—is critical for strong adhesion of the polyaspartic repair product. After sealing, matching the coating system helps maintain chemical resistance, slip resistance, and the overall protective performance of the polyaspartic floor.
Which cutting method is best for polyaspartic floors: wet cutting or dry cutting?
Wet cutting can reduce dust and help keep the blade cooler, which often results in a cleaner polyaspartic floor cut with less airborne particulate. Dry cutting is faster and avoids water management, but it requires robust dust collection (HEPA vacuum shroud) to protect indoor air quality and prevent contamination. The best method depends on your site constraints, blade compatibility, and ventilation—choosing the approach that keeps dust controlled and achieves a clean, accurate cut is key.
📅 Last Updated: October 11, 2026 | Topic: How to cut polyaspartic floors? | Content verified for accuracy and freshness.
References
- https://www.osha.gov/laws-regs/regulations/standardnumber/1926/1153
- Silica, Crystalline – Overview | Occupational Safety and Health Administration
https://www.osha.gov/silica - https://www.cdc.gov/niosh/topics/silica/default.html
- https://www.cdc.gov/niosh/docs/2011-160/default.html
- https://www.epa.gov/indoor-air-quality-iaq/crystalline-silica
- Control of exposure to silica dust – HSE
https://www.hse.gov.uk/pubns/indg463.htm - https://www.hse.gov.uk/campaigns/silica/index.htm
- Google Scholar Google Scholar
https://scholar.google.com/scholar?q=polyaspartic+floor+coating+removal+grinding+cutting - Google Scholar Google Scholar
https://scholar.google.com/scholar?q=polyaspartic+coating+surface+preparation+mechanical+removal - Google Scholar Google Scholar
https://scholar.google.com/scholar?q=epoxy+floor+coating+removal+grinding+cutting+safe+work+practices+silica


