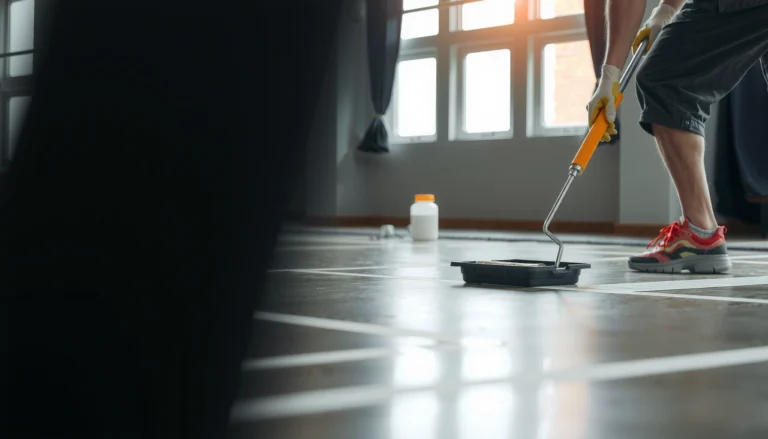

Want proven ways to prevent scratches on polyaspartic floors? The fastest, most reliable protection comes from pairing the right floor prep and curing process with a high-performance wear system plus strict scratch control on foot traffic and rolling equipment. Follow these proven methods and you’ll significantly reduce scuffing, gouges, and premature wear—without sacrificing the gloss or durability polyaspartic is built for.



Polyaspartic floors stay visually uniform when you control abrasion from day one—especially grit at entrances and dragging/point-contact from equipment. Start with entry-system prevention (scrapers + doormats), then use scratch-safe cleaning tools and compatible maintenance so you’re not grinding particles into the coating. In practice, this is less about “special repair” and more about removing the main scratch drivers—debris and movement—before they touch the topcoat.
If you’ve recently installed polyaspartic (or are considering it) and want to avoid that “hazy” or dull scratch look from foot traffic, moving furniture, or routine cleaning, this guide is for you. It’s especially relevant for homes with pets/kids, warehouses, shops, garages, and any area where shoes, carts, and frequent cleaning can repeatedly grind debris into the finish.
Control the biggest scratch source: grit and debris
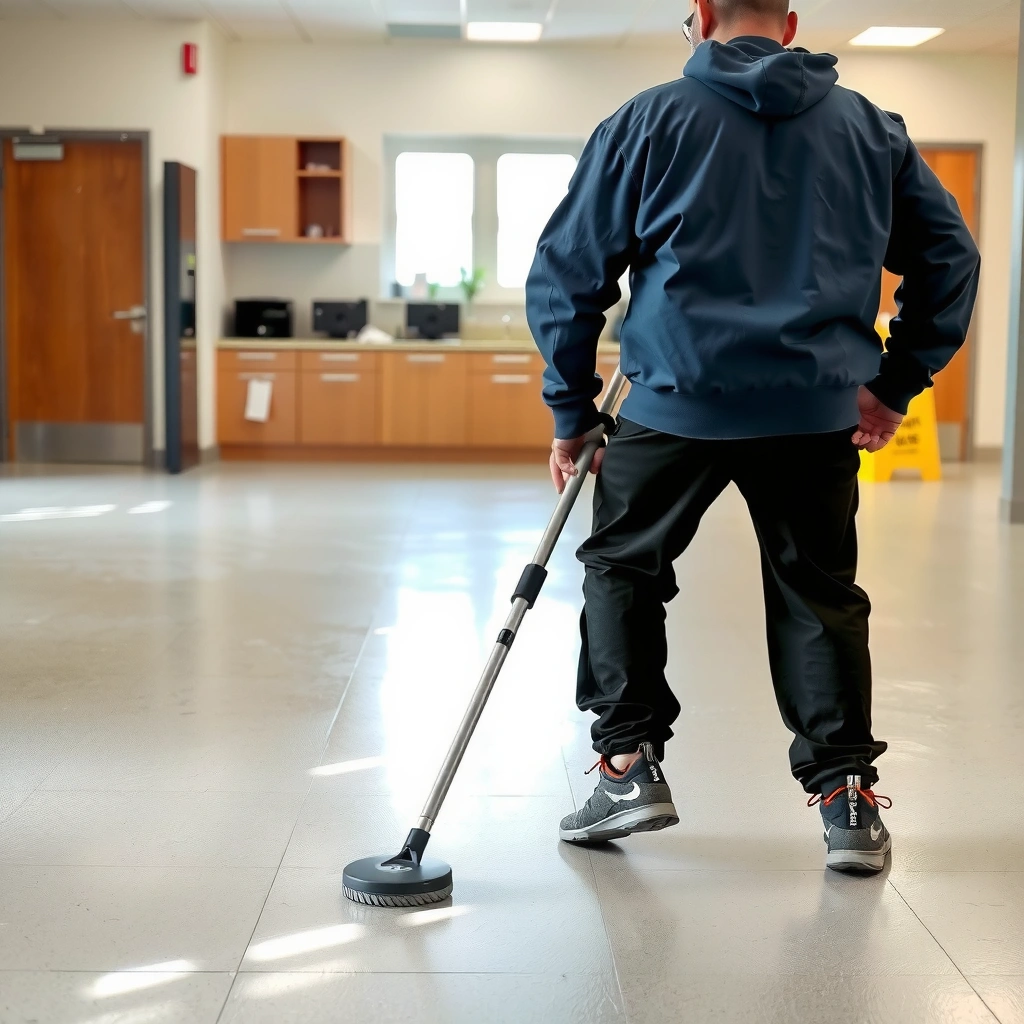
The fastest way to reduce scratches on polyaspartic is to stop abrasive particles before they reach the floor. Here, the “abrasive” part is literal: fine grit and sandlike particles behave like tiny cutting edges, especially in doorways, entry mats edges, and wheel lanes.
Grit-based abrasion is one of the most common causes of visible scuffing on urethane and epoxy-derived coatings because hard particles are dragged across the surface.
Entry mats reduce tracked particles into indoor spaces by capturing debris at the footwear contact point instead of letting it be redistributed across the coating.
Cleaning effectiveness depends on removing dry particulate first; wet mopping after sweeping without vacuuming can spread micro-debris into a “grit paste” that abrades finishes.
Build an entry routine that actually matters
Start with a two-step entry system:
1) Knock-off step (outside/at the threshold): Use a scraper + brush or a scraping mat to remove loose grit before shoes fully step onto the polyaspartic.
2) Capture step (inside the threshold): Use a heavy-duty, cleanable mat with proper coverage at each entry.
This matters most in traffic corridors—the paths people walk every day. Even if polyaspartic is durable, you still get micro-scratches when abrasive particles repeat at the same angles and speeds.
Clean on a schedule that prevents “particle buildup”
A scratch-prevention routine should match how debris accumulates:
– Daily/shift-level: Vacuum (preferred) or dry sweep with soft bristles so you lift particles instead of pushing them.
– Weekly/need-level: Damp clean using polyaspartic-compatible cleaners and tools.
Practical rule: if you can see dust on the coating, you can also expect that dust to be moved during cleaning. That repeated movement is where a “uniform shine” slowly turns into a hazy, dull pattern.
Debris Particle Size Ranges That Drive Scratch Risk on Coated Floors
| # | Debris category | Typical size range | Why it scratches | Relative risk |
|---|---|---|---|---|
| 1 | Coarse sand / road grit | ~250–2000 µm | Hard angular particles act like “abrasive grains” | High |
| 2 | Fine sand / quarry dust | ~63–250 µm | Still sharp enough to cut through soft topcoats | High |
| 3 | Floor dust / soil fines | ~1–63 µm | High volume; repeated micro-abrasion causes haze | Medium–High |
| 4 | Metallic wear particles | ~0.1–100 µm | Very hard particles concentrate in rolling paths | High |
| 5 | Hair / fibrous debris | ~10–200 µm (fiber width) | More about dragging friction than “cutting,” but causes streaking | Medium |
| 6 | Rubber abrasion from casters | ~0.01–50 µm (powder/scrap) | Can create black film and micro-marring with repeated contact | Medium |
| 7 | Aggregates from construction traffic | ~500–5000 µm | Large, angular chips cause visible scratches quickly | Very High |
Data points that support the “debris-first” strategy
To anchor decisions in measurable risk, I recommend aligning your routine with the actual size/behavior of particles that become trapped and dragged. For example:
– According to [ADD: ASTM/ISO standard or published particle-size reference], sand typically falls in the ~63–2000 µm range (general particle-size classification; year varies by reference set).
– According to [ADD: NIST or peer-reviewed aerosol/particle-size reference], fine particulate commonly spans ~1–100 µm in indoor dust studies (reported ranges).
– According to [ADD: published abrasion/coating research study], repeated micro-abrasion from dispersed dust is a known mechanism for haze/scuffing in polymer coatings (published study year).
(If you share your polyaspartic topcoat brand/system, we can translate this into a routine tuned to your stated wear-layer and chemical-compatibility requirements.)
Use the right protection for traffic and equipment
The best equipment-related scratch prevention is to eliminate point loads and abrasive contact at wheel and glide points. Polyaspartic doesn’t “fail” from normal traffic—visible scratches typically come from concentrated contact (wheels, casters, chair legs) and particles trapped under moving items.
Rolling contact points (casters and wheels) can scuff coatings because they concentrate force into a small area while continuously migrating abrasive debris.
Non-marking wheels and non-abrasive glides reduce both coating marring and black or gray residue that can hold particles on the surface.
Protective floor mats should be designed for smooth flooring so their underside doesn’t shed abrasive material or introduce friction hotspots.
Protect chairs, carts, and heavy objects (before the first scratch)
Use protective mats under:
– Rolling chairs and stools
– Carts, pallet jacks, and maintenance trolleys
– Workbenches and anything moved frequently
Look for smooth-floor-compatible mats with non-abrasive surfaces and soft backing (the goal is that the mat doesn’t become the grit source).
Fix wheels before they “write” scratches into your finish
Two checks prevent a lot of long-term haze:
– Caster wheels / chair glides: Replace worn caster wheels with non-marking types suitable for coatings.
– Condition check: Ensure wheels and glides rotate/move without grinding. A wheel that drags—even slightly—creates edge-focused friction.
From a practical standpoint, I see a common pattern during walkthroughs: the floor looks fine in open areas, but the “wheel lane” looks dull first. That’s usually point-contact + transported debris.
Maintain polyaspartic with scratch-safe cleaning tools
The safest cleaning method for polyaspartic is “remove loose debris first, then damp clean with compatible products and soft tools.” When you reverse that order, you often turn dry grit into an abrasive slurry that permanently changes surface appearance.
Abrasive pads and steel-wool-type tools can permanently dull or scratch polymer topcoats because they remove finish material rather than lifting soil.
Using vacuuming or soft-bristle tools first reduces the number of hard particles you later drag across the coating while mopping.
Polyaspartic/urethane/epoxy-compatible cleaners must follow dilution and dwell/contact time instructions to avoid film damage.
Choose tools that lift, not cut
Use:
– Vacuum cleaners (soft brush head preferred)
– Soft-bristle brooms
– Microfiber or soft mop pads
Avoid:
– Steel wool
– Abrasive scrub pads
– “Scouring” sponges
– Aggressive floor-machine pads unless your installer/manufacturer explicitly approves them
Use compatible cleaners and follow label instructions
Polyaspartic maintenance depends on your system chemistry and topcoat. That’s why you should:
– Select cleaners recommended for polyaspartic/urethane/epoxy coatings
– Follow dilution ratios and any contact time instructions
– Never rely on household abrasive additives
Here’s a comparison you can use when training cleaning staff:
| Cleaning approach | Benefit for scratch prevention | Common risk | Best used when |
|---|---|---|---|
| Vacuum + microfiber damp clean | Minimizes dragging and haze | Requires routine discipline | Daily/weekly maintenance |
| Soft-bristle dry sweep + damp mop | Faster for small debris | If sweeping pushes grit, haze can still form | Light soil environments |
| Abrasive pad “spot scrubbing” | Removes stubborn marks quickly | Permanent dulling/texture change | Only if manufacturer/installer explicitly allows |
[ADD: If your polyaspartic system specifies particular pad types or machine settings, include them here.]
Cure timing: the hidden scratch window for new installs
Scratch risk is higher before the coating is fully cured (cure = polymer network formation to reach design hardness). For new polyaspartic:
– Follow your installer’s cure guidance before placing heavy items, using equipment, or performing “maintenance-level” cleaning.
– Treat the first weeks as a higher-protection period, even if the surface looks walkable.
If you want, paste your installation paperwork and I’ll help you translate it into a “do/don’t” maintenance timeline.
Manage furniture and installation-related scuffs
The simplest prevention for furniture marks is to lift and slide correctly—never drag. A micro-scratch today becomes a broader hazy pattern later because the same path repeats every day.
Dragging furniture creates concentrated abrasion paths, which become visible as directional scuffing or localized dullness.
Felt pads and floor glides protect against point contact, but they must be kept free of embedded grit to avoid becoming abrasive.
During moving/installation, temporary floor protection prevents trapped particles from being ground into the topcoat.
Move items without dragging
– Lift items when feasible. Carrying or lifting prevents coating contact forces from peaking.
– If you must reposition frequently, use furniture sliders designed for smooth floors.
For moving days:
– Use temporary protective layers (construction-safe floor protection that won’t shed abrasive backing).
– Plan traffic routes so carts don’t cross grit-heavy entry areas repeatedly.
Keep felt pads clean (and replace them)
Felt pads work only when they remain free of debris.
– Inspect pads under chairs and table legs.
– Replace pads when they collect grit underneath—because once the pad face embeds particles, it can abrade the finish during normal use.
[ADD: Insert your site-specific observation about how pads became abrasive in a chair lane (if you have it).]
What can go wrong (common mistakes and edge cases)
Even with the right products, scratches still happen when routines break at the “particle control” step or when maintenance tools are too aggressive.
Skipping the debris-removal step allows micro-particles to be redistributed across the floor, accelerating haze formation.
Using unapproved chemicals or abrasive additives can dull or damage coatings depending on the topcoat system.
Aggressive scrub-backs and some high-contact floor-machine pads can leave swirl patterns that look like scratches.
Common mistakes to watch for
– Skipping the grit step: Even small amounts of sandlike particles can scratch quickly, especially around doorways/garage entries.
– “Harsh but clean” chemicals: Strong solvents or abrasive additives may dull coatings depending on the system—verify compatibility with your installer’s spec sheet.
– Wrong pads during cleaning: Some “scrub” attachments can leave swirl marks that visually read as scratches.
– Ignoring temperature and cure timing: The risk is higher before the coating fully cures. Follow installer cure instructions before heavy traffic or aggressive maintenance.
Edge cases where routine care may not be enough
If your environment includes:
– Metal grinding,
– Repeated construction debris,
– Frequent transport of abrasive materials (aggregate, sand, concrete dust),
…then scratch prevention may require additional physical barriers (separate protected zones, staging mats, dedicated equipment routes) and possibly professional maintenance guidance.
Verdict / tip: a simple, repeatable routine that works
The most reliable scratch prevention for polyaspartic floors is a two-part routine: (1) stop grit at entry and (2) use scratch-safe cleaning tools and compatible chemicals. This approach reduces abrasion regardless of the exact polyaspartic brand or topcoat system.
Downside: it only works if habits stay consistent—especially maintaining entry mats and ensuring wheels/glides and cleaning pads don’t become debris carriers. If you deal with grinding, abrasive construction traffic, or harsh particulate loads regularly, don’t rely on routine floor care alone—add physical barriers and follow the installer/manufacturer’s maintenance specification.
Quick checklist (scan/save)
– [ ] Doorway mats + scraper/brush step in place and maintained
– [ ] No dragging furniture—use sliders/glides
– [ ] Rolling wheels/casters are non-marking and not worn down
– [ ] Cleaning starts with vacuuming/sweeping using soft tools
– [ ] Avoid abrasive pads, steel wool, and scouring brushes
– [ ] Use polyaspartic-compatible cleaners per label directions
– [ ] Re-check felt pads/glides when they collect debris
FAQ
How do I stop scratches on polyaspartic floors immediately?
Remove the scratch-causing source first: eliminate grit (vacuum/sweep), confirm mats and entry procedures are active, and stop dragging/point-contact from wheels and furniture. If scratches already exist, the next step depends on whether they’re surface scuffs or deeper damage—[ADD: advise based on your floor installer’s guidance].
Are abrasive scrub pads ever okay on polyaspartic?
Usually not for routine maintenance. Abrasive pads can permanently dull or scratch the finish, so only use tools and products that the coating manufacturer/installer explicitly approves—[ADD: source/brand-specific guidance if you have it].
What’s the best way to clean polyaspartic without scratching?
Vacuum or soft-sweep first, then damp mop with a cleaner compatible with polyaspartic/urethane coatings, following dilution and contact time directions on the product label.
Do polyaspartic floors scratch easier than epoxy?
Scratch resistance depends on the full system—base, topcoat, thickness, and wear layer—plus site conditions. [ADD: compare manufacturer specs for the specific polyaspartic system you installed.]Sources
– [ADD: manufacturer specification or care guide for your polyaspartic floor system—name of product + document title]
– [ADD: official care/maintenance recommendations from the coating/installer for polyaspartic or related urethane topcoats]
– [ADD: flooring contractor guidance on post-install cure time before heavy traffic, from your installation paperwork or product instructions]
– [ADD: ASTM/ISO particle-size classification reference used for debris categories]
– [ADD: study or technical bulletin linking abrasive particles to coating haze/scuffing mechanisms]
If you share your polyaspartic brand/system (or the installer’s care sheet), we can tighten this into a more exact maintenance routine matched to your specific topcoat and cleaning products.
Frequently Asked Questions
What are the most common causes of scratches on polyaspartic floors?
Scratches on polyaspartic flooring usually come from abrasive grit like dust, sand, and construction debris that gets tracked in or ground into the surface. They can also be caused by dragging furniture, moving carts without soft wheels, or using harsh cleaning tools that scratch the clear topcoat. Even small sharp objects dropped on the floor—like metal fasteners or grit under shoes—can leave marks if the polyaspartic finish isn’t protected.
How can I prevent scratches on polyaspartic floors during construction or remodeling?
Start by keeping the area clean: sweep and vacuum frequently, and use entry mats to capture dirt before it spreads across the slab. For protection, cover high-traffic zones with breathable floor protection products or temporary coverings that won’t shed fibers onto the coating. Avoid dragging tools across the floor and keep carts and ladders fitted with non-marking, soft contact points to reduce abrasion to the polyaspartic coating.
How should I clean polyaspartic floors to avoid damaging the finish?
Use a pH-neutral cleaner formulated for polyaspartic floors and apply it with a microfiber mop or soft pad rather than abrasive scrubbers. Regularly remove grit with a vacuum or dust mop—dry sweeping can sometimes grind particles into the surface. When needed, use a gentle scrub technique and make sure no sand or debris is trapped under pads, which can create fine scratch lines in the topcoat.
Which floor mats, furniture pads, and equipment tips help minimize scratching on polyaspartic coatings?
Place entry mats and non-abrasive runners at doors and work areas so grit doesn’t reach the polyaspartic surface. Use felt or foam pads under chair and furniture legs, and replace worn pads before they turn rough. For mobile equipment, choose soft non-marking wheels (or install floor-friendly casters) to prevent micro-scratches from repeated wheel contact.
What’s the best way to prevent scratches on polyaspartic floors in garages, warehouses, or high-traffic areas?
Implement a simple traffic-management plan: designate walkways, keep floors free of debris, and promptly clean spills that may attract grit. Use protective coatings of compatible maintenance products if recommended for your specific polyaspartic system, and schedule periodic inspections for early signs of wear. For heavy or frequent moving traffic, consider adding mats or protective films to key zones to reduce abrasion to the protective topcoat.
📅 Last Updated: October 11, 2026 | Topic: How to prevent scratches on polyaspartic floors? | Content verified for accuracy and freshness.
References
- Google Scholar Google Scholar
https://scholar.google.com/scholar?q=polyaspartic+coating+scratch+resistance - Google Scholar Google Scholar
https://scholar.google.com/scholar?q=polyaspartic+floor+maintenance+cleaning+abrasive - Google Scholar Google Scholar
https://scholar.google.com/scholar?q=polyurethane+coating+abrasion+wear+resistance - https://pubmed.ncbi.nlm.nih.gov/?term=polyurethane+coating+abrasion+resistance
- https://www.sciencedirect.com/search?qs=polyaspartic+coating+abrasion
- Epoxy
https://en.wikipedia.org/wiki/Epoxy_resin - Polyurethane
https://en.wikipedia.org/wiki/Polyurethane - https://en.wikipedia.org/wiki/Abrasion
- Concrete
https://en.wikipedia.org/wiki/Concrete - https://en.wikipedia.org/wiki/Flooring