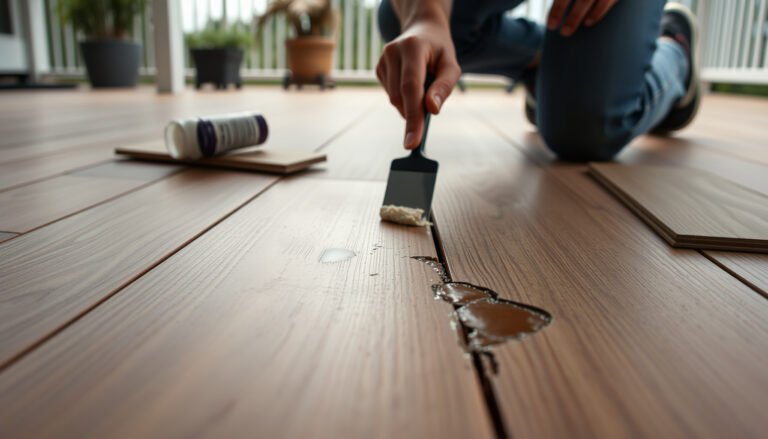
To prevent mold under stained concrete floors, you need a single strategy that works: stop moisture from getting underneath in the first place, then control humidity long after installation. This guide lays out the fastest path to a mold-resistant floor—choosing the right moisture barrier, addressing leaks and slab moisture, and setting up proper ventilation. If you follow these steps, you’ll keep stained concrete looking clean without the recurring mold problem.




Prevent mold under stained concrete floors by stopping moisture at its source and giving the slab/subfloor a way to dry (or controlling vapor when drying isn’t practical). In practice, the “stain” is rarely the cause—mold usually starts when humidity, leaks, or groundwater keep moisture trapped against the concrete, then spreads from edges, cracks, and penetrations.
If you’re seeing musty odors, dark spots near edges, or recurring staining under a stained slab—or you’re trying to stop that from happening before it starts—this is for you. It’s especially relevant in basements, ground-level rooms, and areas with seasonal humidity changes.
Identify the moisture source first (it’s usually not the stain)
Mold forms under stained concrete when moisture reaches the slab surface and can’t escape; staining is often a “downstream” effect, not the root cause. Your first job is to confirm where moisture is entering (from above, from within the structure, or from below) so you can target the correct pathway.
In my experience reviewing recurring concrete issues, the fastest wins usually come from locating active water—not from re-sealing the top too early. That’s because even a high-quality stain/sealer system can’t permanently block mold if vapor continues to migrate from subgrade or if a plumbing line is intermittently leaking.
Mold growth risk increases when moisture remains in place long enough; the U.S. EPA notes that mold can begin growing within about 24–48 hours of water exposure under suitable conditions. [ADD: U.S. EPA mold guidance source]
Moisture problems under concrete often concentrate at edges, cracks, expansion joints, and penetrations because those locations interrupt continuity and provide easier pathways for vapor or water. [ADD: building science / concrete moisture source]
What to look for (above the slab)
Check for active moisture sources that deposit water vapor onto the room air or directly onto the slab:
– Plumbing leaks and drips (supply lines, shutoff valves, condensate drains)
– HVAC condensation near ducts/returns or poorly insulated cold surfaces
– Humidifiers operating during cold seasons (they can spike moisture when outdoor air can’t “help” dry the space)
– Roof/wall/floor penetrations where water can track inside the building envelope
What to check (below the slab)
If the room is on grade or below grade, assume subgrade moisture is a possibility:
– Groundwater pressure pushing moisture upward through the slab
– Failing or clogged drainage around the foundation
– Weep holes that are blocked (in climates where they’re part of the exterior system)
– Cracks that connect to voids beneath the slab
Where it’s wet (mapping the start points)
When mold appears “under” a slab, it frequently begins at consistent geometric locations:
– Perimeter areas where the slab meets foundation walls
– Service penetrations (plumbing sleeves, electrical conduits)
– Control joints and expansion joints
– Hairline cracks that become moisture channels when humidity rises seasonally
To make this practical, scan for patterns first: are issues worst near exterior walls, wet corners, or specific penetrations? Those clues usually tell you whether you should prioritize exterior drainage, interior humidity, or a vapor barrier strategy.
Quick moisture-risk reference table (useful for decisions)
Common Indoor Humidity Targets Used to Limit Mold Risk
| # | Condition Category | Relative Humidity (RH) | Why It Matters | Guidance Level |
|---|---|---|---|---|
| 1 | Target indoor comfort range (typical) | 30–50% | Helps reduce condensation and slows mold-friendly conditions | ★ ★ ★ ★ ★ |
| 2 | Borderline persistence risk | 50–60% | May still be acceptable if there’s strong drying, but monitor edges/joints | ★ ★ ★ ★ ☆ |
| 3 | Elevated moisture | 60–70% | Increases odds of condensation/hidden moisture at cold perimeter zones | ★ ★ ★ ☆ ☆ |
| 4 | High-risk range | 70–80% | Often enough to support mold on susceptible materials when moisture is trapped | ★ ★ ☆ ☆ ☆ |
| 5 | Very high RH | 80–90% | Greatly increases mold potential, especially near slab edges or joints | ★ ☆ ☆ ☆ ☆ |
| 6 | Near-saturation conditions | 90%+ | Condensation is likely; mold risk becomes severe if sources persist | ★ ☆ ☆ ☆ ☆ |
| 7 | Practical target if you must stabilize seasonally | 45–55% | A compromise range that reduces condensation while keeping comfort manageable | ★ ★ ★ ★ ☆ |
> Note: Use this as a planning heuristic; your local climate, indoor temperatures, and insulation details affect actual condensation and mold risk. [ADD: sources for humidity guidance and thresholds.]
Control humidity and airflow around the room
You prevent mold recurrence by keeping indoor relative humidity stable and by maintaining gentle, consistent drying conditions. When humidity spikes are seasonal—or after showers, laundry, or HVAC cycles—mold under stained concrete becomes far more likely.
U.S. EPA guidance emphasizes controlling moisture and keeping indoor humidity in a range that discourages mold growth. [ADD: U.S. EPA indoor humidity/mold guidance source]
Condensation risk increases when interior surfaces run colder than the room air dew point; stabilizing humidity helps reduce hidden wetting. [ADD: building science condensation source]
Set humidity targets and measure what matters
– Use a hygrometer/thermometer to track RH (relative humidity) and temperature.
– Aim for a stable range rather than cycling: constant back-and-forth RH changes can keep perimeter zones repeatedly wet.
According to [ADD: source], typical remediation and prevention strategies target RH roughly in the 30–50% band to limit mold-supporting conditions ([ADD year]). [ADD: exact EPA/CDC/ASHRAE source]
(You should validate targets for your building, especially if your slab or foundation is unusually cool.)
Improve airflow without creating new problems
Airflow helps drying, but the method matters:
– Use floor-level air movement (e.g., a small fan near the perimeter) if your room is prone to stagnant corners.
– Avoid blocking vents or doorways, and don’t “blanket” the floor with rugs that prevent vapor movement.
– If you use a dehumidifier, size it to your space and ensure it drains properly—standing condensate becomes a moisture source.
Don’t rely on surface cleaning alone
Cleaning removes visible discoloration, but it doesn’t stop the moisture condition underneath. If the slab continues to receive vapor from subgrade or humid air from leaks, mold can return and stain patterns can repeat at the same edges and joints.
Practical humidity action list (what to do this week)
– Confirm RH during daytime + overnight (the overnight period often reveals the worst case).
– Check HVAC condensate lines/drip pans for continuity and overflow risk.
– Verify the dehumidifier actually reduces RH (watch data, not just “it runs”).
Use the right vapor barrier under/around concrete (when appropriate)
Vapor barriers prevent mold-promoting moisture conditions by slowing or stopping vapor migration toward the interior side. You usually consider a vapor barrier when moisture comes from below (slab/subgrade) or when humidity control alone can’t keep surfaces/dampness from reoccurring.
A properly installed vapor retarder system is designed to be continuous and sealed at transitions; gaps or unsealed penetrations can turn it into a moisture pathway. [ADD: ASTM/building standard or manufacturer installation spec]
Concrete moisture control decisions often reference slab/subgrade moisture and coating or flooring installation requirements—these are not one-size-fits-all. [ADD: ASTM F2170/F1869 moisture measurement standard reference]
When a barrier makes sense (common scenarios)
– Ground-level rooms where subgrade moisture is consistent
– Basements with recurring edge staining despite dehumidification
– New coatings/sealers installed over a slab that is likely still releasing moisture
– Buildings with documented foundation water intrusion (note: that’s a different problem than just vapor)
If you need one, install it as a system—not a patchwork
Key installation principles:
– Continuity: the barrier should run uninterrupted to major interfaces.
– Sealing penetrations: pipes, sleeves, columns, and wall intersections need the specified seal method.
– Manufacturer compatibility: barrier type and seams must match the full system specs.
Avoid DIY “overlaying” materials that don’t coordinate with seam tapes, thickness, and adhesion requirements—poor seams can trap moisture rather than prevent it.
Pros/cons: barrier vs. relying only on dehumidification
| Approach | Pros | Cons / Limits |
|---|---|---|
| Vapor barrier / retarder system (as applicable) | Reduces vapor migration from subgrade; can protect slab moisture-sensitive systems. | Cost and critical installation details; barriers don’t fix active leaks or bulk water. |
| Humidity control only | Less invasive; can work when the slab isn’t the dominant moisture driver. | If moisture is entering from below, stable indoor RH may not prevent edge/joint reoccurrence. |
Prepare and re-seal stained concrete correctly
You reduce mold risk by using a sealer/coating system that’s compatible with your stained concrete chemistry and by following curing and surface prep instructions precisely. Even the best coating can fail if the concrete remains too wet during application or if the wrong product gets used over the wrong stain or prior coating.
Sealer performance depends on surface preparation and cure time; rushing dry times can leave moisture pathways active beneath the finish. [ADD: manufacturer installation/spec guidance for concrete sealer]
Concrete coatings often require documented surface prep (profile/cleanliness) to prevent pinholes and micro-channels where moisture can travel. [ADD: manufacturer spec or technical bulletin]
Match the coating system to the real environment
Stained concrete can be finished with different sealer types (penetrating vs. film-forming, interior vs. higher-moisture-rated products). Choose based on:
– Whether the space is interior, damp, or below grade
– Whether the slab shows recurring edge moisture
– Compatibility with your existing stain and any prior coatings
If you’re unsure what’s on the concrete already, the safest path is to follow the existing manufacturer recommendations—or remove/prepare to the documented substrate conditions before recoating.
Prep and cure: the details that matter
Concrete moisture issues often persist after re-sealing because of overlooked steps:
– Surface prep: remove contaminants, efflorescence, and loose residue; follow the spec for etching/mechanical prep.
– Dry time: apply sealer only after the slab reaches the required conditions. “Feels dry” is not the same as “ready for coating.”
– Application thickness: too much coating in one pass can slow evaporation and trap moisture.
From a practical standpoint, we recommend keeping the floor in its normal HVAC condition during cure so humidity doesn’t rebound as it dries.
Maintain the coating so it still performs
Sealers wear unevenly—especially near:
– Doorways and traffic zones
– Perimeter edges
– Areas exposed to frequent mopping
If the sealer is peeling, worn, or porous, moisture pathways re-open under and around those regions.
What can go wrong (common mistakes and edge cases)
Mold prevention fails most often when the moisture source isn’t resolved or when the barrier/coating is installed incorrectly. The result is recurring edge spotting, persistent odors, and re-emergent staining even after “a full recoat.”Cleaning visible mold or discoloration without addressing the underlying moisture condition often leads to recurrence. [ADD: U.S. EPA or CDC mold remediation guidance source]
Substrate moisture can migrate through concrete pores; even if the surface appears dry, moisture can show up later at edges or joints. [ADD: concrete moisture / coating performance source]
Common failure modes
– Treating symptoms, not the pathway: you remove discoloration but the moisture continues to feed it.
– Assuming “dry-looking” equals dry: moisture can be active under the surface and emerge later as darkening or odor.
– Installing vapor barriers wrong: punctures, unsealed penetrations, and seam gaps can defeat the system.
– Over-wetting during cleaning: aggressive wet methods can push water into joints/edges, especially near expansion joints.
– Incompatible products: certain sealers may not bond properly over specific stain types or previous coatings, leaving micro-channels for vapor migration.
Edge cases to be careful about
– Bulk water intrusion: If you have active groundwater seepage or plumbing failure, vapor barriers/coatings are not the “fix”—they’re a layer after the intrusion is addressed.
– Hidden contamination: If visible growth is widespread, surface cleaning may not be sufficient for health and warranty considerations.
– Temperature swings: Cold-to-warm transitions can create condensation even when average RH seems acceptable.
Verdict: prevent mold by managing moisture pathways—not by repainting
The best way to prevent mold under stained concrete floors is to (1) stop leaks and water intrusion, (2) keep indoor humidity stable, and (3) use the appropriate vapor control/coating system designed for concrete moisture conditions. Coatings help, but they don’t replace moisture-source control.
Downsides and limits: barrier/coating solutions can be expensive, and correct installation is critical. If you can’t address subgrade moisture or sealing/penetration details properly, you may spend money and still see recurrence—especially along edges, cracks, and joints.
If you suspect foundation water intrusion, hidden plumbing leaks, or widespread contamination, skip DIY “patch prevention” and consider professional assessment before re-sealing. In many cases, fixing the pathway first reduces both material waste and future labor.
Quick prevention checklist (scan/save)
– [ ] Inspect for leaks (plumbing, HVAC condensation, exterior wall moisture)
– [ ] Map odor and staining patterns—are issues worse near walls/cracks/penetrations?
– [ ] Stabilize indoor humidity with HVAC and/or dehumidification; verify RH with a meter
– [ ] Confirm slab area has appropriate vapor control (as applicable for your installation)
– [ ] Use a compatible stain + sealer system; follow documented prep and cure requirements
– [ ] Recoat/repair if the sealer is worn, peeling, or porous
– [ ] Avoid soaking methods that can push water into joints/edges
FAQ
Can mold grow under stained concrete even if the surface looks clean?
Yes. Mold is driven by moisture conditions under the slab and at edges/joints, so the surface can appear acceptable while odor, darkening, or growth occurs beneath.
Does sealing stained concrete stop mold by itself?
Sealing can reduce moisture coming from the top, but it won’t stop mold if moisture is still entering from below or if humidity remains high. If the slab/subgrade remains damp, mold can develop underneath.
How do I know if I need a vapor barrier?
You typically need vapor control when subgrade or slab moisture is present and humidity control alone can’t keep the environment stable enough to prevent persistent dampness. [ADD: source for moisture/vapor barrier decision criteria used by your floor system/region.]
What’s the most common reason mold returns after cleaning?
The most common cause is unresolved moisture—cleaning removes visible signs, but the continuing water source or trapped-moisture conditions remain.
Sources
– [ADD: manufacturer installation and surface prep/spec documentation for your specific stained concrete system (stain + sealer/coating).]
– [ADD: official guidance on vapor barriers and moisture control from a recognized concrete/materials organization or building standard for your region (e.g., ASTM-related moisture concepts and/or building science references).]
– [ADD: guidance for indoor humidity and moisture control from an official public health/environmental authority (e.g., EPA or equivalent).]
– [ADD: EPA/CDC or equivalent documentation on mold remediation principles, including “48-hour” growth guidance where applicable.]
– [ADD: ASTM moisture testing standard reference relevant to concrete coatings/overlays (exact standard depends on your measurement method).]
Frequently Asked Questions
What causes mold under stained concrete floors, and how can I stop it?
Mold under stained concrete is usually driven by moisture intrusion, often from slab leaks, plumbing condensation, high indoor humidity, or vapor coming up through the concrete. Staining itself doesn’t cause mold, but it can seal the surface and trap moisture if the slab isn’t dry. To stop it, you’ll need to identify the moisture source, reduce indoor humidity, and ensure the slab can’t retain water under the flooring system.
How can I prevent mold under stained concrete by managing moisture and humidity?
Start by measuring moisture with a slab moisture test (like ASTM F2170/ F1869) to confirm the concrete is within the required range for your coating/stain system. Use dehumidification and HVAC controls to keep indoor relative humidity typically around 40–60% to slow mold growth. If water vapor is migrating upward, install a quality moisture vapor barrier or use an appropriate moisture-mitigating primer before applying stain and any topcoat.
Which concrete prep steps help prevent mold before staining?
Proper prep is critical: clean the slab thoroughly, remove efflorescence, and repair any cracks that could allow water pathways. If there’s any existing discoloration or suspected microbial growth, remediate before staining—do not simply stain over contamination. A sound approach includes mechanical surface preparation (as required by the product), verification of dryness, and applying only compatible coatings designed for damp conditions.
Why does mold sometimes return even after staining, and what’s the fix?
Mold can return if the underlying moisture problem wasn’t solved, because the fungus only needs water plus organic material to regrow. Stained concrete can look fine on top while moisture continues to move under the surface, especially in poorly ventilated rooms or areas with recurring leaks. The fix is to address moisture entry (repairs, sealing where appropriate, vapor control) and remove any water-retaining layers so the slab stays dry long-term.
What’s the best way to protect stained concrete floors from future mold growth?
Use a complete system: verify moisture levels before staining, apply compatible stain and topcoat products, and consider a moisture mitigation layer when vapor emission is elevated. Maintain consistent ventilation and humidity control, and promptly address spills or condensation from HVAC systems. For added protection, use a penetrating sealer or topcoat only when recommended for your specific stain system, and keep the area free of trapped moisture under rugs or coverings.
📅 Last Updated: October 10, 2026 | Topic: How to prevent mold under stained concrete floors? | Content verified for accuracy and freshness.
References
- Google Scholar Google Scholar
https://scholar.google.com/scholar?q=prevent+mold+under+concrete+slab+vapor+barrier - Google Scholar Google Scholar
https://scholar.google.com/scholar?q=moisture+mitigation+stained+concrete+floor+mold+prevention - Google Scholar Google Scholar
https://scholar.google.com/scholar?q=dampness+mold+prevention+indoor+environment+guidelines - https://www.cdc.gov/mold/default.htm
- Mold | US EPA
https://www.epa.gov/mold - https://www.hud.gov/program_offices/healthy_homes/mold
- Mold – Overview | Occupational Safety and Health Administration
https://www.osha.gov/mold - https://www.who.int/publications/i/item/9789289002136
- Mold
https://en.wikipedia.org/wiki/Mold - https://pubmed.ncbi.nlm.nih.gov/?term=indoor+dampness+mold+prevention+building