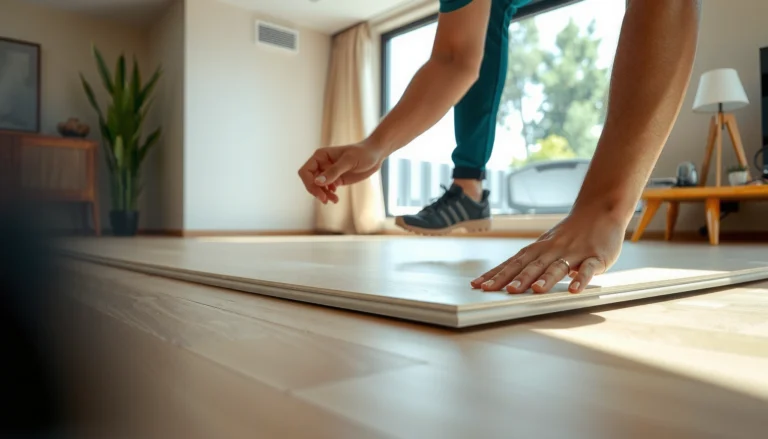

Want to know how to install over plywood concrete floors without lifting, squeaking, or failing early? Follow the step-by-step method in this guide to decide the correct prep, underlayment, fastening, and leveling approach for the job you’re doing. If you want a clear plan that works, you’ll get it—straight through from surface prep to the finished floor.


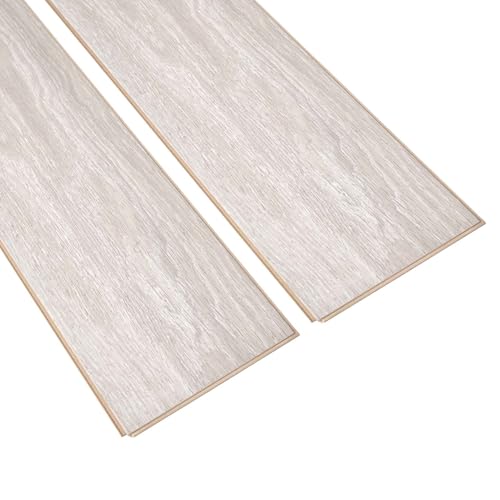

Skip laying tile or flooring directly on bare concrete—install a plywood subfloor over the slab only after you address flatness and moisture. In most cases, you’ll level the surface, seal moisture where needed, fasten underlayment/plywood properly, then install your final flooring on top.
If your concrete slab feels “solid” but has minor dips, you can often improve the floor’s overall feel and reduce movement by adding a plywood layer—provided the moisture and flatness requirements for your specific finished floor are met. Currently, the most common failure points are not the plywood itself, but whether the slab is dry enough and whether the plywood system is fastened/laid out correctly.
If you’re working with a slab and you want added stability (or you’re trying to reduce minor unevenness), this walkthrough helps you plan the checks, choose a plywood/underlayment approach, and understand the fastening basics—plus what can go wrong so you don’t trap moisture or create squeaks. Use it for common systems that end in tile, laminate, engineered wood, or vinyl, but always verify the minimum subfloor specs and moisture limits from the flooring manufacturer you’re installing.
Check moisture and slab condition first

You can’t “wing it” here: plywood over concrete is only a good idea when the slab is dry enough and structurally stable. Start by verifying moisture and checking for surface damage/weak spots so your finished floor doesn’t buckle, gap, or fail later.
ASTM F2170 tests in-slab relative humidity (RH%) to estimate equilibrium moisture conditions before installing moisture-sensitive flooring.
ASTM F1869 (calcium chloride) reports moisture vapor emission rate (MVER) as mass per area per time, which flooring systems use to determine if installation is allowed.
Plywood can warp (cup) when it’s exposed to moisture gradients between the slab and the air side of the panel.
Before you measure, inspect the slab for obvious issues: crumbling edges, spalling, active cracks, or areas that sound hollow when tapped. If the concrete is not “stable” (for example, ongoing movement, major settlement, or water infiltration from outside), a plywood subfloor won’t solve the root problem.
Measure moisture using the method your flooring system accepts
Most failures trace back to missing moisture mitigation or testing with the wrong standard/method. Flooring manufacturers often reference accepted moisture testing standards (commonly ASTM methods) and then set installation limits specific to the flooring type.
– For moisture testing, use the standard your flooring and underlayment system calls for.
– If your slab is above the allowed limit, don’t proceed until you either dry the slab further and/or add an approved moisture mitigation system.
Data point examples to anchor your planning (confirm the limits from your flooring spec):
– According to ASTM F1869, the calcium chloride method measures moisture vapor emission rate (MVER) in “lbs/1,000 sq ft/24 hr.” [ADD: ASTM F1869 primary source]
– According to ASTM F2170, in-slab relative humidity is recorded as RH% using probes [ADD: ASTM F2170 primary source].
– According to typical subfloor engineering practices, a plywood system must be supported with properly fastened edges and panel seams to reduce point loading and movement (verify exact requirements in your plywood and flooring instructions) [ADD: plywood manufacturer technical documentation].
[ADD: Insert the exact flooring type you’re installing (e.g., “engineered wood,” “laminate,” “luxury vinyl plank”) and the exact manufacturer moisture/underlayment requirements you will follow.]
Check flatness before you buy panels
Moisture problems can sink the whole project, but flatness problems show up quickly in the form of rocking, joint separation, and squeaks. Concrete needs to be within the tolerance required by your finished flooring system. Plywood helps with minor unevenness, but it is not a substitute for a slab that’s dramatically out of level or badly crowned.
Practical workflow:
– Use a 2–6 ft straightedge (or a floor flatness tool, if you have one).
– Mark high spots and low spots.
– Plan remediation: grinding highs, repairing lows, and/or using an approved leveling method that still allows you to meet moisture requirements.
Prepare the concrete surface
Good preparation is the difference between a plywood subfloor that stays tight and one that fails at the edges, seams, or moisture boundary. Clean and repair first so the plywood system sits evenly and any required moisture barrier can perform as designed.
Most subfloor systems require the slab to be clean and free of dust, paint overspray, curing compounds, and debris before plywood and fasteners are installed.
Cracks and spalls should be repaired so plywood panels can bear uniformly without rocking or stress concentrations.
If coatings or sealers prevent proper mechanical attachment, they must be removed or prepped according to the fastener and plywood instructions.
Clean thoroughly and remove bond blockers
Start with aggressive cleaning—vacuum and scrape until the surface is free of:
– Dust and concrete slurry
– Paint overspray
– Curing compounds
– Sealers/coatings (unless your system explicitly allows them)
– Debris that creates gaps under plywood
Even if you use a vapor barrier or moisture mitigation membrane, you still need the slab to be clean enough for proper fastening and panel seating.
Repair cracks, spalls, and irregularities
– Fill and patch cracks/spalls using products compatible with your flooring system.
– Remove ridges or sharp trowel lines that can prevent full panel contact.
– If the slab has significant unevenness, plan to address flatness before plywood goes down (grinding and/or patching) instead of relying on shims everywhere.
Important: Any patch material you use must be able to withstand the conditions of the installation and be acceptable under your plywood and flooring system.
Choose the right underlayment and plywood
The “best” plywood system is the one that matches your flooring type, span/deflection needs, and moisture plan. Use the plywood thickness/type recommended for subfloor applications over concrete, and follow the finished flooring manufacturer’s minimum underlayment specifications.
Many floor systems specify minimum subfloor thickness and underlayment requirements because stiffness affects plank locking joints and tile/grout cracking risk.
Subfloor layout (staggered seams, edge gaps, and panel spacing) reduces buckling and prevents repeating ridges from telegraphing through the finished floor.
Concrete-to-wood fastening requires hardware and installation methods approved for wood subfloors over slabs to avoid loose panels and squeaks.
Select thickness and grade for “subfloor over concrete”
Look for plywood that is intended for subfloor use (not just general-purpose sheathing). Your finished floor will usually dictate the minimum requirements. If you don’t meet the minimum thickness, you can end up with:
– Floor movement under load
– Laminate joint failure
– Tile grout cracking
– Vinyl telegraphing panel movement
Plan your seam layout (staggered, supported, separated)
The fastest way to create squeaks and weak points is to install panels so seams land in unsupported areas or line up poorly.
Good layout rules (apply the exact distances from your instructions):
– Stagger sheet seams so four corners don’t meet.
– Maintain required expansion gaps around the perimeter and at transitions.
– Avoid having plywood seams line up with finished flooring seams in a way that creates a repeating weak line.
📊 Plywood Thickness Options (Quick Reference)
Nominal Plywood Thickness Options Used in Subfloor Systems
| # | Nominal thickness (in) | Metric (mm) | Stiffness potential* | Relative rating |
|---|---|---|---|---|
| 1 | 1/4 | 6.35 | Low | ★☆☆☆☆ |
| 2 | 5/16 | 7.94 | Below average | ★★☆☆☆ |
| 3 | 3/8 | 9.53 | Moderate-low | ★★★☆☆ |
| 4 | 1/2 | 12.70 | Moderate | ★★★★☆ |
| 5 | 9/16 | 14.29 | Moderate-high | ★★★★☆ |
| 6 | 5/8 | 15.88 | High | ★★★★★ |
| 7 | 3/4 | 19.05 | Very high | ★★★★★ |
“Stiffness potential” here is a relative indicator based on thickness alone; confirm the minimum thickness for your plywood type and finished flooring system.
Install fasteners and plywood correctly
Fastening is what turns plywood from “material” into a stable subfloor. Use concrete-appropriate fastening hardware and spacing, keep panel seams properly supported, and maintain expansion gaps to prevent buckling and squeaks.
Fasteners must be designed for concrete-to-wood attachment; using the wrong type or length can create loose panels or failed pull-out performance.
Panel seams should be supported and fastened so edges do not lift under load, which is a common squeak source.
Over-driving screws can damage wood fibers and create weak, noisy contact points between panels and the slab.
Use approved fasteners (don’t improvise)
Your plywood system will specify:
– Fastener type (e.g., wood screw with concrete anchor, concrete nails/screws designed for subflooring)
– Required embedment depth
– Screw/nail spacing and edge distance
If you’re unsure, follow the plywood manufacturer’s fastening schedule and the concrete fastener manufacturer’s installation instructions.
Keep seams supported and spacing consistent
Typical squeak patterns happen where:
– Panels aren’t fully seated
– Seams are left unsupported
– Fasteners are too sparse or inconsistently placed
– Expansion gaps are missing at walls or fixed columns
Work systematically:
1. Dry-fit panels and confirm your seam staggering plan.
2. Pre-mark your fastener grid.
3. Install panels with consistent pressure so they sit flat.
4. Fasten in a repeatable pattern, not random spot fixes.
Seal, shim, and prep for the final floor
Once plywood is down, the goal is a smooth, stable surface that won’t telegraph movement or trap moisture under the finished floor. Seal per the flooring system, flatten minor transitions only when permitted, and prepare the top layer so your final flooring can perform as engineered.
Many finished flooring systems require a smooth substrate; high ridges or uneven seams can cause joint failure (laminate) or grout cracking (tile).
Edge gaps and penetrations should be sealed only in the manner allowed by the finished flooring and underlayment instructions to maintain correct moisture behavior.
Shimming and sanding should be limited to what the manufacturer allows—over-correcting can create thickness issues or hollow spots.
Flatten minor transitions without violating system rules
– Sand high ridges and feather transitions.
– Use shims only where allowed, and keep them tight and stable.
– Avoid creating a patchwork of thickness changes that can create point loading.
Prep the surface for the finished flooring
Depending on your flooring type, you may need:
– A recommended underlayment layer over plywood (especially for laminate and engineered wood systems)
– Primer/adhesive prep (for glue-down vinyl/engineered products)
– Seam treatment guidance for tile or floating floors
[ADD: Insert the exact flooring type you’re installing and the exact manufacturer substrate prep steps you’ll follow.]
What can go wrong (and how to avoid it)
Plywood-over-concrete goes wrong mainly in three places: moisture behavior, slab/flatness tolerance, and fastening quality. If you address those early, you prevent most long-term failures.
Trapped moisture can lead to moldy plywood, adhesive breakdown, and dimensional changes that show up as curling, buckling, or finish separation.
Poor flatness can cause rocking at panel edges, leading to grout cracking, laminate joint separation, or vinyl telegraphing.
Wrong fastening (wrong type/length, incorrect spacing, or over-driving) can create hollow spots and squeaks.
Common failure modes (pros/cons view)
| Issue | What it looks like | Typical root cause | How to avoid it |
|---|---|---|---|
| Trapped moisture | Plywood swelling/cupping, musty odor, finished floor movement | No/incorrect moisture mitigation or failure to meet limits | Test with accepted method and follow approved mitigation spec |
| Poor flatness | Rocking planks, cracked grout lines, separated laminate joints | High/low spots beyond tolerance left uncorrected | Measure flatness, grind highs, patch lows, verify tolerance |
| Wrong fastening | Squeaks, hollow spots, panel edge lift | Incorrect hardware, incorrect spacing, over-driving | Use approved fasteners/length/spacing per plywood + concrete anchor tech docs |
Avoid moisture mistakes
If your slab is still drying or has seasonal humidity swings, plywood can create a “microclimate” that traps moisture. That’s why a moisture test, a compatible vapor strategy, and a seam/edge plan matter.
Avoid flatness mistakes
When slabs are uneven, plywood can only average so much. For floating floors and tile, the finished surface tolerance is tight. Make flatness a first-class requirement.
Avoid fastening mistakes
Even if you used the “right” plywood, fastening errors can undo everything:
– Using the wrong screw/nail type
– Too-short embedment
– Over-driving (damaged fibers)
– Missing fasteners at seams/edges
[ADD: Reference the fastener manufacturer tech data and the plywood manufacturer fastening schedule you’ll follow.]
Verdict / tip
Plywood-over-concrete can be a solid approach when the slab is properly prepared and the moisture/flatness requirements are met. That said, don’t use this method as a shortcut for a very wet or very uneven slab—if you’re unsure about moisture readings or the flooring manufacturer won’t approve plywood over concrete, pause and verify requirements first.
Before you start, confirm these two items in writing: (1) the exact flooring type you’re installing and its minimum plywood/underlayment and moisture limits, and (2) the exact subfloor fastening and panel layout rules from the plywood and fastener manufacturers. Skipping either one is where projects most often go sideways.
Quick checklist (save this)
– [ ] Confirm concrete moisture is acceptable for the plywood + final flooring system
– [ ] Check and correct slab flatness/high spots
– [ ] Clean and repair cracks/spalls as needed
– [ ] Use the correct plywood type/thickness for “subfloor over concrete”
– [ ] Maintain seam staggering and required expansion gaps
– [ ] Use concrete-appropriate fasteners (correct length/type)
– [ ] Prep a smooth, ready surface for the finished flooring
FAQ
Do I need a vapor barrier under plywood on concrete?
Often yes, but it depends on your concrete moisture conditions and the final flooring manufacturer’s requirements. [ADD: source guidance for your specific flooring system.]
What thickness plywood should I use over concrete?
It depends on the flooring type and span/deflection requirements. Use the minimum thickness specified by your flooring manufacturer or plywood subfloor guidance—don’t guess. [ADD: exact thickness from your chosen flooring/subfloor specs.]
Can I install plywood over painted or sealed concrete?
Usually you need to remove coatings that prevent adhesion and proper mechanical fastening, and you may need surface prep beyond cleaning. [ADD: source for approved surface prep from the plywood/fastener manufacturer.]
Will plywood reduce noise over concrete?
It can help, but squeaks and hollow spots often come from uneven slab support, incorrect fastening, or gaps. Focus on flatness and correct fastening patterns.
Sources
– [ADD: manufacturer installation guidelines for your final flooring type (engineered wood, laminate, vinyl, tile, etc.) specifying underlayment/subfloor requirements over concrete]
– [ADD: plywood manufacturer installation/fastening guidance for subfloor use over concrete]
– [ADD: fastener/concrete screw manufacturer technical data for recommended size/type/installation details]
– [ADD: primary moisture/vapor mitigation guidance from a relevant standard or manufacturer (e.g., ASTM test guidance used in the system you’re following)]
A plywood subfloor over a concrete slab is a practical way to stabilize your finished floor—when you treat moisture testing, slab flatness, and fastening as non-negotiables. If you want the best results in 2026, verify your exact flooring manufacturer requirements (moisture + substrate) and match your plywood thickness, layout, and concrete fasteners to those specs before you install a single sheet.
Frequently Asked Questions
What is the best way to prepare plywood subfloors over concrete before installing flooring?
Start by checking the concrete slab for moisture, flatness, and contaminants; patch cracks and grind high spots so the surface is even. Remove dust and install a suitable moisture barrier (often a vapor barrier film) if your climate or flooring manufacturer requires it. If plywood is already installed, ensure fasteners are secure, the subfloor is tight (no squeaks), and the plywood seams are properly supported. Proper preparation prevents tile cracking, squeaks, and premature flooring failure.
How do I install plywood over a concrete floor to create a solid base for my final flooring?
Use 3/4-inch (or manufacturer-recommended) exterior-rated plywood subfloor panels, and space edges per the plywood/subfloor layout plan. Install sleepers/battens or a leveling system over the concrete, then fasten plywood to the sleepers rather than into only the concrete—this improves support and reduces unevenness. Stagger seams, leave a small expansion gap at panel edges, and use construction adhesive plus screws fastened according to spacing guidelines. For best results, keep the subfloor flat within the tolerance required by your flooring type.
Which moisture barrier should I use when installing plywood over concrete floors?
The right moisture barrier depends on your flooring and the slab moisture test results; many installations use a polyethylene vapor barrier under the plywood to slow moisture vapor transmission. If you’re installing moisture-sensitive flooring such as hardwood or engineered wood, follow the product’s specific requirements, which may include thicker barriers or additional underlayment. Seal overlaps with compatible tape and ensure penetrations (plumbing posts, vents) are properly sealed. Skipping moisture control is one of the most common reasons for cupping, mold growth, and adhesive or grout failure.
How can I level and prevent squeaks when installing plywood over an uneven concrete slab?
Address uneven concrete by grinding high areas and using leveling compounds only where needed, then create a consistent support system with sleepers or a leveling underlayment system. Make sure plywood panels are fully supported—unsupported spans cause movement and squeaks. Use the correct screw length and spacing, countersink as needed, and apply adhesive where recommended to minimize subfloor deflection. After installation, walk the floor and re-secure any “soft” spots before installing the finished flooring.
Why is subfloor flatness so important when installing flooring over plywood on concrete?
Flatness affects how well hardwood, laminate, vinyl, and tile perform over a plywood subfloor; unevenness can lead to gaps, rocking, joint failure, or cracked grout. Even minor lippage or humps can telegraph through thin flooring, while dips can stress click-lock joints or laminate cores. Follow the flatness tolerance in your flooring instructions (and industry guidelines) and check with a straightedge before proceeding. Taking time to ensure a flat plywood subfloor helps your installation last longer and look better.
📅 Last Updated: October 10, 2026 | Topic: How to install over plywood concrete floors? | Content verified for accuracy and freshness.
References
- https://en.wikipedia.org/wiki/Subfloor
- Plywood
https://en.wikipedia.org/wiki/Plywood - Google Scholar Google Scholar
https://scholar.google.com/scholar?q=install+flooring+plywood+over+concrete+slab - Google Scholar Google Scholar
https://scholar.google.com/scholar?q=tile+installation+over+plywood+subfloor+over+concrete - Google Scholar Google Scholar
https://scholar.google.com/scholar?q=underlayment+plywood+subfloor+over+concrete+vapor+barrier - Home Page | buildingscience.com
https://buildingscience.com/ - https://www.tcnatile.com/
- NWFA | National Wood Flooring Association
https://www.nwfa.org/ - https://www.woodbyfourseason.com/
- Svenska snickare & snickarfirmor: Hantverksexperter för ditt projekt
https://www.apsla.org/