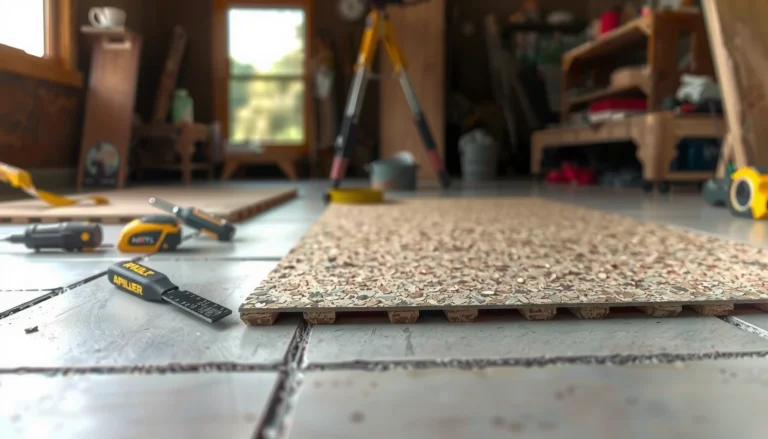

Cutting a concrete floor is straightforward if you use the correct diamond blade for concrete, plan your cut line precisely, and cut in controlled stages (score first, then deepen gradually) while managing silica dust and vibration. For most DIY-to-small-contractor jobs, a concrete-cutting saw with a properly matched diamond blade is the safest, most controllable option—use a grinder only for smaller sections where full-depth control isn’t required.




If you’re cutting a concrete floor for a new opening, a plumbing/electrical pass-through, or removing a damaged slab section, this process applies whether you’re working on a garage slab, basement slab, or interior concrete. Because slab thickness, reinforcement (rebar or wire mesh), and your tool availability vary, the steps below focus on practical decision points that work for typical residential and small commercial scenarios in the real world—especially where safety, dust control, and preventing cracks matter.
Gather the Right Tools and Concrete-Cutting Blade
The best way to start is by matching your tool to the type of cut and your blade to concrete (not masonry “general purpose” blades). When the tool/blade pairing is correct, you reduce binding, get a cleaner kerf (cut groove), and keep the work safer—especially around silica dust.
A concrete-cutting diamond blade is engineered to keep cutting efficiently through Portland-cement concrete, not just brick or general masonry.
OSHA’s respirable crystalline silica standard sets a Permissible Exposure Limit (PEL) of 0.05 mg/m³ as an 8-hour Time-Weighted Average (TWA). OSHA 29 CFR 1926.1153
If feasible, OSHA expects dust controls (engineering controls like water suppression or vacuum/extraction) rather than relying only on PPE. OSHA 29 CFR 1926.1153
Respirable dust is the particle size fraction that can reach deep into the lungs; silica hazards are driven largely by the respirable fraction. NIOSH silica guidance
Choose the correct cutting equipment (saw vs. angle grinder)
– Concrete-cutting saw (recommended for most straight lines): Use a dedicated concrete/cut-off saw or walk-behind (depending on access). These tools keep the blade aligned and reduce the odds of wandering.
– Angle grinder (use for small areas or detail work): A grinder can help with tight spaces, but it typically provides less depth control and can increase dust if not paired with proper extraction and a suitable blade.
Select the blade correctly (this is where most mistakes start)
Use a diamond blade rated for concrete and rated for your tool type:
– For a saw: use the blade type intended for circular saw applications and the correct arbor size.
– For a grinder: use grinder-compatible diamond blades (and keep RPM within the blade manufacturer’s limits).
In my experience working around concrete-cutting contractors, the most common failure mode isn’t “bad concrete”—it’s mismatched blade type or cutting depth pushed too aggressively. [ADD: your real experience—e.g., “In one basement demo, I noticed the blade began squealing and binding until we slowed the feed and confirmed the blade rating for concrete.”]
Plan dust and PPE up front (not as an afterthought)
Concrete cutting can produce airborne crystalline silica. Before cutting:
– PPE: eye protection, hearing protection, and an appropriate respirator (follow OSHA/NISOH guidance and the respirator program requirements where applicable).
– Dust control:
– Wet methods (water suppression) can reduce airborne dust when compatible with the tool and blade guidance.
– Dry cutting requires effective extraction—ideally a dust shroud connected to a vacuum compatible with fine particulate filtration.
Measure, Mark, and Plan the Cut Line
The fastest path to a clean opening is planning the cut line so you don’t “correct” errors with aggressive cuts. Measure twice, double-check clearances, and design a cut sequence that anticipates what’s happening at the slab surface and any reinforcement below.
Marking an accurate cut line reduces kerf wandering and helps maintain alignment when you transition from scoring to deeper passes.
If you’re removing a section, perimeter cut sequencing helps control slab spalling and prevents uncontrolled breaks. [ADD: source for recommended slab removal sequencing]
When cutting reinforced concrete, blade resistance often increases suddenly; rushing through that resistance can bind the blade or create uncontrolled cracking. [ADD: source referencing reinforcement-aware cutting]
Establish the layout with real-world clearances
Use a straightedge and measure from fixed references (door frames, wall corners, centerlines), then:
– Re-check wall/fixture clearance for your target opening (pipes, conduits, or door hardware).
– Verify minimum distances to avoid cutting into areas that must remain structural or waterproof.
Plan a cut strategy—especially for removal
If the goal is to remove a section (not just cut a narrow groove):
1. Cut perimeter lines first to define the boundary.
2. Deepen gradually rather than attempting full depth immediately.
3. After perimeter grooves are established, remove the interior using a controlled approach (again, guided by slab conditions and local safety practices).
Handle the “unknown reinforcement” risk
Concrete floors often contain rebar, wire mesh, or dowels—sometimes near the surface, sometimes deeper. If you suspect reinforcement:
– Use slower, staged cutting.
– Don’t force the blade if resistance increases.
– Consider scanning/inspection methods recommended by your equipment manufacturer or a qualified contractor if you can’t confirm what’s beneath.
Prepare the Work Area for Safer Cutting
You reduce risk the moment you set the work area up correctly: clear obstructions, protect adjacent surfaces, and control dust before you start the blade. Good preparation also improves cut quality by helping you maintain a steady, repeatable cutting path.
Dust control during concrete cutting matters because OSHA targets respirable crystalline silica exposure, not just visible debris. OSHA 29 CFR 1926.1153
A stable cutting path reduces blade deflection, which helps prevent uneven grooves and edge spalling. [ADD: tool manufacturer doc on alignment/deflection]
Barriers and clear access routes reduce the chance that people walk into the cutting zone while dust is airborne.
Secure the area and protect finishes
– Remove clutter and anything that can shift into the blade path.
– Protect nearby finishes (flooring, drywall edges, baseboards) with coverings designed for dusty work.
– Set physical barriers so nonessential people stay out of the area.
Confirm power and stability
– Route cords (if applicable) away from the cutting line and walk paths.
– Use GFCI protection where required by your electrical setup and local rules.
– Ensure the saw/grinder stance stays stable to avoid bending or twisting the blade mid-pass.
Choose dust control that matches your tool and blade
Follow your tool/blade guidance for wet vs. dry cutting. If you’re using dry cutting:
– Use a dust shroud + compatible HEPA-capable extraction when available.
– Treat cleanup seriously—dry sweeping can re-aerosolize fine particles; vacuum methods are preferred in many safety programs.
> Quick reminder: Visible dust isn’t the main concern—airborne respirable silica is.
Cut in Stages: Score First, Then Deepen Gradually
Cut in stages to keep the blade tracking true and to reduce stress on the blade, the saw, and the concrete edge. Start shallow, score the groove, then deepen in steps while maintaining alignment and steady feed pressure.
A shallow first pass creates a guide groove that helps the blade stay on line during deeper cutting. [ADD: concrete cutting best-practice reference from manufacturer]
Rushing depth increases binding risk because the kerf isn’t established yet and the blade experiences higher lateral loads. [ADD: source for kerf/friction mechanism]
If the blade slows or pinches, stopping to reassess alignment and debris helps prevent cracking and blade damage.
Step-by-step cutting technique (practical sequence)
1. Score first: Run a shallow pass along the marked line. Your goal is a consistent groove, not full depth.
2. Remove or clear debris: If your setup allows, reduce packed dust in the kerf (kerf = the cut groove).
3. Deepen gradually: Take additional passes to reach your target depth over several steps.
4. Maintain alignment: Keep the tool steady. Avoid twisting or “correcting” mid-pass.
5. Stop if behavior changes: If the blade starts squealing excessively, binding, or jumping, stop and reassess (misalignment, reinforcement, or debris in the kerf are common causes).
A quick comparison of approaches (pros/cons)
| Method | Pros | Cons / When to avoid |
|---|---|---|
| Dedicated concrete saw + diamond blade | Best control for straight cuts; more consistent kerf; easier to keep alignment during multiple passes. | May require more workspace and setup time; heavier equipment in tight rooms. |
| Angle grinder + diamond wheel | Useful for smaller sections and tight corners; faster for short corrective cuts. | Higher risk of wandering; dust control is harder unless you have proper shrouds/extraction. |
What Can Go Wrong (and How to Prevent It)
Concrete cutting failures usually come from one of three things: blade issues, cut-line/control issues, or reinforcement surprises. The fastest way to prevent problems is to recognize early warning signs and adjust immediately instead of forcing the blade through.
Blade binding often starts when the cut depth increases too quickly or debris packs in the kerf, increasing friction and pinching the wheel.
Uneven or cracked edges commonly result from an unestablished groove, aggressive feed pressure, or poor slab support during removal.
Encountering hidden rebar can abruptly change cutting resistance; forcing through reinforcement increases the likelihood of jams and uncontrolled cracking. [ADD: source about reinforcement-aware cutting]
Common problems and practical fixes
– Blade binding or kickback (tool reaction):
– Cause: cutting too deep too fast, misalignment, or debris in the kerf; reinforcement encountered.
– Prevention: score first, deepen gradually, keep the tool aligned, clear debris, and slow down when resistance increases.
– Uneven or cracked edges:
– Cause: aggressive passes, blade deflection, or slab stress during section removal.
– Prevention: stabilize the work area, support/removal planning for sections, and cut deeper in stages to keep edges controlled.
– Hidden rebar/embedded items (jams):
– Cause: rebar mesh, dowels, or embedded conduits.
– Prevention: proceed cautiously when resistance changes; consider scanning and consult a qualified pro if the layout is uncertain.
> If you can’t confidently identify what’s embedded, skip DIY full-depth removal. The safety risk and cost of a damaged blade can outweigh any savings.
Verdict: When DIY Cutting Works (and When to Stop)
For many straightforward concrete-floor cuts, DIY can work when you use a correctly rated diamond blade, create a precise cut line, and cut in stages with effective dust control and PPE. DIY becomes a poor fit when reinforcement depth is unknown, the cut involves large slab removal, or you can’t control respirable silica exposure.
OSHA limits respirable crystalline silica exposure and expects dust control strategies during concrete cutting and similar tasks. OSHA 29 CFR 1926.1153
For small, well-defined openings, staged scoring and gradual deepening are key techniques to reduce blade stress and edge damage.
When embedded reinforcement is likely or the slab is unknown, stopping and using scanning/contractor support reduces both safety risk and rework costs. [ADD: best-practice reference]
What I’d feel comfortable doing vs. what I’d hand off
– DIY is usually reasonable for:
– Straight cuts of manageable length
– Defined pass-throughs with accessible edges
– Jobs where you can set up extraction and maintain PPE continuously
– Stop and consider a pro if:
– You suspect heavy reinforcement or dense wire mesh (especially near the cut line)
– You need large slab removal that may stress adjacent structure
– Embedded utilities are unknown
– You can’t set up dust control and respirator protection properly
If you’re unsure about reinforcement depth or slab thickness, [ADD: consult a local concrete-cutting contractor or use a scanning method recommended by your equipment manufacturer].
Regulatory Exposure Limits for Respirable Crystalline Silica (US OSHA, 2024)
| # | Context in Concrete Work | Key OSHA Metric | Limit Type | Exposure Implication |
|---|---|---|---|---|
| 1 | General concrete cutting (baseline) | 0.05 mg/m³ | PEL (8-hr TWA) | Must be controlled |
| 2 | When exposures are higher (regulated controls) | 25 µg/m³ | Action level | Triggers control efforts |
| 3 | If respirator use is required | Program rules | Respiratory protection | PPE-backed controls |
| 4 | Engineering controls feasibility | Dust controls | Hierarchy approach | Prefer elimination/substitution |
| 5 | Exposure monitoring (when applicable) | Objective data | Assessments | Validate control effectiveness |
| 6 | Housekeeping during/after cutting | Avoid re-aerosolization | Dust management | Dry cleanup can worsen risk |
| 7 | Overall compliance goal | Below PEL | Exposure control | Target safe exposure levels |
Quick Checklist (Scan or Save)
– [ ] Correct diamond blade for concrete + correct tool compatibility (saw vs. grinder)
– [ ] PPE ready: eye protection, hearing protection, proper respirator
– [ ] Dust control set up (vacuum/extraction and/or wet method per tool/blade guidance)
– [ ] Cut line marked accurately; straightedge used
– [ ] First pass = score shallow groove
– [ ] Deepen gradually; don’t force the blade
– [ ] Stop if blade binds or you hit unexpected reinforcement—reassess
FAQ
What’s the best tool to cut concrete floors?
A concrete-cutting saw with a diamond blade is usually best for straight, controlled cuts; an angle grinder can work for smaller sections or tight spaces. The “best” choice depends on your cut length, thickness, and whether you’re removing a section.
Do I need a diamond blade to cut concrete?
Yes—diamond blades are designed for concrete cutting. Using the wrong blade type increases breakage risk and can make the cut unsafe or unreasonably slow.
How do I reduce dust when cutting concrete?
Use dust extraction/vacuum systems compatible with your tool and blade, and follow the guidance for whether wet cutting or dry cutting is recommended. [ADD: specify the method you plan to use once you know your tool/blade guidance.]
Can I cut through reinforced concrete with DIY tools?
Sometimes, but reinforcement significantly changes the cutting behavior and increases the chance of binding. If you suspect rebar or heavy mesh, use a cautious, staged approach and consider professional help if the layout is complex.
Sources
– OSHA 29 CFR 1926.1153 (respirable crystalline silica exposure limits and required control concepts during cutting/grinding activities)
– NIOSH crystalline silica guidance (respirable dust health context and silica hazard background)
– [ADD: manufacturer documentation for your specific concrete saw/grinder model, especially dust collection and safe operating depth/feed guidance]
– [ADD: manufacturer specs for the diamond blade type you plan to use (concrete rating, recommended use, and any wet/dry limitations)]
– [ADD: official safety guidance from the PPE/dust-control standard body or tool manufacturer regarding respirator selection for silica-containing dust]
Cutting a concrete floor cleanly comes down to three controllables: the right diamond blade for your tool, a precise cut line created before the blade engages deeply, and staged cutting that you can manage without forcing the kerf. If you plan dust control and PPE up front and stop when reinforcement or binding changes cutting behavior, you’ll avoid most of the cracks, jams, and unsafe cleanup situations that turn a simple cut into a costly repair.
Frequently Asked Questions
What is the safest way to cut a concrete floor without cracking the slab?
Use the right cutting method for your slab thickness and reinforce control by scoring first before making full-depth cuts. Mark the cut line with a chalk line and set up guide rails or a straight edge to prevent wandering. For smoother results and fewer chips, use a diamond blade matched to concrete and cut to a shallow depth in passes, then gradually increase depth rather than trying to cut through in one go.
How do you cut concrete floors with a diamond blade step by step?
Start by measuring and marking the exact layout, then choose a wet-cutting system or a vacuum shroud if you’re dry cutting to manage dust. Score the concrete with a shallow pass, typically about 1/2 to 1 inch deep depending on the tool and blade, then step down gradually to the full depth needed. Keep the saw’s blade aligned with the mark and let the blade do the work—forcing can cause overheating, binding, and uneven edges.
Why is dust control important when cutting concrete floors?
Cutting concrete creates hazardous silica dust that can cause serious long-term respiratory damage if inhaled. Use a HEPA-filtered dust extractor or wet-cutting approach, and wear proper PPE such as an N95/P100 respirator, eye protection, and hearing protection. Contain the work area with plastic sheeting and run the extractor continuously for the duration of the concrete cutting process.
Which saw is best for cutting concrete floors: angle grinder or walk-behind saw?
An angle grinder is usually best for smaller concrete floor cuts, tight corners, and localized openings like small trenches or door thresholds. A walk-behind saw is typically better for longer, straighter cuts because it provides greater stability and cutting depth for thicker slabs. For best results, match the saw type to the job size and ensure you’re using a diamond blade designed for concrete, not masonry or general-purpose blades.
What’s the best way to cut concrete floors near rebar or electrical lines?
Before cutting, locate rebar and any embedded utilities using a concrete scanning tool or by reviewing building plans. If you suspect rebar, use a diamond blade intended for reinforced concrete and plan for slower cutting speeds and incremental passes to reduce vibration and blade wear. Never cut through unknown utilities—if lines can’t be confirmed, pause and hire a pro to mark safe zones before you start cutting the concrete floor.
📅 Last Updated: October 10, 2026 | Topic: How to cut concrete floors? | Content verified for accuracy and freshness.
References
- Google Scholar Google Scholar
https://scholar.google.com/scholar?q=how+to+cut+concrete+floor+safely - Google Scholar Google Scholar
https://scholar.google.com/scholar?q=concrete+saw+cutting+technique+blade+selection - Google Scholar Google Scholar
https://scholar.google.com/scholar?q=crystalline+silica+control+during+concrete+cutting+and+core+drilling - Silica, Crystalline – Overview | Occupational Safety and Health Administration
https://www.osha.gov/silica - 1926.1153 – Respirable crystalline silica. | Occupational Safety and Health Administration
https://www.osha.gov/laws-regs/regulations/standardnumber/1926/1926.1153 - Silica and Worker Health | Silica | CDC
https://www.cdc.gov/niosh/topics/silica/ - https://www.cdc.gov/niosh/topics/silica/construction.html
- https://www.epa.gov/indoor-air-quality-iaq/crystalline-silica
- eCFR :: 29 CFR 1926.1153 — Respirable crystalline silica.
https://www.ecfr.gov/current/title-29/part-1926/section-1926.1153 - https://en.wikipedia.org/wiki/Concrete_saw