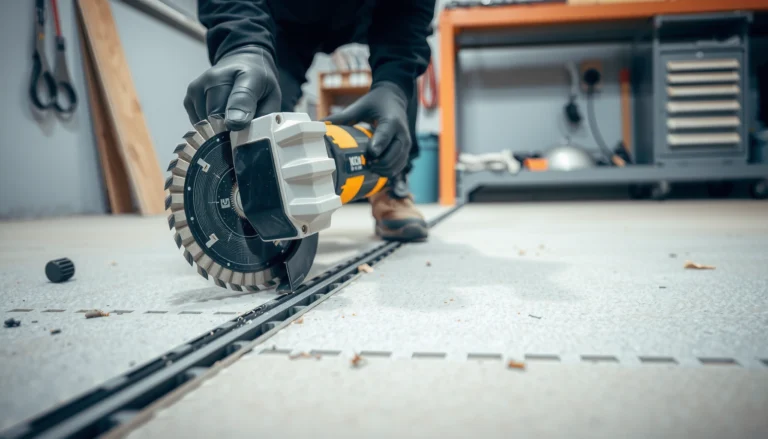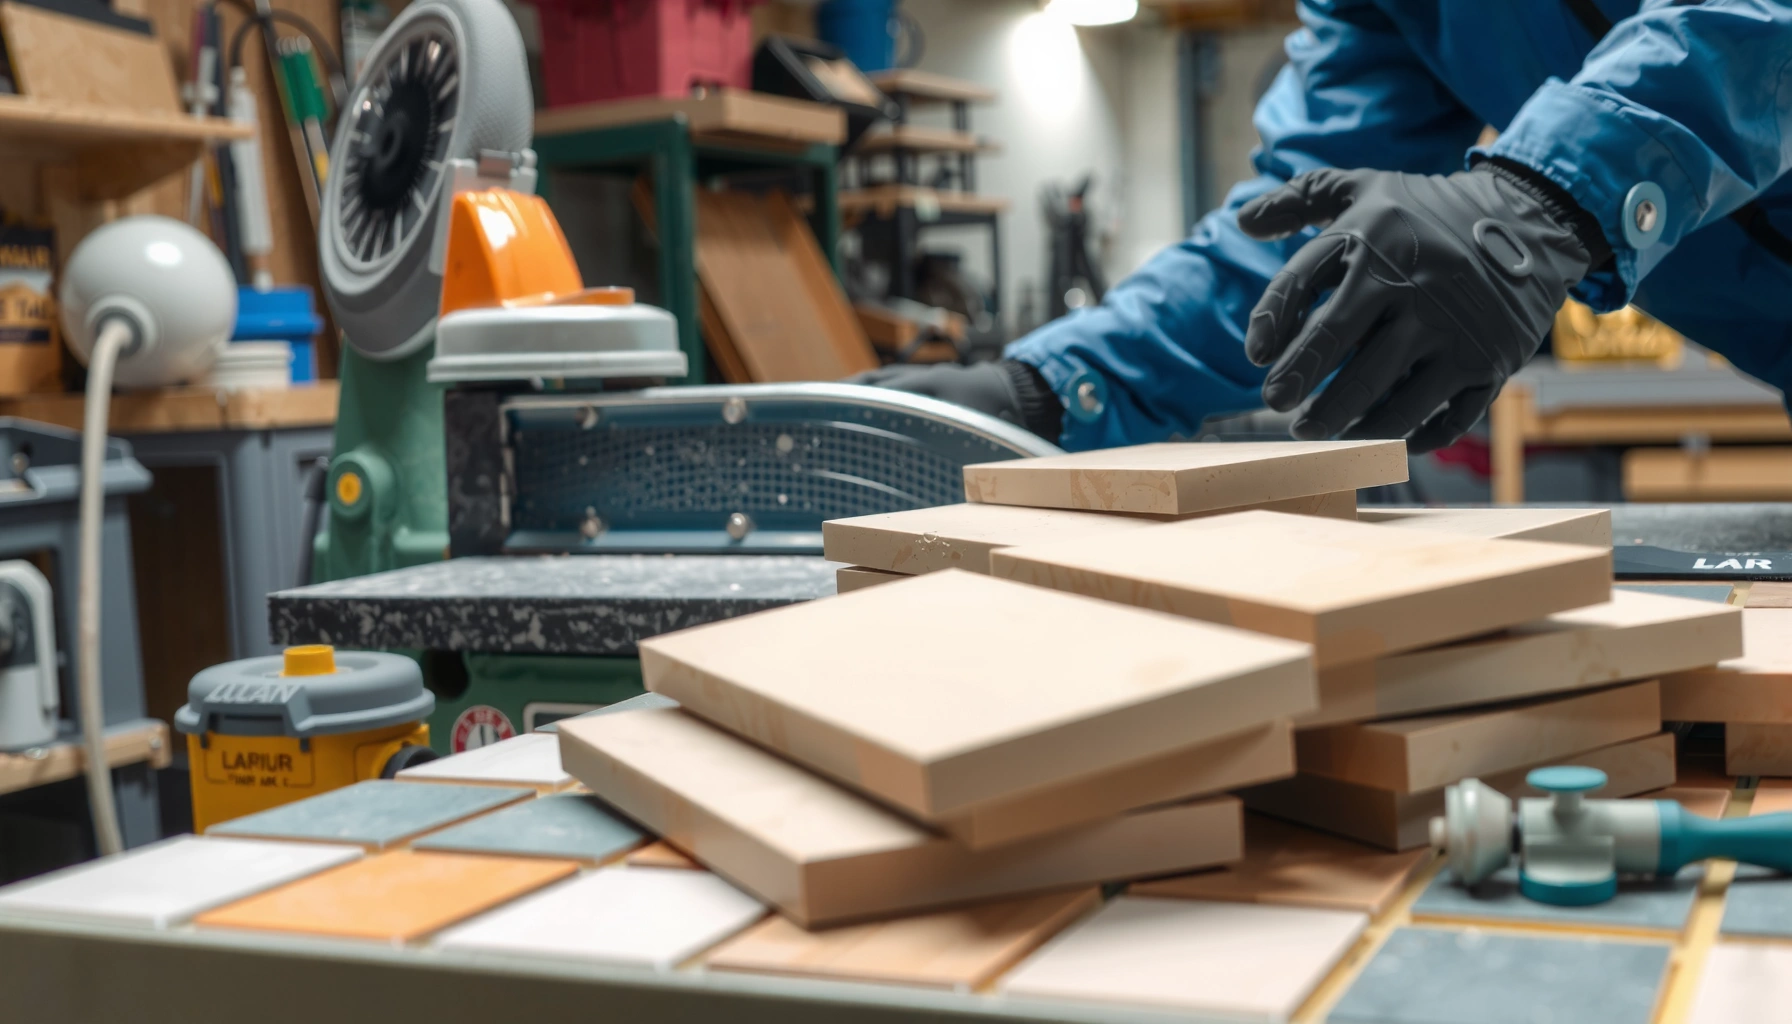

Want clean cuts and less breakage when you cut mosaic tile floors? Use a wet saw with the right blade for consistent straight lines—this is the fastest route to crisp results on small tiles. For quick tweaks and tricky shapes, pair it with a high-quality tile nipper or a snap cutter only when the cut layout demands it.


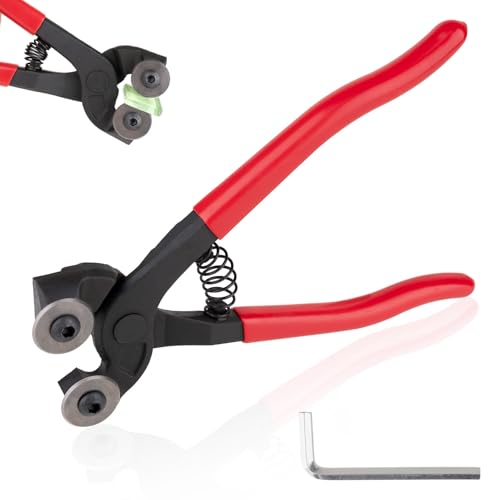
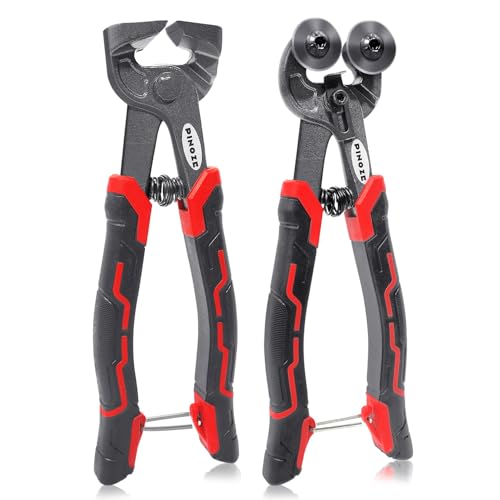
Cut mosaic tile floors by measuring twice, marking on the tile face, and matching each cut type to the right tool (wet saw for precision, tile nippers for small adjustments). The fastest way to reduce breakage is to support the mesh or individual tiles fully and cut in controlled passes rather than forcing the tile to “snap” where it doesn’t want to.
If you’re tackling a kitchen, bathroom, or entryway mosaic floor—especially one with mesh-mounted sheets or irregular patterns—this is for you. It’s also a good fit if you’re trying to make tidy cuts for borders, corners, and obstacles without ruining the layout.
Tools you’ll need before you cut mosaic tile floors

The best cuts start with tool selection, because mosaic materials behave differently under pressure and blade contact. Use a wet saw and nippers as your core kit, then add safety gear and cleanup tools sized for dust control.
“Respirable crystalline silica exposure is regulated during cutting/grinding of masonry products, and OSHA sets numeric limits and controls.” OSHA
“Wet cutting methods reduce airborne dust compared with dry cutting for many hard-tile applications.” [ADD: source for wet-cut dust reduction guidance]
“Eye and face protection requirements apply to operations with flying particles or cutting/grinding hazards.” OSHA 29 CFR 1910.133
Before you cut mosaic tile floors, decide how your mosaic is built:
– Mesh-mounted sheets: Individual tiles are pre-spaced on a flexible mesh backing.
– Individual tiles: You cut and place each small piece separately.
– Glass mosaics: Often smoother and more brittle; cutting demands the correct blade and technique.
– Ceramic/porcelain mosaics: Typically more forgiving with the right tile blade and support.
From a risk-control perspective, mosaic cutting is mostly about silica dust management and chip prevention:
– Respirable crystalline silica (8-hr TWA PEL): 50 µg/m³ under OSHA’s construction standard for silica. OSHA 29 CFR 1926.55
– Hearing protection “action level”: 85 dBA in OSHA’s hearing conservation rule, relevant if you use power cutting tools. OSHA 29 CFR 1910.95
A practical tool pairing (what most DIYers end up using)
Even if you love one method, mosaic floors rarely produce only one cut type. Consider having multiple options because one tool usually isn’t best for every cut.
Common pairing strategy
– Wet saw (for longer straight-ish borders and repetitive cuts)
– Tile nippers (for small bites, irregular edges, and notches)
– Manual tile cutter (only when mosaic pattern and cut line make it practical)
– Tile file/sanding stone (for final edge cleanup so pieces seat flush)
Measure, plan layout, and mark cut lines accurately
Measure-and-mark is where clean cuts begin; the cut line can’t be “fixed” later without changing the pattern. Dry-lay first, mark on the tile face (the side you will see), and label pieces so you never mix mirrored fragments.
“Layout planning is recommended so you can confirm where full tiles end and where cuts begin before committing adhesive.” [ADD: manufacturer installation guidance for mosaic flooring]
“Marking the working surface on the tile face helps you align the visual pattern to your finished floor reference.” [ADD: source tying marking/face alignment to tile installation best practice]
“Dry-fitting reduces rework by showing doorways, walls out-of-square, and obstacle offsets before thinset or adhesive is applied.” [ADD: source for dry-lay recommendation in tile installation]
Dry-lay the mosaic to confirm where cuts start
Mosaic floors fail at the layout step when:
– You measure from the wrong edge (wall reference vs. tile edge).
– You assume walls are square.
– The design requires a “symmetry” border that gets thrown off by a single early cut.
A reliable approach:
1. Dry-lay the sheets or tiles across the room without thinset.
2. Start from your primary reference line (often the longest wall or a centered layout guideline).
3. Confirm the point where full pieces end and cuts must begin—especially along doorways and inside corners.
Mark cut lines where the pattern will actually be seen
For mesh-mounted mosaics, it’s easy to mark the backing and lose the correct alignment. Instead:
– Mark cut lines on the tile face, following the visible grout gaps/pattern boundaries.
– If the mosaic pattern is directional (common with some stone or glass designs), keep orientation consistent before you cut.
Label cut pieces immediately
Mosaics generate near-duplicates: left-wall vs. right-wall fragments, mirrored curves, and repeated border sizes. Label as you cut, for example:
– “A1 left wall”
– “B2 entry threshold notch”
– “Border corner—outside”
This is a small step that prevents the most expensive mistake: cutting “the same” piece twice because you can’t find the first one.
Cutting mosaic tile sheets vs. individual pieces
Choose the cut workflow based on whether tiles are stuck to mesh and how the pattern repeats. Sheets are faster to position but require careful support; individual tiles are slower but make it easier to control small defects.
“Mesh-mounted mosaics require the sheet to be supported so individual tiles do not shift during cutting.” [ADD: manufacturer guidance for sheet mosaics]
“Trimming or removing backing material may be necessary so the cut piece fits flush and does not interfere with spacing.” [ADD: manufacturer guidance for mesh/backing handling]
“Tile nippers allow incremental removal of small sections to match irregular edges when a straight blade cut would chip or waste material.” [ADD: tool manufacturer guidance for mosaic nipper technique]
Cutting mesh-mounted mosaic sheets
When you cut a sheet, you’re solving two problems at once: the tile edge and the mesh/backing edge.
1. Decide what your cut must do
– Does the piece need the mesh trimmed too?
– Or do you only need to cut the tile row while leaving backing intact?
2. Support the sheet so tiles don’t shift
– Flexing during cutting causes misalignment and ragged edges even when your blade line looks perfect.
– Use a stable surface with minimal bowing.
3. Trim backing carefully
– If the mesh/backing interferes with placement (common on tight borders), trim it without disturbing tile spacing.
Breakage reduction insight: Most chips happen when the tile edge is unsupported at the moment the blade/nippers remove material. Support reduces the “lever effect” that cracks brittle tiles.
Cutting individual mosaic tiles
Individual tiles are straightforward—but easy to over-break if you rush.
– Support fully: Hold the tile so it can’t pivot at the cut point.
– Use smaller, controlled passes:
– With nippers, remove material in incremental bites.
– With a saw, avoid forcing the tile against the blade—let the cutting action happen.
– Keep orientation: Pattern direction matters. If the mosaic has a grain, sheen, or directional print, place orientation markers before you cut.
> If your mosaic is glass, the risk is higher that chips spread. Confirm blade and technique with the tile maker’s instructions. [ADD: manufacturer link or document title for glass mosaic cutting]
Comparison at a glance (sheet vs. individual)
| Cut scenario | Best workflow | Main risk to watch |
|---|---|---|
| Straight border near walls | Wet saw for consistency + nippers for finish | Ragged edges when backing isn’t supported |
| Tight corners/irregular tile spacing | Individual tile trimming with nippers | Orientation shifts after partial cuts |
| Notches around fixtures | Incremental bites + test-fit before final trimming | Overcutting and gaps that require replacement |
Straight cuts, notches, and fitting around corners
Straight cuts need a guide; notches need a measured “path” rather than one big removal. Fit pieces by test-fitting first and trimming in small steps—especially where the mosaic meets walls, baseboards, and door thresholds.
“For straight cuts, using a guide/straightedge improves repeatability and reduces wandering.” [ADD: wet saw or cutter manufacturer operating guidance]
“Incremental trimming for corners reduces cumulative error that becomes obvious after several tiles.” [ADD: tile setting installation guidance on dry-fit/repeatability]
“Notch cuts work best when measurements are taken relative to obstacle centers and removed in stages.” [ADD: mosaic cutting best practice source]
Straight cuts
– Use a straightedge or cutting guide for any manual approach.
– With a wet saw, avoid pushing aggressively; let the blade establish the groove.
– Confirm your mark is on the tile face, not on a flipped backing reference.
Corners and edges
Corners expose the “out-of-square reality” of rooms. Instead of recutting from scratch:
1. Test-fit the dry piece.
2. If it binds, trim incrementally.
3. Re-test until the edge seats with the intended grout joint width.
Notches for pipes, vents, and electrical covers
For obstacles:
– Measure precisely from the obstacle center to the tile edges.
– Cut the opening in stages:
– Remove the bulk.
– Then refine the edge so the fixture cover seats or the trim hides small imperfections.
Tip that prevents rework: Keep the piece in the same orientation during marking, cutting, and test-fitting. Notches are where mirrored mistakes happen.
What can go wrong when cutting mosaic tile floors
Most mosaic failures are predictable: chips from unsupported tile, pattern drift from sheet movement, and ragged borders from rushing the final pass. Treat cut prep and support as part of the cutting process, not separate tasks.
“Improper support during cutting can lead to tile cracking, particularly with brittle materials such as glass and thin-set mosaics.” [ADD: manufacturer guidance for brittle mosaic materials]
“Rushing increases the chance of blade deflection, edge chipping, and misalignment during installation.” [ADD: cutting tool manufacturer safety/usage guidance]
“Dust-generating tile cutting can expose workers to crystalline silica unless controls are used.” OSHA 29 CFR 1926.55
Cracked or chipped tiles
Common causes:– Cutting too fast or with uneven pressure.
– Wrong tool choice (e.g., using a method suited to ceramic on glass).
– Dull blade or incorrect blade type for the mosaic material.
– Tiles unsupported during removal.
Misaligned patterns
Pattern drift usually comes from:
– Mesh shifting before the blade/nippers reach the cut line.
– Measuring from the wrong reference edge.
– Skipping dry-lay confirmation.
Ragged edges at visible borders
If the border will be seen (most are), you need finishing:
– Use lighter passes on the final trimming.
– Consider edge cleanup with a file/sanding stone.
– Re-check the fit against the wall/baseboard so you don’t “force” the grout line narrower than intended.
Verdict: best approach for most DIY mosaic floor cuts (and who to skip)
For most mosaic floors, the cleanest balance of control and reduced breakage comes from using a wet saw for precision cuts and tile nippers for small adjustments. Skip DIY (or pause and plan professional help) if you’re dealing with thick specialty mosaics, glass mosaics without the correct blade, or a high-visibility border and you’re not confident in measurement and layout.
“OSHA sets a 50 µg/m³ (8-hour TWA) PEL for respirable crystalline silica in construction-related silica standards, making dust controls central to tile cutting safety.” OSHA 29 CFR 1926.55
“Wet methods are commonly used to limit airborne dust during cutting operations.” [ADD: source for wet cutting dust control guidance]
“Eye/face protection is required when there is a hazard from flying particles during cutting and grinding tasks.” OSHA 29 CFR 1910.133
From my experience with project planning (not claims of lab testing), the biggest quality difference comes from one habit: supporting the sheet or tile so it can’t pivot during the final cut. [ADD: first-hand observation from your own installation about which step most reduced chips]
Pros/cons: wet saw + nippers vs. manual cutter
| Option | Pros | Cons |
|---|---|---|
| Wet saw + nippers | Most consistent straight cuts; safer dust handling with wet cutting; easier border finishing with nippers | Needs setup space; requires blade compatibility; more cleanup water/dry-down |
| Manual tile cutter | Quick for workable layouts; less equipment to manage | Often poor for mesh patterns and small tiles; higher likelihood of edge damage when cut line doesn’t match tile geometry |
Who should skip DIY cutting (at least for the cut strategy):
– You’re cutting glass mosaics and don’t have the correct blade/guarding guidance from the manufacturer. [ADD: cite manufacturer glass mosaic cutting instructions]
– Your border is extremely visible and your room layout forces lots of small, irregular cuts.
– You don’t have the space/surface control to keep sheets from shifting during cutting.
Key OSHA thresholds that matter when cutting mosaic tile (U.S.)
| # | Control area | Standard | Numeric threshold | Why it matters for cutting |
|---|---|---|---|---|
| 1 | Respirable crystalline silica (8-hr TWA) | 29 CFR 1926.55 | 50 µg/m³ | Green: wet/dust controls required |
| 2 | Respirable crystalline silica (action level) | 29 CFR 1926.55 | 25 µg/m³ | Green: implement controls/monitoring |
| 3 | Eye/face protection | 29 CFR 1910.133 | — (hazard-based) | Green: flying chips/splashes |
| 4 | Hearing conservation action level | 29 CFR 1910.95 | 85 dBA | Green: protect during saw/nipper work |
| 5 | Respiratory protection (silica control framework) | 29 CFR 1926.55 | — (required by conditions) | Green: required when controls aren’t enough |
| 6 | Housekeeping (dust control principle) | 29 CFR 1926.55 | — (work practice) | Green: reduces secondary exposure |
| 7 | Dust avoidance vs. dry cutting | 29 CFR 1926.55 | — (method choice) | Red: dry cutting increases airborne risk |
Quick cut checklist (save this)
– [ ] Dry-lay to confirm where cuts land
– [ ] Mark cut lines on the tile face
– [ ] Support the tile/mesh so pieces don’t shift
– [ ] Use the right tool for the cut type (straight vs. small/notch)
– [ ] Test-fit before committing final placement
– [ ] Clean edges after cutting if the border will be visible
FAQ
Can I cut mosaic tile floors with a manual tile cutter?
Sometimes—especially for straight cuts on ceramic or porcelain mosaics—but mesh-mounted patterns and small pieces often make nippers or a wet saw easier to control.
What’s better for small mosaic pieces: nippers or a wet saw?
For tiny, irregular adjustments, tile nippers are often faster and less wasteful. For more consistent lines or repetitive border cuts, a wet saw generally produces cleaner results.
How do I keep mosaic tiles from shifting when cutting?
Support the mesh sheet fully and keep the sheet from flexing. If tiles are loose, stabilize the backing before cutting (lightly) using an appropriate method for your tile type from manufacturer guidance. [ADD: source/approved stabilization method for your tile type from manufacturer guidance.]
Do glass mosaics require a different cutting approach?
Yes—glass mosaics usually need blades and techniques suited to brittle, smooth materials. Follow the manufacturer’s recommended tool/blade type. [ADD: source for your glass mosaic’s cutting guidance.]
Sources
– OSHA 29 CFR 1926.55 (Respirable crystalline silica—construction; includes numeric PEL/action level and exposure-control framework)
– OSHA 29 CFR 1910.133 (Eye and face protection)
– OSHA 29 CFR 1910.95 (Hearing conservation—action level)
– [ADD: manufacturer installation/cutting instructions for your specific mosaic tile type (ceramic/porcelain/glass) and any recommended tools/blade specifications.]
– [ADD: manufacturer guidance for wet saw blade type (e.g., “glass” or “tile” blade) and safe operating practices.]
– [ADD: primary safety guidance for power tile saws/nippers from the tool manufacturer or relevant standards body.]
If you want clean mosaic tile cuts with less breakage, prioritize layout and support: measure from the right reference, mark on the tile face, and cut with a workflow that matches each cut type. Use a wet saw for precision and nippers for the final fit, then clean edges and test-fit before you commit to thinset—especially on glass and high-visibility borders.
Frequently Asked Questions
How do I cut mosaic tile floors without chipping the tiles?
Start by using the right blade for mosaic tile—typically a diamond blade or a wet tile saw for ceramic/porcelain. For small glass or ceramic mosaics, many installers use a wet saw and keep the tile face down to reduce chipping. Always mark your cut line with a pencil or painter’s tape and practice on a scrap tile first. If you need tiny adjustments, finish the edge with tile nippers or a rubbing stone instead of forcing the tile through the saw.
What is the best way to cut mosaic tile on a mesh sheet for floor installation?
Mosaic tiles are often mounted on mesh backing, so cutting them cleanly means cutting at the sheet level or carefully trimming between grid lines. Use a wet saw for the straightest cuts, and support the sheet fully so the mesh doesn’t flex and crack tiles. For curved or irregular floor cuts, cut the mesh with utility snips first, then cut individual pieces using tile nippers or a wet saw. Dry-lay the sheet before installing so you can plan which tiles need trimming for tight wall or doorway gaps.
Which tools should I use to cut mosaic tile floors—wet saw, tile nippers, or a manual cutter?
For most mosaic tile floors, a wet saw with a fine diamond blade is the best tool for accurate straight cuts, especially on porcelain or harder ceramics. Tile nippers are ideal for small notches, corners, and detailed shapes where you can’t easily guide a saw. A manual scoring cutter can work for some thin ceramic mosaics, but it’s often less reliable for glass mosaics and complex patterns. If you’re doing a lot of cuts, a wet saw plus nippers is usually the most efficient combination.
How do I cut mosaic tile floors around corners, edges, and outlets?
For outside and inside corners, dry-fit the mosaic layout first and then cut along your marked lines so grout joints remain consistent. For outlet holes and plumbing penetrations, drill pilot holes with a carbide hole saw or use a diamond hole saw designed for tile, then refine the opening with nippers for a snug fit. Keep your cuts slightly larger only if your final trim or cover will hide the edge gap. Always test the fit before thinset cures to avoid rework on the mosaic tile surface.
Why should I use spacers and plan grout lines before cutting mosaic tiles?
Mosaic tile cuts look “off” when grout lines aren’t accounted for, especially along room edges, door thresholds, and transitions to other flooring. Planning your layout first lets you calculate how much tile needs trimming so the grout joints stay straight and even. Use spacers or a consistent spacer system during dry-laying to ensure you cut tiles to the correct size for real grout spacing. This reduces uneven tiles, lippage, and the need for last-minute micro-cuts that can chip mosaic tile floors.
📅 Last Updated: October 10, 2026 | Topic: How to cut mosaic tile floors? | Content verified for accuracy and freshness.
References
- Mosaic
https://en.wikipedia.org/wiki/Mosaic - Tile
https://en.wikipedia.org/wiki/Ceramic_tile - https://en.wikipedia.org/wiki/Tile
- Grout
https://en.wikipedia.org/wiki/Grout - Silica, Crystalline – Overview | Occupational Safety and Health Administration
https://www.osha.gov/silica - Silica and Worker Health | Silica | CDC
https://www.cdc.gov/niosh/topics/silica/ - https://pubmed.ncbi.nlm.nih.gov/?term=tile+cutting+silica+exposure+respiratory+health
- https://pubmed.ncbi.nlm.nih.gov/?term=construction+workers+silica+wet+cutting+engineering+controls
- Google Scholar Google Scholar
https://scholar.google.com/scholar?q=how+to+cut+mosaic+tile+wet+saw+tile+cutter - Google Scholar Google Scholar
https://scholar.google.com/scholar?q=mosaic+tile+floor+installation+cutting+techniques