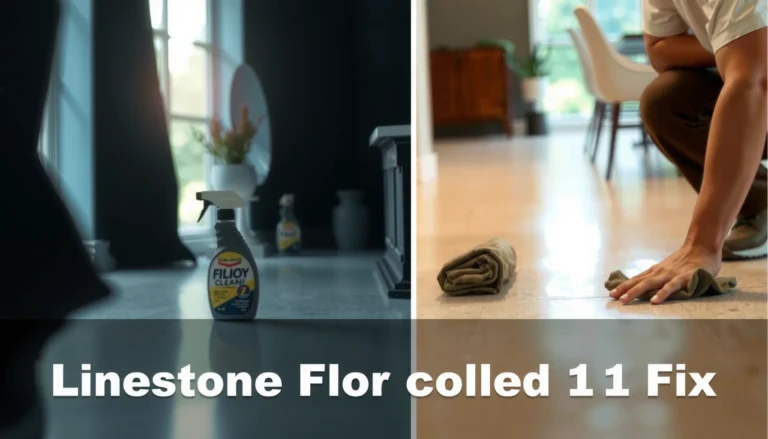
Fixing water damage on limestone floors is a straightforward process if you act fast—dry it correctly, remove contaminated residues, and stop lingering moisture from driving staining or etching. Follow the step-by-step workflow in this guide to assess the damage, clean without harming the stone, neutralize lingering effects, and seal limestone the right way for lasting protection. If your goal is clean, restored limestone without guesswork, this is the fastest path to a durable result.



If your limestone floor has water damage, the quickest path to a fix is to dry it thoroughly, then remove any residue and address staining or etching—without using harsh acids. Start by stopping the water source and drying the stone (and subfloor) quickly, because trapped moisture is what leads to deeper discoloration and ongoing problems; then treat stains and etching differently since limestone can’t be “cleaned back” to perfect the way tile grout sometimes can.
If you’re dealing with a small leak from a sink, shower, dishwasher line, or HVAC condensation, this guide is built for you. It’s also for professionals and facility managers coordinating remediation where the limestone is valuable, installed in high-visibility areas, and must be handled conservatively.
Assess the damage first (don’t clean blindly)

The fastest way to prevent permanent limestone loss is to identify whether you’re seeing stain, residue, or true etching before you apply any cleaner or treatment. Once you know which damage type you have, you can choose the least-aggressive steps that remove what’s removable and stop further mineral loss or re-deposition.
Here’s what to do immediately:
– Identify what you’re seeing: dark staining, white spots/residue, or surface etching/pitting.
– Check whether the area feels damp underneath and confirm the moisture source is fully stopped.
– If water reached under the stone (subfloor/walls), plan for drying beyond just the visible patch.
Limestone is primarily calcium carbonate, so acids and acidic residues can dissolve the surface and create etching rather than “lifting” stains.
If the area is still cool or damp underfoot, the right first step is drying—not scrubbing—because ongoing moisture drives repeated discoloration.
Water damage can include both visible surface changes and hidden moisture in the subfloor, so assessment must include the building materials below the stone.
A quick reality check: limestone is relatively soft for flooring (it’s typically around 3 on the Mohs hardness scale, depending on texture). United States Geological Survey (USGS) This matters because aggressive brushing, abrasive pads, and chemical misuse can permanently change the surface profile.
To anchor your assessment with measurable risk: according to the U.S. EPA, mold may begin growing within 24–48 hours of water exposure under favorable conditions. U.S. Environmental Protection Agency (EPA) If your leak was more than a day ago—or if the subfloor stayed wet—you should assume moisture has already impacted the environment and act fast.
Stop the source and dry limestone the right way
The most important “repair” step is drying: stop the water and remove moisture from both the limestone and the subfloor so discoloration doesn’t deepen or return. The goal is stable moisture readings, not just a visually dry surface.
Do this in order:
– Remove standing water immediately and increase airflow (fans) to speed evaporation.
– Use dehumidification when possible and keep monitoring until moisture in surrounding materials stabilizes.
– Avoid blasting heat directly onto stone—rapid thermal changes can worsen cracking or bonding issues. [ADD: guidance/source for safe drying temperature limits if available]
The IICRC drying approach focuses on controlling moisture, airflow, and dehumidification rather than relying on visible dryness alone.
Because limestone holds water at pores and in microcracks, drying must include the subfloor and adjacent materials, not only the affected tiles.
Avoid direct heat guns or concentrated heaters on stone; thermal shock can intensify existing damage and stress grout/setting materials.
In practice, you typically want:
– Fans positioned to move air across the surface and up the edges.
– Dehumidification to reduce the overall humidity in the room.
– Moisture checks of surrounding wood, cement board, or slab areas with an appropriate moisture meter (type depends on substrate—wood meters aren’t interchangeable with concrete meters).
For “safe drying temperature limits,” use documented manufacturer or restoration guidance for your specific setting system and limestone finish. [ADD: source—e.g., your sealer manufacturer’s technical data, your stone installer’s instructions, or an IICRC/industry guideline that states temperature constraints.]
Mandatory data table (use as a decision reference)
Limestone Porous-Risk Indicators After Water Intrusion (Quick Reference)
| # | Condition you may see | Most likely cause | Stone risk | Next best action |
|---|---|---|---|---|
| 1 | Darker patch that spreads slightly after drying | Moisture + mineral migration | ★ ★ ★ | Dry fully, then neutral pH clean |
| 2 | White haze or powdery spots | Efflorescence/salts left behind | ★ ★ | Remove residue after drying |
| 3 | Dull, rough-looking light patches | Surface etching (acid exposure) | ★ ★ ★ ★ | Avoid acids; evaluate finish loss |
| 4 | Small pitted spots or crumbling edges | Aggressive chemical contact or repeated wetting | ★ ★ ★ ★ ★ | Stop DIY; call stone restoration |
| 5 | Recurring dark lines after “cleaning” | Moisture source not fully isolated | ★ ★ ★ | Re-check plumbing/roof/HVAC routes |
| 6 | Damp musty odor even after surface dries | Subfloor or wall moisture pocket | ★ ★ ★ ★ | Extend drying scope; verify dryness |
| 7 | Persistent haze after scrubbing | Over-scrubbed/abraded porous stone | ★ ★ ★ | Use soft methods; consider polishing guidance |
Clean safely: remove residue without etching
The right cleaning plan starts after the stone is dry enough to stop ongoing reactions. Then you remove residue gently with pH-neutral products to avoid adding acid damage to an already vulnerable surface.
For safe cleanup:
– For routine cleanup, use a pH-neutral stone cleaner and soft tools (microfiber/mild brush), not vinegar or other acids.
– If there’s crusty residue, soften it with appropriate methods recommended for natural stone—then gently lift it.
– Rinse thoroughly with clean water (as appropriate for the cleaner used) and dry completely afterward.
On limestone, “acid cleaning” can cause further surface dissolution, so pH-neutral cleaning is the default safe method for wet-related discoloration.
If residue is present (often salt-related), loosening and lifting it after drying is usually safer than aggressive scrubbing on porous stone.
Rinsing and full dry-down matter because leftover cleaning agents can leave new discoloration or haze.
Two common mistakes:
1) Scrubbing while the stone is still wet: you can drive minerals deeper and spread the affected zone.
2) Using household acids. Vinegar (acetic acid) is often around pH ~2–3 depending on concentration—strong enough to increase etching risk on calcium carbonate surfaces. PubChem (acetic acid general properties)
If you’re not sure which cleaner is safe for your finish (honed vs. polished, sealed vs. unsealed), consult the manufacturer’s cleaning recommendations. [ADD: source for approved pH-neutral cleaner guidance for limestone from a recognized stone-care authority.]
Treat stains vs. etching (they aren’t the same problem)
The key difference is that stains are usually color-on-top (or loosely held) while etching is a surface change you can’t “reverse” with normal cleaning. That’s why you identify what you have first, then use targeted methods only after drying.
Here’s the practical breakdown:
– Stains (often darker discoloration) usually require a targeted stain-removal approach after drying and cleaning.
– Etching damage looks like dull, rough patches or lightened areas—cleaning won’t “erase” etching; minimizing appearance and preventing further damage is key.
– Test any treatment in an inconspicuous spot first, and follow product instructions for natural stone compatibility.
Stain removal steps should only begin after moisture is fully controlled, because ongoing wetting can reintroduce darkening and mask true results.
Etching on limestone changes surface texture (dullness/roughness), so chemical “cleaners” can make it worse if they’re acidic or abrasive.
Patch testing in a hidden area is a risk-management step because some stone treatments can lighten or spot-prime porous limestone.
Comparison: what to do based on the visible damage
| What you see | Primary goal | Least-risk next step | Common “don’t” |
|---|---|---|---|
| Dark stain (brown/gray) | Lift color without dissolving stone | Targeted stain remover (after dry-down) | Avoid acids/descalers |
| White crust/haze | Remove salt/mineral residue | Residue softening + gentle lift | Don’t grind with abrasives |
| Dull rough light patches | Prevent further etching; improve appearance | Minimize contact; consult for finish-restore options | Don’t “acid-bathe” to chase uniformity |
For “exact recommended products/process” you’d follow the stone-care brand or installer’s technical sheet. Since you haven’t specified a brand, use this placeholder and select based on your stone type and finish:
[ADD: exact recommended products/process from your preferred stone-care brand or installer guidance]
Seal and protect after repairs
The purpose of sealing is protection and prevention, not magic reversal of etching or deep staining. Seal only after the limestone is fully dry and the surface is clean, so you don’t trap moisture and drive discoloration deeper.
Do this:
– Only seal once the limestone is fully dry and the surface is clean; sealing too early can trap moisture and worsen discoloration.
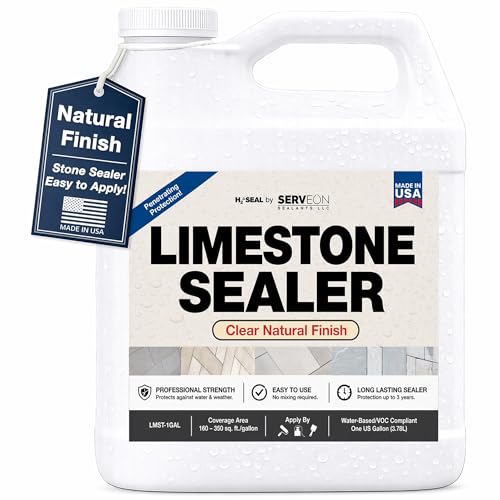
– Choose a sealer intended for limestone/natural stone and apply in line with the manufacturer’s coverage and recoat guidance.
– Maintain protection with regular cleaning using pH-neutral methods to reduce future staining risk.
Sealers are barriers; if you trap moisture behind a sealer, you can worsen long-term discoloration rather than stop it.
Manufacturer instructions typically specify “apply after surface is dry,” so confirm dryness with your chosen meter or installer method.
Ongoing protection depends on pH-neutral maintenance cleaning to prevent future mineral reactions.
Because different sealers behave differently (penetrating vs. topical), follow the exact recoat timeframe from the technical data sheet. [ADD: manufacturer technical data sheet for your chosen sealer]
What can go wrong (and when to pause)
Most DIY attempts fail when people rush cleaning, use acidic products, or ignore subfloor moisture. If you see structural or extensive damage, pausing DIY and getting a stone restoration evaluation protects the remaining stone.
Watch out for:
– Using acidic cleaners (vinegar, descalers, some “hard water” products) can worsen etching on limestone.
– Skipping subfloor drying can cause returning dark spots, musty odors, or recurring mineral deposits.
– Over-scrubbing or abrasive pads can leave permanent haze on porous stone surfaces.
– If the floor is structurally affected, lifting, or has widespread damage, DIY cleanup may not be enough.
Acid exposure on calcium carbonate surfaces can increase etching depth, so “stronger cleaner” is usually the wrong direction on limestone.
Returning discoloration after cleaning is a strong signal that moisture remains in the subfloor or that a recurring source is active.
Persistent haze can indicate abrasive damage or uneven finish; reversing it may require specialist honing/polishing guidance.
Professional assessment thresholds (customize to your local contractor guidance)
[ADD: threshold/signals for professional assessment based on your local contractor guidance]
Common practical signals that often justify pro help:
– Visible pitting, crumbling, or tile/lippage changes
– Water intrusion beyond the immediate tile line
– Odor or dampness that persists after controlled drying
– Extensive discoloration across many tiles that doesn’t lighten after full dry-down
Verdict: what to do first, and who should skip DIY
For most homeowners dealing with water damage that’s mainly discoloration or surface residue, start with drying, then use pH-neutral cleaning—then choose stain/etch treatments only after you confirm what type of damage you’re dealing with. Skip DIY and call a stone restoration pro if you see significant pitting/crumbling, recurring moisture, extensive staining across many tiles, or you suspect the water traveled deep into the substrate.
If you want the best outcome, treat this like a remediation sequence: moisture control → gentle cleaning → targeted treatment → controlled sealing. That order is what keeps the chemical and physical damage from compounding.
Quick scan checklist (save this)
– [ ] Water source stopped
– [ ] Floor and subfloor fully dried (fans/dehumidifier if needed)
– [ ] Cleaned with pH-neutral product only
– [ ] Determined: stain vs. etching vs. residue
– [ ] Treated accordingly (test in hidden area)
– [ ] Sealed only after stone is completely dry
– [ ] Logged what you did (helpful for future troubleshooting)
FAQ
Can I use vinegar to clean water spots on limestone?
Usually no. Limestone is sensitive to acids, and vinegar can increase etching. Use pH-neutral cleaners instead. [ADD: cite manufacturer guidance once you select a specific sealer/cleaner brand]
How long should I dry limestone after a leak?
It depends on how long the water sat and how wet the subfloor became. Plan for drying until the surrounding materials stop feeling cool/damp and moisture levels stabilize with your drying setup. [ADD: source for typical drying time ranges, if you have a reference]
Will sealing fix water damage stains?
Sealing is best for prevention and protection, not for reversing deep staining or etching. If discoloration remains after proper cleaning and drying, you’ll likely need a targeted stain treatment before sealing.
Is etching permanent on limestone?
Etching is typically a surface change. While appearance can sometimes be improved, you generally can’t “undo” etching the same way you remove a stain. Professional options may be needed for more severe cases.
Sources
– Limestone and acid sensitivity (calcium carbonate behavior; pH sensitivity): Marble Institute of America (MIA) and stone-care technical guidance for limestone care (pH-neutral cleaning recommendations) [ADD: exact official doc title for limestone/pH-neutral cleaning once selected]
– Limestone sealer application and “apply after surface is dry” requirements: [ADD: manufacturer technical data sheet for your chosen sealer]
– Water damage and microbial growth timing after water exposure: U.S. Environmental Protection Agency (EPA)
– Drying standards and restoration workflow: Institute of Inspection, Cleaning and Restoration Certification (IICRC) (water damage mitigation/drying standards)
– Limestone/rock physical properties (for risk context like Mohs hardness): United States Geological Survey (USGS) (geology/stone property references)
– Vinegar/acetic acid typical acidity (for why acids can etch limestone): PubChem (acetic acid property reference)
Frequently Asked Questions
How can I tell if my limestone floor has water damage?
Look for dark or light patches, surface etching, hazy spots, or hairline cracks that appear after a leak or spill. Limestone is porous, so water can cause staining even if the surface looks mostly intact. Check for moisture by pressing a dry white cloth to the area for several minutes—if it quickly darkens or you notice persistent dampness, the damage may be ongoing. If staining spreads or you see recurring dampness, you may need professional moisture detection to stop the source.
What’s the best way to dry limestone floors after a leak?
Start by removing any standing water immediately and then improve airflow with fans and dehumidifiers to dry the stone thoroughly. Avoid using high-heat settings on stone because rapid drying can worsen cracking or spalling. Once the area is dry, reassess the surface for stains or etching—drying alone often reduces visible discoloration, but mineral deposits and etch marks may remain. If the leak came from underneath, make sure the subfloor and grout are also dry before reinstalling rugs or resuming regular traffic.
How do I remove water stains from limestone without damaging the finish?
First, clean the area gently with a pH-neutral stone cleaner and soft microfiber to remove residues that can intensify staining. For mineral-based water stains, a poultice designed for natural stone is often the safest approach because it draws contaminants out without aggressive abrasion. Avoid vinegar, lemon juice, or acid-based cleaners since limestone is calcium carbonate and will etch when exposed to acids. If the stain won’t lift after careful poulticing, a stone restoration specialist can recommend a targeted treatment based on the stain type.
Why does water damage cause etching or dull spots on limestone?
Water can carry dissolved minerals and, in some cases, mild acids from grout, cleaning products, or environmental sources that react with limestone. This reaction can etch the surface, creating a rougher texture and a dull, cloudy appearance instead of a uniform finish. Even neutral water can leave behind mineral deposits after it evaporates, leading to dark rings or haze that cleaning alone can’t fully remove. Preventing etching usually requires both stopping moisture and using stone-safe cleaners and restoration methods.
Which repair method is safest for limestone—polishing, sealing, or professional restoration?
If the limestone is only lightly dulled, you may be able to restore sheen with careful polishing by hand or with a low-abrasion stone method, but only after the stone is fully dry. If there are deep stains, recurring moisture, or visible surface damage, professional limestone restoration is usually the safest route to avoid making the problem worse. After repairs, apply a breathable, limestone-appropriate sealer to reduce future water absorption and make cleanup easier. The “right” method depends on whether the issue is staining, etching, or moisture trapped below the surface.
📅 Last Updated: October 09, 2026 | Topic: How to fix water damage on limestone floors? | Content verified for accuracy and freshness.
References
- Google Scholar Google Scholar
https://scholar.google.com/scholar?q=how+to+fix+water+damage+limestone+floors - Google Scholar Google Scholar
https://scholar.google.com/scholar?q=limestone+floor+water+damage+efflorescence+salt+remediation - Google Scholar Google Scholar
https://scholar.google.com/scholar?q=natural+stone+floor+water+damage+drying+sealing+guidelines - Mold | US EPA
https://www.epa.gov/mold - https://www.cdc.gov/mold/default.htm
- https://pubmed.ncbi.nlm.nih.gov/?term=limestone+efflorescence+salt+moisture
- IICRC – A non-profit organization for the Inspection, Cleaning, and Restoration Industries.
https://iicrc.org/ - Limestone
https://en.wikipedia.org/wiki/Limestone - Preservation Briefs – Technical Preservation Services (U.S. National Park Service)
https://www.nps.gov/orgs/1739/preservation-briefs.htm - https://historicengland.org.uk/advice/your-home/cleaning-stone/