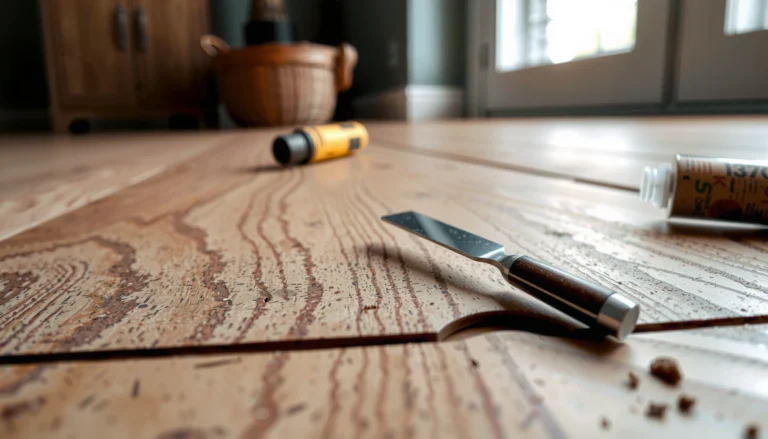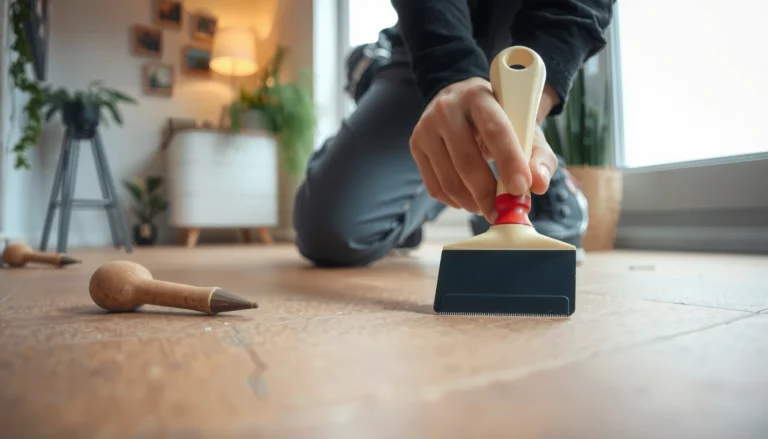

Fixing gaps in granite floors is a straightforward repair if you identify the cause and follow the right fill-and-finish method. This step-by-step guide shows you exactly how to remove loose material, prepare the gap for bonding, choose the correct granite-safe epoxy or grout, and restore a clean, flush surface. By the end, you’ll know what to do for hairline separations versus wider gaps—and how to prevent them from coming back.




If you have gaps in granite floors, the fix usually starts with identifying why the stone moved—most commonly grout failure, a loose/failed mortar bed, or a cracked/incorrectly filled joint. Clean out the joint fully, then re-pack and re-seal using a granite-appropriate grout or joint filler, and finish with the right sealant to prevent moisture from re-opening the gap. You’ll learn how to diagnose the cause, choose the right filler, and avoid the common mistakes that make gaps come back.
This guide is for homeowners, DIY remodelers, and property managers dealing with visible separation between granite tiles, hairline cracking along seams, or joints that have widened after installation, water exposure, or temperature changes.
Diagnose the cause of the granite floor gaps

You can often stop the problem long-term only by correcting the cause (not just refilling the visible seam). The fastest way is to confirm whether the issue is grout/joint deterioration or movement within the tile assembly.
If a granite tile “rocks” or produces a hollow/clicking sound when pressed, the failure is usually below the surface (setting bed or substrate), not in the grout line.
Grout joints that widen after water exposure commonly indicate that the joint was not sealed correctly or that the grout lost integrity and allowed moisture ingress.
Gaps that track corners and perimeter lines are frequently consistent with inadequate movement accommodation at transitions or edges.
Check whether it’s just the joint—or deeper tile movement
Start with a simple tactile inspection: look for separation in grout/joint lines, then carefully check tile stability by pressing on adjacent tiles. If you feel rocking, a “click,” or inconsistent firmness between tiles, treat it as a potential setting-layer or substrate issue.
Why this matters: rigid grout repair can only “bridge” a stable seam. If the tile assembly shifts, the new joint filler will be stressed repeatedly and gaps will reappear.
Look for patterns that point to the failure mechanism
Use the gap’s geometry as evidence:
– Following perimeter edges or corners: often indicates expansion/deflection or a missing/incorrect perimeter movement accommodation.
– Appearing after leaks, steam, or repeated wet mopping: often indicates moisture-related grout or sealant failure.
– Developing across many tiles at once: may suggest an underlying substrate problem, like insufficient mortar coverage or deflection.
Inspect the substrate (or at least the perimeter)
If you can view the perimeter—around vents, thresholds, or transitions—check for signs like uneven transitions, failed underlayment, or missing backing material. Where access is limited, observe clues: recurring gaps near the same room features, cracked tile edges, or uneven lippage often correlate with a compromised floor assembly.
> Data anchors (practical field targets):
> According to typical natural-stone installation practice, many grout joints are commonly set around 1/16 in (≈1.5 mm) to 1/8 in (≈3 mm) depending on tile size and layout (use your existing joint width as the closest reference).
> According to manufacturer technical guidance for joint prep, successful re-grouting typically requires removing material to stable edges and full depth rather than patching thin surface cracks (source varies by product—match your labeled instructions).
> According to ANSI/TCNA movement-joint philosophy (movement joints should remain flexible), movement areas require a sealant strategy rather than rigid grout (see Sources at the end).
Gather supplies (and pick the right filler for granite joints)
You need the right joint material system for the type of joint you’re repairing. Choose a rigid granite-compatible grout for stable seams and a flexible joint filler for movement joints—then pair it with a granite-appropriate sealer system.
Natural stone is porous and is often sensitive to stains, so joint repair materials and sealers should be labeled compatible with granite (especially for polished surfaces).
Movement joints are designed to accommodate motion; they typically require a flexible sealant, not a rigid grout that can crack under shear.
Correct tool choice (oscillating scraper/grout removal tools and fine brushes) reduces edge chipping and improves bond by exposing clean, sound substrate.
Tools you’ll actually use during prep
You want tools that remove failed material without chewing up polished stone edges:
– Oscillating scraper/blades or grout removal tools (gentle enough to avoid edge spalling)
– Utility knife/razor for scraping loose grout remnants
– Fine wire or nylon brush for dust control
– Vacuum with a crevice attachment (dust is the enemy of adhesion)
– Masking tape and plastic sheeting for keeping repair material off polished granite
Choose the joint repair system based on what failed
A key decision: Is this a normal grout joint or a true movement joint?
– Rigid grout / re-grout: Use when the joint is stable and the failure is grout deterioration or cracking within a fixed seam.
– Flexible joint filler / sealant: Use when the joint area is expected to move (transitions, perimeters where motion is accommodated, changes in plane, etc.).
Because granite is a natural stone, you also need a granite-appropriate sealant strategy. Most repair plans include both:
1) joint material (grout or flexible filler), and
2) a compatible sealer to reduce moisture uptake.
> Important: The placeholder in your workflow is the exact product system. Your repair success depends on matching the joint filler chemistry and sealer compatibility.
> Use: [ADD: exact sealer type/spec from your existing product or installer notes].
Plan for cure timing (and the “re-seal later” rule)
Joint fillers and grouts need full cure before sealing. Sealing too early can trap moisture and reduce adhesion or cause haze/staining on polished granite.
– Use your product labels for cure windows: [ADD: sealer/grout cure windows from your product labels].
Remove loose grout/material and prep the gap correctly
You can’t reliably fix gaps unless you remove weak, failing material to sound edges. Proper depth, cleanliness, and drying steps are what make the new joint filler last.
Successful grout repair typically requires removing all loose grout until you reach stable material so the new compound can mechanically bond.
Vacuuming and dust control improve bond strength because joint filler adhesives cure poorly on residual powder.
Some fillers tolerate minimal moisture while others require fully dry joints; following the label’s “dry joint” requirement is critical to prevent debonding.
Remove everything that’s already failed
Start by removing loose grout and any crumbly filler until it’s solid. If you only scrape the surface crack, the weak layer under it will continue to fail and the gap will return.
Then:
– Wipe/jostle-free clean
– Vacuum thoroughly
– Brush again if dust still clings to the joint walls
Dryness rules depend on the product chemistry
Some systems allow slight residual dampness; others require a fully dry joint. Follow the product label for:
– required drying time
– acceptable moisture conditions
Protect surrounding polished granite
Polished granite can show smears, haze, and stubborn residue. Mask adjacent stone if needed, and do a careful test removal/cleanup on a small area first.
Fill, grout, or seal—working from the joint outward
You fix the gap by matching the material to the joint behavior and then restoring the stone’s moisture protection. Work cleanly so the joint looks uniform and doesn’t create new weak spots.
For standard (non-moving) grout seams, packing the joint slightly overfull and then tooling helps achieve consistent contact and minimizes voids.
For movement areas, a flexible joint filler is preferred because it can deform with the floor assembly without cracking.
After the repair cures, applying the manufacturer-recommended sealer helps reduce staining and moisture ingress, which are common drivers of re-opening gaps.
If it’s a stable grout joint
1. Pack the joint with your granite-appropriate grout
2. Slightly overfill
3. Tool to match the existing profile
4. Clean excess before it fully hardens (use the product’s recommended cleanup method)
If it’s likely to move
Use a flexible joint filler designed for movement joints. The goal is not “perfect rigid grout texture”—the goal is long-term performance without repeated cracking.
Cure, clean, then re-seal
Once fully cured:
– Clean the granite surface (especially on polished faces)
– Apply the recommended sealer system
Follow: [ADD: sealer/grout cure windows from your product labels] for cure and recoat timing.
What can go wrong (and how to avoid repeat gaps)
Most repeat failures come from bonding/compatibility mistakes or from fixing the visible symptom while the floor assembly keeps moving.
Re-filling over loose grout is a top cause of rapid re-cracking because the bond forms on failing material, not on sound substrate.
Using rigid grout in a movement joint can crack quickly because grout cannot accommodate shear or deflection.
Sealing too early can trap moisture and lead to adhesion problems, discoloration, or surface haze.
Common mistakes that reopen gaps
– Leaving weak material behind: If any crumbly joint wall remains, new filler can detach and create hollow voids.
– Wrong product in the wrong joint type: Rigid grout in a moving area is the classic mismatch.
– Skipping or rushing the cure: Sealing or heavy traffic before full cure can compromise integrity.
– Ignoring tile movement: If tiles rock, the problem is usually the setting layer/substrate—filling won’t correct the root cause.
Comparison: rigid grout vs. flexible filler (quick decision)
| Feature | Rigid grout (typical for stable seams) | Flexible joint filler (typical for movement joints) |
|---|---|---|
| Designed to accommodate movement | No | Yes |
| Failure mode when stressed | Cracking, seam opening | Stretching/relieving stress |
| Best locations | Stable grout seams with minimal expected motion | Transitions, perimeters, movement joints |
| Typical look goal | Uniform grout line profile | Smooth, compatible seal line finish |
Verdict / tip: when DIY repair is realistic vs. when to call in help
DIY works when the gap is limited to the grout/joint line and tiles feel solid underhand pressure. Skip DIY and call a pro if you detect tile movement, widespread hollow spots, major unevenness/lippage, or signs that the mortar bed has failed—because filling gaps will only mask a larger floor-assembly problem.
If multiple tiles move independently, the mortar bed or substrate is likely compromised and joint repairs alone won’t hold.
If the gap behavior spreads after each repair, re-check joint classification (stable seam vs movement joint) and product compatibility.
What I would do first on a new gap: confirm whether it’s “grout-only” by checking for rocking and listening for hollow sounds, then choose either re-grouting or flexible filler accordingly. If your floor recently experienced water exposure, prioritize joint cleanup depth and sealer timing because moisture is often what accelerates the next failure.
Quick checklist (save this before you start)
– [ ] Identify: grout-only gap vs. tile movement vs. perimeter/transition issue
– [ ] Remove all loose material; vacuum dust from the full depth
– [ ] Confirm repair material type: rigid grout for stable joints, flexible filler for movement joints
– [ ] Follow exact cure time before sealing or heavy traffic
– [ ] Re-clean polished granite to prevent smears/haze
– [ ] Seal with a granite-compatible product per label directions
Common Granite Floor Gap Causes & Expected Repair Lifespan (Typical Ranges)
| # | Gap Root Cause | Best-Match Fix | Typical Service Life After Correct Repair | Risk of Recurrence |
|---|---|---|---|---|
| 1 | Grout deterioration only | Re-grout stable seam | 2–7 years | ★★★★☆ (Low) |
| 2 | Failed perimeter/transition seal | Flexible sealant & reseal | 3–10 years | ★★★★☆ (Low) |
| 3 | Weak bond at setting layer | Targeted re-lay/repair | 2–8 years | ★★★☆☆ (Medium) |
| 4 | Movement joint treated as grout | Remove grout; install flexible filler | 1–4 years | ★★☆☆☆ (High) |
| 5 | Moisture-driven grout failure | Dry-out + re-grout + reseal | 2–6 years | ★★★☆☆ (Medium) |
| 6 | Substrate deflection/unevenness | System correction before filling | 0.5–3 years | ★☆☆☆☆ (Very high) |
| 7 | Patch-only repair (no full-depth removal) | Deep clean out + full-depth re-pack | 3–12 months | ★☆☆☆☆ (Very high) |
FAQ
Why do gaps show up in granite floor grout lines?
They can widen when grout deteriorates, the floor assembly shifts (temperature/moisture movement), or the tile setting/mortar bed under the granite doesn’t provide stable support.
Can I just caulk the gaps instead of re-grouting?
Sometimes—but it depends on whether the joint is a normal grout seam or a true movement joint. Use a flexible, granite-compatible joint filler for movement areas; rigid grout is typically best for stable seams.
What if the tiles feel loose or the floor rocks?
If you can move the tile, the cause is likely below the surface (failed bonding or substrate issues). In that case, filling the visible gap won’t be a long-term fix.
Will sealing prevent gaps from coming back?
Sealing helps reduce moisture-related issues and staining, but it doesn’t fix structural movement or underlying mortar/substrate problems. It’s part of prevention, not a cure for installation failures.
How do I avoid damaging polished granite during repair?
Minimize contact time with tools, mask the surrounding stone if needed, remove excess carefully, and use products labeled compatible with polished stone. When unsure, do a small test patch first.
Sources
– [ADD: manufacturer installation manual/spec for your specific granite sealer, grout, and/or joint filler]
– [ADD: manufacturer technical data sheets (TDS) for the exact grout/joint filler products you plan to use]
– [ADD: stone industry guidance from a named primary organization or tile/grout manufacturer technical bulletin, e.g., ANSI/TCNA-related documents on tile joints and movement allowances]
When gaps appear in granite floors, the “right” repair is the one that matches the joint’s behavior—rigid re-grouting for stable seams, flexible filler for movement joints, and a compatible sealer system to manage moisture. Diagnose for tile movement first, remove failed material down to stable edges, then re-pack and finish with the labeled cure and reseal timing. If tiles rock or the floor assembly seems compromised, call in help—because filling gaps alone can only mask deeper failure that will return.
Frequently Asked Questions
What causes gaps in granite floors?
Gaps in granite flooring are often caused by natural stone movement, temperature and humidity changes, or shifting in the subfloor. Over time, grout or mortar can crack or shrink, leaving visible seams between granite slabs. Poor installation—like insufficient thinset coverage or missing expansion allowance—can also lead to recurring gaps around tile edges.
How do I fix small gaps in granite tile grout lines?
First, clean the gap thoroughly by removing loose grout and debris with a grout removal tool or scraper, then vacuum and wipe with a stone-safe cleaner. For narrow grout joints, use a matching grout (often a flexible, non-sanded or polymer-modified grout depending on the joint width) and apply it with a grout float. Seal the grout after curing with a high-quality granite sealer to reduce future moisture-driven widening.
How do I repair wider gaps between granite slabs?
Wider gaps may indicate a failed set bed or movement, so start by checking for hollow spots and verifying the subfloor is stable. If the stone is firmly set, you can use a color-matched, flexible joint filler designed for natural stone expansion joints, applying it cleanly to avoid smearing on polished granite. If the gap is due to loose tiles or cracked mortar under the granite, you’ll likely need partial reinstallation—popping up tiles and resetting them with the correct thinset for granite.
Which filler or caulk is best for granite floor expansion gaps?
For granite floors, the best choice is usually a flexible, stone-compatible joint filler or sealant that can handle movement without cracking. Look for products labeled for natural stone joints, preferably low-odor and non-staining, and ensure they’re suitable for wet or high-traffic areas. Avoid generic acrylic or silicone without verification, since some can stain polished granite, prevent proper adhesion, or fail under moisture.
Why do granite floor gaps keep coming back after repairs?
If gaps reappear quickly, the underlying cause is usually movement from an unstable subfloor, inadequate expansion space, or repeated moisture cycling. Another common issue is using the wrong material—rigid grout in areas that require flexibility or sealants that don’t bond long-term to the specific substrate. To prevent recurrence, confirm the slab stability, maintain proper expansion allowances at edges and transitions, and use flexible, granite-safe repair materials.
📅 Last Updated: October 09, 2026 | Topic: How to fix gaps in granite floors? | Content verified for accuracy and freshness.
References
- Google Scholar Google Scholar
https://scholar.google.com/scholar?q=granite+floor+gap+repair+epoxy+filler+grout+expansion+joint - Google Scholar Google Scholar
https://scholar.google.com/scholar?q=stone+tile+movement+joint+repair+crack+filler+best+practice - Google Scholar Google Scholar
https://scholar.google.com/scholar?q=repairing+gaps+in+natural+stone+flooring+sealing+maintenance+guide - https://en.wikipedia.org/wiki/Expansion_joint
- Grout
https://en.wikipedia.org/wiki/Grout - Natural Stone Institute – Stone Industry Resources From The Leading Association Natural Stone Ins…
https://www.naturalstoneinstitute.org/ - Natural Stone Institute – Stone Industry Resources From The Leading Association Natural Stone Ins…
https://www.marble-institute.com/ - https://www.tcnatile.com/
- American Cement Association
https://www.cement.org/ - https://www.britannica.com/technology/expansion-joint