


Cracked granite floor scratched? This step-by-step guide shows exactly how to fix scratches on granite floors, using the right filler and finishing method for the depth of the damage. You’ll get clear, do-this-next instructions to remove surface marks, restore the honed or polished look, and finish with a seal that helps prevent new scratches. Follow it closely and you can make most granite scratches nearly disappear—without replacing the stone.
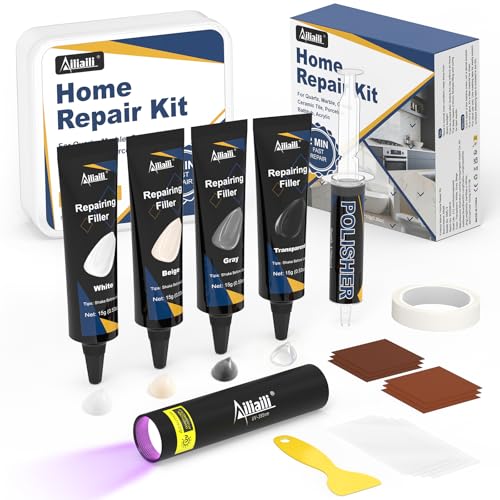



You can usually improve granite floor scratches by matching the repair method to the scratch depth: light scuffs and surface etching often come out with careful polishing, while deeper damage typically needs controlled honing/grinding and then a re-polish (and often resealing). Start by cleaning thoroughly, then use a fingernail “feel test” to estimate how far down the damage goes before you choose polish, repair compound, or a refinement process.
If your goal is a floor that looks uniform again—without haze, swirls, or a “ghost line” where the scratch used to be—this guide walks through the safest DIY decision path for sealed or polished granite tile/planks. For major chips, crumbling edges, or structural cracking, DIY typically can’t restore the original geometry cleanly, and professional refinishing is the better route.
Who this is for / when it applies:
This is for homeowners and property managers dealing with visible scratches on sealed or polished granite tile/planks—especially in high-traffic areas like entries, kitchens, and hallways. If you’re dealing with major chips, crumbling edges, or structural cracking, skip to professional refinishing because DIY approaches are unlikely to restore it cleanly.
Assess the scratch depth and type
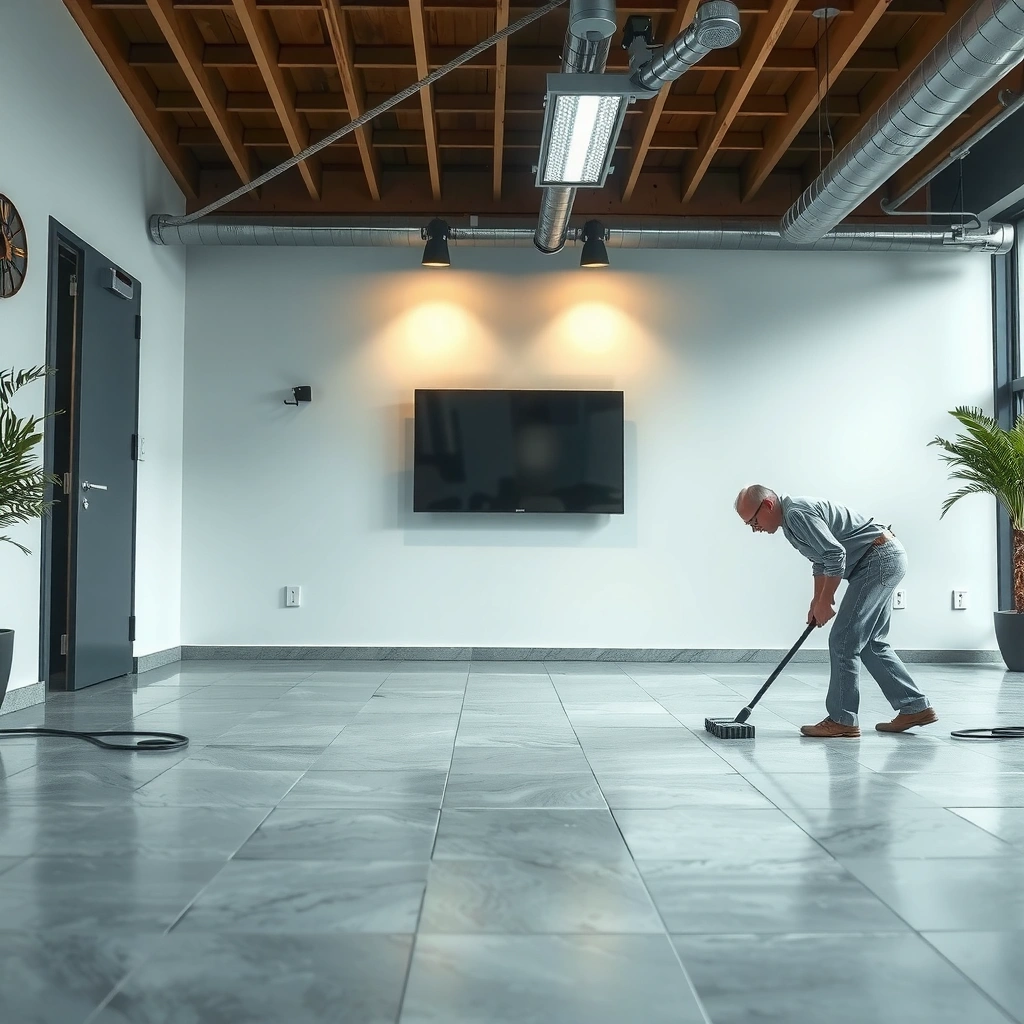
The first step is deciding whether you’re dealing with surface abrasion/polish loss or a deeper gouge that removed stone. Your choice (polish vs. honing/grinding vs. pro refinishing) hinges on scratch depth, and the fastest low-risk way to estimate it is the fingernail feel test plus a quick visual “finish/contrast” check.
A fingernail “catch” is a practical indicator that a scratch is deep enough to interfere with the stone’s surface profile, not just the shine.
Granite hardness depends on its minerals (notably quartz and feldspar), so grit-driven scratches often look sharper when the surface finish is gone.
If a scratch area looks different in color/brightness after cleaning, it can indicate localized sealer wear in addition to surface damage.
Use a fingernail “feel test”
– If your fingernail catches firmly on the scratch, you’re generally beyond light polish loss.
– If your nail glides over it, the damage is more likely shallow—often caused by grit abrasion, dry cleaning residue, or wear to the top polish layer.
Check scratch location and pattern
Look at how the scratch behaves:
– Linear tracks (especially from something dragged—grit, small stones, chair legs) tend to be abrasion.
– Dull patches / cloudy zones (often tied to cleaners or wipe-down methods) tend to be surface dulling or etching-like effects.
Evaluate finish and sealer wear clues
Even with sealed granite, localized scratches can change how light reflects and how the surface absorbs water.
– If the scratched area looks darker/light differently than surrounding stone after drying, you may need re-polishing plus resealing, not just cosmetic buffing.
Three helpful technical anchors (so you understand why abrasion matters):
– According to the U.S. Geological Survey (USGS), quartz has Mohs hardness 7.
– According to USGS, feldspar commonly has Mohs hardness ~6.
USGS (Mohs hardness / mineral properties)– According to USGS descriptions of granite composition, quartz typically makes up a substantial fraction of granite (commonly cited as roughly 20–60% depending on the specific rock).
That mineral mix is exactly why grit can create durable-looking lines—and why “just buff it” works only when the damage is mostly on the surface.
Clean and prep the area correctly
The best scratch repair starts with decontamination: if you buff over grit, you can create new scratches or widen the damage. Clean first, dry completely, and mask adjacent areas when you’re using compounds so you don’t leave haze or residue where you didn’t intend to.
Removing sand and micro-grit before polishing is critical because polishing pads can transfer embedded particles into the stone.
Granite-care guidance commonly emphasizes using pH-neutral cleaners to reduce the risk of finish changes from harsher chemicals.
Masking adjacent flooring helps prevent uneven residue or haloing when using repair powders or stone compounds.
Wash with a pH-neutral cleaner
– Use a pH-neutral (not “strong,” not “acidic,” not “descaling”) cleaner suitable for natural stone.
– Thoroughly rinse and remove all residue. Even soap films can block consistent polishing.
Remove grit completely (don’t skip the corners)
– Pay attention to grout edges, tile boundaries, and the scratch’s immediate perimeter.
– If the scratch runs along a seam, it’s common to find trapped abrasive just beside it.
Dry fully before you test or polish
– Granite polishing and repair products don’t behave consistently on damp stone.
– Let the area dry until it matches the rest of the floor’s normal appearance.
Mask and ventilate
– If you’re using polishing powders/compounds, mask nearby surfaces to reduce “haze drift.”
– Provide ventilation and follow label directions for any stone repair chemistry (especially if it includes solvents or fine powders).
Polish out light scratches and scuffs
For light surface scratches, the safest DIY path is a granite-safe polishing method first—because you’re restoring reflectivity without removing a significant amount of stone. Work slowly, in small sections, and re-check often so you don’t over-haze the surrounding finish.
Surface-level scratches that don’t catch a fingernail are often treated effectively with granite-safe polishing systems rather than abrasive grinding.
Stone polishing should be done in controlled passes with frequent inspections to avoid creating a different sheen in the repaired zone.
After polishing, removing all residue and allowing full dry time helps you judge whether the scratch truly improved or only temporarily looked better.
Start least-aggressive: polishing powder/pad system or stone polish
– Choose products specifically intended for natural stone granite (and compatible with a sealed surface).
– Avoid “universal restorers” unless the manufacturer explicitly states suitability for granite and your finish type (honed vs. polished).
Work in small sections with even pressure
– Use gentle, even pressure and keep your passes consistent.
– If you see swirling or cloudy spreading, stop and clean off residue before continuing.
Inspect often—and clean residue before reassessing
– Wipe away polishing residue completely.
– Wait for the area to dry fully; wet stone can mask the true depth/visibility of a scratch.
Pros/cons snapshot (DIY polishing vs. deeper refinement):
| Approach | Best for | Upside | Risk/Downside |
|---|---|---|---|
| Granite-safe polishing | Scratches that don’t catch a fingernail (surface dulling) | Lowest-risk, minimal material removal | Won’t erase deep gouges (“ghost line” remains) |
| Repair paste for minor surface damage | Slight defects/etching where polish alone doesn’t even out sheen | More targeted cosmetic improvement | Can look patchy if sheen or color doesn’t match |
| Controlled honing/grinding | Fingernail catches; visible profile change | Can level deeper damage | More material removal; higher chance of needing reseal/pro |
Repair deeper scratches (grind/hone then re-polish)
If the fingernail catches, you usually need a more abrasive, controlled “refinement” approach because everyday polishing won’t rebuild the missing profile. The objective is to flatten the damaged micro-geometry before you bring the finish back toward uniform reflectivity.
When a scratch physically catches, it typically indicates a profile change that polishing can’t fully correct without additional material removal.
Staged honing/grinding uses progressively finer abrasives to reduce visible marks and restore a consistent surface texture.
A repair area may require resealing after honing because protective layers can be partially removed or left uneven.
Use staged process (coarser to finer) rather than random rubbing
– The safe DIY logic is: reduce height differences first, then polish for appearance.
– Trying to force a deep line out with fine polish alone often wastes time and can create an uneven sheen around the scratch.
Follow granite-appropriate pads/tools and refine the finish
– Use tools and pads that are meant for granite finishing (often diamond-based systems).
– Keep motion controlled and consistent across the scratch zone to avoid creating a “dish” or over-thinned spot.
Plan for resealing afterward
– Even if you restore shine, granite’s protective layer may be compromised.
– As a rule of thumb, if the repaired zone looks different under light or absorbs water differently during normal cleaning, resealing is the safer follow-up step.
– Always follow your sealer manufacturer’s label for whether resealing is required after honing/polishing and for preparation requirements (cleaner type, cure time, dryness).
What can go wrong (and how to avoid it)
Most DIY failures come from treating scratch depth incorrectly, using incompatible products, or creating uneven residue/pressure. If you avoid those three failure modes—especially grit removal and consistent sheen—you dramatically improve your odds of a visually uniform result.
Polishing a deep gouge without leveling first commonly leaves a visible “ghost line” because the underlying profile damage remains.
Acidic cleaners can dull or etch natural stone finishes, so using them during repair increases the chance of mismatched sheen.
Uneven pressure or stopping mid-area can leave haloing, where the repaired patch reflects light differently than the rest of the floor.
Treating a deep scratch like a light one
– Symptom: after “polishing,” the line is still clearly visible.
– Fix: reassess with the fingernail test. If it catches, move toward refinishing/honing—or stop and schedule professional stone restoration.
Using the wrong products
Avoid:
– acidic cleaners,
– “DIY stone restorers” that don’t specifically call out granite/polished surfaces,
– household abrasives that can leave unpredictable scratch patterns.
Stick to:
– manufacturer-approved granite-safe cleaners and polishing systems compatible with your finish.
Skipping grit removal
– The polishing step can embed remaining sand and turn a single scratch into a broader swirl.
– If you see new micro-lines appearing during buffing, stop, deep-clean, and restart with clean pads.
Uneven sheen
– Don’t repair only half of a tile/plank face if the finish needs uniformity.
– Work methodically: the same number of passes, similar pressure, and consistent section boundaries.
pH Levels of Common Cleaners and Typical Granite Risk
| # | Cleaner type | Typical pH range | Granite finish risk* | Best use after repair? |
|---|---|---|---|---|
| 1 | pH-neutral stone cleaner (typical) | 6.5–7.5 | Low | Yes |
| 2 | Ammonia-based glass cleaner | ~11 (often alkaline) | Medium | Caution |
| 3 | Baking soda solution | ~8–9 | Low–Medium | Usually |
| 4 | Neutral detergent (non-stone specific) | ~7–8 | Medium | Caution |
| 5 | Vinegar / acetic acid cleaners | ~2–3 | High | No |
| 6 | Descalers (often hydrochloric-based) | ~1–2 | High | No |
| 7 | Abrasive scouring powders | Variable (often basic/neutral) | Very High (mechanical) | No |
“Granite finish risk” reflects the typical likelihood of damaging polish/sealer through acidity or abrasion. Always follow your specific sealer and granite manufacturer guidance.
Verdict: what to do first, and when to call a pro
For most homeowners, the best first move is cleaning the floor thoroughly and then polishing out surface scratches and scuffs—this is the lowest-risk approach and often improves appearance dramatically. If fingernails catch or the scratch looks like a true groove, DIY can still help with the right granite-safe tools, but professional honing/refinishing is more likely to deliver a uniform finish across a larger area.
Start with the least aggressive step (cleaning and polishing) because it carries the smallest risk of changing the granite’s overall sheen.
If the scratch is deep enough to catch a fingernail, leveling is usually required; polish alone typically cannot rebuild the missing stone profile.
Professional stone restoration is recommended for widespread scratching, structural damage, or uncertainty about whether your granite is honed or polished.
What I’d do in practice (decision logic)
– First: Clean + dry + fingernail test on the scratch.
– If shallow: Polish with a granite-safe method and reassess after residue is removed and the area is fully dry.
– If deep: Consider staged honing/grinding only if you have the correct tools and can maintain consistent sectioning and pressure.
– If unsure: Stop early. The cost of correcting an uneven DIY sheen often exceeds the price difference for professional refinishing.
When to skip DIY entirely
Skip DIY and plan for professional refinishing if:
– scratching covers a large surface area,
– there are major chips or edge crumbling,
– you see cracking that suggests structural movement,
– you’re not sure whether your granite is honed (matte) vs. polished (glossy), because the finish change can be permanent.
Quick checklist / scan-and-save
– [ ] Clean thoroughly (remove all grit), then dry fully
– [ ] Fingernail test: does your nail catch?
– [ ] If surface-level: polish using granite-safe method/products
– [ ] If deep: consider staged honing/grinding approach (or pro)
– [ ] Inspect often—don’t keep chasing the scratch without checking
– [ ] Clean residue, dry, and reassess the finish
– [ ] Reseal if polishing/honing compromised the protective layer
FAQ
Can I fix granite floor scratches without resealing?
Sometimes light polishing won’t noticeably change the sealer, but deeper refinement often affects the protective layer. If the repaired area looks different or absorbs water differently than surrounding stone, resealing is usually the safer next step—[ADD: resealing guidance from your sealer’s label or manufacturer specs].
What’s the safest DIY method for scratched granite?
The safest start is cleaning and polishing a small test area using granite-appropriate products/pads. Avoid acids and household abrasives, and stop early if the scratch doesn’t improve—[ADD: recommended granite-safe product type based on the manufacturer of your existing sealer].
Will steel wool or scouring pads damage granite?
Yes. They commonly risk creating new abrasion marks or changing the finish unevenly. If you’re not using granite-rated pads/tools in a controlled process, it’s easy to worsen the surface.
How do I know if the scratch is etching versus abrasion?
Etching typically looks like dulled or slightly matte areas rather than sharp lines, and it’s commonly tied to acidic spills or cleaners. Abrasion scratches are usually more defined and often follow traffic or grit movement patterns.
Should I polish honed granite the same way as polished granite?
No—honed granite is intentionally non-glossy. Polishing a honed finish can permanently change its appearance; if you have honed stone, [ADD: use manufacturer guidance for honed vs. polished granite finishing].
Sources
– [ADD: manufacturer/spec documentation for the exact granite sealer you use—recommending whether resealing is required after honing/polishing]
– [ADD: stone restoration/polishing guidance from a granite or stone fabricator association or a major stone-care manufacturer—official documentation on pH-neutral cleaners and appropriate abrasives]
– USGS mineral property references (Mohs hardness values for common granite minerals like quartz and feldspar)
A practical way to get great results is to treat the scratch like a diagnosis, not a cosmetic flaw: clean well, use the fingernail feel test to estimate depth, then choose polishing for surface damage or controlled refinement for true grooves. When you match the method to the damage—and avoid harsh chemicals, embedded grit, and uneven pressure—you can often restore a granite floor’s appearance safely, while knowing clearly when it’s worth handing the job to a professional.
Frequently Asked Questions
What’s the best way to fix shallow scratches on granite floors?
For shallow scratches, start by cleaning the area with a pH-neutral granite cleaner and drying completely. Use a granite polishing compound or scratch remover made for natural stone, applying it with a soft microfiber pad in gentle, circular motions. If the scratch remains, lightly buff again and consider finishing with a granite sealer to help the surface blend and reduce future damage.
How do I repair deeper scratches or gouges in granite flooring?
Deeper scratches may require a professional-grade granite repair kit that includes matching stone resin or epoxy and color pigments. Clean the gouge thoroughly, dry it, then fill the scratch with the resin and level it with a plastic putty knife. After curing, sand the area with fine-grit wet/dry sandpaper and polish the spot to match the surrounding granite surface.
Why do granite scratches look darker or catch dirt, and how can I reduce this effect?
Granite scratches can appear darker because the damaged surface holds dirt and reflects light differently than the rest of the stone. To reduce this, deep-clean the floor and remove embedded grime before attempting any scratch repair. After polishing, applying a quality granite sealer can improve scratch visibility and make future cleaning easier by limiting absorption.
Which products should I use to remove scratches from granite without damaging the finish?
Look for products specifically labeled for natural stone or granite, such as granite polishing powders, micro-abrasive scratch removers, or stone repair kits. Avoid harsh abrasives, acidic cleaners, and chemical cleaners that can etch or dull granite. Always test any product in a small, hidden area first and follow the manufacturer’s directions for safe, even results.
How can I prevent scratches on granite floors after fixing them?
Prevention starts with using felt pads under furniture, protective mats at entryways, and avoiding dragging objects across the surface. Regularly sweep or vacuum with a soft brush attachment to remove grit that acts like sandpaper. Reapply granite sealer as recommended for your stone and traffic level, since well-sealed granite tends to resist staining and helps maintain a smoother finish after repair.
📅 Last Updated: October 09, 2026 | Topic: How to fix scratches on granite floors? | Content verified for accuracy and freshness.
References
- Google Scholar Google Scholar
https://scholar.google.com/scholar?q=how+to+remove+scratches+on+granite+floor+polishing - Google Scholar Google Scholar
https://scholar.google.com/scholar?q=granite+scratch+repair+honing+sealing+study - Google Scholar Google Scholar
https://scholar.google.com/scholar?q=natural+stone+surface+scratches+polishing+abrasion+resistance - Granite
https://en.wikipedia.org/wiki/Granite - https://en.wikipedia.org/wiki/Polishing
- Abrasive
https://en.wikipedia.org/wiki/Abrasive - https://pubmed.ncbi.nlm.nih.gov/?term=granite+polishing
- Natural Stone Institute – Stone Industry Resources From The Leading Association Natural Stone Ins…
https://www.naturalstoneinstitute.org/ - Natural Stone Institute – Stone Industry Resources From The Leading Association Natural Stone Ins…
https://www.marble-institute.com/ - https://www.britannica.com/science/polishing


