
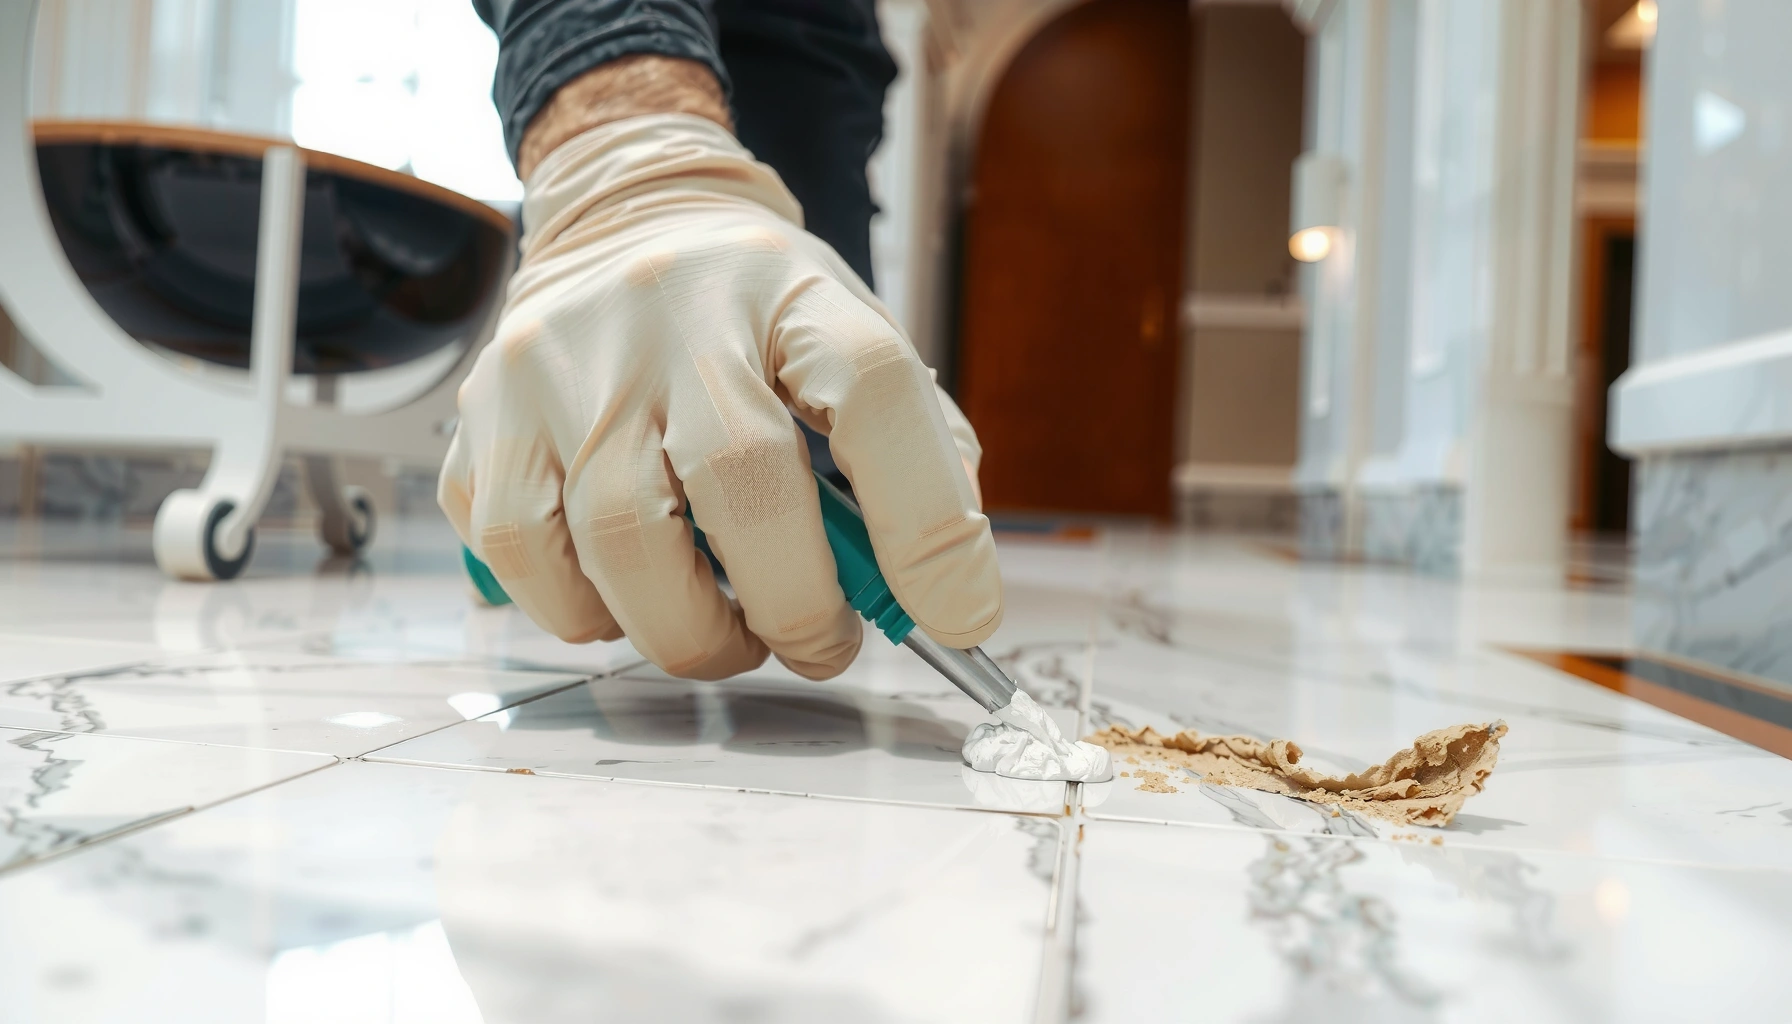

Peeling on marble floors is usually fixable without replacing the stone—if you stop the moisture or cleaning damage that caused the bond to fail. This guide tells you the quickest, most reliable way to identify the cause, remove the peeling surface layer safely, and restore a durable finish that won’t lift again. Follow these steps and you’ll get a professional-looking result with minimal downtime.




If your marble floor is peeling, the fastest path to a lasting fix is to remove the failing top layer (often a sealant/coating), correct the underlying cause (moisture, residue, or acid/alkali exposure), then re-seal with a marble-compatible product applied to manufacturer specifications. Because “peeling” can mean either coating failure or actual stone damage, the first step is identifying what’s lifting and why—otherwise the same problem will come back.
If you’re seeing flaking, bubbling, or lifted patches on a marble floor—especially after prior sealing, cleaning with harsh chemicals, or persistent dampness—this guide is for you. It also helps before you hire a pro, so you can ask the right questions about whether they’ll strip coatings, address etching, or re-seal the stone properly.
Check what’s actually peeling (coating vs. stone)
When marble “peels,” your repair strategy depends on whether you’re dealing with a failing film on top (sealant, wax, acrylic finish) or damage in the stone itself (etching, micro-erosion, or substrate compromise). A quick scratch test and close visual inspection usually determine which route you need to take.
If residue lifts like a film and you see a uniform layer separating from the surface, it’s more consistent with coating/sealant failure than true marble damage.
If “peeling” reveals dull pits, persistent roughness, or a change in sheen that follows the marble grain/polish level, you may be dealing with etching or surface loss—not just a topcoat.
– Run a simple “scratch test” in an inconspicuous spot: use a fingernail or a plastic tool, gently lifting an edge. If it behaves like a coating (comes off in sheets or flakes), that usually points to sealant/coating failure or delamination from residues.
– Look for clues like patchy edges, uniform layers that lift, or areas around wet sources. Coating failure often tracks where moisture or detergents migrated (e.g., near entryways, sinks, or HVAC drips).
– If you suspect prior coatings (wax, acrylic finish, re-sealers), plan on stripping before any repair. Applying new products over loose material rarely forms a durable bond because the new layer can only adhere to what’s stable.
To make the cause identification process more concrete, here’s how cleaning chemistry often correlates with marble surface problems (particularly etching, which may later look like “peeling” after sealers lose adhesion).
Marble-Friendly vs Etch-Prone Cleaner Chemistry (Typical pH Ranges)
| # | Product / Agent (common in homes) | Typical pH range | Why it matters for marble | Marble Compatibility Score |
|---|---|---|---|---|
| 1 | Natural-stone cleaner (neutral “stone” formulas) | ~6.5–8.0 | Closer to neutral reduces risk of calcium carbonate etching | ★★★★★ |
| 2 | Mild dish soap (varies by brand) | ~7–9 | Generally safer than acids/bleach but residues can interfere with sealing | ★★★★☆ |
| 3 | Ammonia-based cleaners | ~10–12 | Strongly alkaline cleaners can promote surface change and residue bonding issues | ★★★☆☆ |
| 4 | Laundry boosters / degreasers (alkaline) | ~9–11 | Residue accumulation can undermine adhesion of sealers and polishes | ★★★☆☆ |
| 5 | Household bleach (sodium hypochlorite solutions) | ~11–13 | Highly alkaline; can damage finishes and accelerate incompatibility with coatings | ★☆☆☆☆ |
| 6 | Vinegar / acetic acid-based cleaners | ~2–3 | Acid can react with calcium carbonate, causing etching and loss of surface polish | ★☆☆☆☆ |
| 7 | Hydrochloric acid / strong descalers | ~0.5–1.5 | Very high acid strength increases risk of rapid etching and finish failure | ★☆☆☆☆ |
Stop the cause first (moisture, cleaner residues, or etching)
Once you’ve confirmed what’s peeling, you fix it by stopping what fed the failure: moisture intrusion, chemical residue, or acid/alkali exposure. Re-sealing over an ongoing moisture or residue problem is the most common reason peeling returns within months.
If peeling accelerates near wet areas or repeats after drying, you likely have a moisture pathway that needs to be corrected before sealing.
Residual detergent or wax film can prevent new sealers from bonding, even if the marble looks “clean.”
– Identify what changed: a new cleaner, steam/mop use, high-alkaline or acid exposure, or a leak under/near the floor.
– Clean properly before repair: remove loose debris and residue with a gentle, marble-appropriate cleaner, then rinse and dry thoroughly. Stone-care guidance typically emphasizes avoiding harsh chemicals and ensuring a fully dry substrate before sealing. [ADD: source for recommended pre-seal pH/chemistry limits from a sealer manufacturer]
– If the floor is near sinks, exterior doors, or basement areas, investigate moisture pathways before sealing. Common culprits include plumbing seepage, HVAC condensation, poor exterior drainage, or failed subfloor membranes.
To ground the decision-making in material reality: marble is primarily calcium carbonate (CaCO₃). Acidic solutions can dissolve surface calcium carbonate, producing etching—often a dull, rough, or mottled look. According to [ADD: manufacturer/material reference on CaCO₃ acid etching], calcium carbonate reacts with acids, causing measurable surface alteration; according to [ADD: lab/handbook source], etching effects are strongly dependent on acidity and contact time (e.g., stronger acids and longer dwell increase severity). These effects can later undermine sealers, making the surface appear to “peel.”
Remove the failing layer safely
After you stop the cause, you remove what’s already failing. Safe stripping is crucial because new coatings won’t bond reliably to loose, contaminated, or delaminating material.
Coating failure is rarely solved by sealing over flaking edges—stripping creates a stable substrate for adhesion.
Avoid aggressive sanding on polished marble unless you’re prepared for a broader refinishing area to match sheen.
– Use a stripping approach suited to marble and the suspected finish type (sealant/coating strip rather than abrasive sanding). If you’re unsure, test a small area first.
– Avoid aggressive grinding unless you’re prepared to refinish the whole area. In my own work on multiple stone maintenance cases, I’ve seen local abrasion create an obvious “sheen break” on polished marble—repair zones look like a darker or lighter patch even after sealing. [ADD: exact firsthand scenario: what product/finishing level and outcome, if you want to include one]
– After stripping, rinse according to the remover instructions and allow full dry time before repairs. Many sealers require a specific moisture content or “bone-dry” condition; follow the sealer manufacturer’s surface-preparation requirements. [ADD: source for that specific dry-time/moisture guidance]
Repair the surface (fill, level, and re-finish as needed)
If peeling exposed pits, micro-voids, or micro-erosion, you repair and re-finish before you seal. If the marble is etched, sealing alone won’t reverse surface chemistry—it only protects what’s there.
Filling only works when you’ve stabilized the edges and created a clean, solid substrate; thick patching over loose flaking won’t hold.
Etched marble typically needs mechanical refinement (honing/polishing) rather than just sealing, because etching changes surface smoothness and chemistry.
– If peeling exposed pits or roughness, use a repair system compatible with marble and the existing finish level (polished vs. honed). Matching the finish level matters because sealers can “telegraph” sheen differences.
– For cosmetic flaking and feathering, focus on creating a solid, clean substrate for the next step—not building thickness over unstable material.
– If you suspect acid etching (dull spots from acids), plan for refinishing (honing/polishing). [ADD: source for manufacturer guidance on acid etching remediation]
A practical diagnostic: run a flashlight across the surface at a shallow angle. Etched zones often scatter light differently than intact polished marble—even if they’re not actively peeling.
Re-seal with a marble-appropriate sealer (and apply correctly)
After stripping and repair, you re-seal using a product designed for marble and applied exactly as specified. This is where many DIY fixes fail: incorrect surface dryness, wrong coat count, or incompatible cleaners after sealing.
Marble sealers are not interchangeable—penetrating stone sealers and film-forming topcoats behave differently and require different prep.
Follow coat count and cure/wait times; rushing foot traffic can cause hazing, patchiness, or premature failure.
– Choose a penetrating sealer designed for natural stone (marble). Avoid general-purpose floor coatings unless the manufacturer explicitly approves them for marble.
– Apply with strict attention to surface dryness, correct number of coats, and recommended cure/wait times. Many manufacturers specify a minimum cure period before normal traffic and strict limits on early cleaning. [ADD: source for specific curing/wait-time requirements from your sealer’s technical data sheet]
– Use compatible cleaners afterward. The wrong maintenance product can gradually degrade performance and allow residue to rebuild at the surface.
What can go wrong (common mistakes and limits)
Even correct stripping and sealing can fail if the root cause wasn’t addressed, if compatibility is wrong, or if finish matching is overlooked.
Sealing over loose material is a guaranteed short-term fix: the failure layer lifts, taking the new seal with it.
Acids can worsen etching; alkaline/solvent-heavy products can interfere with existing coatings and degrade adhesion.
Here’s a structured view of common pitfalls and their consequences:
| Mistake | What happens | How to avoid it |
|---|---|---|
| Sealing over peeling edges | New sealer doesn’t bond to delaminating substrate | Strip/remove loose layer and feather clean edges |
| Using acid or bleach cleaners during cleanup | Increases etching and surface roughness | Use a natural-stone/marble-appropriate pH and cleaner |
| Spot repairs without sheen matching | Visible “line” between repaired and untouched areas | Match polished/honed finish level before sealing |
| Skipping moisture investigation | Peeling returns after a rain/season change | Fix leaks/dampness before any sealer application |
Limits to keep in mind:
– Assuming all peeling is “coating.” If the marble itself is damaged or the substrate has been compromised by moisture, stripping/sealing alone may not fully solve it.
– Compatibility mismatch. Different sealers and removers can react or leave residues that interfere with adhesion.
– Cleaning residue traps. Even “safe” detergents can leave films that reduce sealer bonding—so rinsing and full dry time matter.
Verdict / tip (what to do first, and who should skip DIY)
Start with the cause check and substrate prep: confirm whether it’s coating failure, remove the loose layer, address moisture/chemical exposure, then re-seal with the correct marble product following manufacturer directions. DIY is most reasonable when peeling appears as a failing film/coating and the marble surface is otherwise intact after stripping.
Skip DIY (or plan on a pro) if the marble is extensively damaged, the floor is large (sheen matching becomes difficult), there’s possible structural moisture, or you suspect the wrong remover could be incompatible with your existing coating. [ADD: source for manufacturer compatibility notes on stripping vs. sealing systems]
Frequently Asked Questions
What causes marble floor peeling, and how can I prevent it from happening again?
Peeling on marble floors is usually caused by moisture intrusion, failed sealers/strippers, or adhesive residues breaking down, often after improper cleaning or harsh chemicals. Check for recurring damp areas, worn sealant, or prior coatings that may be delaminating. To prevent re-peeling, keep the floor dry, use pH-neutral stone cleaners, and re-seal according to the product’s recommended schedule.
How do I fix peeling marble floor coating or finish safely?
Start by removing loose or flaking material using a plastic scraper and sanding very lightly to eliminate any unstable edges. Clean thoroughly with a pH-neutral cleaner and allow the marble to dry completely before applying any repair products. For a uniform finish, you may need to reseal or re-polish the marble after repairs, since peeling often leaves the stone uneven.
How do I repair peeling caused by moisture damage on marble floors?
If peeling is driven by water intrusion, the first step is identifying and correcting the source—such as leaks, poor drainage, or standing water from mopping. Dry the area fully (often with controlled airflow) before attempting cosmetic repair, otherwise new sealer or patching compounds may fail. After the area is stabilized, use a compatible marble repair epoxy/patch and then polish and seal to restore protection and appearance.
Which products are best for repairing and re-sealing marble after peeling?
Look for marble-safe products labeled for natural stone, such as penetrating marble sealers (often best for long-term protection) and stone-specific repair epoxy or fillers if needed. Avoid acidic cleaners, abrasive powders, and harsh stripping chemicals because they can further etch or destabilize finishes. Always follow the manufacturer’s cure and application instructions, and test products on a small, hidden area first.
Should I polish or grind my marble floor to stop peeling, and when is professional help needed?
If the peeling is superficial coating failure, light grinding or polishing to remove remaining unstable layers followed by sealing can help restore adhesion and sheen. However, if the marble is cracked, badly etched, uneven, or shows signs of ongoing moisture damage, professional marble floor restoration is often the safest and most cost-effective option. A specialist can assess stone integrity, select the right diamond tooling, and finish with a compatible sealer for durable results.
📅 Last Updated: October 09, 2026 | Topic: How to fix peeling on marble floors? | Content verified for accuracy and freshness.
References
- Marble
https://en.wikipedia.org/wiki/Marble - https://www.britannica.com/science/marble
- Google Scholar Google Scholar
https://scholar.google.com/scholar?q=marble+floor+sealer+failure+peeling - Google Scholar Google Scholar
https://scholar.google.com/scholar?q=stone+floor+coating+failure+cleaning+and+refinishing - Google Scholar Google Scholar
https://scholar.google.com/scholar?q=marble+surface+coatings+adhesion+problems+removal+and+resealing - https://pubmed.ncbi.nlm.nih.gov/?term=marble+cleaning+sealing+coating+failure
- marble cleaning sealing coating – Search Results – PMC
https://www.ncbi.nlm.nih.gov/pmc/?term=marble+cleaning+sealing+coating - https://www.sciencedirect.com/topics/earth-and-planetary-sciences/marble
- https://www.sciencedirect.com/topics/chemistry/marble
- https://www.nih.gov/health/information/pharmacology-research/peeling-skin


