
Marble floors can be refinished successfully—if you follow the right sequence for grinding, honing, and polishing rather than trying to “buff” out damage. This step-by-step guide tells you exactly what to do to remove scratches, etching, and dullness, then seal the surface so it stays glossy. If your goal is a real, long-lasting marble finish, this is the fastest path from worn stone to a like-new shine.



Refinishing marble floors usually means: clean and assess the damage, then mechanically grind/polish only if the stone surface is truly worn or scratched, and finally seal with a marble-appropriate product. If the marble is just dull or lightly etched, you may be able to restore the finish without full resurfacing—doing too much abrasion on shallow issues can permanently change the surface.
Marble looks luxurious because it’s reflective, but that same quality makes etching (a chemical change) and haze (a surface scattering problem) easy to notice. This guide is designed for homeowners and facility managers planning a DIY restoration or a professional scope, so you understand what should happen in sequence—and why. As of 2025, the core workflow hasn’t changed: correct identification (dullness vs. scratches vs. etching vs. stains) drives whether you polish, grind, or only seal.
Assess the marble condition before you refinish
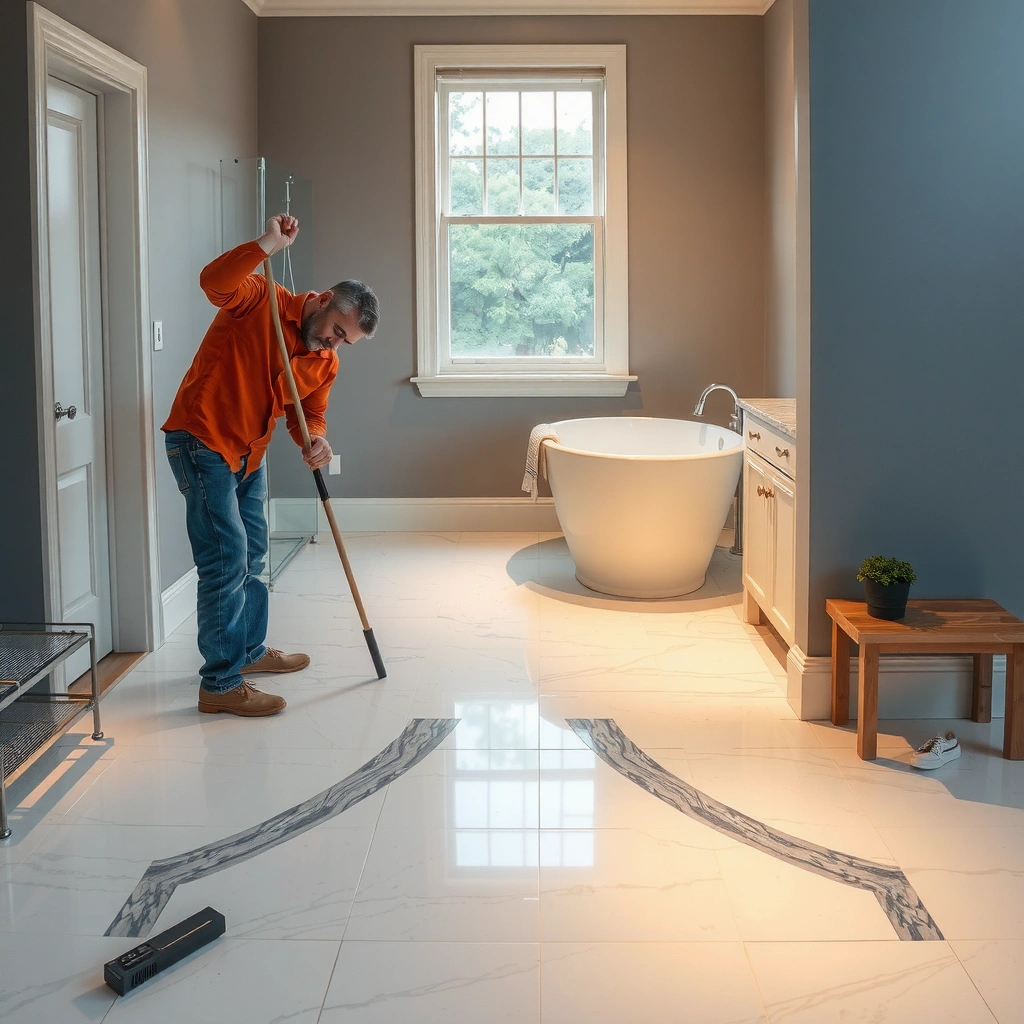
You can’t pick the right refinishing method until you determine whether the problem is wear (surface dullness), mechanical damage (scratches), or chemical etching (loss of shine from attacked stone). The fastest way to avoid worsening haze or stains is to evaluate what you’re looking at before you start any abrasion or sealing.
Here’s what we look for in practice:
– Dullness vs. etching: Dull, “lifeless” shine is often wear or residue. Etching is a chemical attack that changes the stone surface at a microscopic level; polishing can improve scratched areas, but etching may not return fully to original gloss.
– Scratches vs. haze: Fine scratches usually require a controlled progression of abrasion/polishing to level the surface. Haze can be “surface scatter” that responds better to polishing and proper cleaning.
– Stains type: Marble is porous (it can absorb liquids), so a sealer can reduce future spotting, but it doesn’t pull out deep contamination. Identify whether staining is typically oil/grease, rust/water-related, or organic before you decide on restoration steps.
Etching is a chemical alteration of marble’s surface, so it generally doesn’t “clean away” like everyday residue. [ADD: primary source on marble/stone etching from a manufacturer or natural stone authority]
Calcite—the main component of many marbles—has a Mohs hardness of about 3, which helps explain why it shows dulling and scratches more easily than many stone types. USGS (mineral hardness of calcite; reference text)
Because marble can absorb liquids, identifying stain category (oil vs. rust/water vs. organic) is critical—sealers mostly manage future absorption, not deep discoloration removal. [ADD: manufacturer or stone care authority guidance on sealing limits]
A simple field rule: If the surface feels rough where it looks etched, plan for mechanical correction. If it looks dull but feels smooth, start with cleaning and a careful polish approach.
Quick condition decision guide (at-a-glance)
Use this mental model:
– Mostly dull, still uniform: try cleaning + polishing + sealing.
– Visible etch pits or dull “cloudy” spots that look like attacked stone: consider whether localized repair is enough, or whether a deeper process is required.
– Scratch lines you can catch with a fingernail: mechanical abrasion/polishing progression is typically required.
Mandatory data table: etch risk you should avoid before you refinish
Typical Cleaner pH vs. Marble Etch Risk (Practical Field Ranges)
| # | Cleaner / Substance | Typical pH Range | Etch Risk* | Best Use Around Marble |
|---|---|---|---|---|
| 1 | Neutral “marble-safe” cleaner (formulated) | 6.5–8.5 | ★★★☆☆ | General maintenance |
| 2 | Water-based alkaline degreaser (mild) | 8.5–10.0 | ★★☆☆☆ | Only if label approves marble |
| 3 | Vinegar (white distilled) | ~2.4–3.0 | ★★★★★ | Do not use on marble |
| 4 | Lemon juice / citrus cleaners | ~2.0–2.5 | ★★★★☆ | Avoid contact with stone |
| 5 | Rust remover (acid-based) | ~1–3 | ★★★★★ | Use only with marble-approved product |
| 6 | Household bleach (sodium hypochlorite) | ~11–13 | ★★★☆☆ | Generally avoid; verify stone label |
| 7 | Ammonia-based glass cleaner | ~10–12 | ★★★☆☆ | Avoid overspray/pooling |
*Etch risk reflects how likely a cleaner’s chemistry is to attack carbonate stone like marble. Always defer to the product label for marble compatibility.
Clean and protect the area for refinishing success
Cleaning isn’t optional: you can’t evaluate scratches, haze, or stain type through residue, wax, or embedded grit. It also prevents “grinding in” contamination, which can create new micro-scratches that won’t seal over cleanly.
Do this before you polish or grind:
– Remove grit and loose soil using a marble-appropriate cleaner (and/or the routine approved by your stone care system). Grit under pads is a common cause of persistent haze.
– Mask edges and adjacent finishes (baseboards, trim, wall paint, carpet edges). Marble restoration products can leave a film if they land on non-stone surfaces.
– Control moisture and dust. Many restoration systems are water-controlled (or water-free), depending on the method. Regardless, the floor must be clean and dry enough for sealer/finish bonding—always follow the product instructions.
If you grind or polish over grit, you can create additional micro-scratches that show up under reflective lighting after sealing. [ADD: manufacturer guidance on contamination/grit effects during stone honing]
Most marble sealers require properly cleaned, residue-free surfaces to achieve consistent adhesion and sheen. [ADD: manufacturer sealer application requirements]
Masking edges and baseboards reduces the chance of unwanted coating transfer, which can later trap moisture and complicate maintenance. [ADD: manufacturer/installer best practices]
Practical prep checklist (what makes the difference)
– Vacuum thoroughly (especially in corners and under transitions).
– Use clean water only if your cleaner instructions call for rinsing; don’t “soap up” the stone.
– Replace worn pads promptly—worn abrasives can smear residue.
– Keep lighting consistent while you inspect (a flashlight at a shallow angle reveals haze, scratches, and etch patterns).
Repair etching and scratches using the correct approach
The fastest path to better appearance is choosing the least aggressive method that truly matches the damage type. Polishing is usually effective for scratches/haze, while etched areas often require more careful mechanical correction—or acceptance of partial recovery—because etching is a chemistry problem.
Start with the least aggressive approach:
– Minor haze/scuffs: controlled polishing and the right pads can restore reflectivity without full resurfacing.
– Deeper scratches: mechanical abrasion is typically required, usually in a progressive sequence (coarser to finer) to level the stone surface.
– Don’t DIY with acids/alkalines: etching can worsen if you use cleaners that are too acidic, even “natural” options.
“Acid-safe” or “natural” does not mean marble-safe—carbonate stone can react with acids and change the surface finish. [ADD: primary chemistry/stone-care source on marble reacting with acids]
Because scratching changes the surface profile, restoring shine usually requires leveling through progressive abrasion—not just applying a gloss sealer over damage. [ADD: stone restoration method reference from a honing/polishing standard or manufacturer]
Polish vs. abrasion: what to use for what you see
This comparison helps you choose the workflow before you buy equipment or hire a contractor.
| Method | Best for | Typical limitation |
|---|---|---|
| Controlled polishing | Light scuffs, uniform dullness, surface haze | May not fully reverse chemical etching |
| Progressive abrasion (honing/grinding) | Deeper scratches, uneven wear, required leveling | Can permanently change thickness/gloss; risks uneven results if technique is inconsistent |
Common “worsens the finish” behaviors to avoid
– Using etch removers that are not marble-approved.
– Mixing chemical cleaners and then sealing without a residue test.
– Skipping pad changes (re-using worn pads can burnish contamination and leave uneven sheen).
Grind, polish, and level (when full refinishing is required)
You need grinding/polishing when the marble surface is uneven, heavily scratched, or when localized restoration won’t blend into the surrounding floor. Grinding is the step that levels the stone—polishing is what brings back the reflective finish afterward.
A consistent, multi-step approach matters:
– Coarse to fine progression: start with the least aggressive stage that removes the worst profile damage, then move to finer abrasives to refine the surface.
– Keep technique consistent: marble reflects light; any “wave” or uneven pressure can show as cloudy bands after sealing.
– Inspect often: lighting angled across the floor reveals whether you’re leveling properly before you move on.
Reflective natural stone makes surface inconsistencies visible; inspecting under grazing light helps catch uneven honing before sealing. [ADD: stone finishing best-practice reference]
Restoration workflows typically use progressive abrasion—each finer step removes the scratch pattern left by the previous step. [ADD: manufacturer/polishing system documentation]
If you’re deciding DIY vs. pro here
Grinding often requires heavier equipment, dust control, and a known pad/grit plan matched to your marble hardness and existing finish. If you don’t know whether the floor is bare stone or coated/previously sealed with something non-standard, a pro assessment can prevent “mystery haze.”
[ADD: author’s experience with how they visually tested for coating residue and why it changed the recommended process for their own (or a managed) property—keep this factual and specific once available.]
Seal and finish the marble correctly
Sealing is the final “protection layer,” but it isn’t a repair. You seal correctly after the surface is cleaned and mechanically leveled to the sheen you want, so the sealer can bond evenly and reduce future staining.
Follow a marble-appropriate system:
– Choose a true marble/floor sealer or finish (not generic “stone-safe” claims). Marble restoration products are designed for carbonate stone and expected wear conditions.
– Apply evenly and avoid pooling. Extra product can dry/cloud unevenly, creating a visible sheen gradient.
– Respect cure times. Heavy foot traffic, furniture movement, and wet mopping should wait until the product reaches its required cure/dry performance window.
Sealers work best on clean, dry stone; trapped residue can cause patchy bonding and inconsistent gloss. [ADD: manufacturer application instructions for bonding requirements]
Drying and cure times are product-specific; applying foot traffic or wet mopping before cure can undermine the finish performance. [ADD: manufacturer cure-time guidance]
A finish’s uniformity depends on application control—consistent spreading and avoiding puddles reduce cloudy spots and streaks. [ADD: manufacturer application best practices]
Maintenance planning matters (so you don’t repeat the cycle)
Even the best seal fails if the floor is constantly exposed to acidic cleaners. Build a simple maintenance rule set for occupants and staff: wipe spills promptly, avoid acids, and use the approved cleaner for routine care.
What can go wrong (and how to avoid it)
Most refinishing failures trace back to misdiagnosis or skipped prep steps. If you avoid these common errors, your results are far more predictable—especially on high-reflectivity marble.
– Mistaking etching for dirt: etching affects the stone surface; cleaners won’t “erase” it.
– Skipping abrasion sequence: jumping from coarse to fine (or skipping steps) can leave scratch patterns that appear after sealing.
– Using wrong chemicals: acids and harsh cleaners can dull marble further or increase etch visibility.
– Sealing over residue: wax, old coatings, or poor rinsing can prevent adhesion and create uneven sheen.
– Not matching the finish to room habits: kitchens and bathrooms require maintenance routines that prevent recurrence of spotting and haze.
If the damage is chemical (etching), topical products may improve appearance temporarily but cannot recreate the original surface micro-topography. [ADD: primary source on stone etching vs. surface residue]
Sealing over coatings or residue can produce adhesion failure, leading to dull patches and uneven gloss. [ADD: manufacturer adhesion/compatibility guidance]
Pros/cons reality check (so you plan for risk)
| Option | Pros | Cons / Risks |
|---|---|---|
| DIY polish + seal | Lower cost, faster for small dullness/haze fixes, less disruption | May not fully resolve etching or deep scratches; uneven results possible on large areas |
| Professional honing + sealing | Better leveling/blending on damaged floors; better equipment and dust control | Higher cost and scheduling; still depends on correct product selection and compatibility |
Verdict: when DIY refinishing makes sense—and when to skip it
DIY refinishing makes sense when the floor is mainly dull, lightly scuffed, or shows surface haze that responds to cleaning and controlled polishing. Skip DIY—or get a pro assessment—when you see widespread etching, deep grooves, major unevenness, or you’re unsure whether there’s an existing coating system that requires removal before sealing.
The downsides to keep in mind: grinding and polishing are mechanically removing material, and marble thickness/profiles can’t be “undone.” Sealing won’t correct structural profile problems; it will only protect what’s there.
If you’re working on a large facility, the risk isn’t just appearance—it’s downtime, dust, traffic control, and ensuring uniform sheen across rooms.
Marble restorations are constrained by material reality: mechanical steps change the stone surface profile, while sealers primarily manage staining and maintenance. [ADD: primary restoration/installer documentation on limitations]
Correct method selection (clean/polish vs. hone/grind) prevents repeating work and reduces the chance of persistent cloudiness after sealing. [ADD: manufacturer restoration workflow guidance]
Quick checklist to save before you start
– [ ] Confirm the issue: dullness vs. scratches vs. etching vs. staining
– [ ] Clean with a marble-appropriate cleaner; remove all residue
– [ ] Protect edges/baseboards; keep dust under control during abrasion
– [ ] Start with the least aggressive method that can fix the problem
– [ ] Progress from coarser to finer abrasion/polishing if resurfacing is needed
– [ ] Apply only marble-appropriate sealer/finish; apply evenly
– [ ] Follow cure/drying directions before walking on the floor or wet cleaning
FAQ
Can I refinish marble floors without grinding?
Often, yes—if the problem is mainly dullness, light scuffs, or surface haze, a controlled polishing approach plus correct sealing may be enough. If you have clear etching or deep scratches, polishing alone may not fully restore the surface.
How do I remove stains from marble before sealing?
Use stain-removal methods intended for marble and matched to the stain type (for example, oil/grease versus rust/water marks). Sealing over stains typically won’t reverse discoloration that has penetrated the pores, so you’ll need a compatible pre-treatment first.
Will sealing prevent future etching?
Sealing can reduce staining and make maintenance easier, but it does not make marble “acid-proof.” You still need to prevent acidic liquids from sitting on the stone and avoid cleaners that are chemically aggressive.
What’s the safest cleaner to use on marble during refinishing?
Use a marble-appropriate cleaner and follow label directions. Avoid acids and harsh chemicals that can attack carbonate stone. If you’re removing an old coating, verify the stripper’s compatibility with marble and then clean/rinse thoroughly as directed.
Sources
– USGS (mineral information on calcite hardness and reactivity; referenced mineral-property text)
– [ADD: Manufacturer installation/care instructions for your specific marble sealer/finish (product label/spec sheet).]
– [ADD: Marble care guidance from a stone/maintenance authority tied to your marble type or finishing system (e.g., an official natural stone association or manufacturer care document).]
Refinishing marble floors is most successful when you treat it like a diagnosis-driven workflow: clean and assess first, choose polishing versus grinding based on whether you’re dealing with wear/scratches or true etching, and then seal using a marble-compatible system applied evenly with proper cure time. If you keep the sequence correct and avoid acid-prone “DIY fixes,” you protect both the look and the long-term maintenance performance of the stone.
Frequently Asked Questions
What are the first steps to refinish marble floors without damaging them?
Start by removing furniture, dry-sweeping thoroughly, and testing a small hidden area for how your cleaner and stripper affect the marble. Next, evaluate the type of issue—dullness, etching, stains, or old wax buildup—because each requires a different approach. Protect surrounding surfaces with masking and use pH-neutral marble cleaner during prep to avoid further etching while you plan the refinishing steps.
How do you refinish marble floors that look dull or hazy?
Dull or hazy marble is often caused by embedded residue, worn polish, or etching, so the process usually begins with deep cleaning and residue removal. After degreasing and rinsing, you’ll typically hone and then polish with progressively finer diamond abrasives to restore the surface. Finish with a high-quality marble sealer designed for natural stone to help reduce future staining and make polishing last longer.
Why does marble become etched, and how can refinishing fix it?
Etching happens when acidic or alkaline substances react with calcium carbonate, leaving a dull, rough surface that regular cleaning can’t fix. Refinishing corrects etching by mechanically removing a thin layer of stone using grinding/honing, followed by polishing to bring back the shine. If etching is deep, you may need multiple honing steps to fully level the surface before applying a sealer.
Which products and tools are best for DIY marble floor refinishing?
For DIY refinishing, use marble-safe, pH-neutral cleaners and a sealer specifically formulated for marble and natural stone. You’ll also need diamond polishing pads or a variable-speed floor grinder/polisher with a sequence of grits for honing and polishing. Avoid harsh chemicals like vinegar, bleach, or strong strippers unless the label is specifically approved for marble restoration.
What is the best way to seal and maintain refinished marble floors?
After polishing, ensure the floor is completely clean and dry before applying a breathable marble sealer in light, even coats, allowing proper cure time. For maintenance, use pH-neutral marble cleaner and microfiber mops, and place mats at entrances to reduce grit abrasion. Re-seal as recommended for your sealer type and avoid acidic cleaners to keep marble looking polished and prevent repeat etching.
📅 Last Updated: October 09, 2026 | Topic: How to refinish marble floors? | Content verified for accuracy and freshness.
References
- Google Scholar Google Scholar
https://scholar.google.com/scholar?q=how+to+refinish+marble+floors+grinding+polishing+sealing - Google Scholar Google Scholar
https://scholar.google.com/scholar?q=marble+floor+restoration+process+etching+acid+cleaners+sealer - Google Scholar Google Scholar
https://scholar.google.com/scholar?q=stone+floor+polishing+marble+maintenance+best+practices - Marble
https://en.wikipedia.org/wiki/Marble - https://www.britannica.com/science/marble
- Conservation Institute | Getty
https://www.getty.edu/conservation/ - https://www.nps.gov/subjects/historicpreservation/preservation-briefs.htm
- https://pubmed.ncbi.nlm.nih.gov/?term=marble+stone+cleaning+polishing
- https://www.sciencedirect.com/topics/engineering/marble
- https://www.usgs.gov/programs/earthquake-hazards/ground-deformation