
You can install porcelain tile floors over plywood—if your subfloor is correctly prepared and you choose the right underlayment and underlayment system. This guide walks you through the exact prep steps for plywood, including fastening, flattening, moisture considerations, and how to set porcelain for a floor that won’t crack or loosen. Follow these instructions and you’ll know whether your plywood setup is tile-ready and how to install with confidence.




Porcelain tile can be installed over plywood when (1) the plywood is stable and flat with no flex, and (2) you follow a complete, porcelain-compatible tile assembly (underlayment/membrane + the correct thinset + proper setting coverage). The “success formula” is treating the floor like a system—because porcelain’s low water absorption and weight make bond and substrate performance non-negotiable.
If you’re remodeling and your existing subfloor is plywood (not concrete), this approach is a practical way to reach a durable finish in kitchens, bathrooms, laundry rooms, and entryways. It also aligns with what reputable tile installation standards expect when you’re trying to minimize movement—movement is the leading cause of cracking, debonding, and hollow-sounding tile.
Check the plywood subfloor (flatness, fastening, and stiffness)
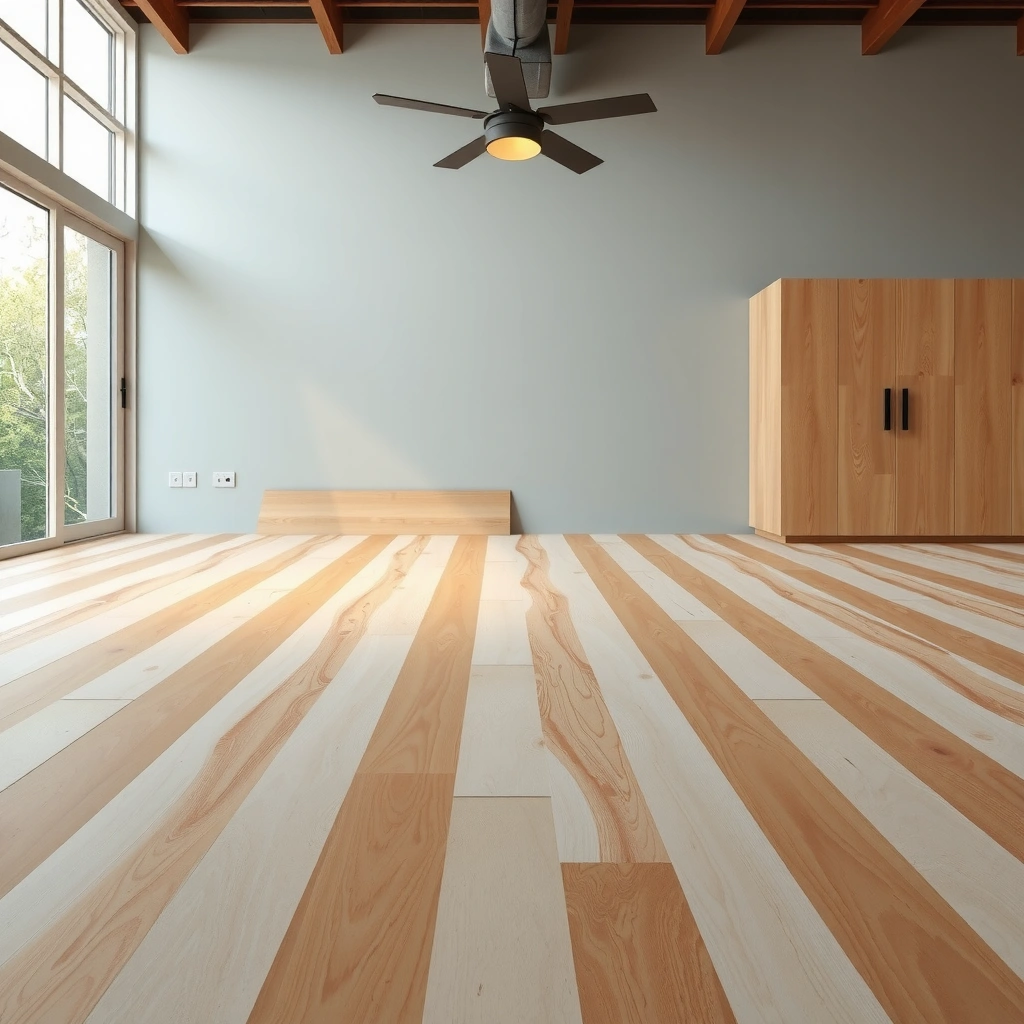
If the plywood can move, porcelain tile will eventually show it through cracking or loose grout. Start by confirming the subfloor is fully fastened, stiff enough for tile loading, and flat enough that you won’t end up “building lippage” with thinset.
A stable porcelain installation begins before you open any thinset bags—tile failures over wood almost always trace back to subfloor movement or out-of-flat conditions. According to the TCNA (Tile Council of North America) and ANSI/TCNA guidance, wood framing must meet a specified deflection limit for ceramic tile floors, typically L/360 for ceramic/porcelain tile and L/720 for natural stone (live load deflection criteria) (TCNA Handbook; ANSI/TCNA-aligned requirements). That’s why you need to check both stiffness and flatness—not just thickness.
A tile over wood system is evaluated on substrate stiffness and deflection, not just on “is there plywood?” (TCNA Handbook guidance for tile over wood)
Tile over plywood must be fully fastened with no loose panels or seam movement; movement transfers through the thinset and can crack grout or tiles.
Porcelain tile telegraphs unevenness because it’s less forgiving at the edges; flatness matters as much as bond.
What to verify in the field
Repeatable checks you can do before you buy materials:
1. Fastening & movement check
– Walk the floor and push near panel seams. If you feel bounce, hear squeaks, or see seams flex, stop and correct framing or fastening first.
– Make sure all plywood edges are supported by joists (no “floating” edges).
2. Flatness check
– Use a straightedge (typically 6 ft / 1.8 m) and measure the size of high spots and low dips.
– Don’t assume “looks flat” is enough—porcelain’s edge geometry will highlight even moderate irregularities.
3. Panel condition
– Replace damaged plywood (soft spots, delamination, water staining that indicates compromised integrity).
– Ensure plywood is dry and acclimated to the space.
In my own renovation planning, I’ve found that the fastest route to a clean tile finish is identifying “problem zones” (often around transitions, old patching, or loosened seams) before underlayment goes down—because those spots are where repairs become messy once you’ve already started tiling.
Decide on the tile-underlayment approach for plywood
You should not install porcelain directly onto raw plywood. Instead, choose a tile-underlayment method intended for plywood and porcelain tile, then follow that manufacturer’s assembly rules exactly.
A “tile system” over plywood typically includes:
– a cement backer board (often cementitious panels), or
– an uncoupling membrane (a membrane designed to reduce stress transfer), or
– a tile-rated underlayment specifically approved for use under porcelain tiles on wood.
The key is that every layer has installation rules—panel fastening schedule, seam treatment, thinset mortar type, and sometimes required accessories. Mixing parts from different systems (or skipping steps) is a common path to failure.
Tile-underlayment products for plywood come with specific fastening, seam, and accessory requirements that affect bond and long-term performance. (Manufacturer installation instructions)
Uncoupling membranes and cement backer boards are not interchangeable with respect to seam treatment and thinset bonding methods.
Porcelain tile assemblies must be installed as a complete system: subfloor → underlayment → mortar → tile → grout.
Choose your path: backer board vs. uncoupling membrane
Below is a practical comparison to help you decide (always confirm your chosen product’s approved use over plywood):
| Feature | Cement Backer Board | Uncoupling Membrane |
|---|---|---|
| Primary function | Adds a tile-ready layer with rigid support | Reduces stress transfer from substrate movement |
| Fastening sensitivity | Very sensitive to screw spacing and edge support | Dependent on membrane type and approved fastening method |
| Seam system | Requires specified joint treatment and reinforcement | Requires approved seam tape/band and overlap details |
| Typical best use | Areas needing a thicker, rigid plane and predictable board layout | Situations where you want additional uncoupling between tile and wood |
Important installation notes (don’t skip)
– Fastener types and spacing: use what the underlayment manufacturer specifies (screw type, spacing, and distances from panel edges).
– Seams: treat seams exactly as directed (tape/mortar/joint mesh, depending on system).
– Height transitions: plan for the combined thickness so doors still open and closures still align.
Prep for tile: clean, prime (if required), and plan your layout
You’ll get better tile appearance and stronger results when you prep the underlayment correctly and plan the layout before mixing thinset. Porcelain floors look best when grout joints stay consistent and edge cuts are intentional—not improvisational.
Before installation, the tile system needs a clean, properly conditioned surface. According to common thinset best practices used across ANSI-compliant installations, mortar bonds fail when substrates are dusty or contaminated (paint overspray, drywall compound residue, construction debris), because dust acts like bond-breaking material.
Thinset mortar performance depends on clean, dust-free contact surfaces; contamination reduces bond strength.
A dry layout helps you balance cuts and keep grout joints aligned without disturbing your underlayment plane.
Porcelain installation is more sensitive to layout mistakes because harder tile edges emphasize lippage and uneven joint appearance.
Surface prep essentials
– Vacuum, then wipe with a clean cloth as appropriate for your underlayment type.
– Remove ridges from thinset used in backer board skim coats (if your system requires it).
2. Prime only when required
– Some membranes or boards may require specific primer or thinset curing steps. If your manufacturer doesn’t call for priming, don’t add it “just because.”
3. Dry-lay and establish your reference lines
– Snap lines based on the room’s true center or a key feature (like a doorway or cabinet toe-kick line).
– Dry set a few rows to confirm how tile edges will land at walls and transitions.
Layout planning that prevents rework
– Decide on grout joint width early (your tile manufacturer and grout system will specify the recommended range).
– Plan transitions at doorways and between rooms so you can maintain consistent tile height (especially if you’re meeting wood flooring or carpet).
Install tile: thinset type, trowel choice, and set technique
Porcelain tile requires the right thinset and a full mortar bond for long-term stability. This means using the thinset your system specifies for porcelain and wood substrates, the correct trowel size, and a setting technique that achieves full coverage.
The biggest technical risk with porcelain over plywood is not “tile is hard”—it’s mortar compatibility and coverage. Porcelain has low absorption, so thinset that relies on tile suction may not bond as intended. That’s why manufacturers differentiate thinset types and require specific combinations.
For porcelain tile, thinset selection must follow manufacturer compatibility guidance because porcelain’s low absorption can affect mortar hydration and bond. (Thinset manufacturer “tile setting”/installation instructions)
Achieving full mortar coverage (often with back-buttering) is critical to avoid voids that can lead to cracking under load.
Using the specified trowel size helps control bed thickness and supports consistent coverage.
Thinset choice: follow the written system rules
Use thinset that your tile and underlayment manufacturer allows for porcelain + plywood. This is where you must read and match instructions; the correct chemistry depends on your board/membrane and tile format.
[ADD: exact thinset recommendation based on your chosen tile and underlayment system—cite from manufacturer instructions.]
Examples of what to document for your project:
– thinset type (modified/unmodified)
– minimum/maximum tile size or format requirements (if listed)
– open time and mortar consistency guidance
– whether back-buttering is required for your tile size
Trowel selection and coverage targets
– Use the trowel notch size specified by the underlayment and thinset instructions for your tile size.
– Back-butter porcelain tiles when required (commonly recommended for larger format tile to ensure full coverage).
– Spread enough mortar to work within the thinset’s open time—then pull a tile and verify the transfer pattern.
To keep this actionable, here’s a system-focused reference table you can use as a documentation “sanity check” while you plan coverage expectations:
Tile-Over-Wood Deflection Limits (Live Load)
| # | Tile / Material Category | Typical Deflection Limit | Where It Applies | Standard Basis |
|---|---|---|---|---|
| 1 | Ceramic & Porcelain tile floors (typical interior) | L/360 | Wood joist framing under tile | TCNA/ANSI criteria |
| 2 | Natural stone floors (interior) | L/720 | Wood joist framing under stone | TCNA/ANSI criteria |
| 3 | Ceramic tile walls (wood backing) | L/240* | Framing-driven movement control | TCNA guidance* |
| 4 | Ceramic/porcelain on exterior deck** | System-specific | Deck deflection & detailing | Verify TCNA method** |
| 5 | Heavy grout load / high point loads | Design-dependent | Concentrated loads | Engineer/installer check |
| 6 | Large-format tile assemblies | Follow system | Trowel/coverage requirements | Manufacturer-defined |
| 7 | Subfloor flatness vs. joist spacing mismatch | Correct before tile | Limits are exceeded by repair | Don’t “fix with thinset” |
Walls and specific framing conditions vary by TCNA method.
Exterior decks require additional waterproofing and structural/durability detailing; deflection limits must be verified per the exact TCNA method.
Setting technique that reduces voids
– Spread thinset with the flat side, comb with the notched side.
– Use gentle twisting pressure to embed the tile.
– Periodically lift a tile to confirm transfer coverage (your thinset system may specify coverage targets).
Grout and finish: curing, joints, and transitions
You shouldn’t rush grout and transitions. Proper cure time and correct joint handling protect the bond line you worked so hard to create.
After tiles are set, grout is the finishing layer that also controls crack initiation by managing how movement concentrates at joints. Follow the grout manufacturer’s mixing and curing instructions for your environment (humidity/temperature can change cure behavior).
Grout and cure schedules are dictated by the grout manufacturer’s instructions; premature exposure can impair strength.
Expansion and change-of-plane joints (where tile meets other materials or height changes) are required to manage movement. (TCNA movement joint guidance)
Sealing grout is only appropriate when the grout manufacturer calls for it (or for specific stain resistance goals in the assembly).
Practical finish steps
– Cure: keep traffic off the floor and protect from water as required by the grout system instructions.
– Joints: maintain consistent grout joints and remove thinset “smear” before it hardens.
– Transitions:
– Use appropriate reducers or transition strips at doorways and between flooring materials.
– Don’t bridge movement joints with rigid grout—use the proper transition or sealant where required.
What can go wrong (and how to avoid it)
Most failures over plywood come from movement, wrong system matching, or poor mortar coverage—not from “porcelain being too difficult.” If you fix the root causes before you tile, you reduce the chance of cracking, debonding, and lippage.
Tile can fail when the subfloor deflects more than the system is designed to accommodate. (TCNA Handbook structural criteria)
Underlayment seams that aren’t installed per instructions can create stress paths that break grout and tiles.
Incomplete mortar coverage leaves voids that can concentrate stress and lead to cracking in porcelain.
Common failure points (and how to prevent them)
1. Subfloor movement
– Symptom: squeaks, bounce, visible seam movement, or cracking that appears in a pattern.
– Fix: add blocking, sister/replace joists, re-fastening plywood—before underlayment.
2. Skipping system rules
– Symptom: tiles sound hollow, grout cracks appear early, or delamination occurs.
– Fix: follow underlayment seam treatment and thinset combo exactly.
3. Wrong thinset or wrong trowel
– Symptom: weak bond, tiles that lift with thinset residue mostly on one surface, or excessive lippage from inconsistent bed thickness.
– Fix: match thinset type to porcelain requirements and underlayment instructions; verify trowel size.
4. Trying to correct flatness using thinset
– Symptom: lippage, inconsistent grout joints, and thinset bed that exceeds acceptable thickness.
– Fix: flatten the substrate and underlayment plane first.
Verdict / tip: when this is a good DIY (and when to stop)
Porcelain tile over plywood is a solid DIY project only when your subfloor is already stiff, fully fastened, and you can achieve the flatness your tile assembly requires—then you commit to a documented system (underlayment + thinset + grout + movement-joint strategy). If your plywood is loose, the joists need major stiffening, or your floor is too out-of-flat to correct before underlayment, stop and plan for pro-level structural repair.
| Criteria | DIY-Friendly Scenario | Stop & Call a Pro |
|---|---|---|
| Subfloor movement | No bounce or seam flex when stepped/pushed | Squeaks, bounce, or shifting seams |
| Flatness tolerance | High/low corrections feasible before tile | Out-of-flat conditions require major rework |
| System documentation | You can match underlayment + thinset + grout per instructions | You’re considering “mix-and-match” materials |
| Tile size complexity | Smaller formats or straightforward layout | Very large-format porcelain with tight tolerances and many cuts |
| Existing tile failure | Fresh build or no prior movement-driven failures | History of cracking/debonding suggests structural movement |
| Verdict | ★★ ★★ (good DIY fit) | ★ ★★ (risk too high) |
If you want the safest path, treat this as a “system install,” not “tile on plywood.”
Quick checklist (scan/save)
– [ ] Plywood is firmly fastened; no movement/squeaks
– [ ] Subfloor is flat enough for porcelain tile (address highs/lows first)
– [ ] Use a tile-rated plywood method (backer board or uncoupling membrane) per its instructions
– [ ] Correct thinset for porcelain + your underlayment system
– [ ] Correct trowel + target full coverage (back-butter as needed)
– [ ] Grout and allow full cure before heavy use
– [ ] Proper transitions/expansion handling at changes and edges
FAQ
Can I tile porcelain directly over plywood?
Usually you shouldn’t tile porcelain directly onto plywood without an appropriate tile-underlayment layer. Porcelain over wood should follow a system designed to manage movement and ensure compatibility between layers.
What thinset should I use for porcelain on plywood?
Use the thinset type that your tile and underlayment manufacturer specifies for porcelain on plywood. [ADD: exact thinset recommendation based on your chosen tile and underlayment system—cite from manufacturer instructions.]
Do I need an uncoupling membrane or backer board?
It depends on your chosen system and your subfloor condition, but both approaches are commonly used over plywood. Pick one path and follow its seam fastening and joint treatment details precisely.
How flat does the plywood need to be?
Tile systems often require tight flatness tolerances, but the exact number depends on the manufacturer’s installation instructions for your underlayment and tile setting method. [ADD: target flatness requirement from your underlayment or tile-setting system documentation.]
What causes cracks when tiling over plywood?
Most cracks are caused by subfloor movement, incorrect underlayment installation, wrong thinset selection, or poor mortar coverage. Start by fixing stiffness and flatness, then stick to the specified materials.
Sources
– TCNA Handbook (Tile Council of North America) — Structural criteria for tile over wood framing; movement joint guidance [ADD: exact method number for your assembly]
– ANSI/TCNA-aligned criteria for tile over wood deflection [ADD: which standard edition you’re using, if you want this cited more precisely]
– Thinset mortar manufacturer installation instructions (tile setting compatibility, porcelain requirements, coverage/open time) [ADD: manufacturer + product line you’re using]
– Tile-underlayment manufacturer installation instructions (plywood fastening, seam/tape requirements) [ADD: backer board or uncoupling membrane brand/model]
– Grout manufacturer installation instructions (mixing, cure time, sealing guidance if applicable) [ADD: grout brand/model]
Porcelain tile over plywood can look excellent and last for years when you treat it as a complete, engineered assembly. Verify stiffness and flatness, choose an underlayment system meant for porcelain on wood, match your thinset exactly to the system, and grout and transition correctly with proper cure and movement-joint handling. If any of the foundational checks fail—especially movement or unacceptable flatness—pause and correct the substrate first.
Frequently Asked Questions
Can you install porcelain tile over plywood subfloors without removing the existing floor?
Yes, porcelain tile can be installed over plywood, but only if the plywood is properly prepared and supported to prevent flex. Tile and grout fail when the subfloor moves, so you typically need a stable, fully fastened plywood layer that meets flatness requirements and has minimal deflection. Most best-practice methods also include adding an approved underlayment system (like a tile backer board or uncoupling membrane) to create a suitable tile substrate.
How do you prepare plywood before installing porcelain tile?
Start by confirming the plywood is in good condition—no soft spots, delamination, or water damage—and that it’s securely fastened to the joists. Replace any damaged sheets, then sand or flatten high spots and remove dust for better thinset bonding. You’ll also want to ensure proper spacing and that seams are flat; many installers use additional layers of plywood or a compatible underlayment system to achieve the right thickness and stiffness for porcelain tile installation.
What underlayment is best for porcelain tile floors installed over plywood?
The best choice is an underlayment system designed for tile over plywood, such as cement backer board, fiber-cement board, or a manufacturer-approved uncoupling membrane. These products help reduce cracking by improving stability and controlling stress between the plywood and the tile assembly. Always follow the underlayment manufacturer’s requirements for thinset type, fastening schedule, seam treatment, and curing—because “tile underlayment” isn’t one-size-fits-all.
How do you handle deflection and prevent cracks when tiling over plywood?
To prevent cracked grout and broken porcelain tile, you must address subfloor deflection first—this usually means ensuring correct joist spacing, adding reinforcement if needed, and installing the plywood correctly. Use a robust thinset mortar appropriate for your tile and substrate, and follow the recommended spacing for fasteners when adding backer board or an additional plywood layer. Also keep the floor very flat (per tile industry tolerances) because uneven plywood can create weak spots where tile can crack.
Which thinset mortar and grout are recommended for porcelain tile on plywood?
Use a thinset mortar rated for porcelain tile and suitable for plywood or the specific underlayment system you’re installing. In many installations, a polymer-modified thinset is used to bond reliably over plywood-backed assemblies, but you should always match the mortar to the tile size, the uncoupling/backer board product, and the manufacturer specs. For grout, choose the grout type recommended for floors (often an un-sanded or sanded grout based on joint width, or a grout that matches your moisture/maintenance needs) and ensure proper mixing and curing to maximize durability.
📅 Last Updated: October 08, 2026 | Topic: How to install over plywood porcelain tile floors? | Content verified for accuracy and freshness.
References
- https://scholar.google.com/scholar?q=porcelain+tile+installation+over+plywood+subfloor Google Scholar
- https://scholar.google.com/scholar?q=tile+over+wood+subfloor+cement+board+uncoupling+membrane+deflection Google Scholar
- Google Scholar Google Scholar
https://scholar.google.com/scholar?q=ansi+a108+a118+tile+wood+subfloor+plywood+requirements - Porcelain tile
https://en.wikipedia.org/wiki/Porcelain_tile - Cement board
https://en.wikipedia.org/wiki/Cement_board - https://www.tilecouncil.org/
- https://www.tilecouncil.org/handbook/
- https://www.tile-assn.com/
- https://www.apawood.org/
- NTCA.com for sale
https://www.ntca.com/