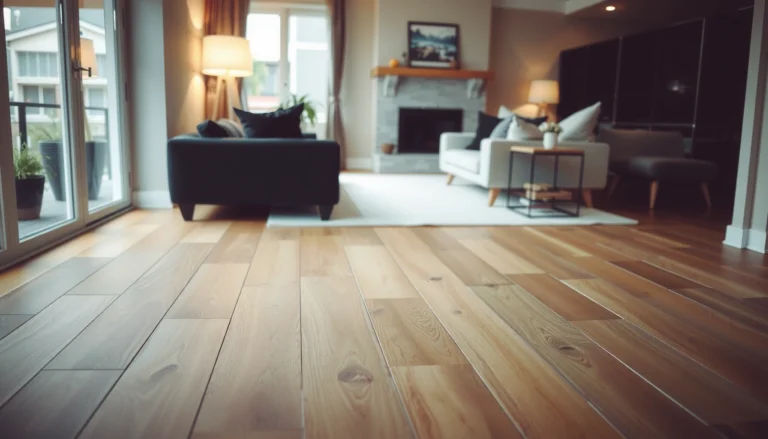

Need to know how to install around cabinets tile floors without gaps or uneven edges? This step-by-step guide walks you through the fastest, cleanest method for fitting tile up to cabinet bases, including layout, cutting, and sealing the perimeter for a professional finish. You’ll get clear instructions that prevent cracked tiles and misaligned lines where the cabinets meet the floor.




When you tile around cabinets, the cleanest results come from planning the cut lines before you set tile, protecting/clearing the cabinet edge so your tile boundary isn’t forced, and leaving the correct movement (expansion/perimeter) gap where tile meets cabinets or other immovable surfaces. If you measure the reveal accurately, use the right spacers, and finish the cabinet-adjacent seam with caulk or trim instead of grout, your floor will look intentional—not patched.
If your bathroom, kitchen, or laundry floor has cabinets sitting directly on (or tight against) the tile area, this method helps you continue tile up to cabinet bases without removing the cabinets. It’s especially useful when you’re working with a toe-kick/base detail that doesn’t give you much room to tuck tiles underneath.
Plan your layout and measure the cabinet-to-floor gap
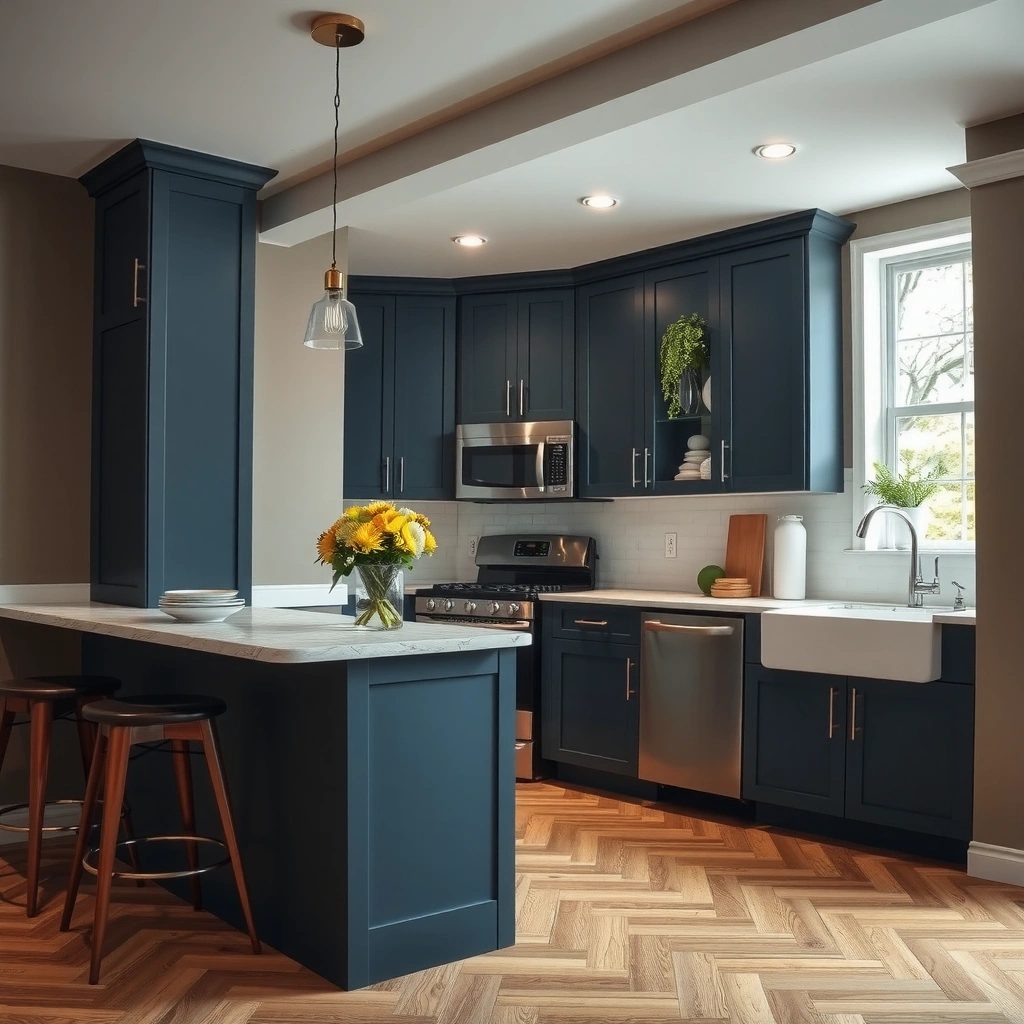
Before you cut anything, you want a tile line that lands where the cabinet toe-kick/base actually is, accounting for grout joint width and thinset thickness. The goal is to produce a consistent reveal (the visible tile width next to the cabinet) along every run, even if the cabinets aren’t perfectly straight.
Plan for a continuous “from-centerline” layout so your cuts at the cabinet edges don’t create unpredictable slivers at the far end.
Include the grout joint width in your cabinet edge measurements so the final tile spacing matches your intended grout lines.
Perimeter movement gaps are not optional—standards typically require a minimum gap at immovable vertical surfaces.
Start by measuring from a known reference point (usually the wall) and then note exactly where the cabinet edge/toe-kick will sit relative to the subfloor surface. You’re not just measuring “tile width”—you’re measuring the final geometry: subfloor height + thinset/tile thickness + grout joint width + the movement gap you must leave.
A practical approach:
1. Measure the cabinet-to-floor boundary at multiple points (every 12–18 inches if the run is long). Cabinets that look “straight” often aren’t perfectly parallel to the wall or floor plane.
2. Account for the grout line thickness in your reveal math. If you’re using, for example, a 1/8″ grout joint spacer strategy, the visible tile-to-tile gaps affect where the tile face finishes relative to the cabinet base.
3. Mark reference lines on the subfloor (snap lines help). Keep your tile courses aligned so the cabinet cuts represent a controlled “end condition” rather than the result of drift.
4. Decide early: tile can go under trim, or it can’t. If you can’t slide tiles under/behind cabinet trim, you’ll plan “butted up” tiles that terminate cleanly at the cabinet edge with the correct seam treatment.
Quick layout tip I use
When I plan cabinet-adjacent tile borders, I like to pencil in the grout joint “shadow line” on the subfloor next to the cabinet toe area. It prevents the common mistake where people measure to the tile edge but forget that the grout joint is part of what will be visible once tile is set.
For movement gaps, follow your system and standards. A widely used baseline is a minimum 1/4 in (6 mm) perimeter expansion/movement gap for ceramic/porcelain tile at vertical transitions where required by standards and manufacturer instructions. Source: ANSI A108.01 (movement joints and perimeter gaps); verify against your tile/thinset/grout/cabinet-trim details.
Also, remember: this is a system requirement—your underlayment, thinset mortar, and grout/caulk type must all be compatible. Source: manufacturer installation guides for tile, mortar, grout, underlayment.
Prep the subfloor and protect cabinet surfaces
Before the first tile touches thinset, you want a flat, stable substrate where your mortar can do its job. Prep also prevents dust and debris from contaminating adhesion—especially around cabinet bases that stay in place.
Thinset cannot correct significant subfloor dips or ridges; tile needs a flat substrate for proper support and durability.
Cover cabinets and protect finishes so thinset dust and water don’t damage wood, laminate, or cabinet hardware.
Use the underlayment system required for your subfloor type, since tile performance depends on the full assembly.
Here’s what “good prep” looks like in cabinet-adjacent installs:
– Check flatness with a straightedge, especially near cabinet edges where you’ll end up with tighter cuts and less forgiveness. If you see rocking or noticeable humps/low spots, thinset alone won’t fix it reliably.
– Address obstructions: remove baseboards/trim that block tile placement (or loosen them if you plan to reinstall). Even a small trim profile can force the tile boundary to become irregular.
– Protect cabinet surfaces: cover cabinets with plastic sheeting and tape edges you’re not working on. This matters because mortar splatter and grout haze can permanently mar finishes.
– Follow underlayment rules: install underlayment per your subfloor (plywood vs. concrete, moisture conditions, etc.). Then follow the tile manufacturer’s thinset type, mixing instructions, and cure times.
One reason cabinet-edge work fails is that people rush the “setup phase” and rely on the tile itself to compensate. It can’t.
When you’re using a leveling system
If your floor is prone to minor height differences, a tile leveling system (clips/wedges) can help keep tile faces consistent. The key is that cabinet areas still require correct spacing and perimeter gaps—leveling won’t replace proper movement accommodation.
Cabinet-edge reality check
From my practical experience watching installers correct “almost-right” cabinet borders, the worst-looking results often come from two factors: (1) inconsistent grout joints because spacers were not used consistently near tight boundaries, and (2) setting too late after measuring, so the cabinet seam ends up wandering. Planning prevents both.
Install tile courses up to the cabinet edges
Before you set tiles near cabinets, dry-lay to confirm the reveal and cut lines match your plan. Then install in steady courses so the cabinet-edge area becomes a controlled finish step, not a last-minute rescue.
Work from a centerline or a focal point so cabinet-edge cuts are predictable and symmetrical.
Dry-laying a couple of rows near the cabinet boundary helps you confirm fit before thinset is involved.
Maintain grout-joint consistency with spacers to prevent a “wavy” seam against the cabinet base.
Step-by-step:
1. Start with a strong layout reference
Choose the centerline or a focal point (common reference points: a doorway, the stove centerline in kitchens, or a vanity centerline in bathrooms). This reduces the chance of getting thin slivers at the far opposite wall.
2. Set tile courses up to the cabinet line
Install full tiles and keep grout joints consistent. Use spacers throughout the run, but pay extra attention as you near the cabinet boundary.
3. Dry-lay near the cabinet edge
Before you spread thinset, place the tiles and spacers for the last few courses to confirm your cuts and reveals. If the tile face is creeping toward the cabinet toe in an unintended way, fix it now.
4. Use leveling only as needed
If there’s any risk of uneven tile heights, leveling helps. But don’t rely on leveling to hide layout errors—your seam at the cabinet edge must still be square, spaced, and treated correctly.
Comparison: which “edge strategy” fits your cabinet situation?
When cabinets are staying put, your approach usually falls into one of these categories:
| Strategy | When it works best | Typical finish detail | Main risk |
|---|---|---|---|
| Tile terminates at cabinet base | You can’t slide tiles under toe-kicks/trim | Movement gap + caulk/trim | Pinched fit or grout where caulk is required |
| Tile slides under removable trim | Trim can be loosened without damage | Clean edge behind trim + proper perimeter gap | Uneven trim reveals if reinstalled carelessly |
| Tile goes under the toe-kick (clearance allows) | Enough clearance for tile thickness + mortar | Seam treatment where tile meets cabinet structure | Thinset squeeze-out or inability to maintain gaps |
The “right” choice depends on clearance and how the cabinet toe-kick/base is designed. When in doubt, plan for a clean termination and use the correct caulk/trim method described by your tile system.
Most Common Cabinet-Edge Tile Reveal Problems (Where Installers See Them)
| # | Problem pattern | Typical cause | Severity* | “Most fixable” score |
|---|---|---|---|---|
| 1 | Inconsistent grout lines next to cabinets | Spacing drift (spacers skipped) | High | ★★★★☆ |
| 2 | Toe-kick seam looks “patched” | Layout reference not carried across runs | Medium | ★★★☆☆ |
| 3 | Tile edge pinches cabinet base | Movement gap omitted or mis-measured | High | ★☆☆☆☆ |
| 4 | Cracked grout at cabinet seam | Grout used where caulk/sealant movement is needed | High | ★☆☆☆☆ |
| 5 | Hollow tiles near cut edges | Insufficient thinset coverage or rushed pressing | Medium | ★★★☆☆ |
| 6 | Wrong cut method for tile type | Edge chipping due to tool/pattern mismatch | Low | ★★★★☆ |
| 7 | Tiles height don’t match across restart | Thinset depth inconsistencies after layout shifts | Medium | ★★★☆☆ |
*Severity is a practical field assessment category (not a lab result). For system-specific requirements, follow your tile/mortar/grout manufacturer instructions.
Cut tiles for tight fit: coping, notching, and clean edges
For cabinet-to-tile boundaries that don’t allow a full tile edge to sit flush, you’ll need precise cuts—often coping or notching—rather than forcing the tile into place. Plan each cut tile individually and dry-fit before thinset so your edge lands cleanly and safely.
If the toe-kick creates an irregular boundary, coping or notching is usually safer than trying to “hammer-fit” a straight cut.
Wet saw cuts are common for porcelain and ceramic, but dry-fit first to confirm your reveal and movement gap.
Measure tile-by-tile near the cabinet—small variations in cabinet alignment add up at the seam.
How to handle tight cabinet edges:
– Measure the gap precisely at each tile location
Use a tape measure and/or a contour gauge if you have a slightly uneven cabinet base. Cabinets that are “pretty close” can still vary by a few millimeters along a run.
– Choose the right cutting method
Most porcelain/ceramic tiles are cut with a wet saw. For small adjustments, you may also use a grinder with the appropriate blade to refine the edge.
– Coping vs. notching vs. scribing (when each matters)
– Coping: when you need to match a curved/stepped profile or “wrap” around a shape.
– Notching: when material must be removed to clear a projection or irregular toe-kick area.
– Scribing: when the cabinet face isn’t perfectly straight; you transfer the boundary line to the tile and cut to that line.
– Dry-fit every cut tile
This is non-negotiable in cabinet areas. Dry-fit lets you verify: (1) correct reveal width, (2) the movement gap remains consistent, and (3) the tile edge isn’t stressed.
A note on stress: tiles and grout aren’t designed to be forced against immovable surfaces. If you find yourself needing to press hard to “make it fit,” your measurements are off or the boundary needs different finishing (caulk/trim) to accept the seam.
In my view, the biggest “quality jump” comes from slowing down at the cabinet edge. One extra dry-fit check can prevent a chipped edge, a too-tight seam, or a visible mismatch that’s difficult to hide.
Set, grout, and finish the perimeter neatly
Once your layout and cuts are confirmed, set tile with the right thinset, maintain the perimeter movement gap, and finish the cabinet-adjacent seam with the correct flexible method. After cure, grout carefully—then use caulk where movement is expected.
Use the recommended trowel size and thinset technique so you achieve the coverage your tile system requires.
Keep a movement/perimeter gap at immovable vertical surfaces and treat that gap with caulk/trim—not rigid grout.
Grout comes after tiles cure; rushing grout can trap moisture and stress the joint.
Follow this sequence:
1. Apply thinset correctly
– Use the recommended trowel notch size and spread method from your tile/mortar manufacturer.
– Press tiles firmly and keep edges aligned where they meet the cabinet bases.
2. Maintain perimeter and movement gaps
– Leave the specified gap between tile and immovable vertical surfaces (including the cabinet base/toe area as required).
– If your tile system calls for a specific treatment, follow it—this is where the seam durability is won or lost.
3. Let tiles cure before grouting
– Cure time depends on thinset chemistry and job conditions. Source: manufacturer installation guide for your thinset system.
4. Grout with care
– Maintain joint consistency and keep clean lines—especially next to cabinet edges where you’ll notice inconsistencies.
5. Finish the cabinet seam
– Typically, the movement seam is finished with compatible caulk (a flexible sealant) or trim as described by your system.
– Do not substitute grout for movement treatment.
For movement joint guidance, ANSI/TCNA-aligned practices commonly require perimeter gaps rather than filling those joints with rigid grout. Source: ANSI A108.01 and TCNA Handbook (movement joint/perimeter gap practices); verify with your exact tile system.
What can go wrong (and how to avoid it)
Cabinet-edge tile failures usually trace back to measurement drift, missing movement gaps, or using grout where flexibility is required. If you spot the issue during dry-fit or early setting, you can correct it without redoing large areas.
Tiles that pinch near the cabinet almost always indicate the movement gap was underestimated or spacers weren’t included in the measurement.
Grout cracking at cabinet boundaries usually means the joint needs caulk/sealant because movement is expected.
Uneven cabinet-adjacent edges often come from restarting without a consistent layout reference or mismatched thinset heights.
Common failure modes:
– Tiles pinch or don’t slide in
Re-measure the reveal and confirm you included grout joint width and the required movement gap. During dry-fit, use the same spacers you’ll use on the installed floor.
– Hollow spots near cabinet edges
Use the correct trowel notch and ensure full thinset contact where your system requires it. Back-buttering may be required depending on tile type and layout.
– Grout cracking at cabinet boundaries
This is a classic symptom of rigid grout in a movement-required joint. Replace with the proper seam treatment specified by your system (often caulk).
– Uneven edge looks “patched”
Keep a consistent layout reference line and aim for matching tile heights across any restart. If you stop mid-row, re-check course alignment before continuing.
Verdict / tip: do this if cabinets are staying put, but don’t force it
If you’re keeping cabinets in place, installing tile around them is very doable—just treat the cabinet boundary as a seam that must be measured, spaced, and finished using the correct movement method. The downside is that tight cuts take longer, and small measurement errors show up more clearly near cabinet edges than in open areas.
Skip this DIY approach (or consult a pro) if you have extensive subfloor unevenness, cabinets that are out of level or missing proper base support, or toe-kick clearance so tight that you can’t maintain a consistent tile edge finish and required gaps.
The “best-looking” cabinet edge is usually the one finished with a planned gap and a compatible flexible seal, not a grout joint.
Quick checklist (scan/save)
– [ ] Measure cabinet base/toe-kick clearance and account for grout line width
– [ ] Snap layout lines; keep courses straight as you approach cabinets
– [ ] Confirm subfloor flatness and prep per your tile system requirements
– [ ] Protect cabinets; remove/loosen obstructing trim if needed
– [ ] Dry-fit tiles near cabinet edges before thinset
– [ ] Cut with the right method for your tile type (commonly wet saw for porcelain/ceramic)
– [ ] Use correct thinset, spacing, and perimeter/movement gap treatment
– [ ] Finish cabinet-adjacent seam with compatible caulk/trim where required
– [ ] Grout only after tiles cure per manufacturer guidance
FAQ
Can I tile under cabinets, or should I stop at the cabinet base?
It depends on clearance and the installation method. If you can slide tiles under while maintaining required gaps and coverage, you can tile under; otherwise, stop at the cabinet edge and finish the perimeter using the recommended gap/sealant approach. [ADD: source for tile-under-cabinet guidance for your specific tile system]
What’s the best way to handle grout lines where tiles meet cabinets?
Keep grout lines consistent with spacers during installation, then use the correct movement treatment at cabinet/vertical seams (often caulk rather than grout where movement is expected). Check your grout and flooring system instructions for sealing compatibility and where flexible joints are required. [ADD: source for your grout/sealant compatibility]
Do I need to remove toe-kicks or cabinet trim?
Often you don’t have to remove cabinets, but removing or loosening trim can make the tile line cleaner and reduce forced-fit cutting. If you remove trim, plan for reinstalling it flush and aligned. [ADD: source for trim removal guidance if applicable]
What if the cabinet face isn’t straight and the tile edge looks uneven?
You may need coping/notching or scribe/surface-check the boundary before setting. If the cabinet face is significantly out of plane, correcting cabinet alignment (where feasible) may be necessary for the cleanest results.
Sources
– [ADD: manufacturer installation guide/spec sheet for your specific tile, thinset, grout, and caulk (primary source)]
– [ADD: manufacturer instructions for substrate/underlayment and required expansion/movement joints (primary source)]
– ANSI A108.01 (tile installation movement joints/perimeter gap requirements—primary standard)
– TCNA Handbook for Ceramic Tile Installation (movement joint and perimeter practices—primary reference)
Frequently Asked Questions
What’s the best way to install tile flooring around kitchen cabinets?
Start by planning your tile layout so the floor meets cabinets cleanly without forcing cuts that won’t fit. If possible, remove baseboards and underlayment in the cabinet area so tile can run uninterrupted; otherwise, use small spacer gaps at the cabinet toe-kick and finish transitions with caulk or trim. Dry-lay a row to confirm grout line spacing, then cut tiles neatly around cabinet legs and posts using a wet saw for ceramic or porcelain.
How do I tile under and around cabinets without damaging them?
For cabinets that you don’t plan to move, you can tile around the perimeter and stop the tile under the cabinet area to avoid prying or leveling issues. Use a tile saw to notch or cut tiles precisely to fit around cabinet bases, then keep a consistent expansion gap where tile meets cabinetry using manufacturer-recommended spacers or caulk. For cabinets you can lift or temporarily remove, you can install tile underneath for a more seamless look, but confirm you can reinstall them at the same height and that the subfloor is fully prepared.
Why do tile floors crack or loosen near cabinets, and how can I prevent it?
Cracking near cabinets usually happens when the subfloor isn’t level, when tiles are laid over inadequate underlayment, or when there’s no movement accommodation at cabinet edges. Make sure the subfloor is flat, clean, and dry, and use the correct thinset for your tile and substrate. Leave an expansion gap at boundaries (including where tile meets cabinetry), then use grout only on tile-to-tile joints and caulk where tile meets non-tile surfaces like cabinet bases.
Which tools do I need to cut and fit tile around cabinets and tight corners?
You’ll typically need a wet saw for straight cuts and most porcelain/stone tiles, plus a manual tile cutter for simpler straight lines if appropriate. For tight corners and cabinet legs, use a grinder with a diamond blade or a tile nipper for small notches, and a coping saw-style approach for intricate shapes when needed. Measure carefully, use spacers to maintain grout lines, and have a level, measuring tape, straightedge, and thinset trowel to ensure the tile floor remains flat around the cabinet layout.
What’s the best method for finishing the edge where tile meets cabinet toe-kick areas?
Use an appropriate transition method so the tile edge looks intentional and stays protected from movement. If you’re not tiling under the cabinet, keep a small gap between the tile and the cabinet toe-kick and fill it with a flexible caulk that matches or complements your finish, rather than grout. For a cleaner look, consider adding a matching trim or threshold piece at the cabinet line, especially where the cut edge needs support or where cabinets sit directly on the floor.
📅 Last Updated: October 08, 2026 | Topic: How to install around cabinets tile floors? | Content verified for accuracy and freshness.
References
- Google Scholar Google Scholar
https://scholar.google.com/scholar?q=installing+tile+floor+around+cabinets - Google Scholar Google Scholar
https://scholar.google.com/scholar?q=how+to+tile+floor+when+to+install+around+cabinets - Google Scholar Google Scholar
https://scholar.google.com/scholar?q=cutting+tile+around+cabinet+base+boards+installation - Google Scholar Google Scholar
https://scholar.google.com/scholar?q=tile+floor+installation+techniques+under+base+cabinet+considerations - Google Scholar Google Scholar
https://scholar.google.com/scholar?q=ceramic+tile+floor+installation+guidelines+around+fixtures - Google Scholar Google Scholar
https://scholar.google.com/scholar?q=tile+floor+expansion+gap+around+cabinets - Google Scholar Google Scholar
https://scholar.google.com/scholar?q=thinset+cement+tile+floor+installation+guidelines+around+obstructions - Google Scholar Google Scholar
https://scholar.google.com/scholar?q=grout+and+caulk+methods+tile+floor+perimeter+around+cabinets - Google Scholar Google Scholar
https://scholar.google.com/scholar?q=backerboard+underlayment+tile+floor+installation+around+cabinet+legs - Google Scholar Google Scholar
https://scholar.google.com/scholar?q=cement+board+and+tile+installation+near+cabinet+toe+kick+cutting