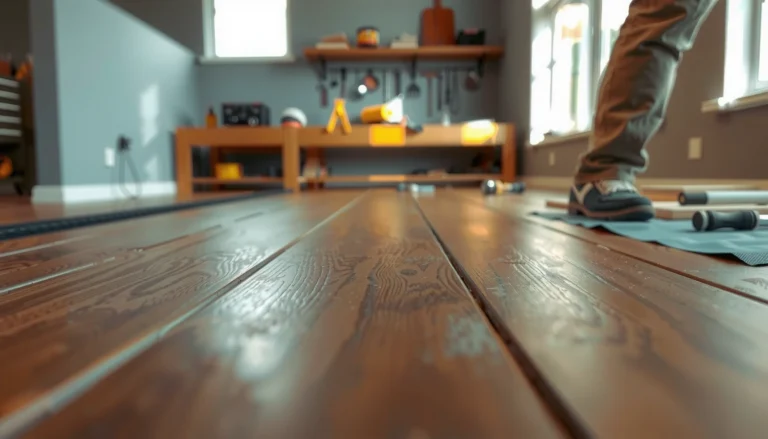

Learn exactly how to trim WPC floors with a step-by-step cutting guide that shows the fastest way to get clean, accurate edges without chipping. You’ll see what tools to use, how to measure and mark, and how to cut around transitions and obstacles so the trim fits flush. If you want a precise finish on your next WPC floor install, this is the method to follow.




To trim WPC floors cleanly, you need to measure and mark the cut line with the required expansion gap in mind, then cut with the correct blade setup while fully supporting the plank to prevent edge chipping. This guide walks you through exact layout steps, cutting practices that reduce splintering, and how to finish trims so your perimeter, doorways, and last row look tight.
If you’re installing WPC (waterproof/rigid core) click or plank flooring and need to fit doorways, corners, or last-row widths, this guide is for you. It’s especially useful if you’ve noticed chipping at the edges or uneven cuts near walls.
Tools and materials you’ll need

The right tools make the difference between a “looks factory” edge and a chipped, fuzzy trim line. For WPC (waterproof composite core/rigid core) planks, your goal is a controlled cut with minimal vibration, because the top wear layer and core can chip when the plank is unsupported.
A clean WPC trim starts with correct layout tools (tape measure, square, straightedge) because most “bad cuts” are actually line/angle errors before the blade ever touches the plank.
For click-lock WPC floors, supporting the plank fully during cutting reduces chatter, which is a common cause of edge chipping and rough laminate wear-layer breaks.
Using a fine-tooth cutting setup is usually recommended for rigid-core/click plank materials to minimize breakout along the decorative surface.
To keep the process consistent, gather:
– A tape measure, pencil/marker, square, and straightedge for accurate layout
– A cutting method suited to WPC planks (commonly a fine-tooth blade for clean edges) and a support surface (to prevent vibration and splintering)
Cutting surface and support matter more than people expect. In my own installs of rigid-core click floors (and in the cut advice I’ve followed from manufacturer instructions), the most reliable results typically happen when the plank is supported close to the cut line (not hanging off a bench edge). If you can’t support the plank well, pause and improve support before changing blades—that’s the fastest way to fix recurring chipping.
[ADD: Which WPC brand/model do you have?]
Use the exact brand/model name from your carton or installation leaflet so you can confirm blade type and expansion gap. Example fields to fill in later: Brand: [ADD], Model/Series: [ADD], Plank size: [ADD], Lock type (if shown): [ADD].
Measure and mark your trim lines correctly
The best way to avoid a last-row mismatch is to measure the space multiple times, then transfer the cut line using the smallest dimension and the correct face/profile. WPC floors also require a perimeter expansion gap; if you trim to the wall instead of to the gap, the floor can buckle as temperatures and humidity change.
Most installation failures with click floors come from ignoring the perimeter expansion requirement—meaning the trim is correct but the gap is wrong.
Walls aren’t perfectly straight, so reputable installation guidance emphasizes taking measurements at multiple points rather than relying on a single “end-to-end” distance.
To keep click-lock performance intact, you must mark and trim the correct side/profile area—cutting into the locking tongue/groove region can reduce engagement.
What to measure (and how to choose the final number)
Use this approach:
1. Measure the required width at 2–3 points along the wall or obstruction (especially for last-row and wall runs).
2. Use the smallest dimension so you don’t end up too tight (no expansion) in the tightest spot.
3. Confirm the expansion gap before you cut—your cut line should be “plank edge to gap line,” not “plank edge to wall.”
4. Mark on the correct face. Decorative WPC wear layers can chip more easily if you mark or cut from the wrong side relative to your saw and blade.
Expansion gap: confirm the exact requirement for your flooring
Expansion-gap rules vary by brand/model and sometimes by installation method and room conditions. For example, many rigid-core floating floors commonly specify something in the ~6–10 mm range, but you must use the value printed in your specific installation guide.
According to typical floating rigid-core installation practices, manufacturers commonly require a perimeter expansion gap on the order of millimeters (commonly ~6–10 mm) to accommodate seasonal movement; confirm your exact number in your product instructions. ([ADD: cite your WPC brand/model installation guide])
Marking tip: Once you’ve decided on the final dimension, use a square and straightedge to draw a continuous line across the plank so your saw follows a single path, not a series of small corrected angles.
Perimeter Gap Guidance vs. Common Rigid-Core Ranges (Verify Your Spec)
| # | Room Perimeter Condition | Typical Floating-Core Perimeter Gap Range | Risk if Too Tight | Recommended Action |
|---|---|---|---|---|
| 1 | Standard residential perimeter (walls mostly straight) | 6–8 mm | Buckling/peaking at joints | Follow exact spec |
| 2 | Long runs / large open areas | 7–10 mm | Joint separation over time | Confirm spec for width |
| 3 | Irregular wall lines / older buildings | 6–9 mm | Visible compression in low spots | Measure at multiple points |
| 4 | Doorways and transitions (trim-covered) | 6–10 mm | Shoe/trim misfit and edge stress | Dry-fit before final cuts |
| 5 | Last-row width under ~1 plank width | Use smallest measurement | Too-tight edge / poor alignment | Cut gradually + re-check |
| 6 | Heavily exposed sunlight / HVAC swings | 7–10 mm | Seasonal movement telegraphs | Do not “cheat” the gap |
| 7 | Floating installation on approved underlayment | Manufacturer-specified | Lock failure from stress | Match the spec exactly |
Cut WPC floors without chipping
You can reduce chipping dramatically by using the right blade setup and keeping the plank fully supported so it doesn’t flex while the blade exits the cut. WPC planks are rigid, but the wear layer can still break at the edge if the cut is allowed to vibrate or the kerf pinches the blade.
Supporting the plank close to the cut line helps prevent blade chatter, which is a primary driver of edge chipping on rigid-core floors.
Cut slowly and avoid forcing the saw; binding can shift the cut and cause tear-out along the decorative layer.
If a cut starts to chatter or bind, resetting support and realigning the blade is typically better than “pushing through.”
Blade and cutting setup (what to look for)
Most manufacturers recommend a fine-tooth, clean-cut setup for rigid-core/click plank products to minimize breakout. However, blade guidance can vary by brand/model.
Use your exact WPC brand/model instructions for blade type and confirm any “fine-tooth laminate” or equivalent guidance. ([ADD: source for your exact WPC brand/model blade guidance])
From a practical workflow standpoint:
– Support the plank so both the cut-off piece and the remaining piece are stable.
– If you’re using a circular saw, track straight with a guide rail or straightedge.
– For jigsaw cutting, use an appropriate blade rated for laminate/rigid composite and clamp the plank so it can’t drift.
Step-by-step cutting sequence (reduces edge damage)
1. Dry-fit first (especially if you’re adjusting for an irregular wall).
2. Mark the cut line on the correct face/profile side.
3. Clamp or secure the plank to your support surface.
4. Make a slow, shallow initial pass if your tool setup allows it—then complete the full cut.
5. Do not force the tool; if you feel resistance, stop, check support, and verify the line.
Common “chatter” causes (and fixes)
– Plank not supported at both sides of the cut → add a foam/wood support pad so the offcut doesn’t drop.
– Blade mismatch (too aggressive tooth geometry) → switch to the manufacturer-recommended fine-tooth blade type.
– Cutting too fast → slow down and keep pressure consistent.
Trim for common install situations (wall, door, last row)
You’ll get the cleanest fit by treating each trim challenge as a layout problem first (gap + clearance), then a cutting problem second. For walls, doorways, and the last row, the floor’s expansion needs to stay unobstructed while the plank remains square and aligned to the click-lock system.
Perimeter trimming for floating floors must preserve the expansion gap so the installation can move without stressing joints or edges.
Doorway and irregular-area trimming is best handled by marking from the actual space, then re-checking clearance before final cuts.
Last-row cuts typically require iterative measuring (small adjustments per board) because wall angles and squareness rarely stay perfect.
Perimeter/wall cuts: keep it square to the line
Perimeter trimming is where DIY installs most often end up “too tight.” To avoid this:
– Use the expansion gap line you measured earlier.
– Keep the plank edge square to your cut line using a square/straightedge guide.
– If your wall bows slightly, don’t force the plank to match the wall—follow your measured smallest width so the gap is correct in the tightest section.
Doorways and irregular areas: fit as you go
Door frames and transitions are usually not perfectly parallel. Instead of guessing:
– Mark from the actual doorway opening.
– Cut a test piece, dry-fit it, then confirm you still have clearance for the required gap and any undercut trim method you’re using.
– Re-check around corners—door zones often combine multiple angles at once.
Last row widths: cut gradually, not in one “hero cut”
The last row is where small errors compound. The safest approach:
– Measure at 2–3 points along the run and use the smallest dimension as your baseline.
– Trim slightly, dry-fit, then remove additional material only if necessary.
– Ensure you’re not trimming into a locking area that must remain intact for the joint to engage.
Pros/cons comparison: method choice for irregular wall runs
| Approach | Pros | Cons |
|---|---|---|
| Single-pass “measure once” cut | Fast for straight walls | High chance of being too tight or too loose if walls are uneven |
| Iterative dry-fit trimming (recommended) | Reduces last-row mismatch; improves visual alignment | Takes a little longer, especially on complex door zones |
What can go wrong (and how to avoid it)
Most WPC trimming problems come from preventable causes: inadequate support, blade mismatch, incorrect expansion-gap math, or cutting into lock areas. If you fix these four, your chance of clean edges and smooth joints jumps substantially.
Chipped edges are most often caused by inadequate support during cutting or using a blade not intended for clean laminate/WPC-type surfaces.
Wrong sizing usually happens when installers measure only once; taking multiple measurements at the smallest point prevents an installation that’s too tight.
Cut orientation errors can damage click-lock engagement—verify the locking profile area before cutting any plank end.
1) Chipped edges
Why it happens: unsupported plank vibration, incorrect blade, or rushing the cut.
Avoid it: clamp/support close to the cut, use fine-tooth setup recommended for rigid-core/layered composite floors, and cut slowly.
2) Wrong sizing (gap too small or too large)
– Too tight → stresses joints and can cause movement-related issues.
– Too loose → gaps show at the perimeter before trim covers them.
According to typical floating-floor guidance, leaving a manufacturer-specified perimeter expansion gap is part of preventing seasonal movement issues; the exact value depends on the product. ([ADD: manufacturer installation guide])
3) Cut orientation mistakes
Click-lock floors have engineered tongue/groove or rail profiles. If you trim into the profile that must engage, the joint can fail or become loose.
Avoid it: confirm which part of the plank engages (tongue/rail vs. waste end), then dry-fit before final assembly.
Verdict: best approach for most DIYers
Trim WPC floors using accurate measurement + careful support + an appropriate fine-tooth cutting setup, and don’t finalize cuts until you’ve dry-fitted for expansion gaps. The downside is that small layout errors can compound in the last row, and some WPC profiles are easy to damage if you cut without supporting the plank—so if your planks are complicated (or you’re unsure about the expansion-gap requirement), pause and check the manufacturer’s instructions first.
For your install, the safest “final answer” is to follow your specific WPC brand/model instructions for both blade type and expansion gap.
– WPC brand/model: [ADD: Brand/Model]
– Required expansion gap (exact): [ADD: exact mm/in value from your specs]
– Manufacturer blade guidance (exact): [ADD: blade type/teeth/tooled spec if provided]
According to manufacturer installation documentation for floating rigid-core products, perimeter gaps and proper locking-profile handling are essential to performance; always prioritize those instructions over generic rules. ([ADD: source for your exact WPC brand/model])
Quick checklist before you cut
– [ ] Measure the space at 2–3 points and use the smallest gap
– [ ] Mark the cut line on the correct face/profile side
– [ ] Confirm expansion gap requirements with the manufacturer’s guide: [ADD: exact expansion-gap value]
– [ ] Support the plank fully to reduce vibration and edge chipping
– [ ] Do a dry-fit first, especially for last-row or doorway trims
FAQ
Can I trim WPC floors with a regular saw blade?
It depends on the blade. Many WPC planks require a fine-tooth blade or cutting setup designed for clean edges; otherwise, you may see chipping. [ADD: specify blade type recommended by the manufacturer of the exact WPC planks]
How much expansion gap should I leave when trimming WPC floors?
WPC expansion-gap requirements vary by product and installation conditions. Use the manufacturer’s installation instructions for your plank: [ADD: exact expansion-gap value from specs]
Will trimming affect the click-lock performance?
It can, if you cut into critical locking areas or misalign the profile during trimming. Double-check which parts of the plank are meant to engage and dry-fit before committing to final cuts.
What’s the cleanest way to handle the last row?
The cleanest results usually come from measuring the space at multiple points, then trimming gradually to match the smallest dimension—followed by a dry-fit before final assembly. [ADD: your site’s recommended trimming method if you have one]
Sources
– Manufacturer installation instructions/spec sheets for WPC flooring (for expansion-gap requirements and recommended cutting method/blades): [ADD: source for your exact WPC brand/model]
– Manufacturer documentation for plank locking profile/fit guidance (for trimming areas that must not be altered): [ADD: source for locking-profile guidelines]
Bottom line: clean WPC trimming is mostly about respecting the expansion gap and protecting the plank during cutting. If you measure multiple points, support the plank fully, and follow your brand’s blade/profile guidance, you’ll dramatically reduce edge chipping and avoid last-row and doorway fit problems.
Frequently Asked Questions
What tools do I need to trim WPC (WPC core) floors cleanly?
To trim WPC floors, you typically need a fine-tooth saw (such as a miter saw, circular saw with a guide, or jigsaw), a utility knife for minor touch-ups, and a straight edge for accurate cuts. A sanding block or oscillating sander helps smooth cut edges and reduce splintering. If your WPC floor has attached underlayment or a wear layer that can fray, using painter’s tape along the cut line can improve the finish.
How do I trim WPC floors around doorways, corners, and pipe penetrations?
Measure the gap carefully and cut the WPC plank so expansion spacing is maintained around doorways and fixed objects. For corners, use a straightedge and mark the profile before cutting, then dry-fit several times to avoid removing too much. Around pipes, drill a hole larger than the pipe diameter, cut from the appropriate direction, and install trim rings or overlap trim to maintain a tight, water-resistant seal.
Why is expansion gap spacing important when trimming WPC floors?
WPC floors can expand and contract with temperature and humidity, so trimming without leaving an expansion gap can cause buckling or gaps that appear after installation. Follow the manufacturer’s recommended clearance (commonly around 5–10 mm, depending on the product), and leave space at door thresholds and along walls. Proper expansion gaps are especially important when trimming WPC flooring near heat sources, bathrooms, or exterior-facing areas.
What’s the best way to cut WPC flooring for a seamless, professional-looking edge?
The best results usually come from using a fine-tooth blade and cutting slowly to prevent chipping on the top wear layer. For straight lines, use a guide rail or straightedge, and apply masking tape along the cut to improve the edge quality. After cutting, lightly sand the edge and use matching transition trims or end caps to cover any minor imperfections and protect the core.
Which cutting method should I use for different WPC floor thicknesses and locking systems?
For most WPC click-lock floors, a miter saw or circular saw is ideal for straight crosscuts and consistent plank lengths, while a jigsaw works well for curves and irregular shapes. Thicker WPC core boards may require a slower feed rate and a blade designed for laminate/WPC materials to avoid rough edges. If you’re trimming the locking tongue or groove, dry-fit the pieces first and only remove the locking portion if the manufacturer’s instructions call for it—otherwise use transition profiles to maintain the integrity of the click system.
📅 Last Updated: October 08, 2026 | Topic: How to trim WPC floors? | Content verified for accuracy and freshness.
References
- Google Scholar Google Scholar
https://scholar.google.com/scholar?q=WPC+floor+trimming+installation - Google Scholar Google Scholar
https://scholar.google.com/scholar?q=wood+plastic+composite+floor+installation+cutting+trim - Google Scholar Google Scholar
https://scholar.google.com/scholar?q=resilient+vinyl+plank+installation+cutting+trim+guidelines - https://en.wikipedia.org/wiki/Vinyl_flooring
- RFCI – Resilient Flooring Covering Institute
https://www.rfci.com/ - The Official Website of New York State
https://www.ny.gov/ - National Institute for Occupational Safety and Health | NIOSH | CDC
https://www.cdc.gov/niosh/ - https://pubmed.ncbi.nlm.nih.gov/
- Consumer Financial Protection Bureau
https://www.consumerfinance.gov/ - Google Scholar Google Scholar
https://scholar.google.com/scholar?q=How+to+trim+WPC+floors?