


How to cut WPC floors without splitting or damage: use the right blade, scoring method, and support setup for clean edges on the first try. This guide gives you the fastest, most reliable cutting approach—whether you’re trimming planks or making precise doorway cuts—while protecting the core and locking system. If you’ve struggled with chips, cracks, or fused edges, this is the method that fixes it.


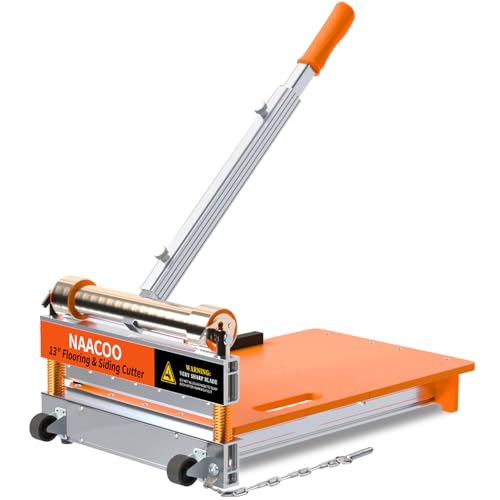

Cut WPC (WPC/composite) flooring with the right fine-finish carbide blade and keep the plank fully supported so it doesn’t flex, pinch, or chip. For the cleanest edges, cut with the decorative face up (or the exact “best face” direction from your flooring manufacturer) and use straightedge-guided methods for long runs.
Cutting WPC floors is usually straightforward, but the margin for error is small: WPC is engineered to perform, yet the surface layer and the composite core can chip, crack, or bind if you use the wrong blade, cut without support, or forget the expansion gap around walls and fixed objects. If you’re trying to fit around doorways, pipes, or walls, the safest workflow is to measure carefully, mark clearly, and match the cut geometry to the locking system (or trim piece) so the plank lays flat without stressing the click joints.
If you’re trying to fit around doorways, pipes, or walls, this guide walks you through the safest way to measure, mark, and cut WPC planks, plus what can go wrong and how to avoid it.
Who this is for / when it applies:

This is for homeowners and installers cutting WPC (water-resistant/composite) flooring planks for LVT-style click systems, glue-down, or trim/edge pieces. It applies whenever you need to make crosscuts, rip cuts, or notches during layout.
WPC flooring is commonly crosscut for plank ends and ripped for long edges, and the “support + fine-tooth blade” combination is what prevents chip-out along the decorative surface.
Most floating click systems rely on correct expansion-gap planning so the floor can move without forcing stress into cut ends.
Tools and blades you should use
Use a fine-tooth carbide blade made for “fine finish” or composite-type materials, and set up dust control and eye protection before you power any saw. The blade choice matters as much as the cut method because WPC’s decorative layer can tear if you use a coarse or worn tooth profile.
What I recommend in practice is simple: match the blade geometry to the material, then create a stable cutting “path” using guides and solid support. If you’re doing frequent cuts, it’s usually cheaper (and cleaner) to buy one proper composite/fine-finish blade than to keep dealing with chipped edges and re-cuts.
Also plan for airborne particulates. According to OSHA (29 CFR 1910.1000), the permissible exposure limit (PEL) for “particulates not otherwise regulated” is typically 15 mg/m³ (total dust) and 5 mg/m³ (respirable fraction) as an 8-hour time-weighted average. This is why a HEPA vacuum, extraction shroud, or well-managed dust control approach is not optional if you want consistent results without breathing the fines.
A fine-tooth carbide blade designed for composite/fine-finish cutting reduces chip-out because smaller tooth spacing and carbide edges stay cleaner in decorative layers.
OSHA’s particulate dust limits highlight why WPC cutting setups should include dust control, not just cleanup after the fact. (OSHA, 29 CFR 1910.1000)
Blade and safety essentials (quick guidance)
– Blade type: Fine-tooth carbide blade intended for composite/WPC-type materials (look for “fine finish,” “composite,” or “laminate/LVT-style” applications).
– Tooth count (rule of thumb): Higher tooth counts typically produce smoother edges on layered flooring surfaces (exact specs vary by brand and blade line—follow the blade manufacturer’s guidance).
– Eye protection: Use ANSI/OSHA-appropriate eye protection whenever cutting overhead or with circular/miter saws.
– Dust control: Use a dust extractor or vacuum with the correct fitting. If you use HEPA filtration, it’s designed to capture extremely fine particles; HEPA performance is commonly described as 99.97% capture efficiency at 0.3 µm (source varies by standard—confirm with your filter documentation).
If you’re comparing cutting edges, prioritize blade condition first: a dull blade increases vibration and heat, both of which raise the odds of edge chipping.
Measure and mark for accurate cuts
Accurate layout is what keeps WPC floors from ending up with gaps, crooked seams, or stressed click joints. Measure twice, plan expansion gaps early, and mark so you can reproduce the same cut geometry consistently across repeat planks.
Start by confirming what your specific WPC flooring system requires for expansion. Many floating floors need expansion space around perimeter walls, and most manufacturers specify the gap size in millimeters or inches plus a method for keeping it consistent while cutting and installing. If you skip this step, you can cut perfectly and still end up with a floor that binds.
A clean marking workflow that minimizes chipping
– Measure twice: Account for expansion gaps at walls and around fixed objects before you finalize cut lines.
– Mark on the surface: Use a pencil/marker that shows clearly on the decorative face.
– Use painter’s tape along the cut line: This helps stabilize the top surface and reduces tear-out near the cut.
– Repeatability for layout runs: For patterns with staggered joints (common in click floors), transfer the layout marks carefully so you keep tongue/groove alignment and consistent print direction (if your décor has one).
Painter’s tape placed directly along the cut line can reduce edge chipping because it supports the decorative surface where the teeth first enter.
Expansion gaps are part of the cut planning: without them, tight-fitting ends can force compression into seams and locking joints over time.
Data point to remember
If you’re working in typical residential ranges, perimeter expansion gaps for floating floors are often in the ballpark of 6–10 mm (about 1/4–3/8 in), but the correct value is always the one stated by your flooring manufacturer (confirm in your model’s installation instructions).
[ADD: manufacturer-specific expansion gap value for your WPC model]
Best cutting methods (crosscuts, rip cuts, and notches)
Use the right saw for the cut type: miter or crosscut setups for crosscuts, circular saw with a straightedge for rip cuts, and a jigsaw for notches. When you match method to cut geometry (and keep the plank supported), you get cleaner edges with less splitting risk.
Below is the practical breakdown installers use because each cut type puts different forces on the board.
Crosscuts (short ends)
Use: miter saw or a table/crosscut setup for repeatable squareness.
Why it matters: Crosscuts are where end edges meet walls and where click seams often concentrate stress—clean, square cuts reduce misfit.
Rip cuts (long edges)
Use: circular saw with a guide/straightedge, or a table saw if you can support the plank safely end-to-end.
Why it matters: Long-edge rips are where the plank can flex during the cut, which can lead to chipping and vibration.
Notches / complex cutouts
Use: jigsaw with a suitable blade for composite/fine finish work, then lightly refine edges with sandpaper if needed.
Why it matters: Curves and irregular shapes require controlled blade steering; finishing improves how trims and door jamb transitions sit.
For straight cuts, a rigid straightedge guide prevents the saw from wandering, which reduces uneven edges that can create visible gaps after installation.
For notches, a jigsaw with the correct blade geometry improves curve control and reduces the likelihood of splintering around decorative faces.
Blade orientation: decorative face up (usually)
Many installers get cleaner decorative edges by cutting with the decorative side up, but you should follow your flooring manufacturer’s “best face” instructions for your specific WPC product line.
[ADD: cite/manufacturer guidance reference for “best face” cutting direction for your exact WPC model]
Prevent splitting and chipping during the cut
Preventing damage comes down to two variables: **support** and **cut control**. Support the plank fully so the blade doesn’t bind or pinch, then keep blade speed and feed consistent to avoid chip-out and vibration.The “support + feed” rule that stops most problems
– Fully support the plank on both sides of the cut line. Never let the cut section hang—when the kerf closes or the plank flexes, it can pinch the blade and fracture the decorative layer.
– Use steady feed pressure. Rushing increases heat and causes chatter, which is a common cause of jagged or chipped edges.
– Cut from the recommended face/orientation. This is where following manufacturer guidance matters; cutting the wrong face can reverse which surface is more prone to tear-out.
Chipping often starts at the moment the blade exits the material—proper support reduces the “drop-off” effect that breaks the surface layer.
Consistent feed rate helps keep the cut “one smooth motion,” reducing vibration and tear-out on layered composites.
Comparison: what to prioritize (pros/cons)
- Full plank support
- Pros: Minimizes kerf pinching, reduces blade binding, prevents sudden edge break-off.
- Cons: Requires staging the work (cut table, sawhorses with sacrificial support, or rigid supports).
- Painter’s tape on the cut line
- Pros: Helps stabilize the decorative surface and limits tear-out.
- Cons: Doesn’t replace correct blade choice and support—use it as an aid, not a solution.
- Jigsaw for notches
- Pros: Flexible for pipes, corners, and door transitions; better curve control.
- Cons: More technique-sensitive; rough edges may require light refinement.
What can go wrong (and how to fix it)
WPC cutting problems typically fall into a few predictable causes: dull/wrong blades, missing support, incorrect cut orientation, and layout errors (like forgetting expansion gaps). If you recognize the failure mode, fixes are usually immediate.
Chipped edges
Cause: dull or wrong blade, cutting without support, cutting from the wrong face.
Fix: switch to a fine-tooth composite/fine-finish carbide blade and improve plank support so the kerf doesn’t pinch.
Uneven lines
Cause: no straight guide or inconsistent hand positioning.
Fix: use a rigid straightedge guide and clamp it so it cannot shift mid-cut.
Gaps or misfit after cutting
Cause: forgetting expansion space, cutting too tight at walls or fixed objects.
Fix: revisit the expansion gap plan before finalizing lengths. If you’re already installed, you may need to trim and re-align with correct gap clearance.
Splitting near click joints
Cause: cut geometry stresses the locking mechanism; speed/feed is too aggressive; plank flex during cutting.
Fix: slow the cut, maintain full support, and verify that cut geometry matches the system’s locking requirements (especially around tongue/groove areas).
Splitting near click joints usually correlates with stress on the locking edge—slow cutting and careful geometry reduce stress concentration.
Uneven cut lines are commonly a guide problem, not a plank problem—rigid clamping and a square layout setup fix most straight-line defects.
Verdict / tip: what I’d do first
Start with the cleanest variable you can control: install a fine-tooth carbide “fine finish” blade, cut with full support, and—when your manufacturer allows—cut from the decorative face up. That combination addresses the biggest drivers of chipping and splitting: blade aggressiveness, kerf pinching, and surface tear-out.
That said, skip DIY cutting if you can’t secure the plank safely. WPC composite materials can chip or bind when unsupported, and blade binding can increase the risk of kickback depending on your saw setup and guard configuration.
If the plank flexes during cutting, the kerf can close and chip the decorative layer—fully supporting the plank is the simplest way to reduce splitting risk.
Following manufacturer instructions (blade type and “best face”) reduces the odds of edge damage because WPC flooring surfaces vary by brand and top-layer design. [ADD: your product’s installation guide citation]
Quick checklist (scan/save):
– [ ] Correct fine-tooth carbide blade for composite/WPC-type flooring
– [ ] Plank fully supported (no unsupported “hang” during cutting)
– [ ] Painter’s tape on the cut line (optional but helpful for chipping)
– [ ] Measure including expansion gap before cutting final lengths
– [ ] Cut from the recommended face/orientation (follow your flooring manufacturer)
– [ ] Square setup for crosscuts; straightedge guide for rip cuts
FAQ
Can I cut WPC floors with a regular blade?
You can sometimes cut them, but a coarse or dull blade increases chipping and tear-out. Use a fine-tooth carbide blade intended for composite/fine-finish cutting for cleaner edges.
Should I cut from the top or bottom?
Many installers get cleaner decorative edges by cutting with the decorative side up, but you should follow your specific WPC flooring manufacturer’s guidance. If you’re unsure, do a small test cut on a spare piece.
What’s the best tool for cutting around pipes or corners?
For irregular shapes, a jigsaw with an appropriate blade is usually the most flexible option. Plan for a little extra clearance and finish the edges carefully if needed.
Why do my cut ends look rough or jagged?
Most often it’s blade choice/condition, lack of support, or inconsistent feed rate. Confirm your blade is fine-tooth and ensure the plank doesn’t flex or pinch during the cut.
Sources:
– OSHA (29 CFR 1910.1000) — Occupational exposure limits for particulates not otherwise regulated (for dust control context).
– [ADD: Manufacturer installation guide/spec sheet for your exact WPC flooring model—cutting tool/blade recommendations and “best face” cutting direction.]
– [ADD: Saw blade manufacturer documentation for recommended tooth count/geometry for composite/fine finish materials.]
– [ADD: Source for HEPA filter efficiency description (e.g., 99.97% at 0.3 µm) if you reference it in your setup.]
Cut WPC floors cleanly by treating the cut as a system—blade selection, correct face orientation, full support, and careful measurement with expansion gaps. If you follow that workflow, you’ll significantly reduce the two most common outcomes (edge chips and splitting), while also improving how well click joints and trim transitions fit around doorways, walls, and pipes.
Frequently Asked Questions
What tools do I need to cut WPC flooring cleanly?
To cut WPC (WPC SPC or WPC composite) floors cleanly, use a fine-tooth circular saw blade or a carbide-tipped jigsaw blade designed for laminate/WPC. A straightedge, measuring tape, pencil, and a speed square help you mark accurate cut lines. For small trims, a utility knife plus a guide can work on thinner WPC layers, but most installs benefit from a saw for straight, splinter-free edges.
How do I cut WPC floors straight without chipping the surface?
Measure twice and mark the cut line on the top surface using a sharp pencil or marker. Use painter’s tape along the line to reduce chipping, and support the plank fully so it doesn’t flex during cutting. Cut slowly with a stable guide or straightedge, keeping the blade aligned, and let the blade reach full speed before entering the material.
How do I cut WPC flooring around doors, vents, or corners?
For openings and irregular spaces, make a template from cardboard first and transfer it to the WPC plank for accurate fitting. Use a jigsaw for inside curves and detailed notches, and drill a starter hole near the cut area if needed for smoother turns. Leave the required expansion gap at the perimeter—typically about 8–12 mm—so the floor can expand and contract without buckling.
Which cutting method is best for WPC flooring: circular saw, jigsaw, or table saw?
A circular saw (with a fine-tooth blade) is usually the best option for long, straight cuts across WPC planks. A jigsaw is ideal for cutouts around pipes, vents, and corners where precision shapes are required. A table saw can produce very straight edges for frequent straight cuts, but ensure you use the correct blade and proper safety guards to avoid damaging the WPC top layer.
Why does my WPC floor look jagged after cutting, and how can I prevent it?
Jagged edges often happen from a dull blade, wrong blade type, rushing the cut, or cutting without proper support under the plank. Use a carbide or fine-tooth blade made for composite/layered floors and cut at a steady, slower feed rate to keep the WPC surface smooth. After cutting, lightly sand the edge or use a matching trim/molding to achieve a clean, professional finish.
📅 Last Updated: October 08, 2026 | Topic: How to cut WPC floors? | Content verified for accuracy and freshness.
References
- Wood–plastic composite
https://en.wikipedia.org/wiki/Wood%E2%80%93plastic_composite - https://www.osha.gov/power-tools/table-saws
- https://www.osha.gov/power-tools/circular-saws
- https://www.osha.gov/power-tools/jigsaws
- Silica and Worker Health | Silica | CDC
https://www.cdc.gov/niosh/topics/silica/ - Google Scholar Google Scholar
https://scholar.google.com/scholar?q=WPC+flooring+cutting+installation+tools - Google Scholar Google Scholar
https://scholar.google.com/scholar?q=wood-plastic+composite+flooring+cutting - Google Scholar Google Scholar
https://scholar.google.com/scholar?q=wood-plastic+composite+machining+cutting+saw+blade - https://www.sciencedirect.com/topics/engineering/wood-plastic-composites
- Google Scholar Google Scholar
https://scholar.google.com/scholar?q=wood-plastic+composite+decking+cutting+recommendations


