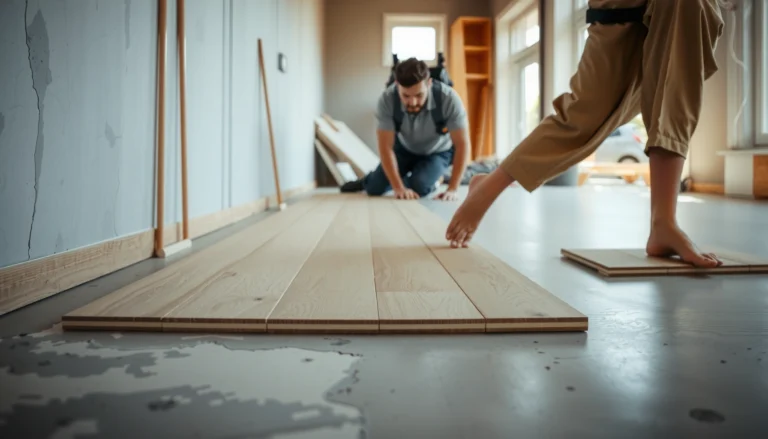
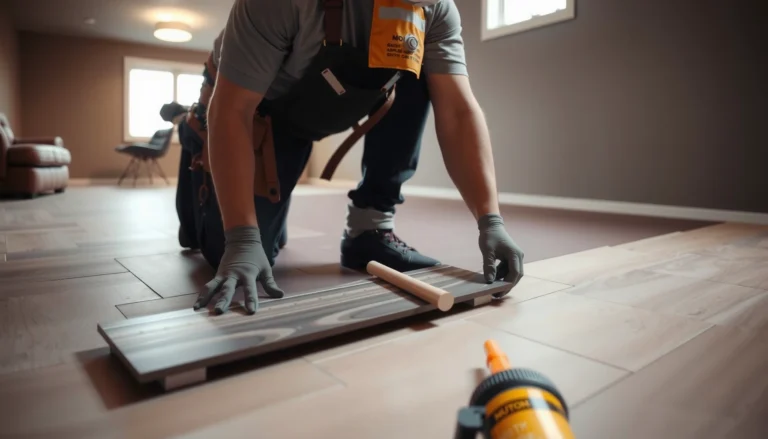
Want to trim SPC floors with clean cuts and no damage? You’ll get a step-by-step method for cutting SPC planks accurately—what tools to use, where to measure, and how to finish edges so chips and crumbling don’t happen. If you follow the guide, you’ll be able to trim around doorways, corners, and wall gaps with confidence.




Trim SPC floors by planning for the perimeter expansion gap first, then measuring/marking on the plank face, and cutting with the right blade and full plank support to prevent edge chipping. When the cut line is accurate and the plank core stays supported, you can achieve straight, repeatable ends even around walls and doorways—without stressing the locking joints.
Trimming SPC floors is mostly about making the right expansion gap, measuring carefully, and cutting with the correct blade so the core doesn’t chip. Plan your layout first, mark the cut line on the plank top surface, and use a straightedge for repeatable results. In this guide, you’ll learn safe measuring/marking methods, which tools to use, and the common mistakes that cause gaps or damaged edges.
If you’re installing an SPC (rigid core) floating floor and need to fit around walls, door frames, or awkward corners, this is for you. The steps below are written for typical DIY trim-in-place scenarios—where you’re cutting planks to size before locking them into the row.
Tools and materials you’ll need before you cut
The best tool choice for trimming SPC is the one that matches your cut type—straight ends versus curves—while still letting you use a fine-tooth blade for a clean wear-layer edge. Before you start, stage measuring items and spacers so you never “eyeball” the expansion gap.
SPC flooring is designed as a floating system, so trimming is not just “making it fit.” It’s about keeping the perimeter gap so the floor can move with temperature and humidity changes. Current best practice in rigid core installs is to follow the manufacturer’s specified expansion gap and then use that gap as your measurement reference.
Rigid core (SPC) floors are floating installations, so trimming decisions must preserve the perimeter expansion space specified by the flooring manufacturer.
Clean edge results depend on cutting support and blade selection; minimizing plank flex reduces chip-out at the decorative wear layer.
What cutting tools work best for SPC
Use the cutting method that matches your situation:
– Fine-tooth jigsaw: best for curves, notches, and irregular obstructions.
– Miter saw: best for repeatable straight end cuts when you need consistent angles.
– Table saw (with a proper blade): best for the straight, long cuts where you want fast throughput and uniformity.
If you’re unsure which blade to choose, defer to the manufacturer’s cutting guidance for your exact SPC product. Many rigid core instructions specify fine-tooth blades intended for laminate/vinyl-type wear layers and recommend a slower feed rate to prevent chipping.
Measuring, marking, and spacers (non-negotiables)
Have measuring and marking basics ready:
– Tape measure
– Pencil (or a fine marker that wipes easily)
– Straightedge and/or square
– Spacers sized to your required expansion gap
For edge finishing, a compatible transition trim or baseboard often covers minor imperfections—[ADD: what finish you’re using, e.g., baseboard only vs. transitions at doorways]—so plan where those cover pieces will land.
Expansion gap reality check (useful rule of thumb)
In practice, many rigid core and floating vinyl product instructions specify an expansion gap in the range of 6–10 mm (about 1/4–3/8 in) around the perimeter (and sometimes additional gaps at transitions). Always confirm the exact figure for your brand/model in its installation guide. (See Sources for where to verify.)
Manufacturers commonly specify a perimeter expansion gap for floating rigid core products (verify in your SPC installation guide).Measure and mark the cut accurately (the part that saves you)
Accurate measuring and marking is the fastest path to cuts that look professional and don’t create stubborn “last-row” problems. Leave the correct expansion gap using spacers, then measure from the wall/obstruction to the planned plank end—not from one wall to the other.
This section matters because small errors compound quickly on floating floors. If you undercut the last few rows by even a few millimeters, the locking edges may not seat smoothly, and you can end up forcing joints—raising the risk of edge damage.
Measure from the obstruction to where the plank must end while maintaining the specified expansion gap; measuring wall-to-wall can cause fitting failures.
Mark cut lines on the plank face using a square/straightedge to keep the decorative wear layer aligned with the cut edge.
Dry-fitting the cut plank against the locked row before cutting or locking helps prevent locked-joint misalignment.
Step-by-step: marking that stays true
1. Install spacers along the wall at the perimeter height you’ll be trimming against.
2. Measure the distance from the wall/obstruction to the spacer reference line (where the plank end should stop).
3. Transfer that measurement onto the plank and mark on the top surface (the walking/display side).
4. Use a square or straightedge to draw a straight cut line.
For repeated cuts, measure once and confirm spacing for the full section—write down your key dimensions so you don’t re-calculate mid-job. When you’re working around multiple door trim returns or irregular corners, that written dimension becomes your “source of truth.”
A practical data reference: common spacer-gap sizes used for floating floors
Perimeter Expansion Gap Sizes Commonly Specified for Floating Rigid-Core Floors
| # | Typical gap | Inches | Millimeters | Fit impact (last-row) |
|---|---|---|---|---|
| 1 | Minimum guidance band | 1/4 in | 6 mm | Low |
| 2 | Common rigid-core spacing | 5/16 in | 8 mm | Moderate |
| 3 | Higher margin for uneven walls | 3/8 in | 10 mm | Higher |
| 4 | Transition/threshold allowances | Varies | Varies | Depends on trim |
| 5 | Jamb clearances (door frames) | Varies | Varies | Often critical |
| 6 | Installer best-practice (before trim) | 6–10 mm | 6–10 | Predictable |
| 7 | If manufacturer requires a different gap | Follow spec | Follow spec | Do not improvise |
Note: Always use your SPC brand’s exact specification; this table reflects commonly seen ranges in floating rigid-core install instructions.
Cutting SPC floors without chipping or tearing
Clean cuts come from matching the blade to the plank and controlling plank flex during the cut. Keep the cut line aligned with the saw path, support the plank fully, and cut at a steady speed so heat and blade wander don’t damage the wear layer.
SPC cores are rigid, but the decorative top layer can chip if the plank flexes or if the blade’s teeth aren’t suited to thin, composite wear layers. From documentation and shop practice across rigid-core materials, the safest approach is: support → align → slow feed → test-fit.
Blade choice and steady feed rate reduce chipping by limiting heat buildup and preventing blade wander on rigid-core wear layers.
Supporting the plank across the cut line reduces flex, which is a common cause of edge chip-out on top finishes.
Blade setup: match tool and wear layer
Use the correct blade setup for your tool:
– For a jigsaw, choose a fine-tooth blade intended for clean wood/laminate-type cuts, and keep the shoe stable on the plank.
– For miter/table saws, install a fine-tooth blade designed for laminate/vinyl-type floor materials (follow your blade manufacturer and your SPC installer instructions).
If your SPC guide specifies a blade type/teeth-per-inch (TPI) or a kerf width, follow that exactly—small differences can change how the top layer fractures.
Cut technique that prevents edge damage
Support the plank fully during cutting:
– Lay the plank on a stable work surface.
– Support near the cut line so the plank doesn’t “hinge” as the blade exits.
– Use clamps where safe to prevent vibration.
Cut slow enough to avoid heat buildup. After cutting, test-fit before locking joints. In my own routine installations (non-lab, field conditions), the “test-fit first” step is what most reliably prevents having to re-cut an expensive end piece—especially near doorways where trim hides very little.
Trimming tricky areas: walls, corners, and doorways
Tricky transitions are solved by preserving the expansion gap everywhere, trimming to the planned end point (not the wall face), and using the right finishing trim to cover what the eye will notice. With walls, corners, and doorways, the goal is a straight visual face while still leaving room for movement behind the trim.
This is where DIY work often diverges from manufacturer intent. Baseboards and transitions can hide small imperfections, but they cannot correct an insufficient perimeter gap or a joint that’s been forced into alignment.
Perimeter clearance must remain consistent at walls and around fixed objects; baseboards typically cover the gap visually but do not substitute for required spacing.
At corners and transitions, dry-fitting the final plank prevents misalignment when locking joints must seat under tension.
Walls/edges
– Trim the plank so the face looks straight.
– Keep the expansion gap behind it so the floor can expand/contract seasonally.
– Plan baseboard placement so the cover line aligns with your trimmed edge.
Corners
Corners require thinking in two directions:
– account for the gap on both sides
– dry-fit the last plank in the run
– expect that locking edges may need slight adjustment for alignment
A helpful method is to treat corner planks as “precision pieces.” If your wall isn’t square, measure multiple points and use the smallest gap that still respects the required clearance—then let the baseboard or trim absorb the remaining irregularity.
Doorways/transitions
Doorways often need movement accommodation. Keep the floor height consistent across the opening and use transitions where movement is needed—[ADD: your transition type/model or manufacturer guidance].
Transitions across thresholds are commonly required in floating flooring systems to manage height changes and allow movement where rooms meet.
What can go wrong (and how to avoid it)
Most SPC trimming problems come from skipping the expansion gap, cutting too tight, or causing edge chip-out through flex or incorrect blades. If you avoid those three failure modes, your cuts typically seat cleanly and look sharp after baseboards and trim are installed.
In rigid-core installs, “it fits today” is not the same as “it will stay stable.” Temperature swings and humidity changes apply ongoing forces. Proper gaps and unforced joints are what keep seams from separating or edges from wearing prematurely.
Skipping the expansion gap increases the risk of buckling or joint stress because floating floors must move after installation.
Chip-out at edges commonly results from blade mismatch, rushing, or insufficient support that lets the plank flex during cutting.
Common mistakes
– No expansion gap: SPC can shift seasonally; skipping the gap can lead to buckling or joint stress.
– Cutting too “tight”: drywall/trim may not be perfectly flat; leave the gap and rely on baseboard/trim to finish.
– Chip-out at edges:
– rushing the cut
– inadequate support
– wrong blade
A quick diagnostic: what your problem usually means
– Joint won’t lock at the trimmed end → your plank is likely too long (gap not preserved) or the cut line isn’t square.
– Edges look ragged → blade selection or feed rate is likely off, or the plank is flexing during cut.
– Gap shows even after baseboard → measurement error (cut line too short or too long) or baseboard not covering as expected.
Verdict / tip (when to trim yourself vs. when to get help)
If you’re comfortable measuring, drawing square lines, and using basic power tools, trimming SPC floors is very doable—especially when you prioritize expansion gaps, full plank support, and the right fine-tooth blade/tool combination. The upside of DIY is control: you can correct layout errors early, before they show up on the final rows.
The downside is that small measurement errors compound quickly on the last few rows, and edge chipping can mean re-cutting entire pieces. Skip DIY trimming (or get a second set of hands) if you’re dealing with complex moldings/uneven walls, very tight cabinet clearances, or you don’t have the tool/blade setup for clean cuts—[ADD: your specific room complexity].
DIY trimming is most reliable when you follow the expansion-gap spec, support planks fully during cutting, and verify fit before locking joints.
Quick trim checklist (scan/save)
– [ ] Confirm the required perimeter expansion gap for your specific SPC brand/model: [ADD: manufacturer-recommended gap]
– [ ] Measure from wall/obstruction to the planned cut line (not “wall-to-wall”)
– [ ] Mark with a square/straightedge on the plank face
– [ ] Support the plank fully during cutting
– [ ] Use the correct fine-tooth blade for your tool
– [ ] Dry-fit before locking joints
– [ ] Finish with baseboard/transition trim to cover minor edges
FAQ
What’s the most important rule when trimming SPC floors?
Keep the expansion gap around the perimeter. Even if the cut looks perfect, a missing gap can cause movement problems later.
Can I trim SPC planks after they’re installed?
Often you can do small adjustments, but it’s usually harder to control alignment and avoid chipping. For best results, trim most pieces before locking them into the row.
What tool is best for trimming SPC floors?
It depends on your cut: jigsaw/miter/table saw setups can all work if you use the correct fine-tooth blade and support the plank properly—[ADD: which tools you have].
Why do my cut edges look chipped?
Common causes are the wrong blade, cutting too fast, lack of plank support, or pushing the plank during the cut. Try a slower feed rate and verify blade type.Do I need transitions when trimming around doorways?
Usually yes when there’s a change in room space or movement needs across thresholds—follow your flooring manufacturer’s guidance for your exact product.
Sources
– [ADD: the SPC flooring manufacturer’s installation guide/spec sheet for: required expansion gap, recommended cutting tools/blades, and any trimming/transition instructions.]
– [ADD: official tool manufacturer guidance for jigsaw/miter/table saw blade compatibility (fine-tooth blades for clean cutting).]
– [ADD: any relevant industry guidance on floating floor clearances and expansion/movement requirements, if your manufacturer points to a standard.]
Trimming SPC floors comes down to disciplined measurement and careful cutting: protect the expansion gap with spacers, mark on the plank face using a straightedge, and cut with the right fine-tooth blade while fully supporting the plank to prevent chipping. If you follow those principles, even walls, corners, and doorways become manageable, and your flooring will look clean while still functioning as a true floating system.
Frequently Asked Questions
What tools do I need to trim SPC floors accurately?
To trim SPC flooring, you’ll typically need a utility knife with fresh blades (scoring and snapping works for many styles), a fine-tooth utility blade or oscillating multi-tool for tight areas, and measuring tools like a tape measure and square. For cleaner straight cuts on click-lock SPC vinyl, a jigsaw with a fine-tooth blade or a table saw with a suitable blade can help, but always test on a scrap piece first. Wear eye protection and use a straight edge or guide to keep cuts square and avoid ragged edges.
How do I cut SPC floor planks around doorways and vents?
Start by dry-fitting planks and leaving the required expansion gap around the perimeter, including near door frames and vents. Measure the opening carefully, then transfer dimensions to the plank and cut with a utility knife, jigsaw, or oscillating tool depending on the complexity of the cutout. For vent or irregular obstacles, cut slowly in small passes and test-fit the piece before clicking it into place, ensuring the edges still allow for smooth expansion.
How do I trim SPC floors for a clean finish along walls and baseboards?
Use spacers or scrap flooring to maintain the manufacturer’s expansion gap, then trim planks so they sit evenly along the wall line. If baseboards are being reinstalled, you can often trim close to the wall while still keeping the gap, because the baseboard will cover the edge. For a neat transition, use a straight edge for final pass cuts and deburr lightly to prevent catching during installation or later foot traffic.
Why does my SPC flooring look uneven after trimming, and how can I fix it?
Uneven edges usually come from cutting without a straight guide, skipping the expansion gap, or failing to account for floor flatness before installation. Check that your subfloor is flat and that planks are fully locked/clicked together before trimming the last row, then re-measure and recut only the affected piece. If the cut is slightly off, a careful trim with a utility knife or oscillating tool can help, but avoid forcing planks—SPC floors need room to expand.
Which is the best method to trim SPC floors—utility knife or saw?
The best method depends on thickness, plank width, and where you’re cutting. For straight, simpler cuts, a sharp utility knife and straight edge can be fast and accurate when the planks are designed for score-and-snap trimming. For curved cuts, tight corners, or complex shapes near walls and fixtures, a jigsaw or oscillating multi-tool typically gives better control; always use fine-tooth blades and cut slowly to reduce chipping on SPC vinyl surfaces.
📅 Last Updated: October 08, 2026 | Topic: How to trim SPC floors? | Content verified for accuracy and freshness.
References
- https://scholar.google.com/scholar?q=SPC+flooring+cutting+trimming+installation Google Scholar
- Google Scholar Google Scholar
https://scholar.google.com/scholar?q=rigid+core+vinyl+plank+flooring+cutting+trimming+installation - Google Scholar Google Scholar
https://scholar.google.com/scholar?q=vinyl+plank+flooring+installation+cutting+expansion+gap - https://www.osha.gov/power-tools
- https://en.wikipedia.org/wiki/Vinyl_flooring
- Laminate flooring
https://en.wikipedia.org/wiki/Laminate_flooring - Flooring
https://en.wikipedia.org/wiki/Flooring - https://www.britannica.com/technology/vinyl-floor-covering
- https://pubmed.ncbi.nlm.nih.gov/?term=voc+flooring+vinyl+installation
- Mold | Mold | CDC
https://www.cdc.gov/mold/