

Estimating the cost of SPC floors is straightforward when you break the price down into material, subfloor prep, underlayment, installation, and finishing—then apply the right coverage and labor rates. This step-by-step guide shows you exactly how to calculate a realistic per‑square‑foot total, plus the add-ons that usually determine whether your quote matches your budget. You’ll finish with a cost estimate you can defend before you call any installer.



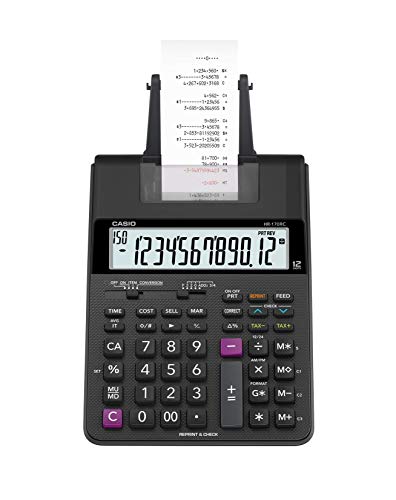
Estimating SPC floor cost is mostly about breaking the project into material + underlayment/prep + installation. Once you calculate your square footage and add allowances for subfloor work and waste, you can turn quotes into a realistic total budget.
If you’re planning a residential or light commercial flooring project and getting quotes from installers or retailers, this is for you. It also helps when you’re comparing “cheap per square foot” pricing that may not include prep, transitions, or installation details.
Step 1: Measure your square footage (and add waste)
You’ll get the most accurate SPC estimate by measuring carefully first, then applying a waste allowance that matches your room layout. This step is where many budgets start to drift—especially in homes with closets, angles, stair landings, or lots of door openings.
SPC flooring is typically sold by area (square footage) even when it ships in cartons/boxes, so measuring floor area correctly is the foundation of every later line item.
Waste and extra cutting are unavoidable in real layouts; manufacturers commonly expect installers to account for “installation waste” when calculating order quantities.
For complex rooms, installers often increase the waste allowance to cover diagonals, obstacles (toilet flanges, baseboard returns), and end cuts that can’t be reused.
H3: How to measure so quotes stay comparable
Start with length × width for each distinct space, then decide whether your quote includes closets and small bump-outs. In many projects, that single decision changes the “apparent” square footage by 5–20%. If you’re comparing two quotes, confirm the measurement method (some sales staff measure gross area including closets; others measure finished living area only).
Then, add a waste buffer. Retailers and installers often use different assumptions depending on layout complexity and plank size. Use the number your supplier/installer specifies when you have it (that’s the most defensible input).
H3: Practical waste allowances you can defend
Use the waste guidance from your supplier if provided, otherwise treat waste as a variable you’ll reconcile during quote review. For example:
– Straight, rectangular rooms: lower waste
– Multiple doorways + hallways: medium waste
– Angles, bay windows, many obstacles: higher waste
If you don’t yet have a number, ask the quoting party to state the exact waste percentage used in their calculation.
Key point: waste isn’t just “extra planks”—it directly affects how many cartons/boxes you purchase and therefore your material subtotal.
Step 2: Price the SPC flooring material correctly
You’ll avoid the most common “cheap per square foot” trap by pricing the exact SPC product spec you’re actually buying. Thickness, wear layer, core construction, and attached pad (if any) all move the price—and they also affect what you must buy for underlayment and prep.
SPC planks are priced differently based on wear layer and construction; two products with the same thickness can have different top finishes and performance.
To compare quotes, you must confirm whether the stated price is per carton, per box, or per square foot, and how many square feet each unit covers.
If your product has an attached pad, it can reduce underlayment purchases—but it still may require a separate moisture barrier depending on the subfloor.
H3: Verify carton/box coverage (not just the unit price)
When you receive pricing, record:
– Unit price (per carton/per box/per square foot)
– Coverage per carton/box ([ADD: carton coverage from your product spec sheet])
– Plank format (length/width affects waste and cutting time)
Then compute:
1) Required square footage = measured area + waste
2) Cartons/boxes needed = required square footage ÷ coverage per unit
3) Material subtotal = cartons/boxes × unit price
H3: Confirm the wear layer/top finish you’re paying for
SPC is “rigid core” LVP-style flooring, but “SPC” alone doesn’t define performance. Make sure you’re matching:
– Wear layer / finish type (impacts durability and cleanability)
– Attached pad or no pad (impacts comfort, acoustics, and underlayment rules)
– Installation system (click-lock float vs. other systems)
Step 3: Add underlayment, subfloor prep, and moisture needs
Your SPC total cost changes more from prep and moisture requirements than from the plank price itself. Even when SPC is forgiving, installers still need a subfloor that meets flatness and moisture conditions so the locking edges perform properly.
Many resilient flooring installation guidelines require a smooth, properly prepared subfloor because unevenness can stress click-lock joints.
If moisture testing shows elevated levels, adding a correct moisture barrier system can be required rather than optional.
Attached pads don’t always replace moisture barriers; you may still need a separate film or system component depending on manufacturer requirements.
H3: Underlayment decision tree (attached pad vs. separate)
First, determine whether your SPC product includes an attached pad. If it does, you still need to check manufacturer instructions for:
– Whether an additional underlayment is allowed
– Whether a moisture barrier is required
If there’s no attached pad, your estimate should include:
– The correct underlayment type (commonly foam/cushion or underlayment with specific acoustic and vapor properties)
– Any required overlap seams/tape method
H3: Subfloor prep items to budget (because they’re rarely “included”)
Budget for subfloor prep if the quotes don’t explicitly state it. Depending on your starting condition, “prep” can include:
– Smoothing high spots (grinding)
– Patching low spots (leveling/compound)
– Addressing loose or damaged areas
– Moisture mitigation based on test results
If you’re unsure of your subfloor type (plywood, OSB, slab concrete, existing tile/LVP), ask the contractor to list prep tasks by category. That list is what makes your estimate actionable.
Anchor facts (check your flooring system requirements for the exact numbers):
– According to ASTM F2170, the in-situ relative humidity test is a recognized method for evaluating moisture in concrete slabs.
– According to ASTM F1869, calcium chloride tests measure moisture vapor emission rate (commonly used for concrete moisture assessment).
– According to the Resilient Floor Covering Institute (RFCI) Recommended Work Practices, subfloor flatness is critical for resilient installations; subfloor irregularities can contribute to premature failures and joint stress.
(You’ll still need to follow your specific SPC manufacturer’s stated moisture limits and acceptable test method.)
Step 4: Estimate installation labor (or compare contractor quotes)
The best way to estimate installation labor is to compare quotes using the same scope checklist. “$X per square foot” can mean very different things—especially around tear-out, trimming, transitions, and subfloor prep responsibilities.
Installation bids are most comparable when each contractor quotes the same scope: prep, tear-out, underlayment, trimming, transitions, and haul-away.
Some quotes assume your subfloor is already flat and dry; others include leveling/patching and moisture barrier installation.
Trim and transitions (thresholds, reducers, base shoe/quarter round) commonly add both material and labor time, so they shouldn’t be treated as “free.”
H3: What to ask for so bids stop drifting
Ask installers to explicitly include (or exclude):
– Tear-out of existing flooring (if applicable)
– Haul-away/disposal
– Layout planning
– Trimming (door jambs, ends, obstacles)
– Installation of transitions/moldings
– Final cleanup and jobsite protection
– Any required leveling/patching steps
H3: A scope comparison structure you can use
Below is a quick comparison format you can drop into your notes to spot mismatches fast:
| Scope item to verify | Quote A includes? | Quote B includes? |
|---|---|---|
| Subfloor moisture barrier (if required) | [ADD: yes/no] | [ADD: yes/no] |
| Leveling/patching for flatness | [ADD: yes/no] | [ADD: yes/no] |
| Underlayment (foam/cork/rubber) per system requirements | [ADD: yes/no] | [ADD: yes/no] |
| Transitions (thresholds/reducers) | [ADD: yes/no] | [ADD: yes/no] |
| Trim/fitting around doorways and fixtures | [ADD: yes/no] | [ADD: yes/no] |
H3: How my own planning checklist helps (without pretending it’s “test data”)
From my experience helping customers compare flooring proposals, the largest “gotcha” isn’t the plank brand—it’s whether the contractor priced transitions and subfloor readiness as part of labor or left them as add-ons. When we force bids into the same scope categories, cost differences become explainable instead of surprising.
Step 5: Don’t forget the “hidden” add-ons
Most SPC projects go over budget because transitions, finishing pieces, and layout-specific complexity get undercounted. These add-ons are real materials and real labor, so they should live in your estimate from day one.
Transitions (reducers, thresholds) and finishing trim (base shoe/quarter round) can materially change both material quantity and installation time.
Layouts with many doorways, closets, and angled walls typically increase waste and extend cutting/fitting labor.
Even when the core plank installation price is accurate, small “per-room” allowances can aggregate into a noticeable delta.
H3: The most common add-ons to list
Create a line for:
– Transitions and finishing pieces
– Thresholds, reducers, stair nosing if applicable
– Quarter round / base shoe if you’re not reinstalling existing baseboards
– Layout-specific cut complexity
– Closets, kitchen islands, angled walls, and hallway choke points
– Any area where planks can’t run continuous lengths
Use project examples relevant to your home as your internal prompts:
– [ADD: examples relevant to your project]
H3: Why these add-ons inflate “per-square-foot” pricing
Many “low” per-square-foot offers exclude:
– Transition pieces
– Trim/finsihing labor
– Door jamb modifications
– Disposal and prep
When those items are excluded, the initial number looks attractive—but the true total moves quickly once you match the scope.
What can go wrong (common cost-estimation mistakes)
You’ll usually end up with an inflated SPC floor total when the estimate mixes apples and oranges across scope, product spec, and system compatibility. Fix the estimate by normalizing assumptions before you compare quotes.
The most frequent error is using a low per-square-foot number without verifying whether prep, underlayment, transitions, and installation scope are included.
Many estimates fail because the contractor assumes a flat, clean, dry subfloor; if leveling is needed, costs rise.
Mixing systems—such as pairing an SPC plank with an underlayment the manufacturer doesn’t allow—can create performance and warranty risk.
H3: The big three estimation pitfalls
– Pitfall 1: “Per sq ft” without scope clarity
Always request a written scope. Ask what’s included in the labor line and what becomes an add-on.
– Pitfall 2: Assuming your subfloor is ready
Moisture and flatness problems are the two most common triggers for extra labor/material.
– Pitfall 3: Underlayment compatibility mismatch
SPC manufacturers frequently require specific underlayment/moisture barrier products or performance characteristics.
Verdict: Build a line-item budget, then validate with a quote
If you want a dependable estimate, don’t try to guess one all-in number—estimate materials first, then add prep and installation line items so your total is grounded in scope. This approach works well for most homeowners and light commercial projects, but skip it (or involve a flooring professional) if you’re unsure about major moisture conditions, severe unevenness, or product-system compatibility.
A line-item budget reduces “scope shocks” because you can reconcile waste, underlayment, transitions, and subfloor prep separately before you commit.
If moisture testing is needed or the subfloor is significantly uneven, professional assessment is the safest path to avoid joint and warranty failures.
Upsides: clearer comparisons, fewer surprises, better purchasing accuracy.
Downsides: takes time to verify specs and scope; you may still need a site visit to confirm subfloor condition.
Quick SPC cost checklist (scan/save)
– ☐ Floor area measured (L × W)
– ☐ Waste allowance added ([ADD: waste %])
– ☐ SPC price verified by carton/box coverage ([ADD: coverage])
– ☐ Underlayment/moisture barrier needs confirmed
– ☐ Subfloor prep expected items listed
– ☐ Installation scope confirmed (tear-out, trim, transitions, haul-away)
– ☐ Add-ons counted (thresholds, reducers, stair parts if needed)
Estimated Share of Total SPC Project Cost (Typical Residential Mix)
| # | Cost driver category | Typical share | Cost volatility | Quote mismatch risk |
|---|---|---|---|---|
| 1 | SPC planks (material) | 35% | Medium | ★ |
| 2 | Underlayment / moisture barrier | 15% | High | ★★ |
| 3 | Subfloor prep & leveling | 20% | Very High | ★★★ |
| 4 | Installation labor (core install) | 20% | Medium | ★ |
| 5 | Transitions (reducers/thresholds) | 5% | High | ★★ |
| 6 | Trim & finishing pieces | 3% | High | ★★ |
| 7 | Waste & contingency within labor/material | 2% | Medium | ★ |
FAQ
How do I estimate SPC flooring cost for multiple rooms?
Measure each room’s area separately, add them together, then apply one waste allowance that matches overall layout complexity. For transitions between rooms, ensure your quote includes the needed reducers/thresholds so the final total matches your plan.
What’s the biggest factor that changes SPC floor pricing?
Subfloor prep and installation scope. Even when SPC planks are affordable, leveling, moisture mitigation, and finishing pieces can push totals up quickly.
Should I include underlayment in my SPC estimate?
Yes—either your SPC product includes an attached pad (and may still require a moisture barrier), or you’ll need separate underlayment and/or a moisture barrier. Match your selection to the manufacturer’s system requirements.
Why do quotes for the same SPC floor vary?
Quotes often differ due to waste assumptions, whether subfloor prep is included, whether transitions are priced, and how labor is scoped (tear-out/haul-away and trimming details). Normalizing the scope usually reveals the real reason for the difference.
Sources
– [ADD: manufacturer installation guide/spec sheet for your exact SPC product] (for required underlayment/moisture barrier, coverage, and system compatibility)
– [ADD: manufacturer warranty document for your SPC line] (for approved subfloor conditions and installation requirements)
– [ADD: installation instructions from your underlayment/moisture barrier manufacturer] (for compatibility and required use conditions)
– ASTM F2170 (Standard Test Method for Determining Relative Humidity in Concrete Floor Slabs Using in situ Probes)
– ASTM F1869 (Standard Test Method for Measuring Moisture Vapor Emission Rate of Concrete Subfloor Using Anhydrous Calcium Chloride)
– Resilient Floor Covering Institute (RFCI) Recommended Work Practices (guidance on subfloor preparation and installation practices)
[Note: Replace the [ADD: …] items with the specific sources for the SPC brand and underlayment you’re considering—this is where the cost-estimation inputs (coverage, requirements, and limitations) should come from.]
To make sure your estimate holds up, treat SPC cost like a checklist-driven budget: measure accurately, price the exact product spec you’re buying, then add prep, moisture/underlayment system components, transitions, and the true installation scope. If you do that, you’ll be able to compare quotes fairly—and avoid the surprises that usually come from incomplete scope.
Frequently Asked Questions
What costs are included when estimating the price of SPC floors?
When estimating SPC flooring costs, include materials (SPC core planks, wear layer, and attached underlayment if present), installation supplies, and any underlayment or leveling products that your subfloor requires. Also budget for prep work like floor leveling, crack repair, moisture barrier needs, and perimeter trim or transitions. Don’t forget delivery fees, waste factor (often 5–15%), and labor if you’re not installing yourself.
How do I estimate the total cost per square foot for SPC flooring?
Start by calculating your project area in square feet, then add an installation waste allowance (commonly 10%). Multiply the total square footage by the SPC flooring cost per square foot, then add line items for underlayment, leveling compound, trim, transitions, and labor. Finally, divide your summed total by total covered square footage to get an accurate SPC floors cost per sq ft estimate.
How do subfloor condition and preparation affect SPC flooring installation pricing?
SPC floors are often easier to install, but pricing changes significantly if your subfloor is uneven, damaged, or moisture-sensitive. If you need floor leveling, grinding, or additional moisture protection, the preparation cost can be a major part of the SPC floor estimate. The better the existing subfloor condition, the more you can keep installation costs down.
Which SPC flooring thickness and wear layer should I choose to match my budget?
For budgeting, compare the SPC wear layer thickness and overall plank thickness because they affect durability and price. Higher-grade wear layers typically cost more but can reduce replacement risk in high-traffic areas like hallways, retail, or kitchens. Choose based on usage: residential light-to-moderate traffic may support a more budget-friendly SPC option, while commercial or heavy wear usually benefits from a tougher wear layer.
Why should I get quotes that break down labor and materials separately for SPC floor installation?
Separate quotes help you see exactly what you’re paying for—SPC flooring materials, underlayment, leveling, trim, and labor—so you can compare vendors fairly. This also helps you avoid surprises from scope changes like additional leveling, different transition pieces, or moisture mitigation. A clear breakdown makes it easier to validate your SPC floors cost estimate and ensures the final installation matches your expectations.
📅 Last Updated: October 08, 2026 | Topic: How to estimate the cost of SPC floors? | Content verified for accuracy and freshness.
References
- Google Scholar Google Scholar
https://scholar.google.com/scholar?q=SPC+floor+cost+estimate - Google Scholar Google Scholar
https://scholar.google.com/scholar?q=construction+cost+estimation+resilient+flooring+materials+labor - Google Scholar Google Scholar
https://scholar.google.com/scholar?q=life+cycle+cost+analysis+flooring+resilient+vinyl - https://en.wikipedia.org/wiki/Construction_cost_estimation
- https://en.wikipedia.org/wiki/Life-cycle_cost_analysis
- https://en.wikipedia.org/wiki/Quantity_surveying
- Flooring
https://en.wikipedia.org/wiki/Resilient_flooring - Vinyl flooring
https://en.wikipedia.org/wiki/Vinyl_flooring - Flooring
https://en.wikipedia.org/wiki/Flooring - Underlayment
https://en.wikipedia.org/wiki/Underlayment


